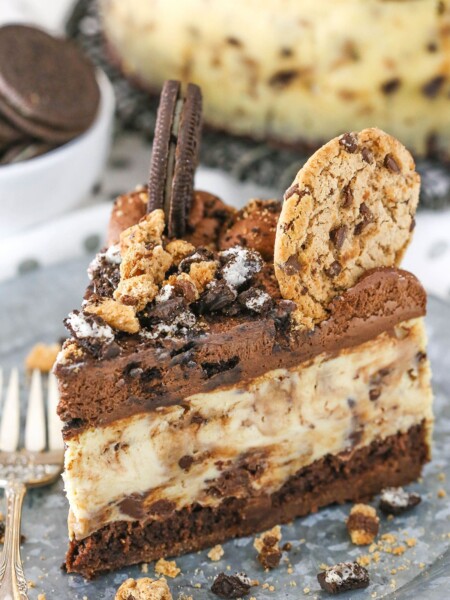
This Cheesecake Factory copycat recipe starts with fudgy chocolate cake layered with chocolate ganache, Oreo cheesecake, fluffy Oreo mousse, and creamy chocolate frosting. Topped with crumbled Oreos and chocolate chips, this is the ultimate Oreo dream cheesecake!

You will be hard-pressed to find a dessert that shows off Oreo cookies more than the Cheesecake Factory’s Oreo Dream Extreme Cheesecake. It is absolutely brimming with them. This copycat recipe starts with a chocolate cake on the bottom, layered with chocolate ganache, homemade Oreo cheesecake stuffed with whole Oreos, and a light and fluffy Oreo cookies-and-cream mousse coated in chocolate frosting. You get it. Oreos everywhere. This dreamy Oreo cheesecake is so good.

Why This Cheesecake Factory Copycat Works
- Easier than you think. With all those layers, this cheesecake might seem like a lot. But, even though it’s more steps than, say, my single-layer Oreo pie, each component comes together easily.
- Make-ahead magic. You can even prepare certain elements, like the cake, frosting, and cheesecake, in advance. Since the whole cheesecake needs time to chill in the fridge before it’s ready to serve, this is one of my favorite make-ahead desserts for birthdays and special occasions.
- Oreos inside and out. I call this my “ultimate Oreo cheesecake” because it’s positively bursting at the seams with cookies n’ cream flavor and chocolate. Oreo lovers, this one’s for you!

Ingredients You Will Need
Oreos. More Oreos. And some other ingredients too. Here are the key ingredients in this dessert, along with tips to keep in mind. For the full list and amounts, scroll to the recipe card below.
- All-purpose flour – I use all-purpose flour throughout the recipe, but feel free to use your favorite 1:1 gluten-free substitute instead.
- Natural unsweetened cocoa powder – You could try using dark or dutch-process cocoa, but your cake will likely turn out a touch more dense. I recommend sticking with the natural unsweetened cocoa.
- Semi-sweet chocolate chips – Dark chocolate chips and/or milk chocolate chips would be fine here as well. Keep in mind that the ganache will be a little thinner with milk chocolate and a little thicker with dark chocolate.
- Cream cheese – Bring the cream cheese to room temperature before using. It will incorporate with the other ingredients better and give you a smoother filling. Also, be sure to use brick-style cream cheese, which is thicker, not the tub cream cheese, which is softer for spreading on things.
- Heavy whipping cream – When making the mousse, you want to start with cold heavy cream. It will whip up better.
- Oreos – These can be original Oreos or store-brand chocolate sandwich cookies. You’ll need about two standard-sized packages (the ones with approximately 36 cookies in each).

The Oreo Dream Extreme Cheesecake, Layer by Layer
Follow the recipe one step at a time, and you’ll be on your way to the ultimate layered Oreo cheesecake. Refer to the printable recipe card for the detailed instructions.
Chocolate Cake
The bottom layer of the dessert is a single layer of moist chocolate cake. You’ll mix the batter, then bake the cake in a greased springform pan at 350ºF for 12- 15 minutes. The cake layer needs to be completely cool before you add the homemade chocolate ganache.
Oreo Cheesecake
The second component is a rich vanilla cheesecake layer filled with whole Oreo cookies. You’ll layer and bake the cheesecake on top of the chocolate cake layer. Beforehand, wrap the pan with foil, since you’ll bake the cheesecake in a water bath. Afterward, chill the cheesecake in the fridge for at least 5 hours.
Oreo Mousse
Next is a creamy white chocolate mousse filled with chopped Oreos. Once the cheesecake has chilled for a few hours, spread the mousse on top. You’ll return the cheesecake to the fridge for another 2-3 hours.
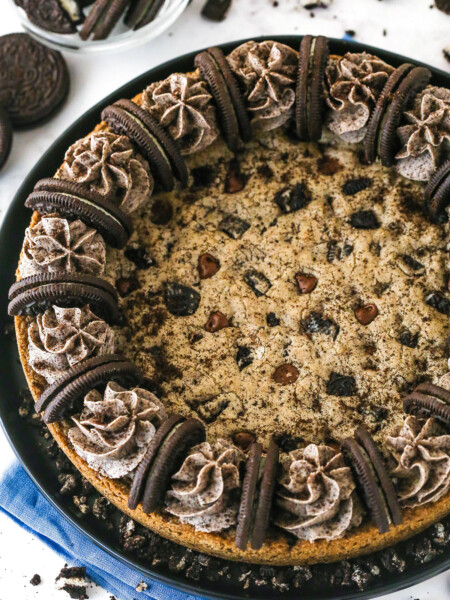
Frosting and Decorating
The finishing touches on an Oreo Dream Extreme Cheesecake are the chocolate frosting, more crushed Oreo cookies, and mini chocolate chips. You could also get creative with a drizzle of fudge sauce or a sprinkle of chocolate curls. Keep the cheesecake in the fridge until 45 minutes before serving. Take it out ahead to take the chill off.
Assembling
The order in which you prepare the layers doesn’t matter too much. You can even make the chocolate cake and cheesecake layers and freeze them to spread the process out. I usually make the Oreo mousse and frosting on the day I plan to assemble and serve the cheesecake, so they’re fresh. It’s really up to you!

Recipe Tips
This Oreo Dream Extreme Cheesecake copycat recipe takes time, but it isn’t hard, and with a few helpful tips, I know it’s going to turn out great! I have a full tutorial on how to make a perfect cheesecake with in-depth tips, and here are a few that are specific to this recipe.
- Use the right tools. Use a springform pan. This will allow you to release the cake from the pan without it falling apart. Seal-proof the pan by wrapping the exterior in aluminum foil or a slow cooker liner, which prevents the water from seeping in.
- Bake in a water bath. The water bath works to distribute heat more evenly, preventing the sides of the cheesecake from browning too quickly. In addition, the steam from the water bath helps the cheesecake from drying out.
- Room temperature. Room temperature ingredients (in this case, eggs, sour cream, and cream cheese) are easier to incorporate. It avoids overmixing the batter.
- Mix on low speed. You do not want to work too much air into the cheesecake batter. Air bubbles will rise to the top of the cake in the oven, cracking the surface. Mixing at a low speed helps prevent this.
- Don’t open the oven. This will cause steam to escape the oven and the temperature to drop, disrupting the baking process and potentially leaving you with a sunken cheesecake.

Make Ahead
Assemble the cheesecake from start to finish before refrigerating the whole thing (see my notes below on proper storage). I actually prefer making cheesecakes in advance because they need to chill for a few hours before serving anyway.
How to Store This Oreo Cheesecake
- Keep refrigerated. The cheesecake must be stored in the refrigerator and can stay there for up to 4-5 days. After decorating, transfer the cake to a cake carrier, if you have one, and refrigerate. Alternatively, you can slice the cake and store it in an airtight container in the fridge. See how to store cheesecake.
- Freeze. I recommend pre-freezing the cheesecake uncovered so it firms up before wrapping it in Saran Wrap. Store it in the freezer for up to 3 months. Alternatively, you can wrap and freeze individual slices, or freeze the cheesecake before you add the frosting and decorations. Thaw the cheesecake in the fridge before serving.
More Oreo Desserts to Try

Oreo Dream Extreme Cheesecake (Cheesecake Factory Copycat)
- Prep Time: 1 hour 45 minutes
- Cook Time: 2 hours
- Total Time: 3 hours 45 minutes, plus chilling time for the cheesecake and the mousse
- Yield: 12–14 slices 1x
- Category: Dessert
- Method: Oven
- Cuisine: American
Description
Oreos on Oreos on Oreos! Layers of chocolate cake, chocolate ganache, Oreo cheesecake, Oreo mousse, and more Oreos come together in this decadent Cheesecake Factory copycat.
Ingredients
Chocolate Cake
- 1/4 cup + 3 tbsp (56g) all purpose flour
- 1/2 cups (104g) sugar
- 3 tbsp (21g) natural unsweetened cocoa powder
- 1/2 tsp baking soda
- 1/8 tsp baking powder
- 1/4 tsp salt
- 1/4 cup (60ml) milk
- 2 tbsp (30ml) vegetable oil
- 1/4 tsp vanilla extract
- 1 large egg white
- 1/4 cup (60ml) water
Oreo Cheesecake Filling
- 4 oz (114g | 2/3 cup) semi-sweet chocolate chips
- 6 tbsp (90ml) heavy whipping cream
- 16 ounces (452g) cream cheese, room temperature
- 2/3 cup (138g) sugar
- 2 tbsp (16g) all purpose flour
- 2/3 cup (153g) sour cream, room temperature
- 2 tsp vanilla extract
- 2 large eggs, room temperature
- About 30 Oreos
Oreo Mousse
- 3 ounces (85g) white chocolate
- 1 cup, plus 2 tbsp (260ml) heavy whipping cream, cold, divided
- 1/2 cup (58g) powdered sugar
- 1/2 tsp vanilla extract
- 10 Oreos, chopped
Chocolate Frosting
- 3/4 cup (168g) unsalted butter, room temperature
- 1 cup (169g | 6 oz) semi sweet chocolate chips, melted
- 3 cups (345g) powdered sugar
- 1/4 tsp salt
- 4–5 tbsp (60-75ml ) heavy whipping cream
Additional
- 1 cup (6 oz) mini chocolate chips
- 1 cup crushed Oreos
Instructions
To make the chocolate cake
- Preheat oven to 350°F (176°C). Line a 9-inch (23cm) springform pan with parchment paper in the bottom and grease the sides.
- In a medium sized bowl, combine the flour, sugar, cocoa, baking soda, baking powder and salt. Whisk until well combined.
- In another medium sized bowl, combine the milk, vegetable oil, vanilla extract and egg white. Whisk until well combined.
- Add the dry ingredients to the wet ingredients and whisk together until well combined.
- Add the water and whisk until well combined. Batter will be thin.
- Pour the batter into the springform pan and bake for 12-15 minutes, or until a toothpick inserted in the middle comes out with a few crumbs.
- Remove cake from the pan and set aside on a cooling rack to cool. Wash the springform pan for use again later.
To make the Oreo cheesecake filling
- While the cake is cooling, make the cheesecake filling. Add the chocolate chips to a medium sized bowl.
- Heat the heavy whipping cream until it begins to boil, then pour it over the chocolate chips. Allow the mixture to sit for 3-4 minutes, then whisk until smooth. Set aside.
- In a large mixer bowl, add the cream cheese, sugar and flour and beat on low speed until completely combined and smooth. Be sure to use low speed to reduce the amount of air added to the batter, which can cause cracks. Scrape down the sides of the bowl.
- Add the sour cream and vanilla extract mix on low speed until well combined.
- Add the eggs one at a time, mixing slowly to combine after each addition. Scrape down the sides of the bowl as needed to make sure everything is well combined.
- Reduce the oven temperature to 300°F (148°C). Re-line the bottom of the 9 inch springform pan with parchment paper and spray the sides with non-stick spray. You want to be sure it’s well done so that they cheesecake doesn’t stick to the sides after baking. Prepare the pan for a water bath by wrapping the outside of the pan with aluminum foil. Here’s how I like to prepare my pans for a water bath to prevent leaking.
- Reset the springform pan edges around the cooled chocolate cake, then pour the melted chocolate mixture on top of the cake. Spread it into an even layer.
- Add the about 1/3 of the cheesecake filling to the pan and spread into an even layer. Top the filling with 10-12 Oreos (leave them whole).
- Add another 1/3 of the cheesecake filling and spread into an even layer. Top the filling with another 7-8 Oreos, trying to offset their position from the ones on the first layer.
- Add the remaining 1/3 of the filling, spread into an even layer, then top with another 10-12 Oreos. The Oreos will sit on top of the cheesecake.
- Place the springform pan inside another larger pan. Fill the outside pan with enough warm water to go about halfway up the sides of the springform pan. The water should not go above the top edge of the aluminum foil on the springform pan.
- Bake the cheesecake for 45 minutes. The center should be set, but still jiggly.
- Turn off the oven and leave the door closed for 20 minutes. The cheesecake will continue to cook, but slowly begin to cool as well.
- Crack the door of the oven for 30 minutes to allow the cheesecake to continue to cool slowly. This process helps prevent cracking.
- Remove the cheesecake from the oven and water bath wrapping (leave it in the springform pan) and refrigerate until firm, 5-6 hours or overnight.
To make the Oreo mousse
- To make the Oreo mousse, add the white chocolate chips and 2 tbsp (30ml) of heavy whipping cream to a small bowl. Microwave in 10 second increments until melted and smooth. Set aside to cool to about room temperature.
- Whip remaining 1 cup (240ml) of heavy whipping cream, powdered sugar and vanilla extract in a large mixer bowl fitted with the whisk attachment until stiff peaks form.
25. Carefully fold about 1/3 of the whipped cream into the cooled white chocolate mixture until combined. - Fold in the remaining whipped cream until well combined, then add the chopped Oreos – crumbs and all.
- Spoon the Oreo mousse on top of the cooled cheesecake and spread into an even layer. Place the cheesecake back in the fridge until the mousse layer is cold and firm, 2-3 hours.
- When the mousse layer is cold and firm, remove the cheesecake from the springform pan.
To finish off the cheesecake
- To make the frosting, beat the butter until smooth.
- Add the melted chocolate and mix until smooth and well combined.
- Slowly add the powdered sugar and salt, mixing until smooth and well combined.
- Add 4-5 tablespoons of cream, as needed, to get the right consistency frosting.
- Place the cheesecake on a serving plate and frost the edges with the chocolate frosting.
- Combine the mini chocolate chips and crushed Oreos and press them into the frosting on the sides of the cake.
- Pipe frosting onto the top of the cheesecake in a spiral, beginning from the middle of the cheesecake and piping towards the edge.
- Use the remaining frosting to pipe swirls around the outer edge of the top of the cheesecake.
- Sprinkle some of the remaining mini chocolate chips and Oreo crumbs on the top of the cheesecake, then garnish with a few Oreos.
- Refrigerate the cheesecake until ready to serve. The frosting can get a bit firm, so I suggest leaving it out for about 45 minutes before serving to make it easier to slice. Cheesecake is best when well covered and eaten within 4-5 days.
Nutrition
- Serving Size: 1 Slice
- Calories: 725
- Sugar: 73.2 g
- Sodium: 329.6 mg
- Fat: 41.3 g
- Carbohydrates: 84.8 g
- Protein: 9.8 g
- Cholesterol: 111.1 mg


This cheesecake is so decadent and chocolatey! Totally worth the time and effort, and the instructions made it super easy to follow! Thanks!!
Do you have any advice for removing the cake and placing it onto the decorating stand? Please let me know!
Here’s my post for removing cheesecake from the springform pan. You could also try freezing it for 20 minutes or so to firm it up a bit first, if that helps.
What size cake box do you recommend for this?
That probably depends on what you’re transporting it on. Like, is it on a 10 inch cake board? You’d need a box large enough for that.
I just made this, and it came out SO GOOD! It was my first time making a cheesecake, and only my second time making a cake from scratch, and while things did go wrong – only gave cream cheese less than half an hour to thaw, did not realize sour cream had to be room temp, the springform pan I was using was old and had black smudges that wouldn’t come out so I lightly greased it and coated it head to toe in parchment paper – even with multiple thing technically going wrong, it still came out really good and I would totally make it again.
Thank you for the easy to follow directions and fantastic recipe!
I’m so glad you enjoyed it!