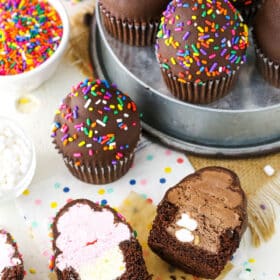
These festive Ice Cream Cupcakes are calling your name. Made of moist chocolate cupcakes stuffed with ice cream, topped with fluffy whipped cream, and dipped in chocolate, they are a summer dessert dream.

Why You’ll Love This Recipe
- So festive. These are some of the most celebratory cupcakes I have ever seen (except for maybe my Ice Cream Cone Cupcakes). They’re perfect for a summer birthday, baby shower, or [insert another warm weather soiree here]. Cheers!
- Great textures. Between the crunch of the chocolate shell, the fluffy whipped cream, the moist cupcakes, and the smooth ice cream, there are so many different, pleasing textures in each of these little desserts. A sensory sensation.
- Highly customizable. There are about a zillion different ways to make these cakes your own. Different cupcake flavors, ice cream flavors, whipped cream flavors, and more. Check out the section below titled “Variation Ideas” for inspiration.

Ingredient Notes
Here’s what you’ll need to make these ice cream-filled cupcakes. Have a look at the recipe card below for exact measurements.
Chocolate Cupcakes
- All-purpose flour – Or a quality 1:1 gluten-free flour.
- Natural unsweetened cocoa – Dutch-processed cocoa powder will also work. You’ll get a slightly richer chocolate flavor.
- Baking soda – For the perfect rise.
- Salt – You need a little salt to balance out the sweetness of the cupcakes.
- Unsalted butter – The butter should be at room temperature. If it is too cold, it won’t cream properly with the oil, vanilla, and sugar.
- Vegetable oil – I used a little vegetable oil in addition to the butter because it adds some extra moisture to the cupcakes that the butter alone can’t provide.
- Sugar
- Vanilla extract
- Eggs
- Milk – I generally use whole milk, but 2% will also do the trick.
Filling and Whipped Cream
- Ice Cream – Pick your favorite flavor and let it sit out at room temperature for a while until softened (but not totally melted).
- Heavy whipping cream – The whipping cream should be cold. Otherwise, it won’t whip up and hold volume properly.
- Powdered sugar – The powdered sugar adds sweetness to the whipped cream and stabilizes it so it holds volume.
- Natural unsweetened cocoa powder (optional) – If you want to make chocolate whipped cream, replace half of the powdered sugar with natural unsweetened cocoa powder.
- Vanilla extract
- Pink gel icing color – You don’t have to color your whipped cream, but I think it makes for a fun little twist. I went with pink, but use any color you’d like.
Chocolate Coating
- Semi-sweet chocolate – You’ll want to chop the chocolate pretty fine for optimal melting. Milk chocolate or dark chocolate would also work.
- Vegetable oil – The vegetable oil makes the melted chocolate perfect for dipping.
- Sprinkles – The sprinkles are optional, but they make these cupcakes feel extra festive.

How to Make Ice Cream Cupcakes
Time to tie on your apron! Here’s a quick look at how to make these fun, festive cupcakes. Be sure to scroll to the recipe card below for more detailed instructions.
- Prep. Preheat the oven to 350°F and prepare a cupcake pan with cupcake liners.
- Combine the dry ingredients. Whisk together the flour, cocoa, baking soda, and salt.
- Combine the wet ingredients. Beat the butter, oil, sugar, and vanilla extract until light in color and fluffy. Mix in the eggs, one at a time.
- Put it all together. Mix half of the dry ingredients into the batter, followed by the milk and then the remaining dry ingredients.
- Bake. Fill each cupcake liner 3/4 full with batter and bake for 15-17 minutes.
- Cool. Allow the cupcakes to cool for a couple of minutes in the pan before transferring them to a cooling rack.
- Core. Use a knife or a cupcake corer to remove the centers from the fully cooled cupcakes.
- Fill. Fill each cupcake with 2-3 tablespoons of softened ice cream.
- Chill. Allow the cupcakes to chill in the freezer while you make the whipped cream.
- Make the whipped cream. Beat the heavy whipping cream, powdered sugar, vanilla, cocoa powder (if you want chocolate whipped cream), and gel icing (if using) on high speeds until stiff peaks form.
- Decorate. Pipe the whipped cream onto the cupcakes.
- Freeze. Freeze the cupcakes until the ice cream and whipped cream are very firm.
- Melt. Combine the chocolate and vegetable oil and microwave in 15-second intervals, stirring between each, until smooth. Cool for a few minutes.
- Dip. Dip the whipped cream portion of the cupcakes into the chocolate and garnish with sprinkles.
- Freeze. Keep the cupcakes in the freezer until they are ready to serve.
- Serve. Remove the cupcakes from the freezer ~15 minutes before serving so they can soften a bit.

Tips for Success
- Room temperature butter. Allow your butter to soften at room temperature before using. If it is too cold or too melted, it won’t cream properly with the oil, sugar, and vanilla (see my next point).
- Don’t skimp on the creaming time. When creaming together the butter, oil, sugar, and vanilla, do so until the mixture has significantly lightened in color and become fluffy. This process incorporates air into the batter, helping to ensure your cupcakes don’t turn out overly dense.
- Don’t over-mix. When mixing the dry ingredients into the batter, mix just until combined and no more. Mixing past this point will cause the glutens in the flour to overdevelop, ending you with tough cupcakes.
- Scrape down the sides of the bowl. When mixing ingredients into the cupcake batter (and also the whipped cream), scrape down the sides of the bowl intermittently to ensure all of the ingredients make it in.
- Cool completely. Allow the cupcakes to cool completely before coring and filling them with ice cream. If they are still warm, they are more likely to fall apart when you core them AND they are certain to melt the ice cream.
- Let the ice cream soften. Let the ice cream sit out for a bit before using it to fill the cupcakes. It’ll be much easier to scoop it into the cored cupcakes if it’s had a chance to soften a bit.
- Cold heavy cream. The heavy cream should be cold. Otherwise, it won’t hold volume properly and you’ll end up with flat whipped cream.
- Let things firm up. Before dipping the cupcakes in chocolate, let them chill in the freezer until the whipped cream is totally firm. Otherwise, it will melt and lose its shape when you dip them in the warm chocolate.
- Chill. Chill. Chill. Keep these cupcakes as cold as possible from the moment you fill them with ice cream. Pop them in the freezer after filling them with ice cream, after adding the whipped cream, and again after dipping them in chocolate. You don’t want that ice cream to melt!
- Choose your cup wisely. For the cup you pour your chocolate dipping sauce into, choose something small that’s relatively deep. You don’t want the whipped cream to hit the bottom when you dip it. I used a juice glass, and it was the perfect size.
- Work quickly. If you’re adding sprinkles to your chocolate-dipped cupcakes, add them immediately after dipping. The chocolate hardens fast and, once it hardens, the sprinkles won’t stick.

Variation Ideas
- Try a different cupcake batter. Not a chocolate person? You can easily make these ice cream cupcakes with a different cupcake batter. Try using the batter for my Red Velvet Cupcakes, these White Cupcakes, or even my Peanut Butter Cupcakes!
- Play with whipped cream. I used pink gel icing color for my whipped cream, but you can use any color you’d like. You could also swap half of the powdered sugar out for natural unsweetened cocoa powder, as mentioned above, to make chocolate whipped cream. My Strawberry Whipped Cream would also be fun.
- Frosting instead of whipped cream. I love using light, fluffy whipped cream for these cupcakes, but you could totally switch things up and use Whipped Cream Cheese Frosting, this Strawberry Frosting, or a simple Vanilla Buttercream.
- Ice cream fun. You can use any flavor of ice cream you’d like to fill the cupcakes. Grab some from the store or make your own. My No Churn Birthday Cake Ice Cream or this No-Churn Strawberry Ice Cream would be awesome!
How to Store
Seal any leftover cupcakes in a single layer in an airtight cupcake carrier or another airtight container that’s tall enough to accommodate them. You can store them in the freezer for up to 3 months.

More Ice Cream Desserts
- Ice Cream Cake Recipe
- No Churn Cake Batter Ice Cream Pie
- Chocolate Chip Cookie Ice Cream Sandwiches
- Chocolate Chip Cookie Dough Ice Cream Pie
- Peanut Butter Chocolate Ice Cream Cone Cake
- Oreo Brookie Ice Cream Cake
Ultimate Ice Cream Chocolate Cupcakes
- Prep Time: 1 hour 25 minutes
- Cook Time: 15 minutes
- Total Time: 1 hour 40 minutes
- Yield: 12–14 cupcakes 1x
- Category: Dessert
- Method: Oven
- Cuisine: American
Description
The Ultimate Ice Cream Chocolate Cupcakes are made with moist chocolate cupcakes stuffed with ice cream and topped with whipped cream, chocolate and sprinkles! Such a great summer treat with so many flavor possibilities!
Ingredients
Chocolate Cupcakes
- 3/4 cup (98g) all-purpose flour
- 6 tbsp (43g) natural unsweetened cocoa
- 1/2 tsp baking soda
- 1/4 tsp salt
- 1/4 cup (56g) unsalted butter, room temperature
- 1/4 cup vegetable oil
- 3/4 cups (155g) sugar
- 3/4 tsp vanilla extract
- 2 large eggs
- 1/2 cup + 2 tbsp (150ml) milk
Filling and Whipped Cream
- Ice Cream (your choice of flavor), softened
- 1 1/2 cups heavy whipping cream, cold
- 3/4 cup (86g) powdered sugar
- 1 1/4 tsp vanilla extract
- Pink gel icing color, optional
Chocolate Coating
- 12 oz semi sweet chocolate (finely chopped)
- 3 tbsp vegetable oil
- Sprinkles, optional
Instructions
- Preheat the oven to 350°F (176°C) and prepare a cupcake pan with cupcake liners.
- To make the cupcakes, combine the flour, cocoa, baking soda and salt in a medium sized bowl and set aside.
- Add the butter, oil, sugar and vanilla extract to a large mixer bowl and beat together until light in color and fluffy, about 2 minutes. Do not skimp on the creaming time.
- Add the eggs one at a time, mixing until mostly combined after each. Scrape down the sides of the bowl as needed to be sure all ingredients are well incorporated.
- Add half of the dry ingredients to the batter and mix until mostly combined.
- Slowly add the milk and mix until well combined.
- Add the remaining dry ingredients and mix until well combined and smooth. Scrape down the sides of the bowl as needed to be sure all ingredients are well incorporated. Do not over mix the batter.
- Fill the cupcake liners about three quarters full. Bake for 15-17 minutes, or until a toothpick inserted comes out with a few crumbs.
- Remove cupcakes from oven and allow to cool for 2-3 minutes, then remove to cooling rack to finish cooling.
- When the cupcakes have finished cooling, use a cupcake corer or knife to remove the centers, then fill them with your choice of ice cream flavor. I used 2-3 tablespoons of ice cream per cupcake.
- Put the cupcakes in the freezer while you make the whipped cream. Place the heavy whipping cream, powdered sugar and vanilla extract in a large mixer bowl and whip on high speeds until stiff peaks form. If you’d like to color your whipped cream, add the gel icing color with the other ingredients before you whip it. NOTE: If you want to make chocolate whipped cream, replace half (6 tablespoons) of the powdered sugar with natural unsweetened cocoa powder.
- Pipe the whipped cream onto the cupcakes. I used a large round tip – Ateco 808.
- Freeze the cupcakes until the ice cream and whipped cream are frozen and firm.
- If you want to do the chocolate coating, add the chocolate and vegetable oil to a microwave safe bowl and heat in 10-20 second increments until melted and smooth. Allow to cool for a few minutes, then pour into a cup or bowl that is deep enough to dip into.
- Dip the whipped cream portion of the cupcakes into the chocolate and let the excess drip off. Add sprinkles quickly, if using, because the chocolate will begin to firm up quickly.
- Place the cupcakes back in the freezer. They are best stored in an air tight container.
- When you’re ready to serve the cupcakes, allow them to soften for about 15 minutes or so. The chocolate topping can be fairly firm, so you want everything to soften a bit.
Nutrition
- Serving Size: 1 cupcake
- Calories: 443
- Sugar: 34.3 g
- Sodium: 76.4 mg
- Fat: 30.1 g
- Carbohydrates: 42.8 g
- Protein: 5.3 g
- Cholesterol: 79 mg


Can you use chocolate chips for the dipping with the vegatable oil? That would mean you could use butterscotch chips. etc. Will chips work?
That should be fine. Chocolate chips can sometimes be a little more finicking, since they’re made to stay in their shape. But I’d think they’d be fine. Keep in mind that other kinds of chips (butterscotch, white chocolate, etc) have different amounts of fats, cocoa solids, etc and probably won’t need as much oil added.
Approximately how long does it take for the whipped topping to freeze?
I haven’t specifically timed it. I would guess it should be pretty frozen within 2 to 3 hours.
I almost took the shortcut and used a box cupcake mix but I’m so glad I didn’t. This cupcake recipe is so luscious! The whole recipe turned out fabulously and everyone was very impressed. Next time I was thinking about baking the cupcakes in ice cream cones to make them easier to hold. Thanks for the great recipe!
Made these with my kiddos today and they turned out fabulous! We used devil’s food cake mix and vanilla ice cream. Recipe fairly easy, and my kids had a lot of fun helping. Thanks for the yummy recipe!
I’m so glad you enjoyed them!
What happens to the part you removed? Looks like half the cupcakes, are you just tossing it? I would crumble and roll the ice cream in it
You could toss it or use it as a crumble, as you mention.
Hello I am making these as we speak, just wondering how long they will last in freezer for? 2 days? 1 week?
Cheers
Nikki
They should be fine in the freezer for at least a week.
Hi! Have you ever done white chocolate to dip in?
I haven’t ever used it for dipping like this, but it should be fine. You just might not need to add as much oil. I’d try 2 tbsp and then add more if you need to thin it out more.
Wonderful thanks for the tip!!
Hi Lindsay! These look absolutely prefect 🙂 Totally have to make these soon… I love the idea. So perfect for summer!
I’m confused. It looks like you added more than 2 T of ice cream. Did you put another big scoop on top or is that all whipped cream?
The topping is all whipped cream . You could try adding more ice cream if you prefer.
First off, I love your recipes! Second, I’m so sad this came when it did. We are experiencing our cold season and this would not seem an appropriate time to be making ice cream cake. That said, I can have ice-cream at any time, so … 😊
Oh my gosh, Lindsay! These are gorgeous! They look so perfect! I’m craving one now…
These look over the top!
Did you cut the top of the cupcake off?? I fill my cupcakes often but how it looks in the photo where its cut in half, it almost looks like there is no top to the cupcake left. And OMG I CAN’T WAIT TO MAKE THESE!!! such a great idea!
I used a cupcake corer to remove the centers. I hope you enjoy them!
These look great, Lindsay! Such a cute idea for summer desserts! And it’d be so fun to experiment with ice cream, whipped cream, and cupcake flavours. I’ll have to try these come summer! 🙂