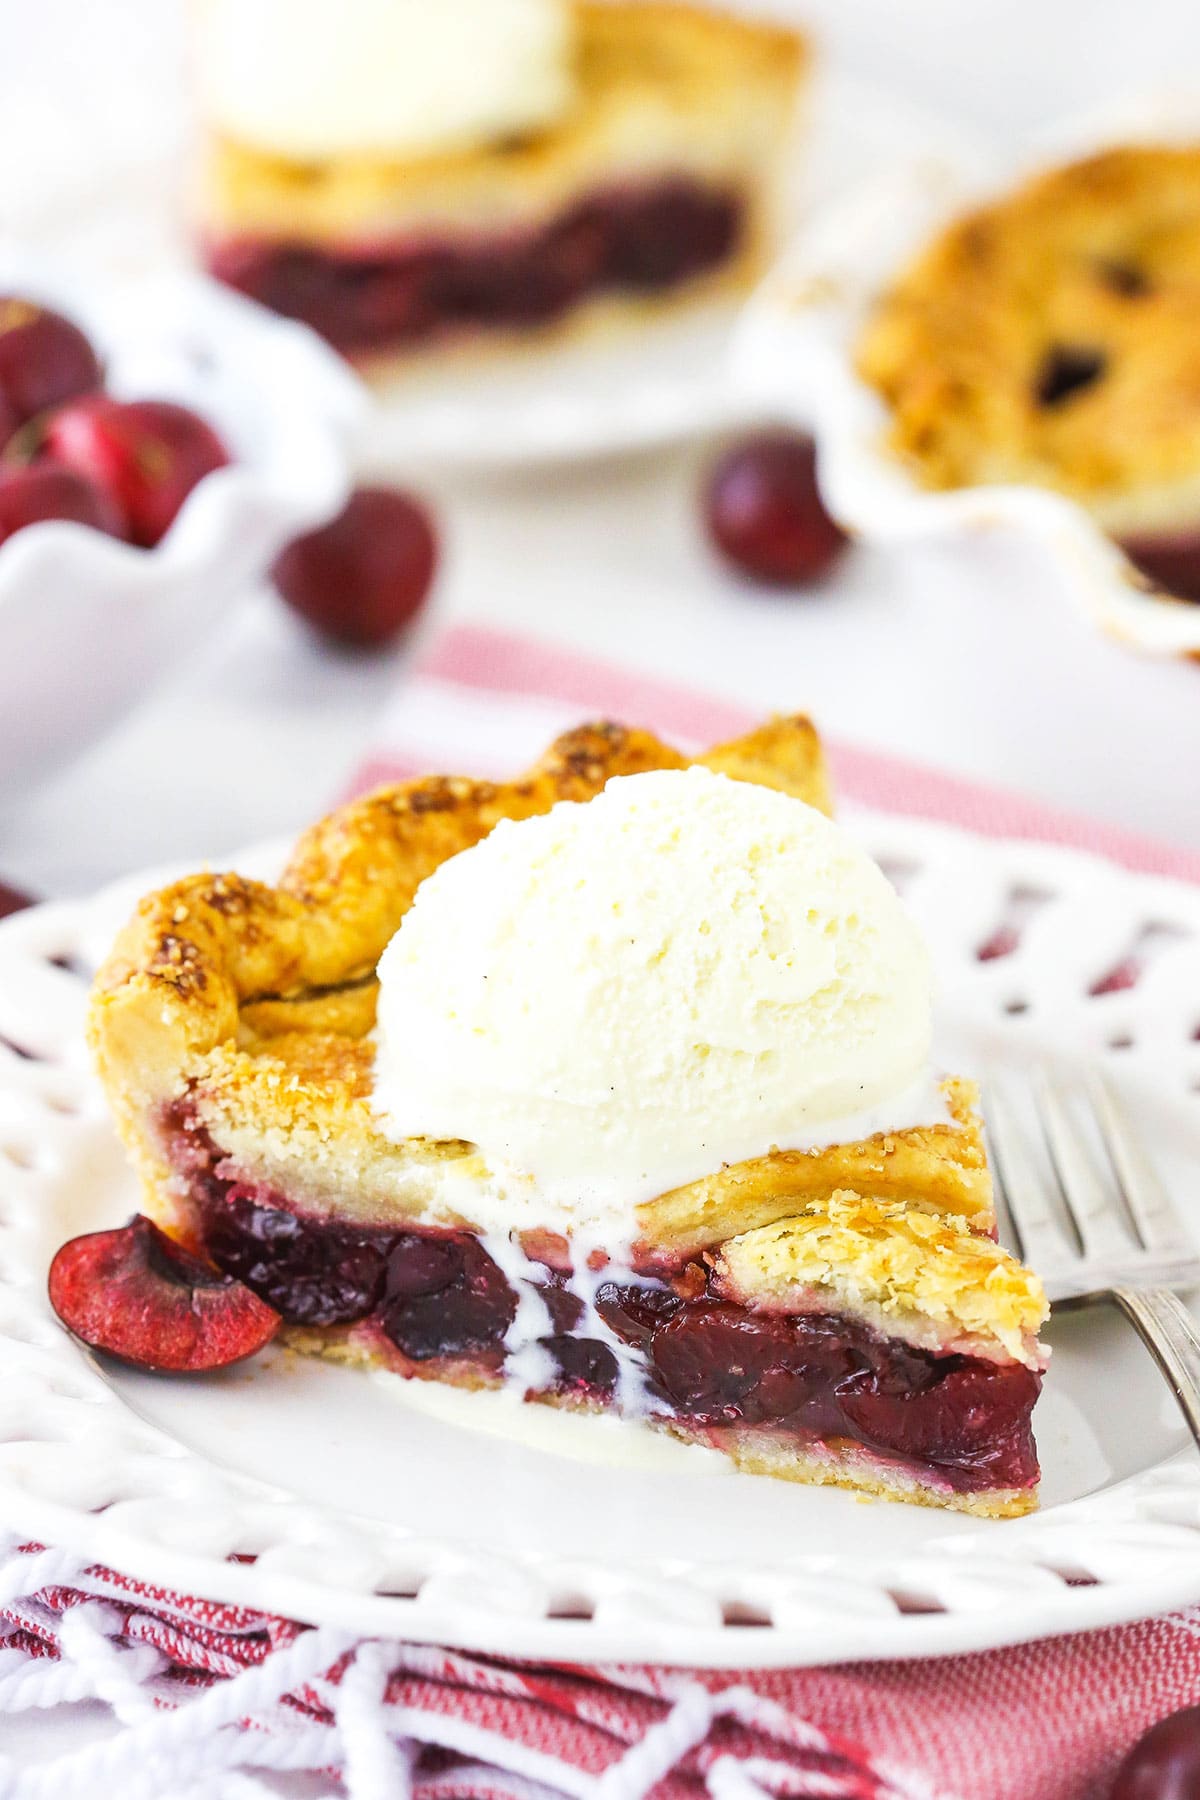
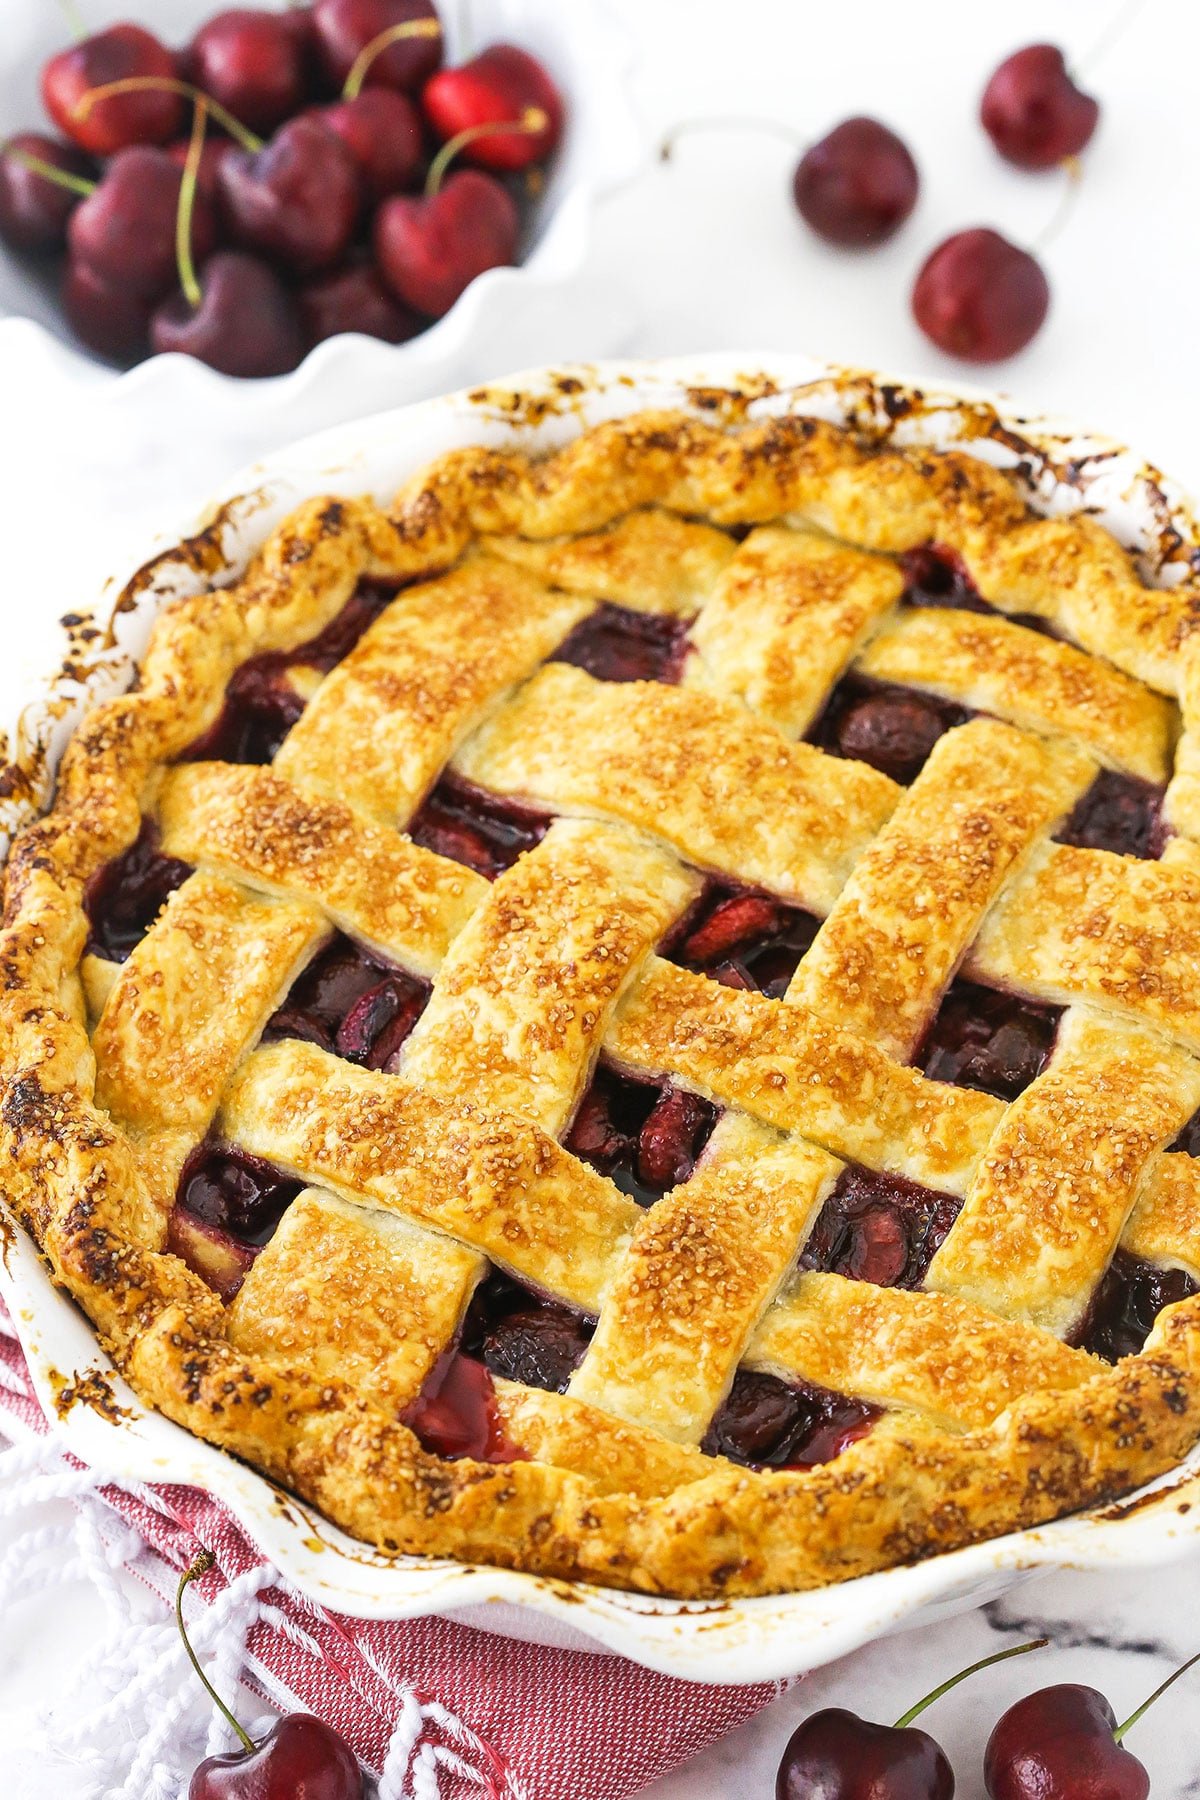
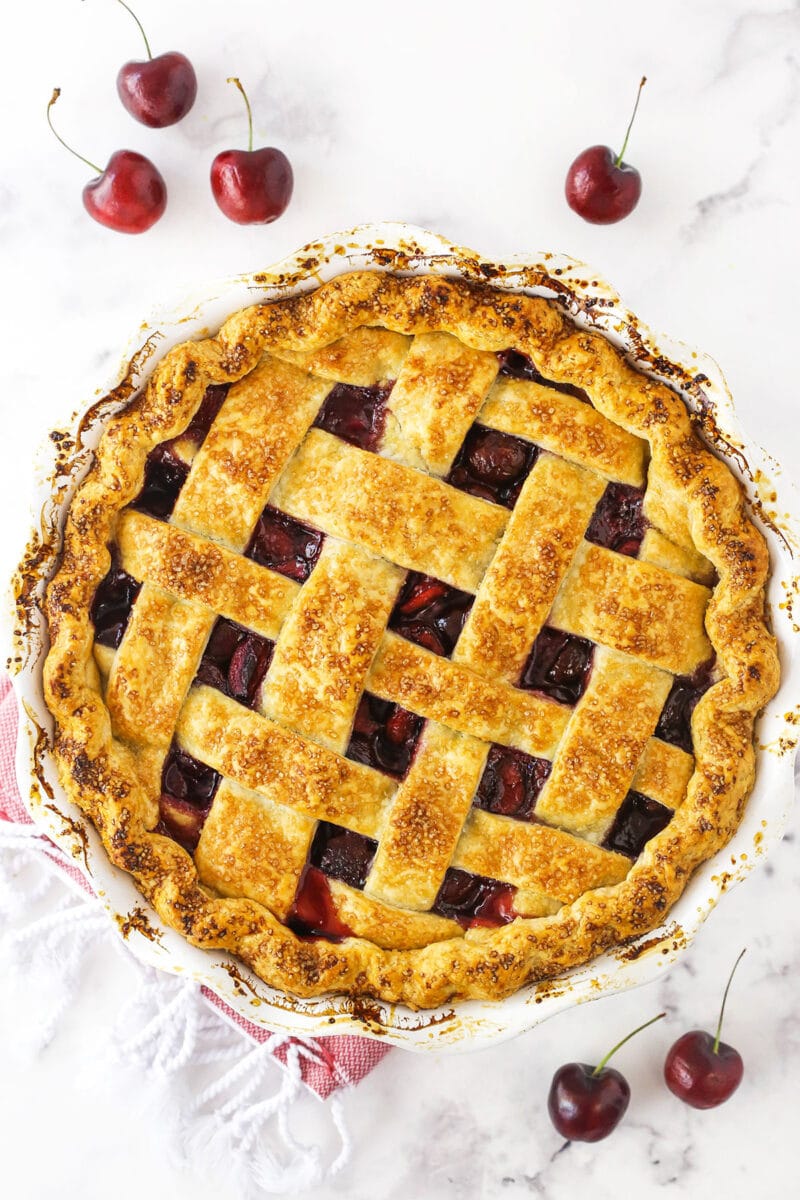
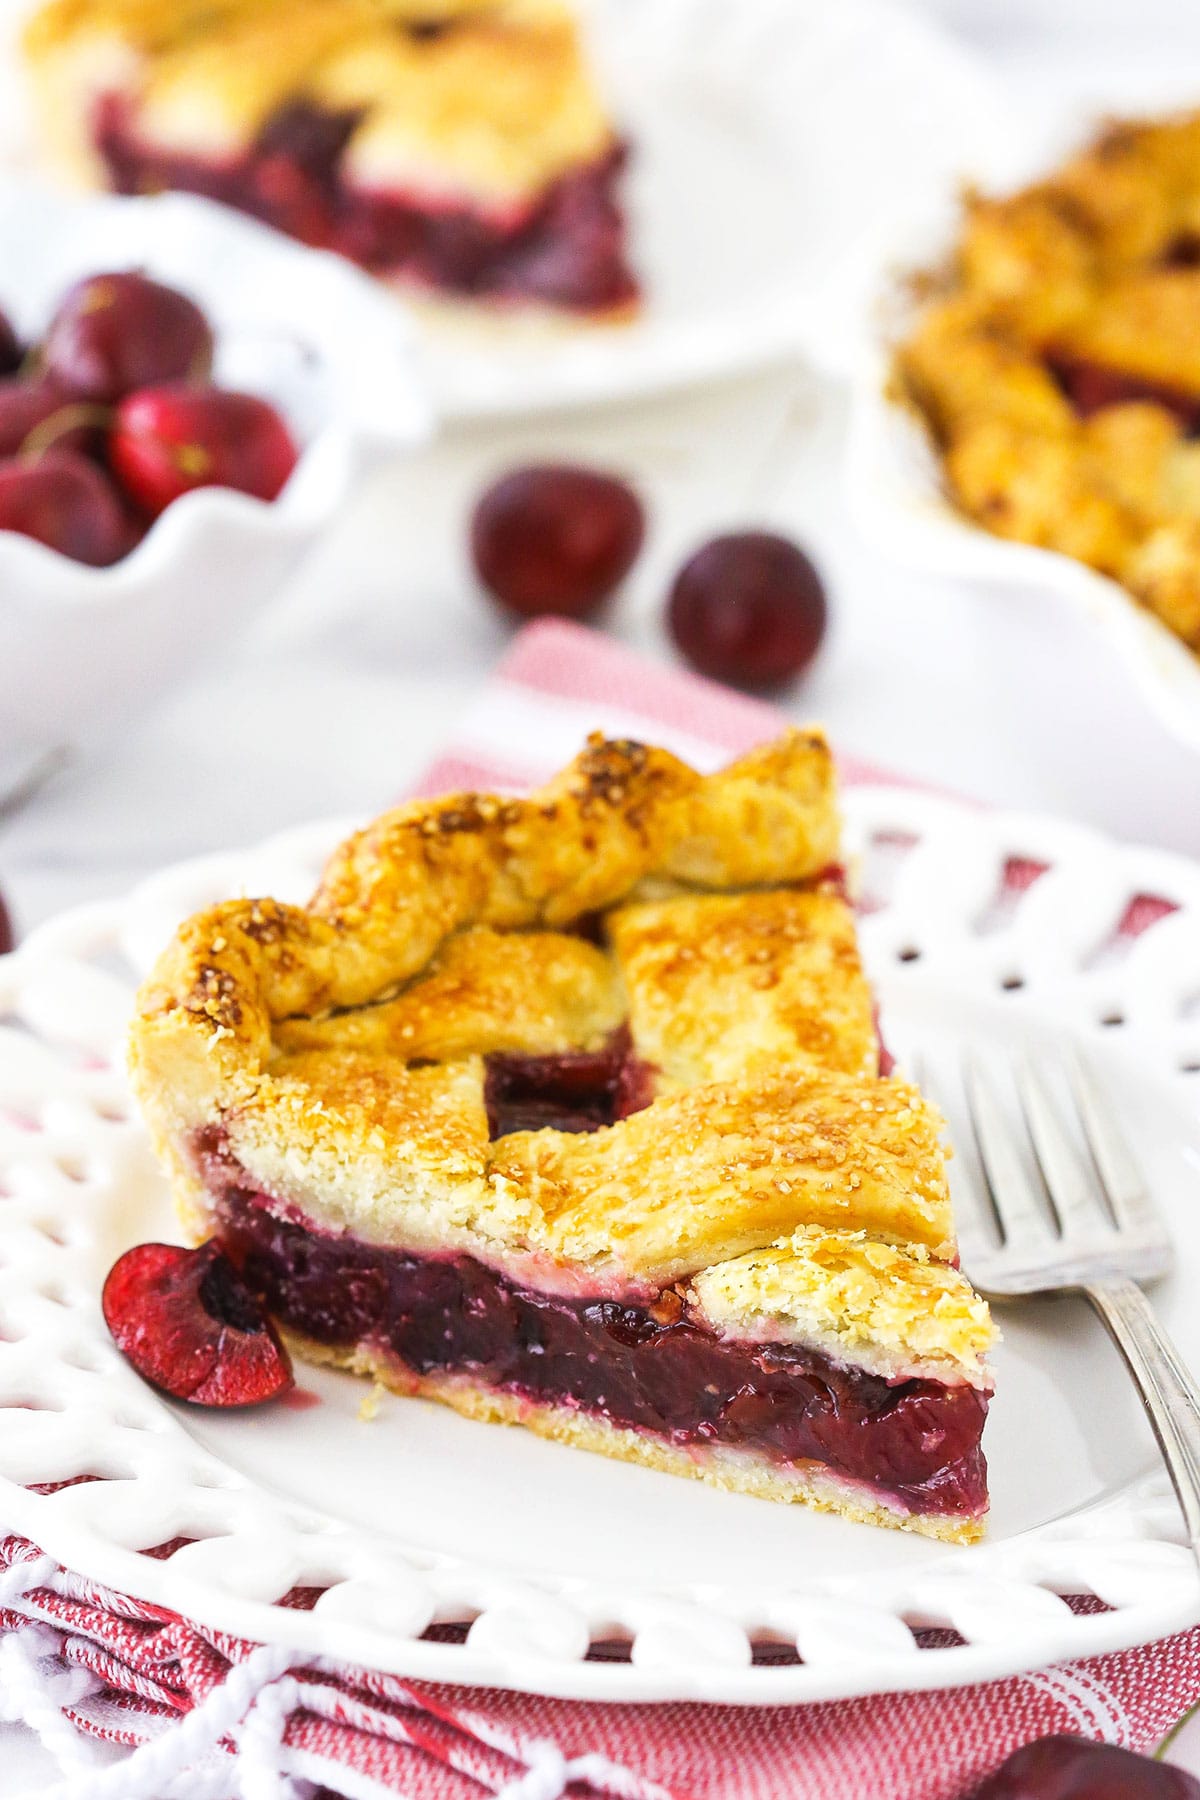
This classic fruit pie features a buttery homemade pie crust and a fresh cherry filling! Whether you make it from scratch or opt for a store-bought crust instead, everyone will be grabbing a second slice of this cherry pie.
Fruit pies always remind me of my grandmother. She made the most incredible pies, and cherry was one of her specialties. My dad still talks about how perfect her crusts were — flaky, buttery, and just the right amount of golden. This cherry pie is my take on her classic, and while nothing will ever quite compare to hers, I like to think she’d be proud.
One of the best things about this recipe is how simple it is. Just a handful of basic ingredients, yet the flavor is out of this world. The cherries are sweet and juicy, with just a hint of almond extract to bring out their richness. And that crust? Perfectly caramelized and crisp, the way a good homemade pie should be. If you’ve never tried cherry and almond together, you’re in for a treat!
Why I Love This Cherry Pie Recipe
- Perfectly sweet and tart. The combination of fresh cherries and a touch of almond extract gives this pie the perfect balance of sweetness with just a hint of tartness. It’s bursting with real fruit flavor!
- Buttery, flaky crust. A homemade crust makes all the difference, and this one is golden, crisp, and absolutely delicious. No soggy bottoms here!
- So easy to make. The filling comes together in minutes with just a few simple ingredients.
- That gorgeous, glossy finish. A little cornstarch thickens the filling beautifully, so every slice holds its shape while still being juicy and irresistible.
- Pairs perfectly with ice cream. A warm slice of cherry pie with a scoop of vanilla ice cream? It doesn’t get better than that!
- A classic for a reason. This is the kind of pie that never goes out of style—comforting, nostalgic, and always a hit at the dessert table.
What You’ll Need
Let’s dive into the ingredients that make up this classic treat. Scroll down to the recipe card to see the full amounts.
- Homemade Pie Crust: Or store-bought (you’ll need two crusts total).
- Fresh Cherries: Pitted and cut in half. If you don’t have a cherry pitter, you can easily remove the pits by poking through them with the thick end of a chopstick. You can also press each cherry down onto the end of a small piping tip.
- Sugar: I use white sugar, but you could also use light brown sugar.
- Cornstarch: This is the thickener I recommend using – you’d need more flour and I don’t care for it as much.
- Salt
- Vanilla Extract
- Almond Extract: If you’d prefer to leave this out, you can substitute it for additional vanilla extract.
- Lemon Juice: Freshly squeezed.
- Unsalted Butter: Sliced into small squares.
- Egg
- Milk: Cream works well too.
- Turbinado Sugar: This coarse cane sugar helps your top crust reach caramelized perfection.
Can I Use Frozen Cherries?
I use fresh dark sweet cherries for my pie filling, but frozen ones work as well. Just remember to pat them dry after you thaw them out to avoid adding excess moisture to the filling. This recipe has not been tested with sour cherries, which are smaller and more tart.
Tips for the Best Cherry Pie
- Don’t skip the lemon juice: Not only does the freshly squeezed lemon juice enhance the cherry flavor, but it also contains a natural thickening starch called pectin. The lack of lemon juice would make for a more runny filling.
- Egg wash is key: In order for your pie crust to get beautifully browned on top, it needs to be brushed with egg wash. This small, simple step makes a big difference.
- Let the pie cool completely before slicing: The filling will be too thin if you serve your pie before it fully cools. The colder it is, the thicker the filling will be.
Can I Make This Pie in Advance?
Yes, this pie can be made up to 1 month ahead of time. Wrap the assembled pie tightly in two layers of plastic wrap, then freeze it. Let it sit at room temperature for 1 hour before you bake it, adding about 10 minutes to the cook time.
How to Store Extras
- Store in the fridge: Keep this pie well covered and refrigerated and enjoy it within 4-5 days. If you’d like, you can warm each slice up in the microwave for 15-20 seconds before you dig in.
- Can I freeze it? This pie should not be frozen once it’s baked – the freezing process will cause the filling to weep (release liquid) upon thawing.
More Fruit Pie Recipes
Print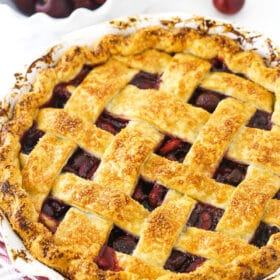
Cherry Pie
- Prep Time: 1 hour
- Cook Time: 45 minutes
- Total Time: 1 hour 45 minutes
- Yield: 10 1x
- Category: Dessert
- Method: Oven
- Cuisine: American
Description
This classic fruit pie features a buttery homemade pie crust and a fresh cherry filling! Whether you make it from scratch or opt for a store-bought crust instead, everyone will be grabbing a second slice of this Cherry Pie.
Ingredients
- Homemade Pie Crust or store-bought pie crust (you’ll need two crusts)
- 4 1/2 cups (590g) pitted cherries, cut in half (need about 1 1/2 pounds unpitted cherries)
- 3/4 cup (155g) sugar
- 1/4 cup (32g) cornstarch
- 1/8 tsp salt
- 1 tsp vanilla extract
- 1/4 tsp almond extract
- 1 tbsp lemon juice
- 1 tbsp cold unsalted butter, cut into small squares
- 1 large egg
- 1 tbsp milk or cream
- 1 tbsp turbinado sugar
Instructions
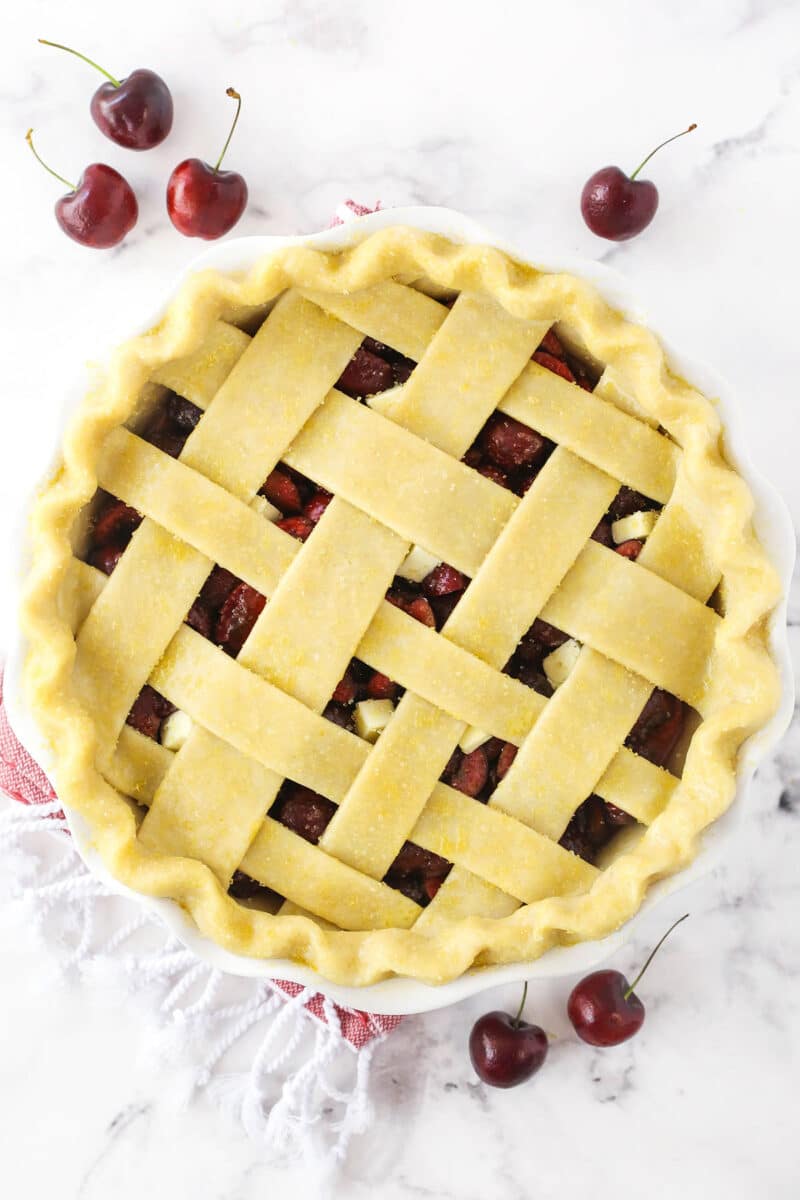
- Place one of the pie crusts into a 9-inch pie dish and don’t flute or crimp the edges for now. Preheat oven to 400°F.
- Combine the cherries, sugar, cornstarch, salt, vanilla extract, almond extract and lemon juice together in a large bowl. Gently stir them so that all of the cherries are coated with some of the sugar and cornstarch mixture.
- Pour mixture into the bottom pie crust. Dot the pieces of butter on top of the filling.
- Grab the other pie crust and arrange into a lattice on top of the pie. You’ll want to use a pastry wheel to cut the crust into strips and then thread them together, over and under, to create the design. Trim the lattice as needed once it’s on the pie and then use the bottom crust edge pieces to seal the crust edges. Flute or crimp as desired.
- Combine the egg and cream for the eggwash. Lightly brush the top of the pie crust with the eggwash and sprinkle with turbinado sugar.
- Bake the pie for 20 minutes at 400°F, then reduce to 350°F for 25-35 minutes. You want the filling to be hot and bubbly throughout to be sure the cornstarch has been activated. Cover to prevent over-browning, if needed.
- Remove pie from the oven and allow to cool at room temperature for at least 3 hours for the filling to thicken. The longer it sits, the thicker the filling will be. If served hot out of the oven, the filling will be too thin. Refrigerate when it’s completely cooled.
Notes
- Makes 8-10 slices.
- To Make Ahead: Wrap assembled pie tightly in two layers of plastic wrap, then freeze it for up to 1 month. Let it sit at room temperature for 1 hour before baking, adding about 10 minutes to the cook time.
- To Store Extras: Cover pie well, keep refrigerated and enjoy within 4-5 days. You can heat individual slices in the microwave for 15-20 seconds if desired. Do not freeze baked pie – the freezing process will cause the filling to weep (release liquid) upon thawing.
Nutrition
- Serving Size:
- Calories: 241
- Sugar: 25.4 g
- Sodium: 131.2 mg
- Fat: 7.6 g
- Carbohydrates: 42.4 g
- Protein: 2.1 g
- Cholesterol: 21.7 mg


If I want to assemble and then freeze to bake later in the week do I bake for the same time and temp?
I haven’t baked it from frozen before, but you could certainly give it a try. I’d use the same temp, but it would likely take a little longer to bake.
Yummy! Thanks Lindsey. I converted it to muffin tin pies, so I had to cook the filling a little bit before I put it in the crusts. I added a little extra almond extract because I love the flavor, and everyone loved them!
Fun! I’m glad they were a hit!
Seriously, THE best cherry pie. Super easy recipe, as are most of Life, Love and Sugar’s recipes, to follow and also, like LLS’s recipes, if Lindsay says it’s the best, you can be sure it is!!!
What a compliment! Thank you! I’m so glad you enjoyed the pie!
Blueberry pie recipe. I made this recipe and it came out runny. The pie did not hold together when it was cut. I baked it an extra 15 minutes until I even saw it start to bubble. What did I do wrong?
Sorry – you started your comment by saying the blueberry pie, but you commented on the cherry pie. I responded to your comment on the blueberry pie a while ago, so if you’re asking about that one, I’d check back on that post.