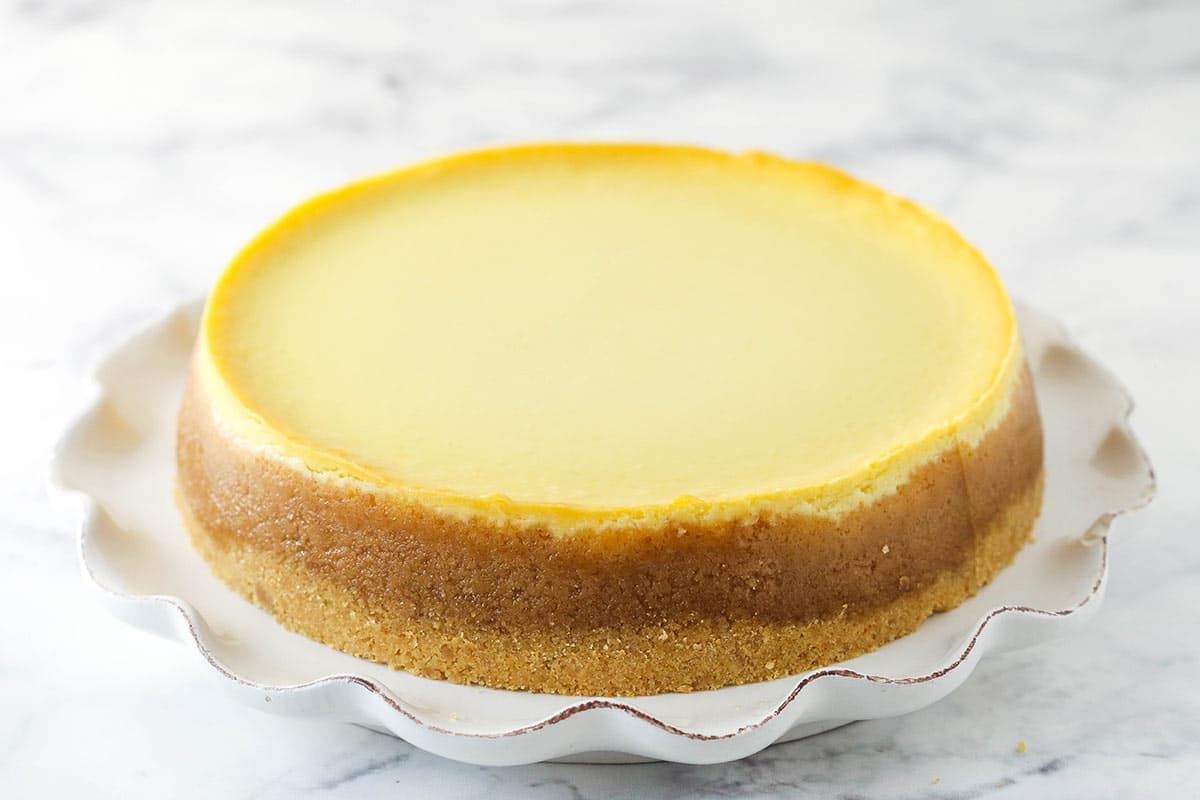
After working hard to bake a beautiful and delicious cheesecake, there’s one final step. You need to remove the cheesecake from the springform pan and get it onto your serving platter. But how do you do that without ruining your cheesecake? Let me show you.
See The Video
How to Remove a Cheesecake from a Springform Pan
Being able to properly remove a cheesecake from the springform pan actually begins…well…at the beginning. Before you ever bake and cool the cheesecake, you want to make sure you are setting the ground work for a successful result.
1. Set Up for Success
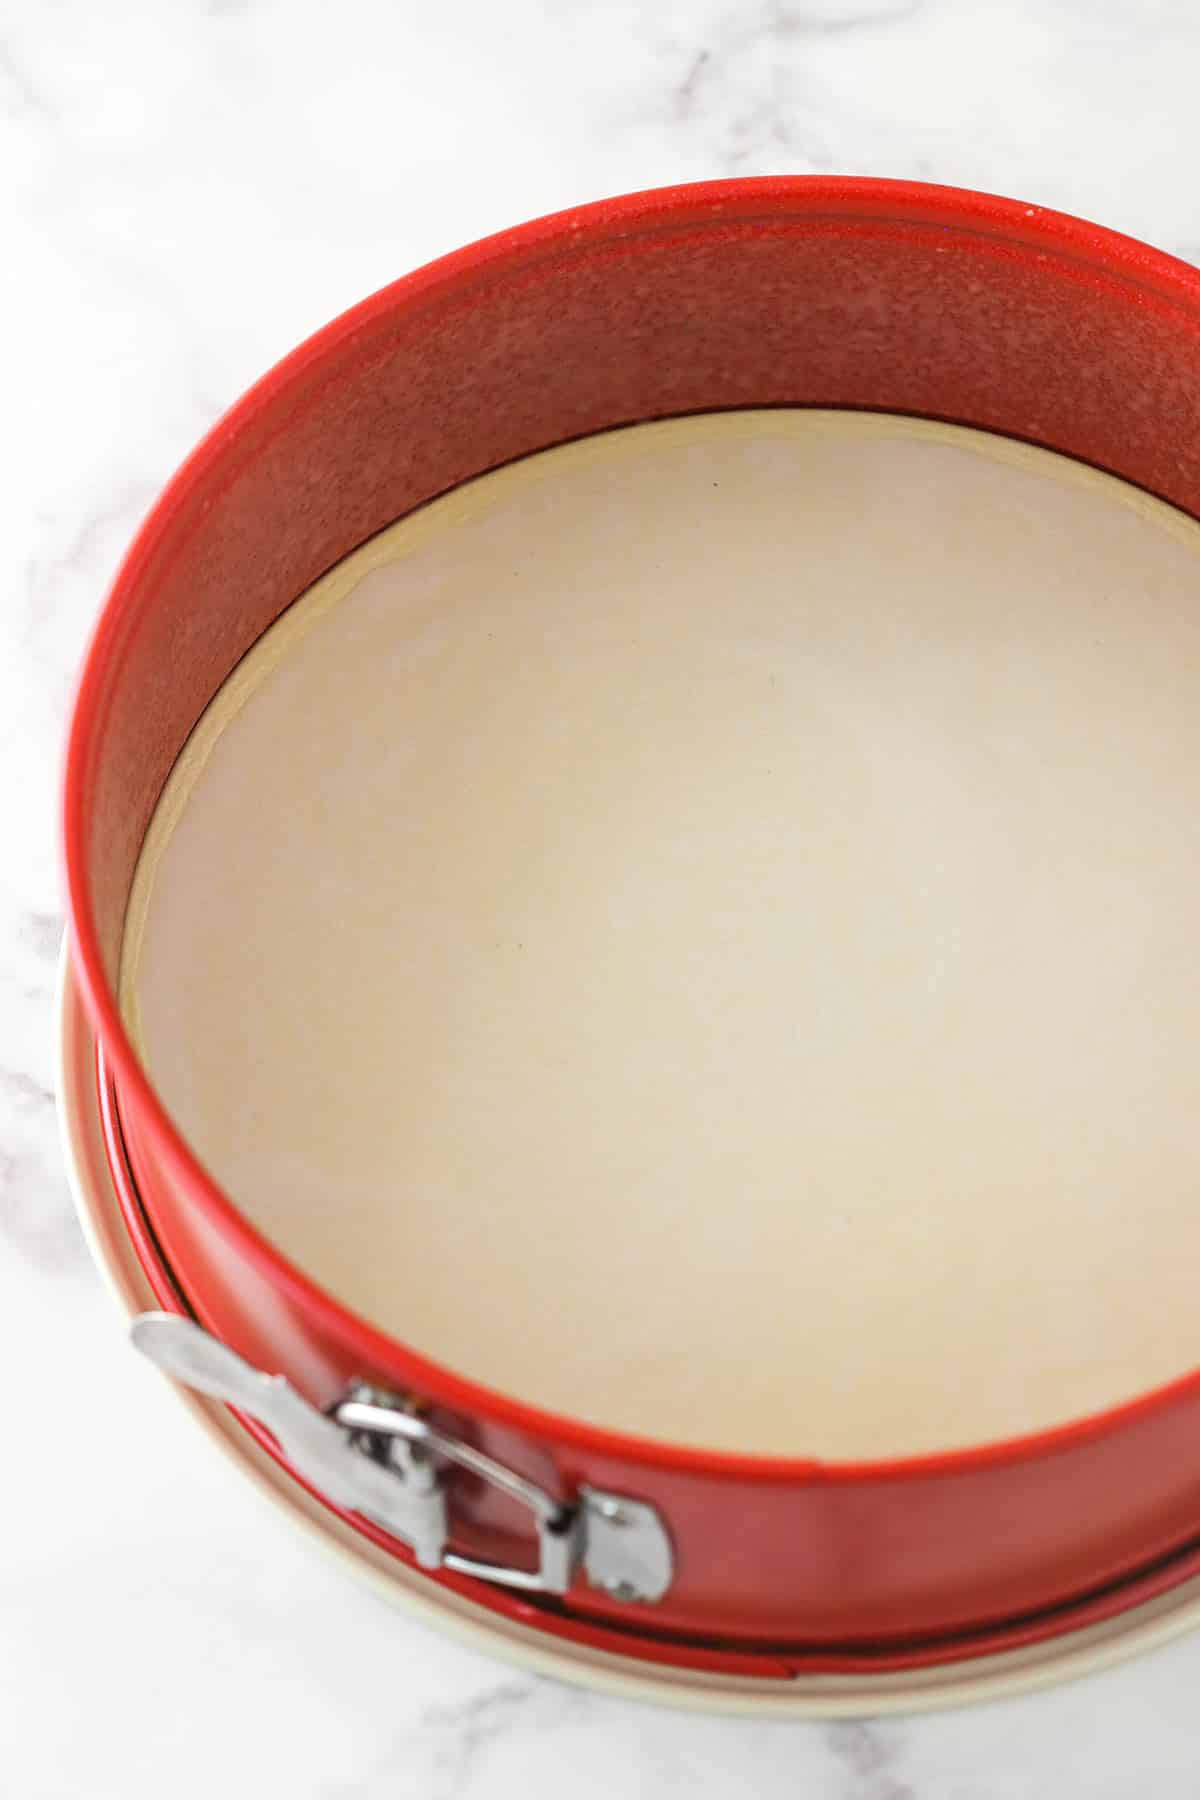
The first part of removing your cheesecake from a springform pan actually begins with setting up your cheesecake correctly from the beginning. You want to be sure you set up your pan by spraying the sides with non-stick baking spray and lining the bottom of the pan with parchment paper before you ever even begin making the crust. It also helps if your cheesecake has crust that isn’t soggy from your water bath leaking. If it did leak, you’re still fine. It just helps if it’s not sticky from being wet and a little softer.
Why is all of the important? Non-stick parchment paper keeps your cheesecake from sticking to the pan, making it easier to remove. Plus, a firm (not wet) crust is going to hold together better during the transition from pan to platter.
Learn more by checking out my post on how to set up a water bath for cheesecake.
2. Fully Bake and Cool Your Cheesecake
Just like setting up your pan is important, you also need to bake your cheesecake properly. An under baked cheesecake that is too soft in the middle may not hold together as well when you’re moving it around. Be sure to know how to tell if your cheesecake is done baking.
When it’s done baking, be sure to cool it fully before trying to remove it from the pan. This will allow it to firm up, so that you can move it to a platter.
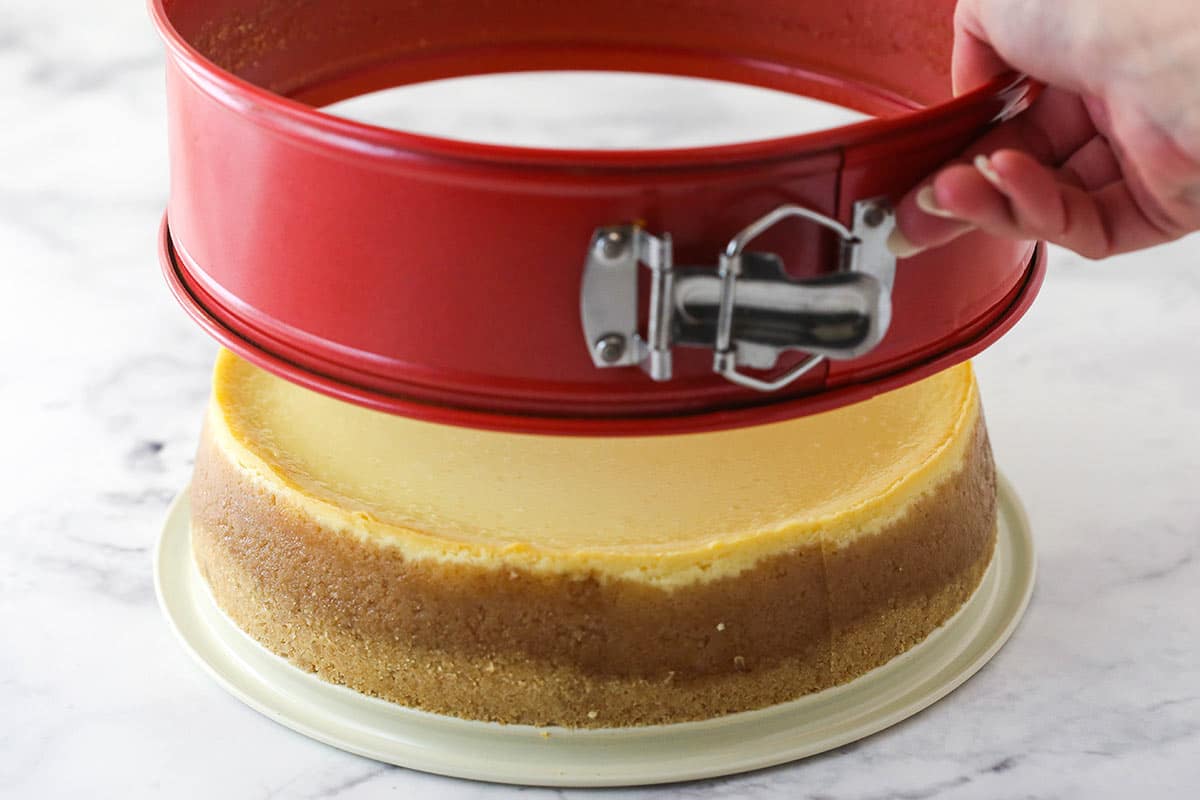
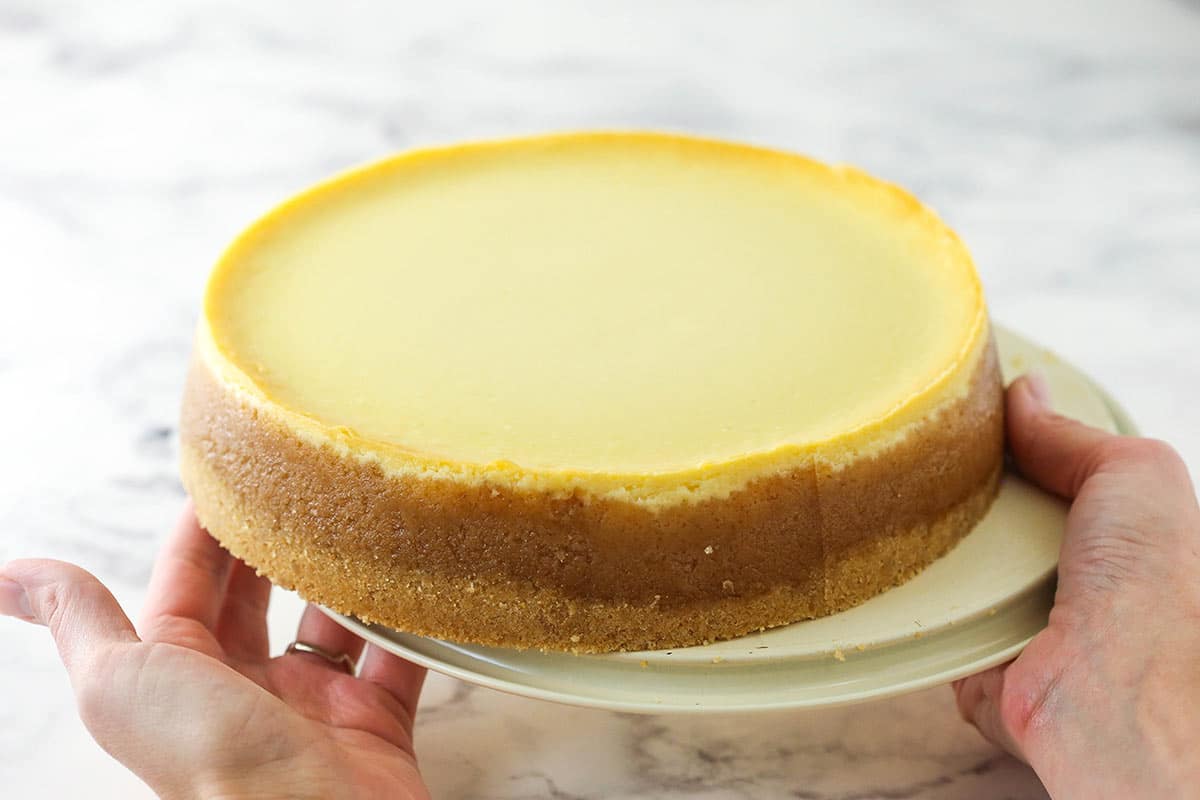
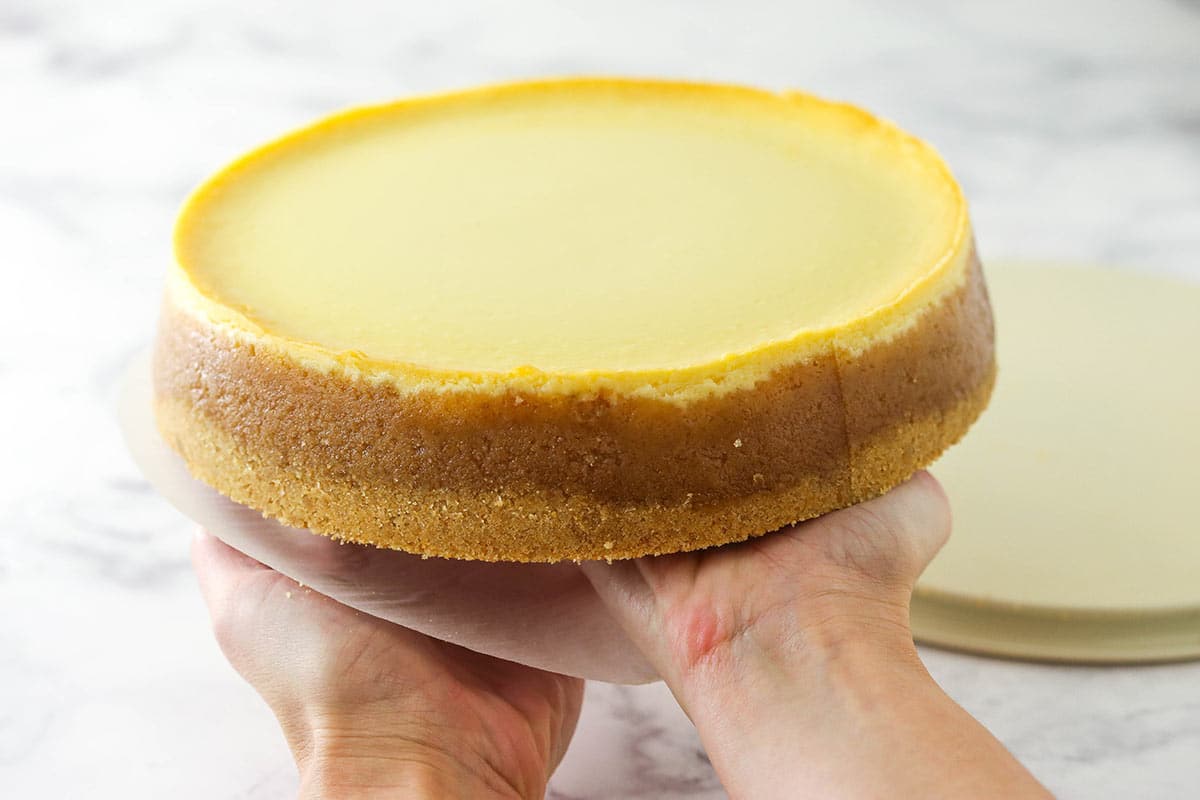
3. Remove the Cheesecake from the Pan
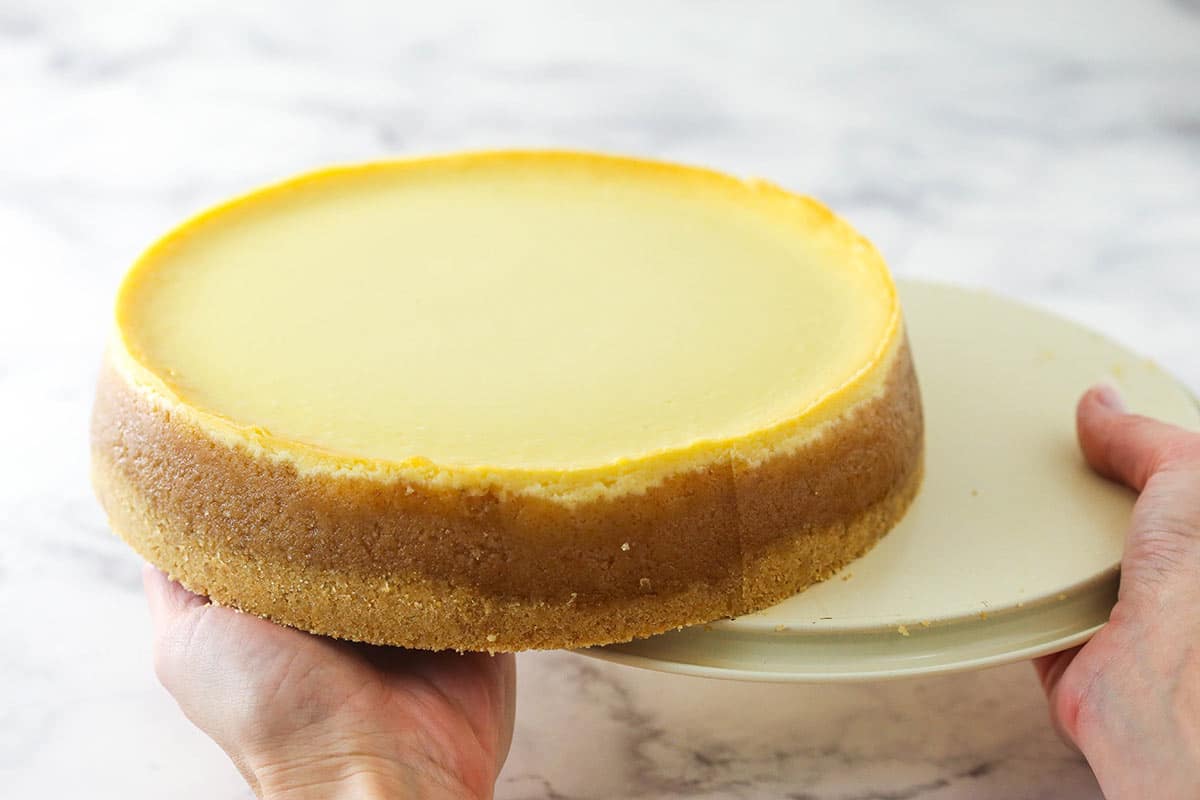
Once your cheesecake is cooled and firm, you’re ready to go! I hate to state the obvious, but the first thing you’ll need to do is remove the sides of the springform pan.
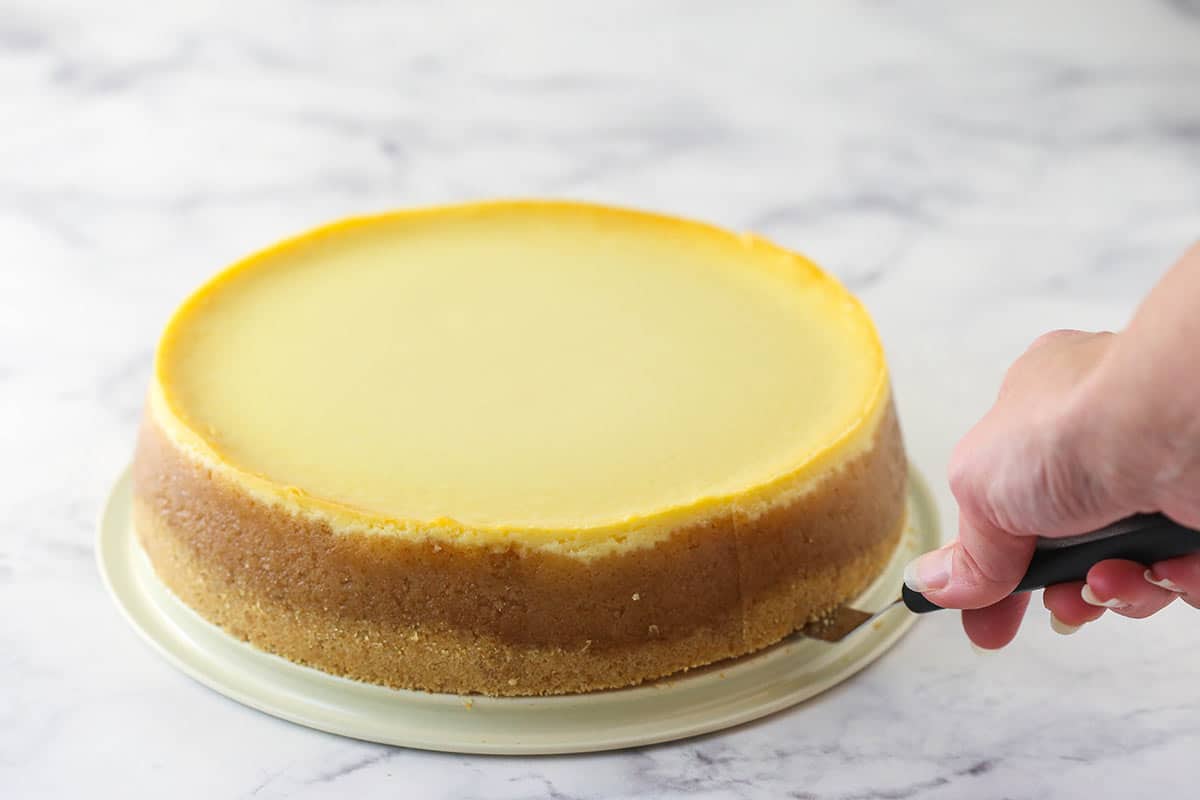
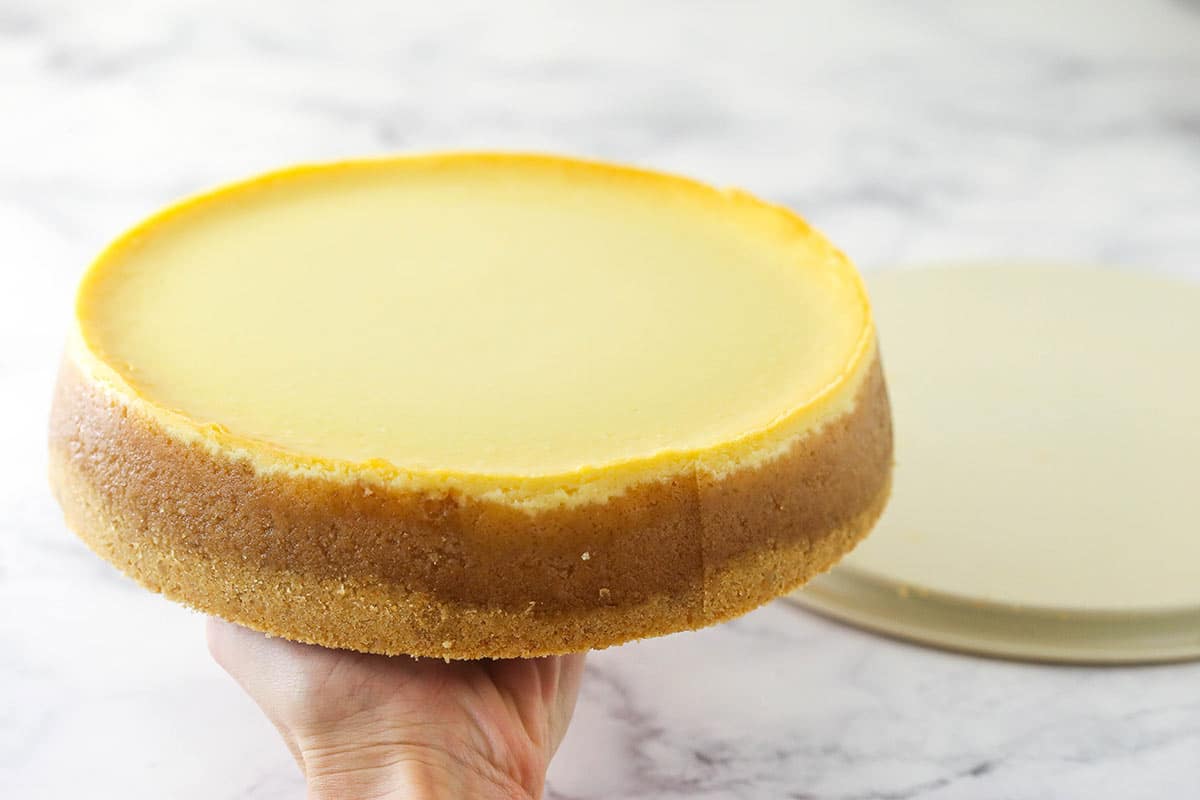
Next, you’ll want to run an offset spatula (or a thin knife, if you don’t have an offset spatula) between the bottom of the cheesecake and the bottom of the pan. This will loosen the cheesecake from the pan.
While holding the pan with the cheesecake in your hand, gently push the cheesecake off of the pan. I’m right handed, so I use my right hand to begin to push the cheesecake towards my left hand.
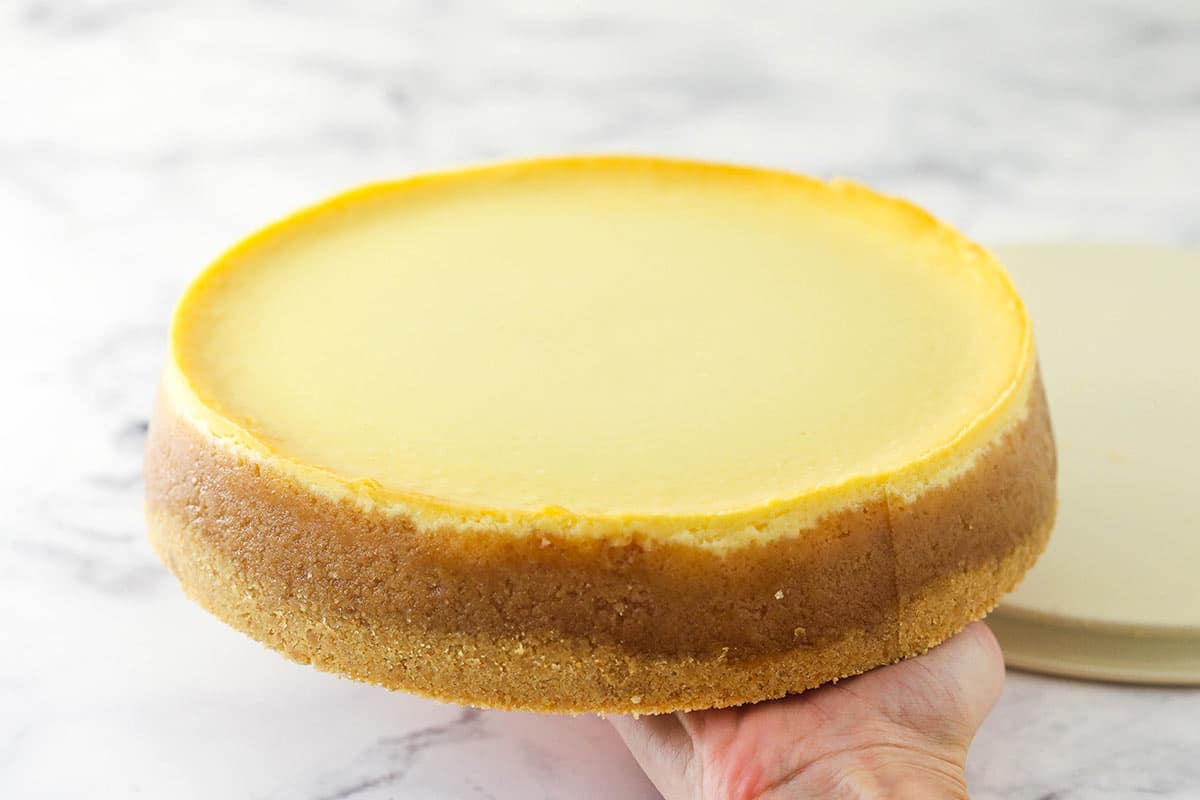
As the cheesecake moves towards my left hand and becomes more loose, I slide it off of the pan and onto the palm of my left hand.
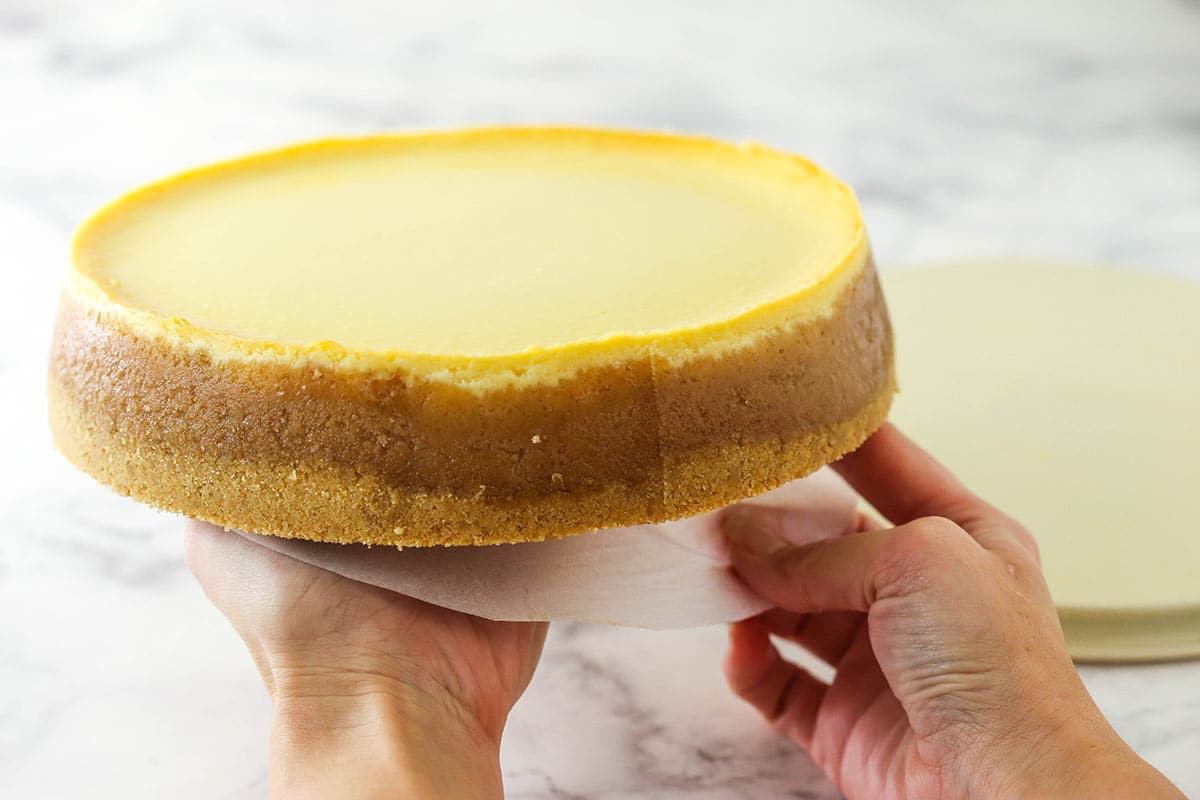
Next, I’ll remove the parchment paper. The cheesecake should be fairly solid in your hand, so just use your other hand to begin to peel back the paper. Once the paper is about half way off, switch the cheesecake from resting in one hand to the other and place the new hand on the part of the cheesecake that no longer has parchment paper. Then, remove the rest of the paper.
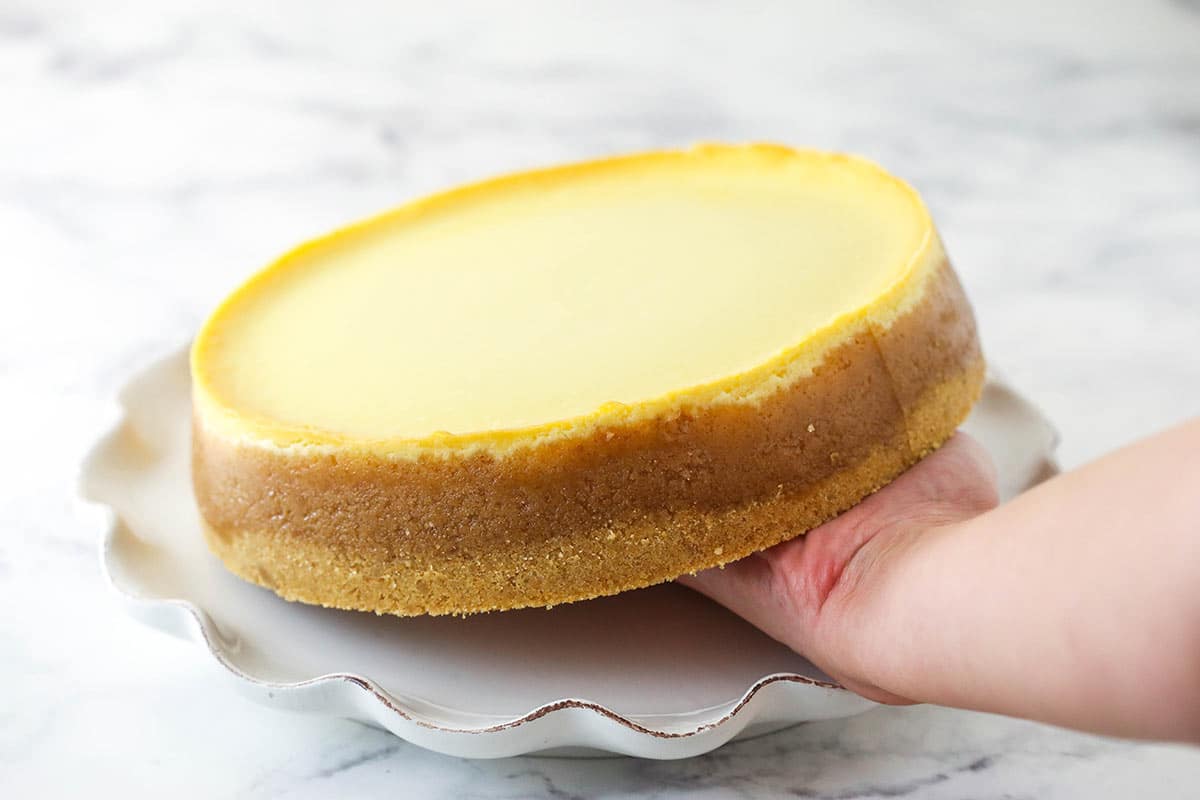
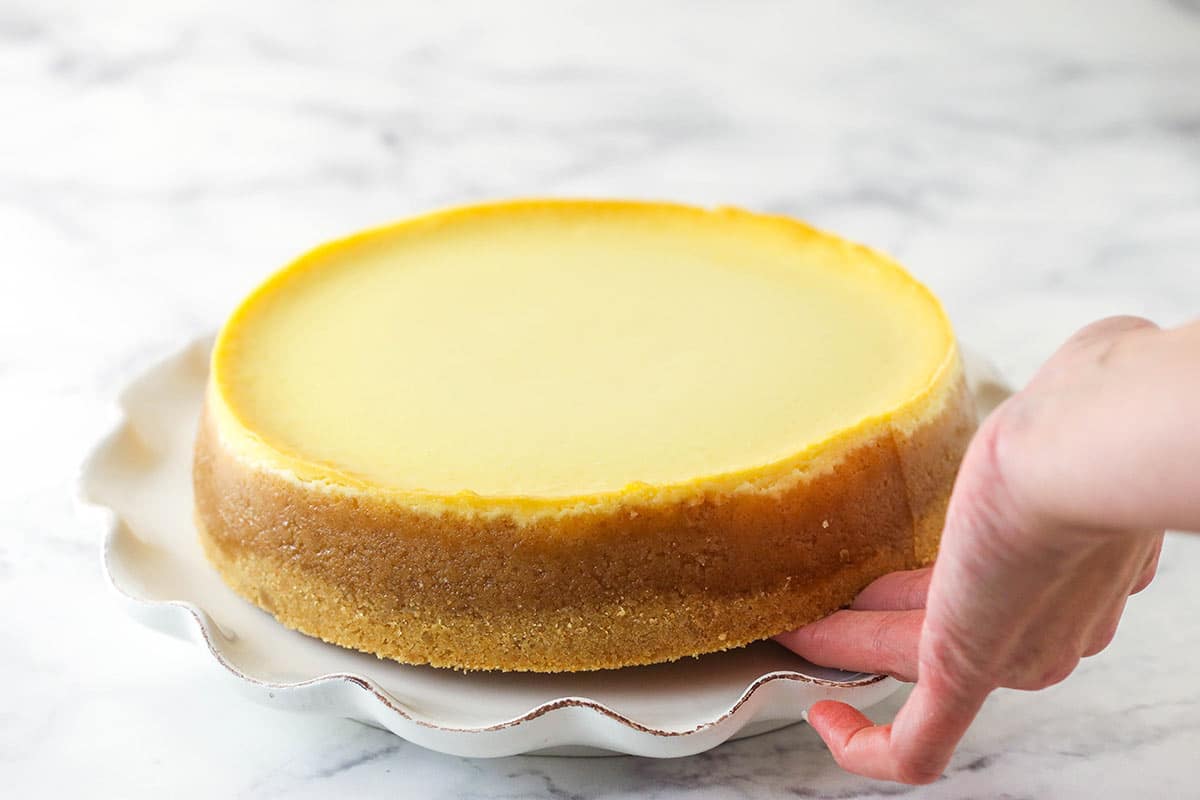
All that’s left now is to place the cheesecake on a serving platter. Just hold your cheesecake over the platter or cake stand of choice and lower it onto the platter as best you can, until just a couple fingers remain. Quickly move your fingers out of the way and your cheesecake will be at its final destination. Decorate it as desired and serve! If you have leftovers, be sure to check out my post on How to Store Cheesecake.


Thank you for showing how to transfer the cheesecake to a plate. It worked perfectly!
I’m so glad to hear it was helpful!
Where did you get the silicone(?) Pan for the water bath? I’ve been using tin foil but that looks much easier! Also what size is it?
I got it on Amazon. It’s a 10 inch.
I am looking forward to making this cheesecake. How do you get the spring form pan OUT of the silicone pan that goes in the waterbath…. wait till it cools completely in the waterbath or remove it from water and then cool.
You could do it either way. I often set the whole thing – water bath and all – on the stove when I first pull it out of the oven and when it’s cool enough, I’ll remove the silicone pan from the larger pan. Often I just refrigerate the springform and silicone pans together, but you could remove it too. Either way is fine.
Thank you for all the tips, especially setting up the water bath using the crock pot liner. I made your Pumpkin Chocolate Chip Cheesecake for tonight’s Happy Hour at our Clubhouse. As it’s October, it had to become a “Ghoul Pumpkin Cheesecake”. I have made cheesecakes for years and your tips on setting up and plating up are invaluable. Thank you for making our cheesecakes a success from start to finish.
Awesome! I’m so glad it was all helpful!
I just made the lemon blueberry cheesecake for the first time for my family for Easter yesterday. I followed your instructions to the letter. I also watched how to put the cheesecake in a water bath and how to remove the cheesecake from the pan. The result was perfection! Everyone raved about the taste. Thank you for all these tips and the amazing recipe.
Awesome! I’m so glad you enjoyed the recipe and found all the tips helpful!
Thanks for the tips. Can I ask what springform pan you use as the lip on the base seems better than the ones I have and is inverted so I don’t have to gauge in under a rim. Thanks.
I’m glad it was helpful! Yes, here’s the springform pan I use.
What is the purple pan that you have the springform pan in? Do you not use crockpot liners and foil anymore?
I actually have a note at the top of the post about setting up my water bath that I’ve started using a silicone pan and the link to it is there. It reduces waste and is truly water proof. I’m actually going to be updating that post soon to reflect those changes. The crockpot liners still work really well, I just have found the silicone pan to be even easier.
The video didn’t show how to. Remove the cheesecake. Went to banana bread.
There was a setting turned on that you had to actively click a button to remain on that video. I’ve removed that setting so it should work better now.