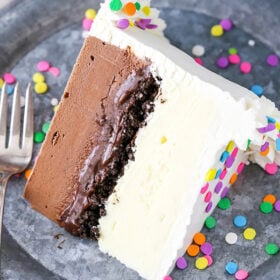
This Copycat DQ Ice Cream Cake layers chocolate and vanilla ice cream with that classic fudge and crunchy cookie center. And yes, it tastes just like the real thing. Best part? It’s surprisingly easy to make at home.

I’ve eaten a lot of cake over the years—cheesecakes, layer cakes, sheet cakes—and while I never picked the same one twice, there was one I always looked forward to: Dairy Queen’s. That thick, fudgey center with the chocolate crunchies? Absolute magic. I used to scoop that layer out and eat it straight. So when I started making my own ice cream cakes, recreating that iconic middle became the challenge. After a lot of testing (and more than a few spoonfuls), I finally cracked it—and this copycat recipe is the result.
Is It Hard to Make an Ice Cream Cake?
Nope! You don’t need an ice cream maker or fancy equipment. Just a springform pan, some store-bought ice cream, and a little time. The layers are simple to assemble, and you can make it ahead, which means zero stress on the day you serve it. It’s the kind of recipe that looks impressive but comes together with basic steps. That’s the best kind, right?
The rich fudge and crunchy cookie center is just like the classic DQ version (maybe even better), and honestly, it’s worth making the whole cake just for that.

What You’ll Need
You won’t believe how simple these ingredients are. I bet you were expecting super fancy and overly complicated ones, right? Here’s a quick look at what you’ll need. Don’t forget to scroll down to the recipe card for a printable list.
- Oreo cookies – You’ll crush these (filling and all) to make that classic chocolate cookie crunch layer.
- Butter – Just a little melted butter helps bind the cookie crumbs together.
- Vanilla and chocolate ice cream – Grab your favorite store-bought brands. Let them soften slightly before layering.
- Semi-sweet chocolate chips, heavy cream, light corn syrup, and vanilla – These come together to make the rich, fudgy center layer that tastes just like the original.
- Cold heavy whipping cream, powdered sugar, and vanilla extract – For the fluffy homemade whipped cream topping.
- Sprinkles – Optional, but highly encouraged for that classic birthday cake look!
How to Make An Ice Cream Cake
Start with an 8×3-inch cake pan for a nice tall cake, or use a 9-inch pan or springform if you prefer. Line the inside with plastic wrap so it’s easy to lift out later.
Make the Oreo Layer
- Prep your tools: Preheat oven to 350 degrees. Line a cookie sheet with parchment paper or a silicone baking mat and set aside.
- Make Oreo mixture: Combine the Oreo crumbs and melted butter. Stir well then spread onto the prepared cookie sheet.
- Bake for 8-10 minutes: Cool. Break any big clumps into smaller ones. Set aside.
Now we are going to assemble the layers:
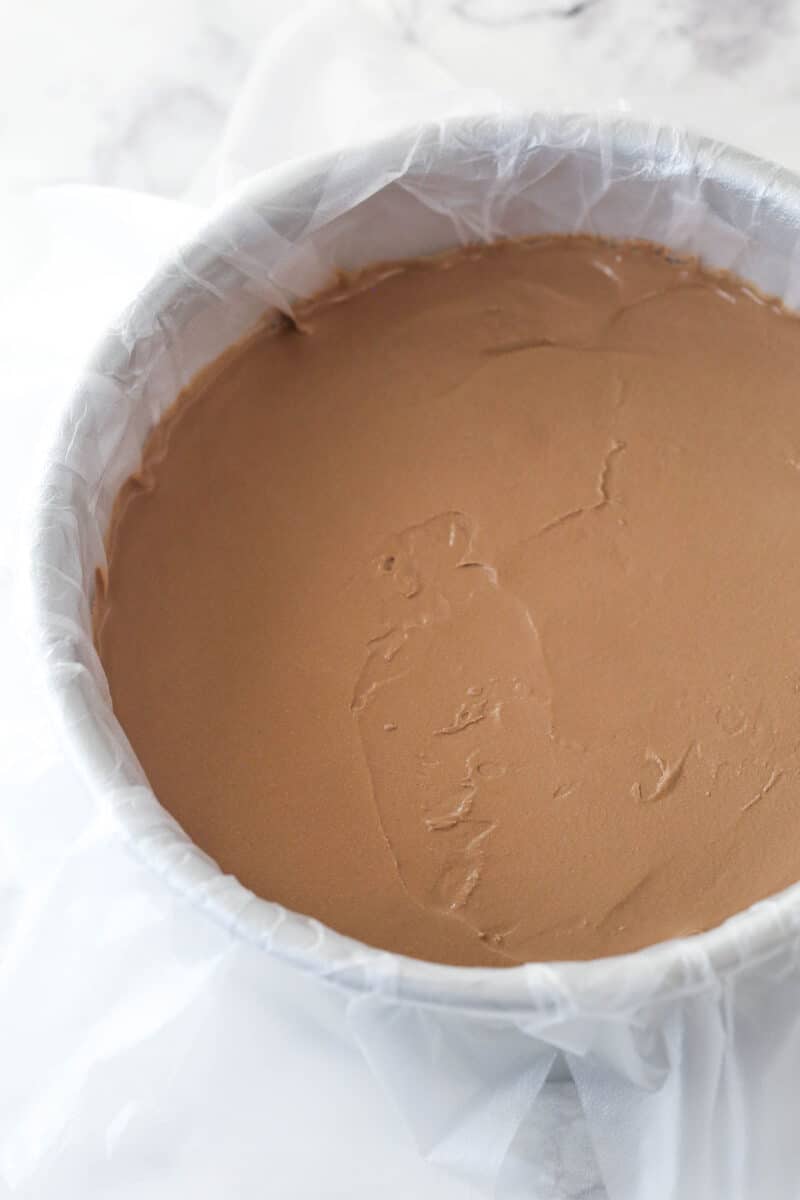
- Chocolate ice cream: About 20 minutes before you need it, set the chocolate ice cream out to soften. Stir it until smooth and creamy. Add to the prepared cake pan and spread into an even layer. Freeze for 30 minutes.
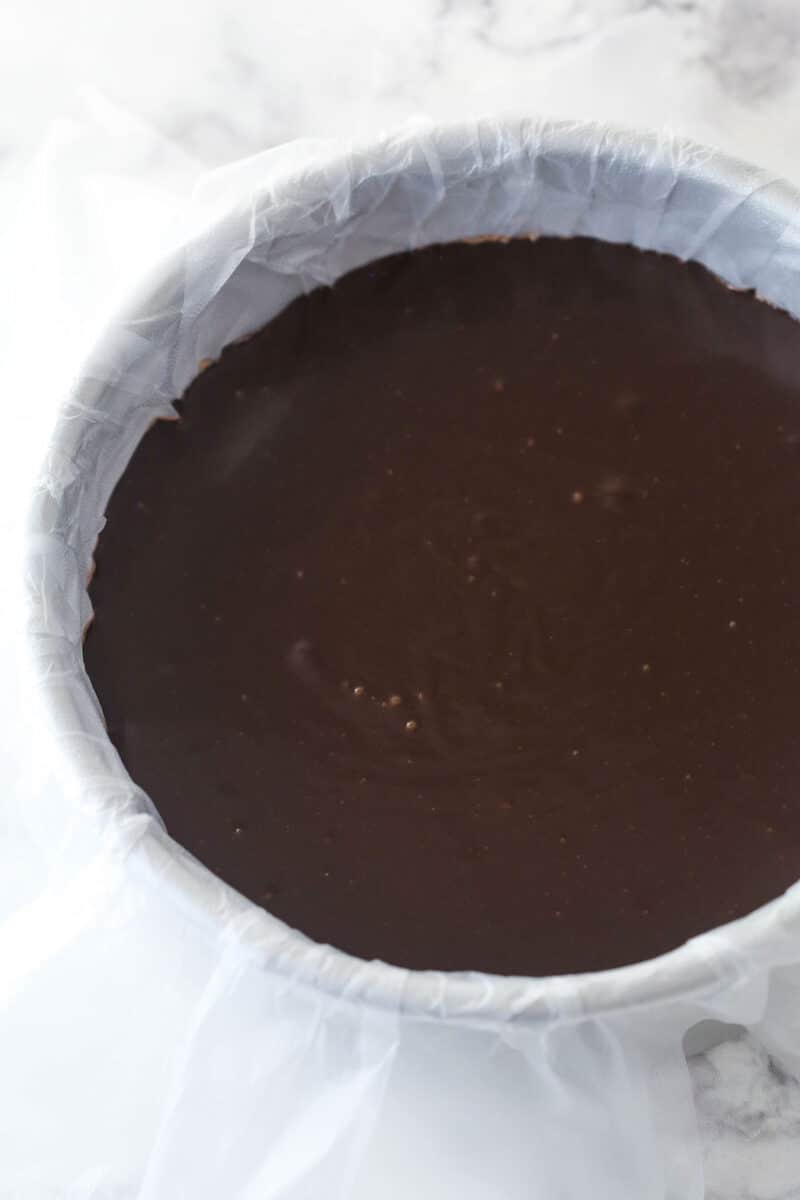
- Fudge layer: Make the fudge as directed in the recipe card below. Remove the cake pan with the chocolate ice cream from the freezer, then pour the chocolate fudge over the ice cream and spread into an even layer. Freeze for about 10 minutes.
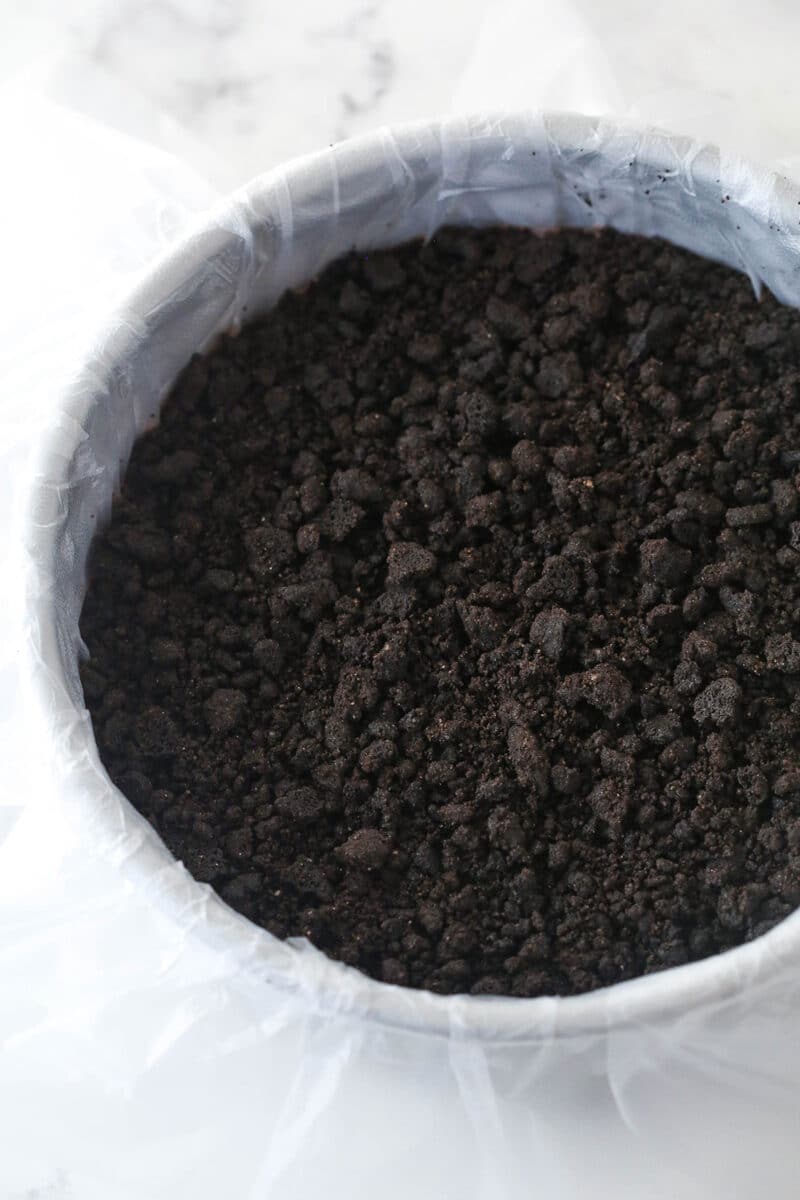
- Oreo cookie layer: Add the cookie crumbles to the top of the fudge layer, then freeze for about 2 hours, until mostly firm.


- Vanilla ice cream layer: About 20 minutes before you need it, set the vanilla ice cream out to soften. Once softened, stir it up until smooth and creamy. Add the vanilla ice cream to the top of the cake, then freeze until firm, 2-3 hours.
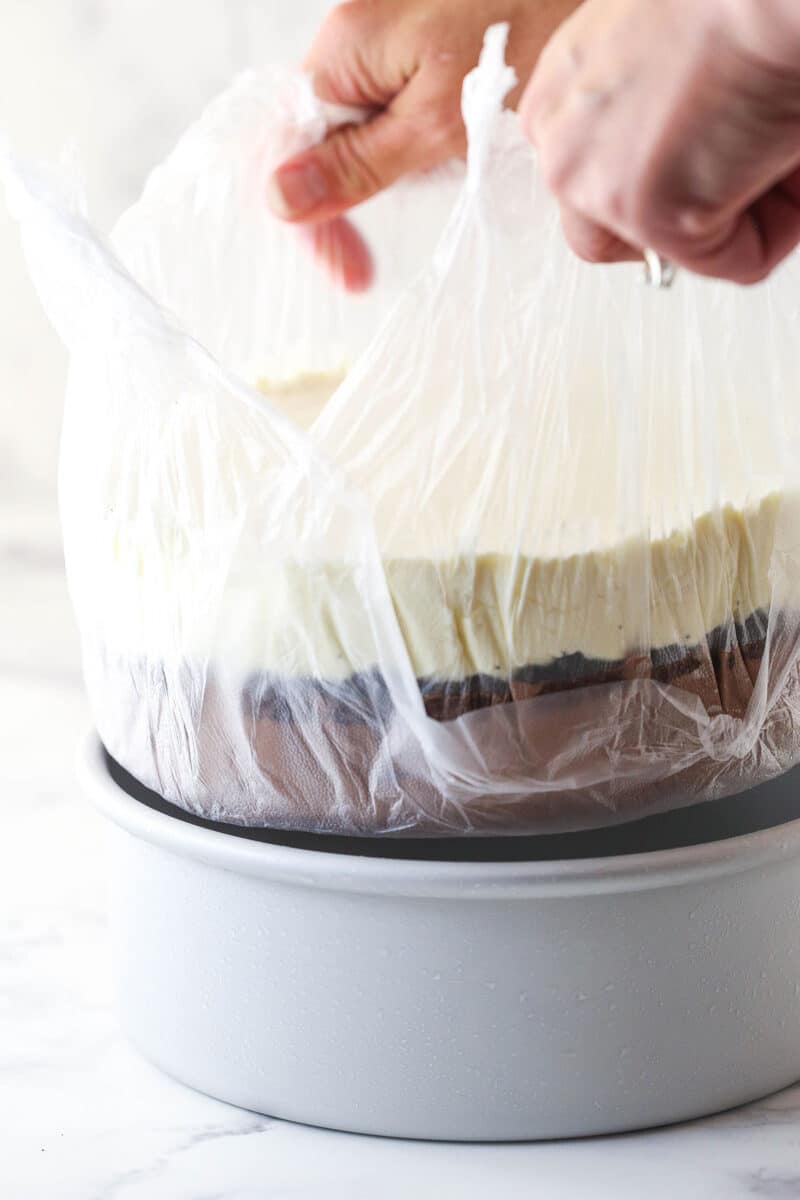
- Remove from cake pan: Use the clear wrap to lift the frozen cake out of the pan. Place it on a cardboard cake circle or a serving plate. Set it back in the freezer.
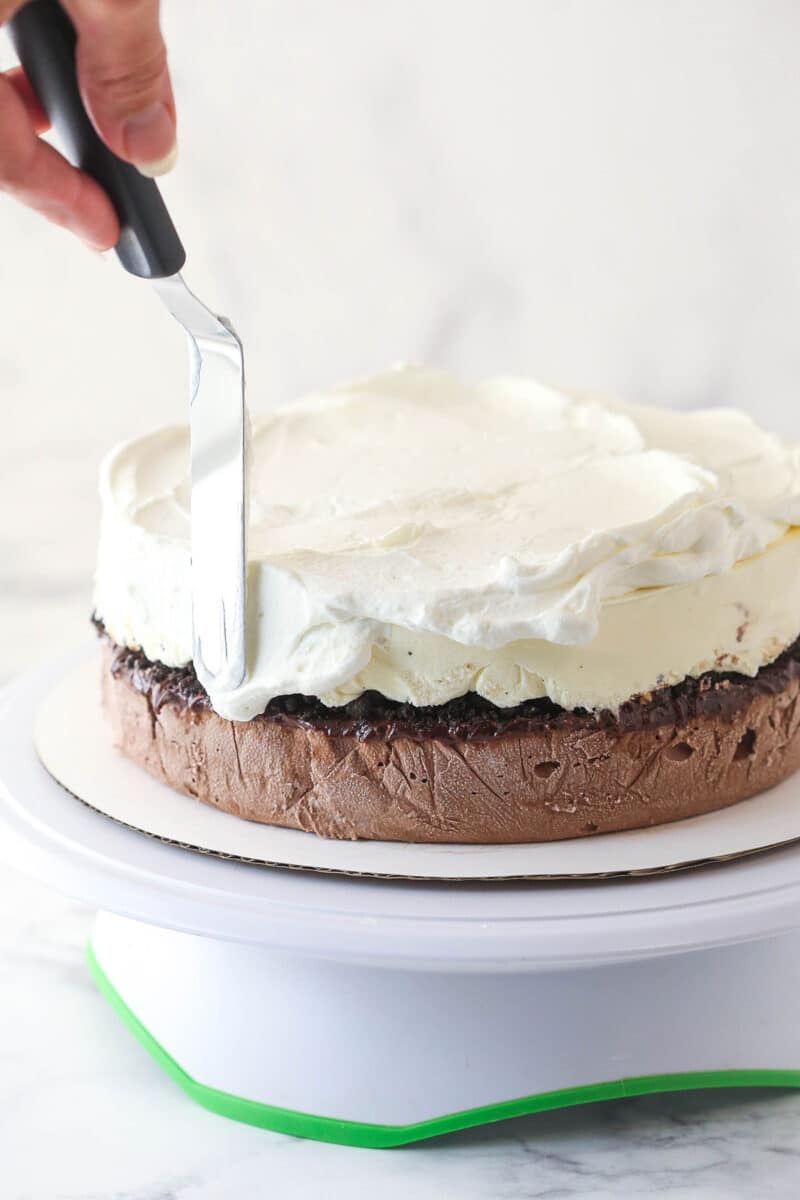
- Whipped cream layer: When it’s done, frost it with my homemade whipped cream. It uses some powdered sugar to keep it from wilting. It stays stable for days and days making it ideal for an ice cream cake.
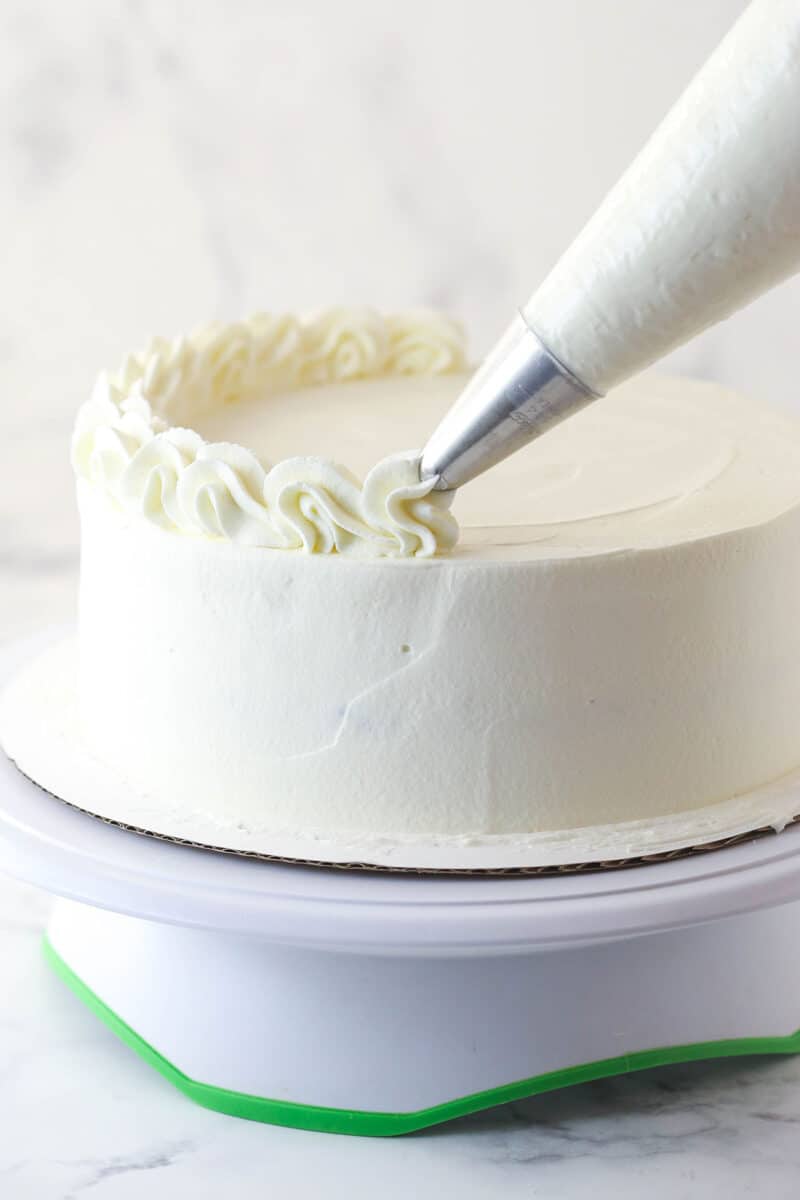
- Add decorations and freeze until ready to serve: Decorate the ice cream cake as you like for your occasion and you’re ready to go!
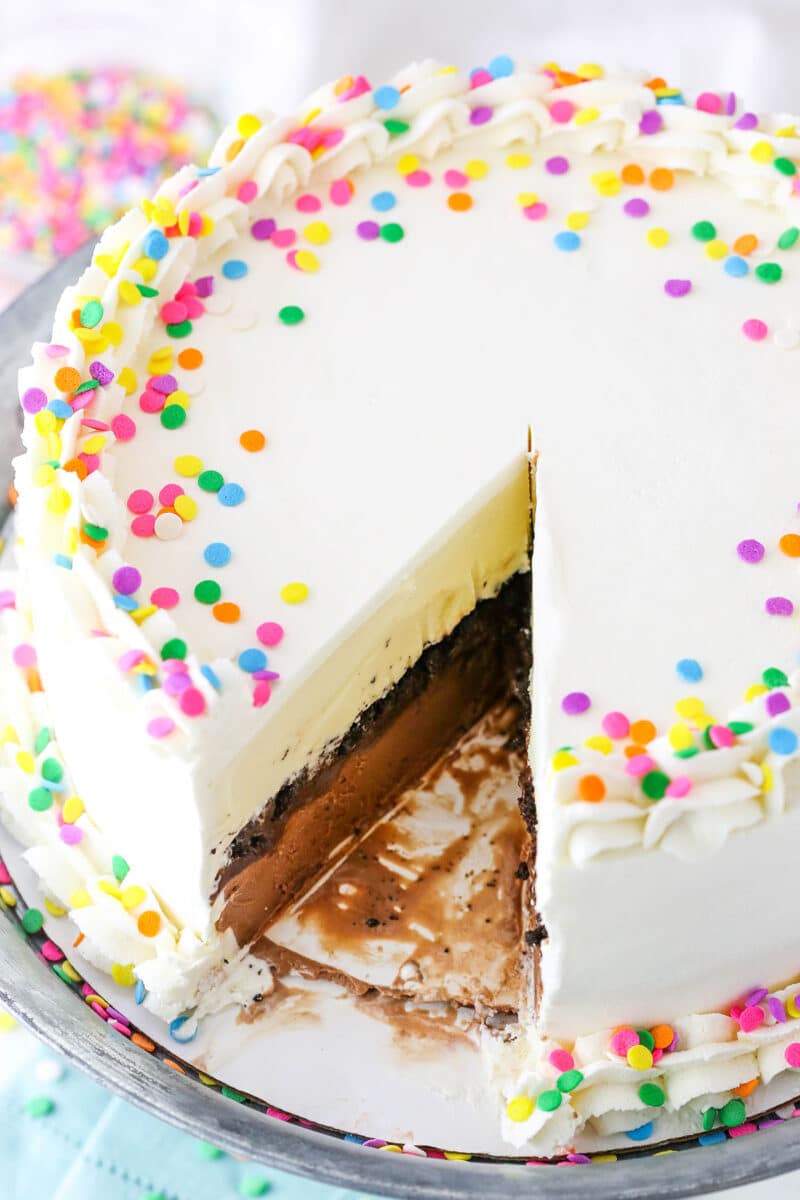
This is seriously the BEST Copycat Dairy Queen Ice Cream Cake! You will love it. And just like when I was a kid, you will want to eat the chocolate fudge and chocolate crunchy layer right out of the center.
How to Store
This is a great make-ahead dessert! You can build the whole cake in the pan, cover it, and freeze it for up to a week before serving. Just wait to frost and decorate until the day before (or day of) so it looks fresh. Once decorated, keep it in the freezer. If you have a cake box or cake carrier, that’s ideal—but if not, it’ll still be fine uncovered (in the freezer) for a couple of days.

Shop the post

Watch How To Make It
Copycat Dairy Queen Ice Cream Cake
- Prep Time: 5 hours 15 minutes
- Cook Time: 10 minutes
- Total Time: 5 hours 25 minutes
- Yield: 12–14 slices 1x
- Category: Dessert
- Method: Freezer
- Cuisine: American
Description
This Copycat Dairy Queen Ice Cream Cake has layers of chocolate and vanilla ice cream around the iconic layer of chocolate crunchies and chocolate fudge. It is so easy to make and tastes just like the real thing!
Ingredients
Chocolate Cookie Crunchies
- 3/4 cup (100g) Oreo crumbs (about 9 Oreos)
- 1 1/2 tbsp butter, melted
Ice Cream Layers
- 1.5 quart container vanilla ice cream
- 1.5 quart container chocolate ice cream
Chocolate Fudge
- 6 oz | 1 cup semi-sweet chocolate chips*
- 3 tbsp light corn syrup
- 1/2 tsp vanilla extract
- 1/2 cup (120ml) heavy whipping cream
Whipped Cream
- 2 cups (480ml) heavy whipping cream, cold
- 1 cup (115g) powdered sugar
- 1 1/2 tsp vanilla extract
- Sprinkles
Instructions
- Preheat oven to 350 degrees. Line a cookie sheet with parchment paper or a silicone baking mat and set aside.
- Combine the Oreo crumbs and melted butter and stir until well combined. Spread the crumbs evenly onto the prepared cookie sheet.
- Bake for 8-10 minutes, then allow to cool. Use your fingers to break any big clumps into smaller ones. Set aside.
- Line an 8×3 inch cake pan* with clear wrap that covers the bottom and goes above the sides of the cake pan. I used two pieces.
- About 20 minutes before you need it, set the chocolate ice cream out to soften. Once softened, stir it up until smooth and creamy. Add the softened chocolate ice cream to the prepared cake pan and spread into an even layer. Freeze for 30 minutes.
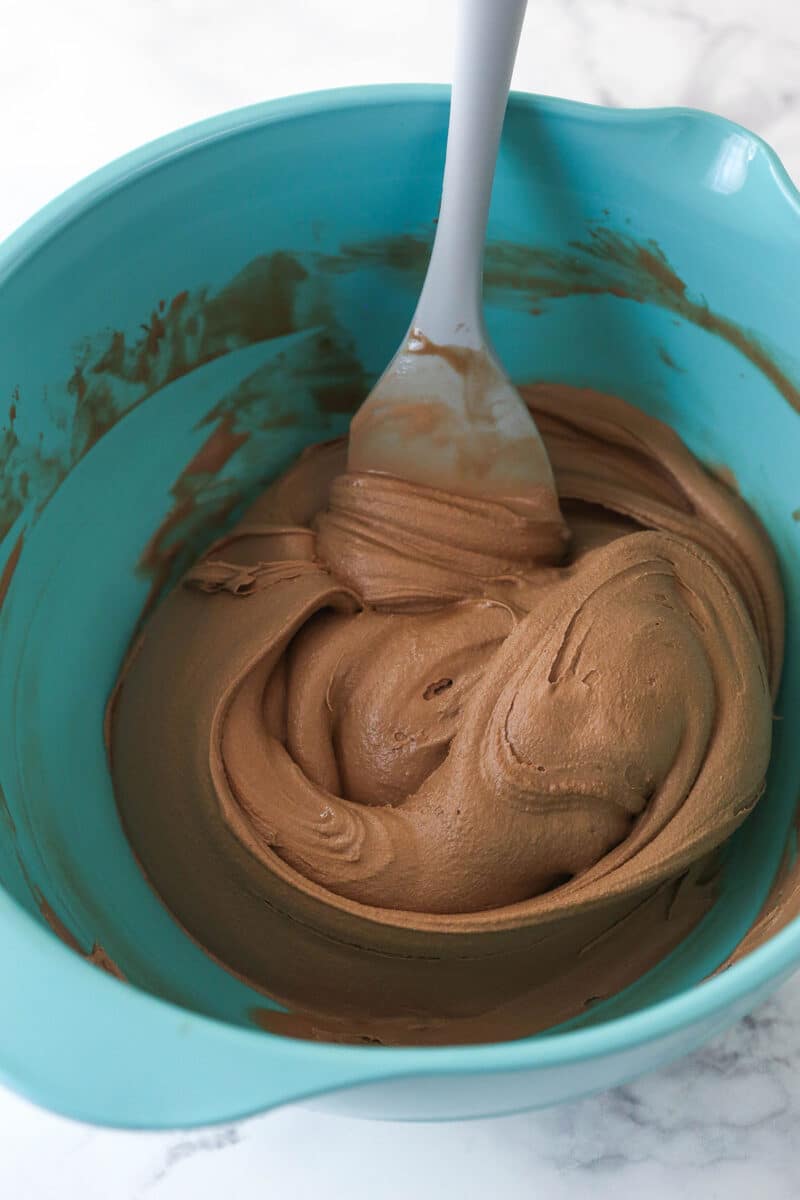
- To make the fudge layer, add the chocolate chips, corn syrup and vanilla extract to a medium sized bowl.
- Heat the heavy whipping cream just until it begins to boil, then pour it over the chocolate chips. Allow to sit for 2-3 minutes, then whisk until smooth.
- Remove the cake pan with the chocolate ice cream from the freezer, then pour the chocolate fudge over the ice cream and spread into an even layer. Freeze for about 10 minutes.
- Add the cookie crumbles to the top of the fudge layer, then freeze for about 2 hours, until mostly firm.
- About 20 minutes before you need it, set the vanilla ice cream out to soften. Once softened, stir it up until smooth and creamy. Add the vanilla ice cream to the top of the cake, then freeze until firm, 2-3 hours.
- Use the clear wrap to lift the frozen cake out of the pan, then place it on a cardboard cake circle or a serving plate. Set it back in the freezer.
- To make the whipped cream, add the heavy whipping cream, powdered sugar and vanilla extract to a large mixer bowl. Whip on high speed until stiff peaks form.
- Frost the cake with the whipped cream and decorate as desired. I used Ateco tip 844 for piping the borders.
- Freeze the cake until ready to serve. Cake is best when stored well covered and eaten within 4-5 days.
Notes
- I like using the 8×3 inch cake pan and having a taller cake, but if you don’t have one of those pans on hand and don’t want to purchase it, you could also use a 9 inch pan (including a springform pan). The cake just won’t be as tall.
- Semi-sweet chocolate must be used, not milk chocolate or another, for the fudge layer to set properly
Nutrition
- Serving Size: 1 slice
- Calories: 661
- Sugar: 50 g
- Sodium: 118.6 mg
- Fat: 46.3 g
- Carbohydrates: 55 g
- Protein: 8.4 g
- Cholesterol: 173.7 mg


Dairy queen cake is not made with ice cream it’s made with ice milk which is way fresher tasting and not so heavy feeling, though your cake recipe may be good it will not taste like Dairy queen.
Amazing … Make it Gluten Free!!
A very good knock off for a Dairy Queen ice cream cake!!! I have a son and a grand daughter who are celiacs. I bought GF Oreo style cookies and scraped the filling off, then made into crumbs. Wonderful!! My son had not had an ice cream cake for close to 20 years and grand daughter never. For Christmas I added crushed candy canes into the vanilla ice cream and sprinkled also on top of whipped cream. I live not too far from Costco so I buy their soft serve ice cream in a cup instead of a cone. Takes 3-4 cups of each flavour depending on size of pan. I do chocolate layer first up to the crumbs. Next trip to Costco I buy the vanilla. Makes it so so easy.
So glad the recipe worked well for you!
Can I make the cookie crumble bit ahead of time? If so, how should I store it?
Yes, just store it in an air-tight container at room temperature.
This was so great! Thanks 🙂
I have two boys with anaphylaxis allergies to peanuts and have never experienced a DQ cake. It was awesome to give the birthday boy a DQ cake tonight!
I did space out making the cake in three different times to ensure ice cream was really frozen. Otherwise, delicious and easy to make.
Awesome! I’m so glad it worked well for you!
This recipe is amazing! I make it for every birthday in my family now, thank you so much!
I’m so glad it’s a hit!
This recipe is amazing! I make it for every birthday in my family, thanks so much!
Awesome! I’m so glad it’s a hit!
The centre tastes amazing! BUT my centre didn’t freeze at all! So it just kept on oozing out from the sides – even through the frosting – this was after being in the freezer for more than a day… 🤷🏽♀️
Did you use semi sweet chocolate or another type of chocolate? It truly makes a difference.
Needs to freeze longer. 3 hours and it was still soft on the bottom and completely ruined and came apart once pulled from the pan. I should have trusted my gut and left it over night. Now I have to go buy one because I don’t have time to make another.
Same thing happened to me. I was luckily able to save it but it was a huge mess. The outcome was tasty but I would say freeze it as long as you need to. 3 hrs isn’t enough at all.
Could you use a glass 9×13 instead?
Sure. I know plenty of people have commented that they’ve used a 9×13 pan before.
Making this currently and realize I only have milk chocolate chips for fudge layer. Can I use these or will it change the texture?
It may affect the texture and make the fudge layer softer. Without testing it, it’s hard for me to know if it’ll create a big problem or not.
Yes it will definately change the texture! I did it with milk chocolate and it was too runny. Need semi sweet!!
This recipe is ok
Put fudge layer over chocolate ice cream and froze again I think you need to let fudge layer chill before putting on ice cream my ice cream came through the fudge layer otherwise everything else was ok
Making this this weekend for my fiancés birthday!! So excited! For the chocolate chips, is it 1 cup plus 6 oz. Or is it 6oz. to 1 cup?
Thank you!!
6 ounces is equal to 1 cup. So you need 1 cup (or 6 ounces), depending on how you prefer to measure. Does that help?
Did you smooth the oreos in a bag or blend them up? My first batch of oreos burned on 350 for 10 min. Not sure what I did wrong, they’re hard to keep an eye on because they’re already black, I couldn’t tell they were burned until I taste tested.
I use a food processor to grind them into crumbs. When they look kind of like they are melting together a bit, they are likely done.
Lindsay, isn’t a cup equal to 8 ounces? Hence the confusion? 🙂
That is true for liquid, not solids.
My family just loved it. They said it was better than the one we usually buy. I will be making it from now on!!!!
Awesome! So glad it was a hit!
I made this cake for a summer BBQ and it was so delicious that everyone thought it was from DQ. Thank you for sharing!
Awesome! So glad it was a hit!
I am trying this as we speak. Do we scrape the filling out of the cookies first or use the entire cookie to make the crumbs?
You don’t have to scrape out the filling. Just use the entire cookie.
This looks amazing! I would like to make it with frozen custard and a layer of the Oreo on the bottom! Would there be any contraindication to making those changes? I know custard will melt faster. Would love to know your thoughts on these substitutions and addition of the Oreo layer
Having not used those particular things, it’s hard for me to say. I think the Oreo on the bottom sounds tasty, but may be a little bit crumbly.
Yummmmmmmmmm!
Thank you! I’m sooooo looking forward to eating this!!
It is great to have a homemade version when my store doesn’t carry the real thing.
I’m so glad you’re happy with it!