

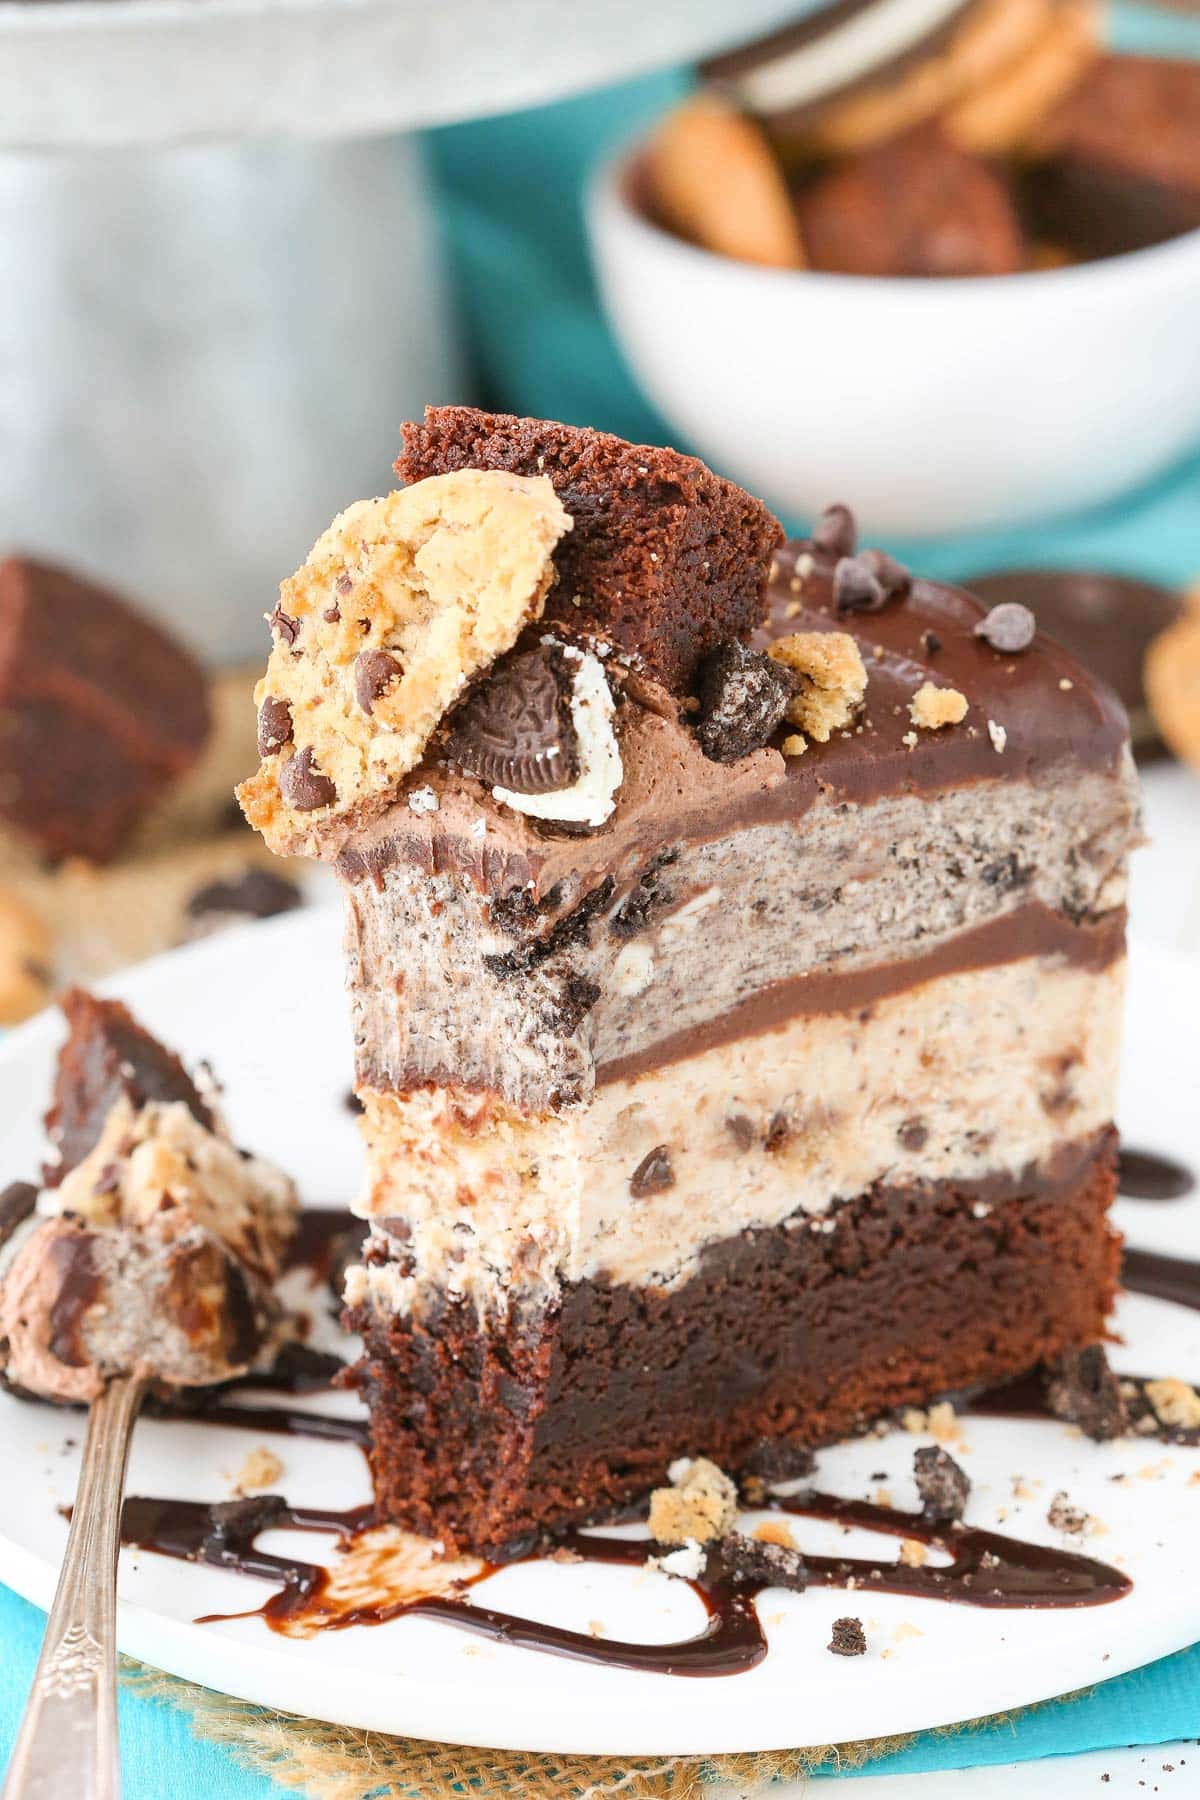
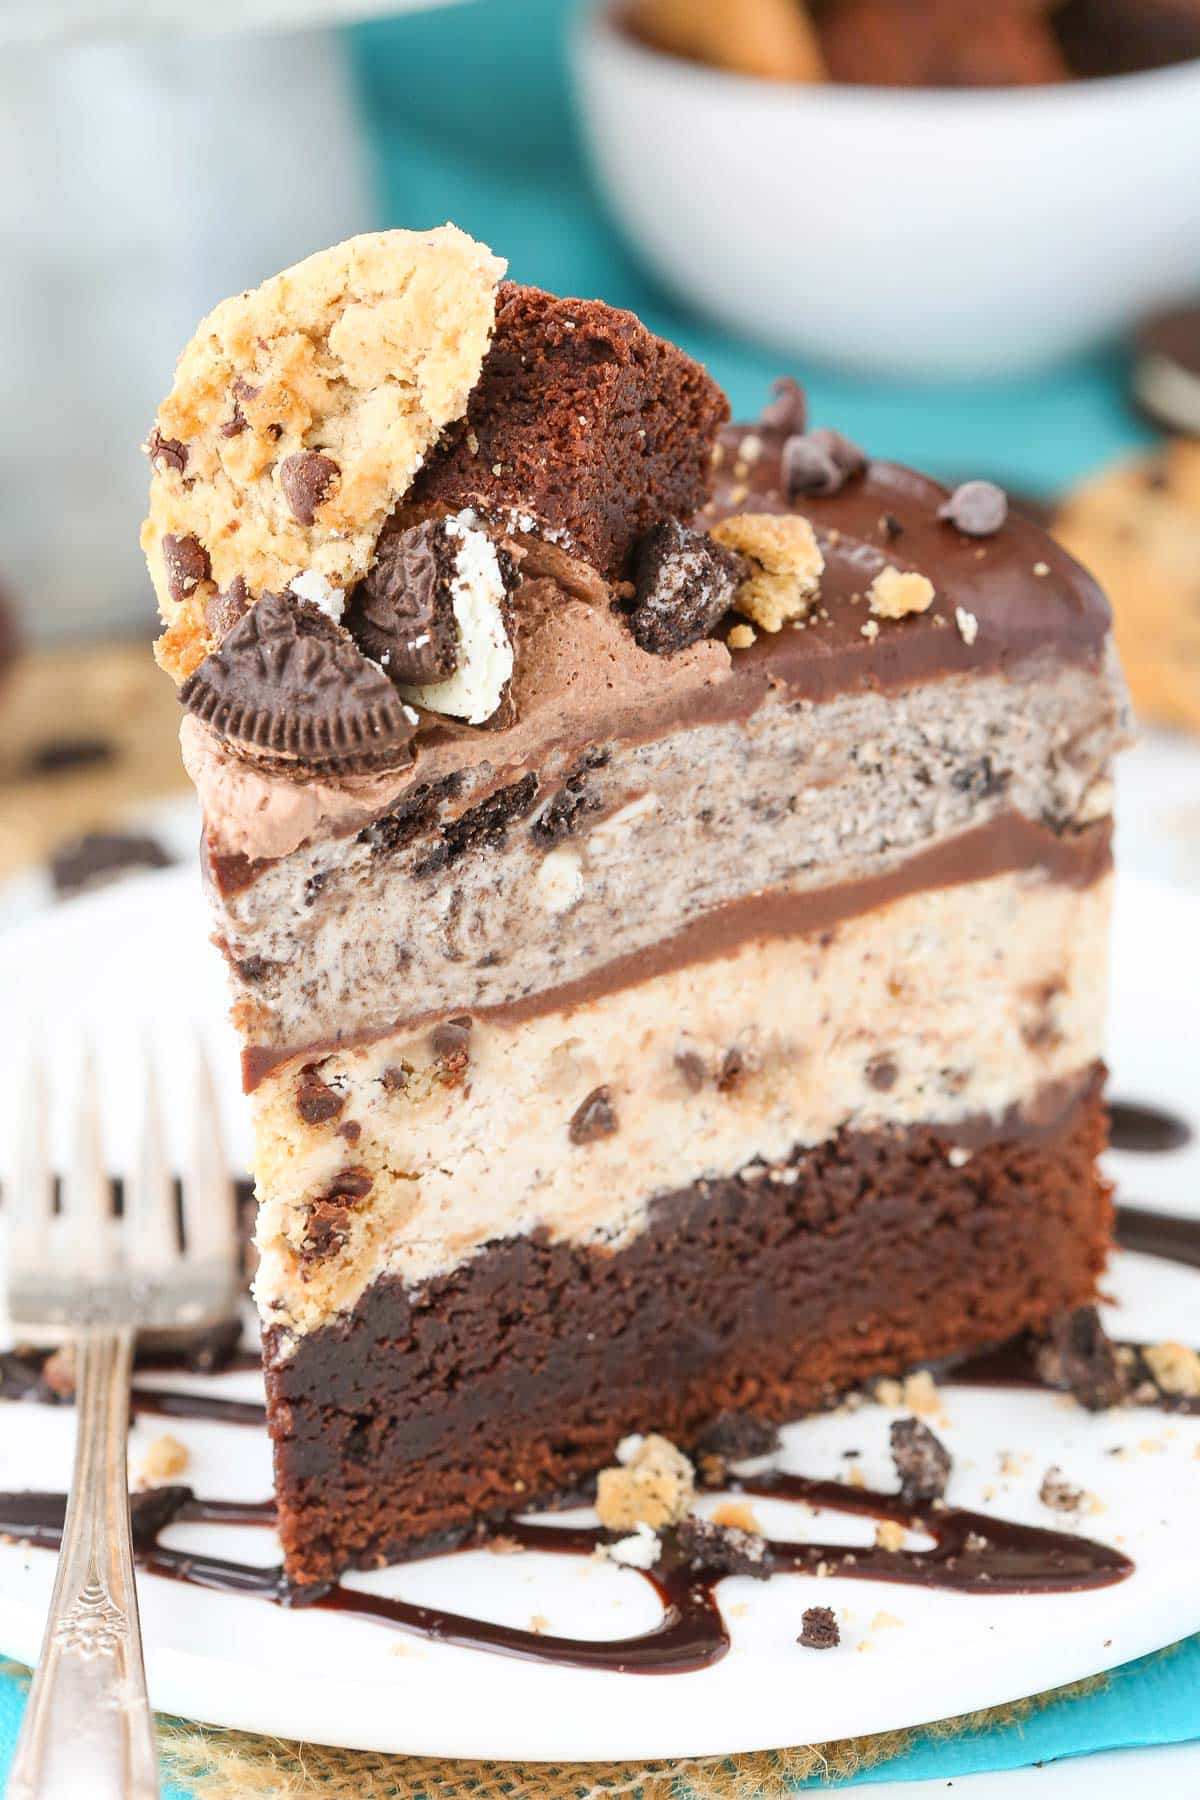
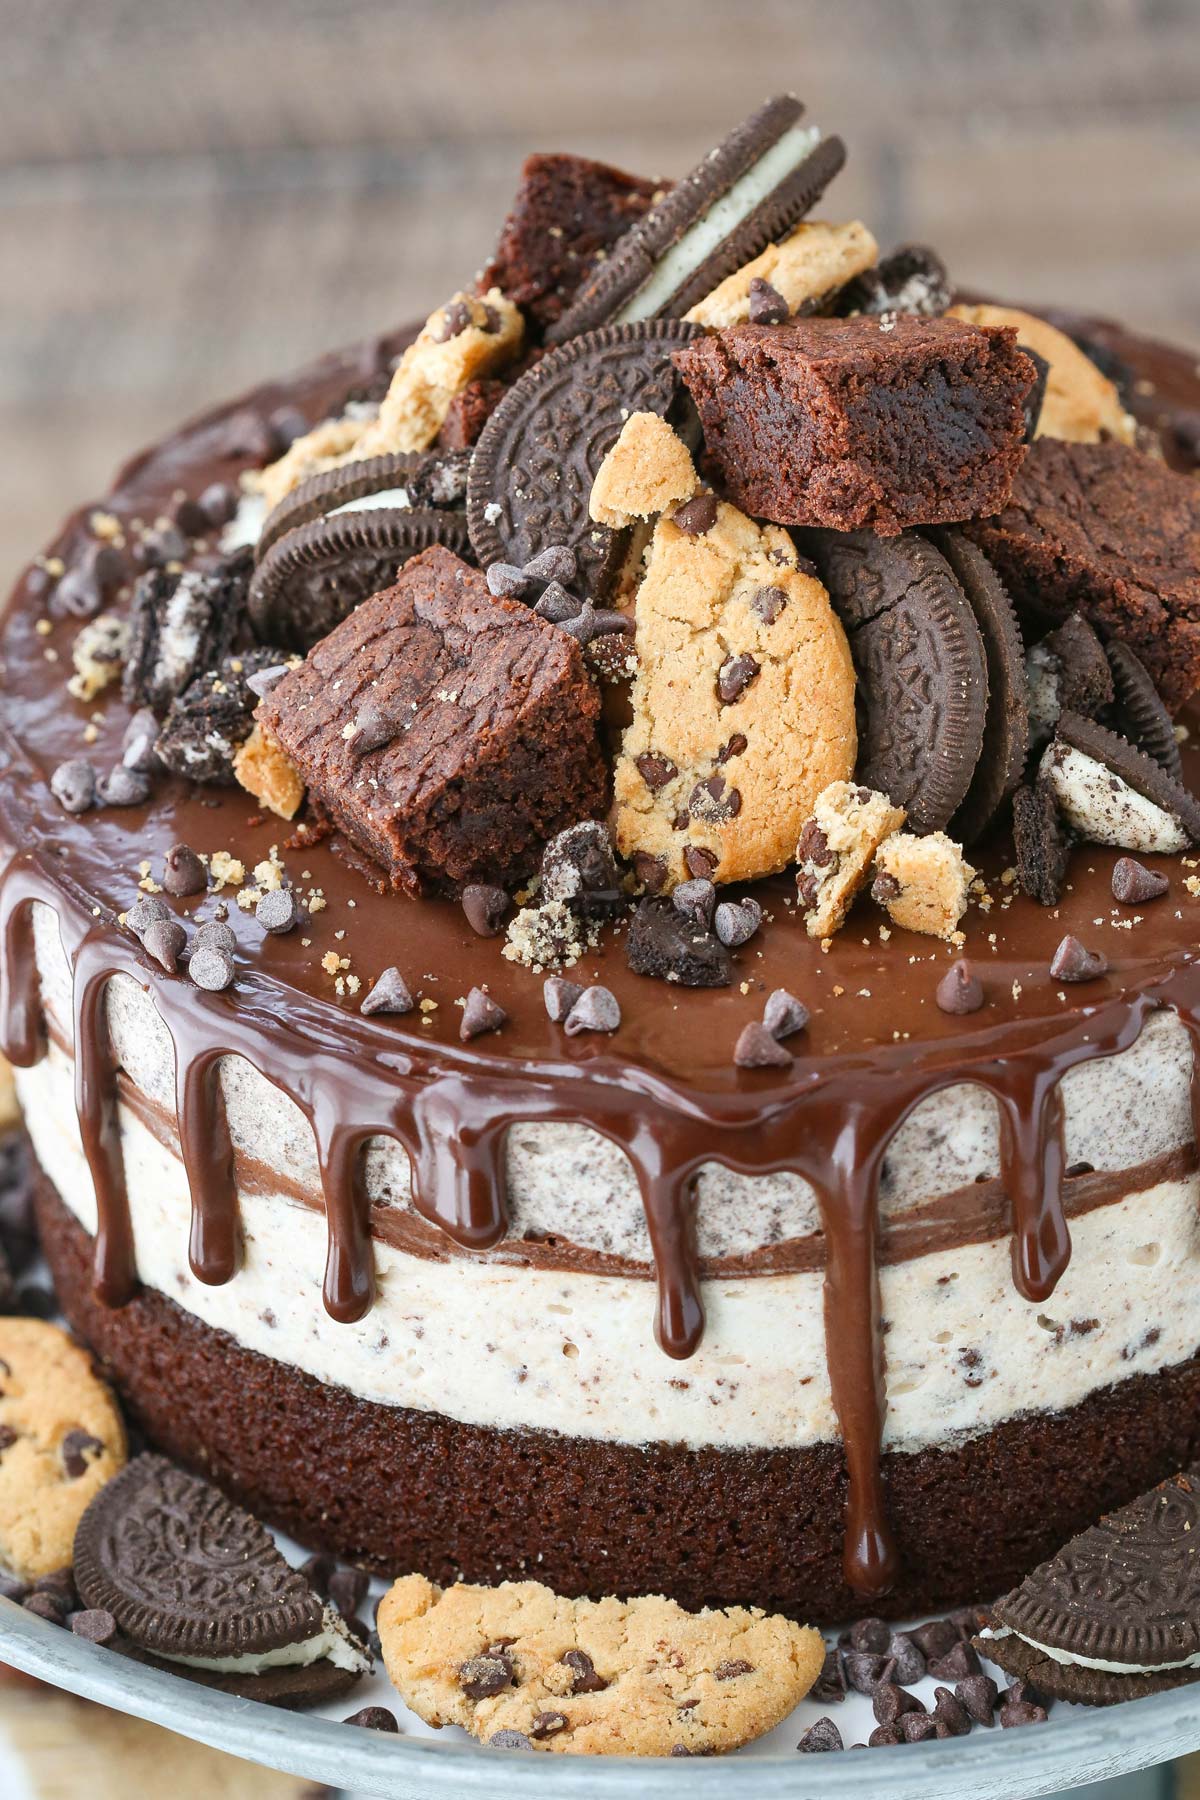
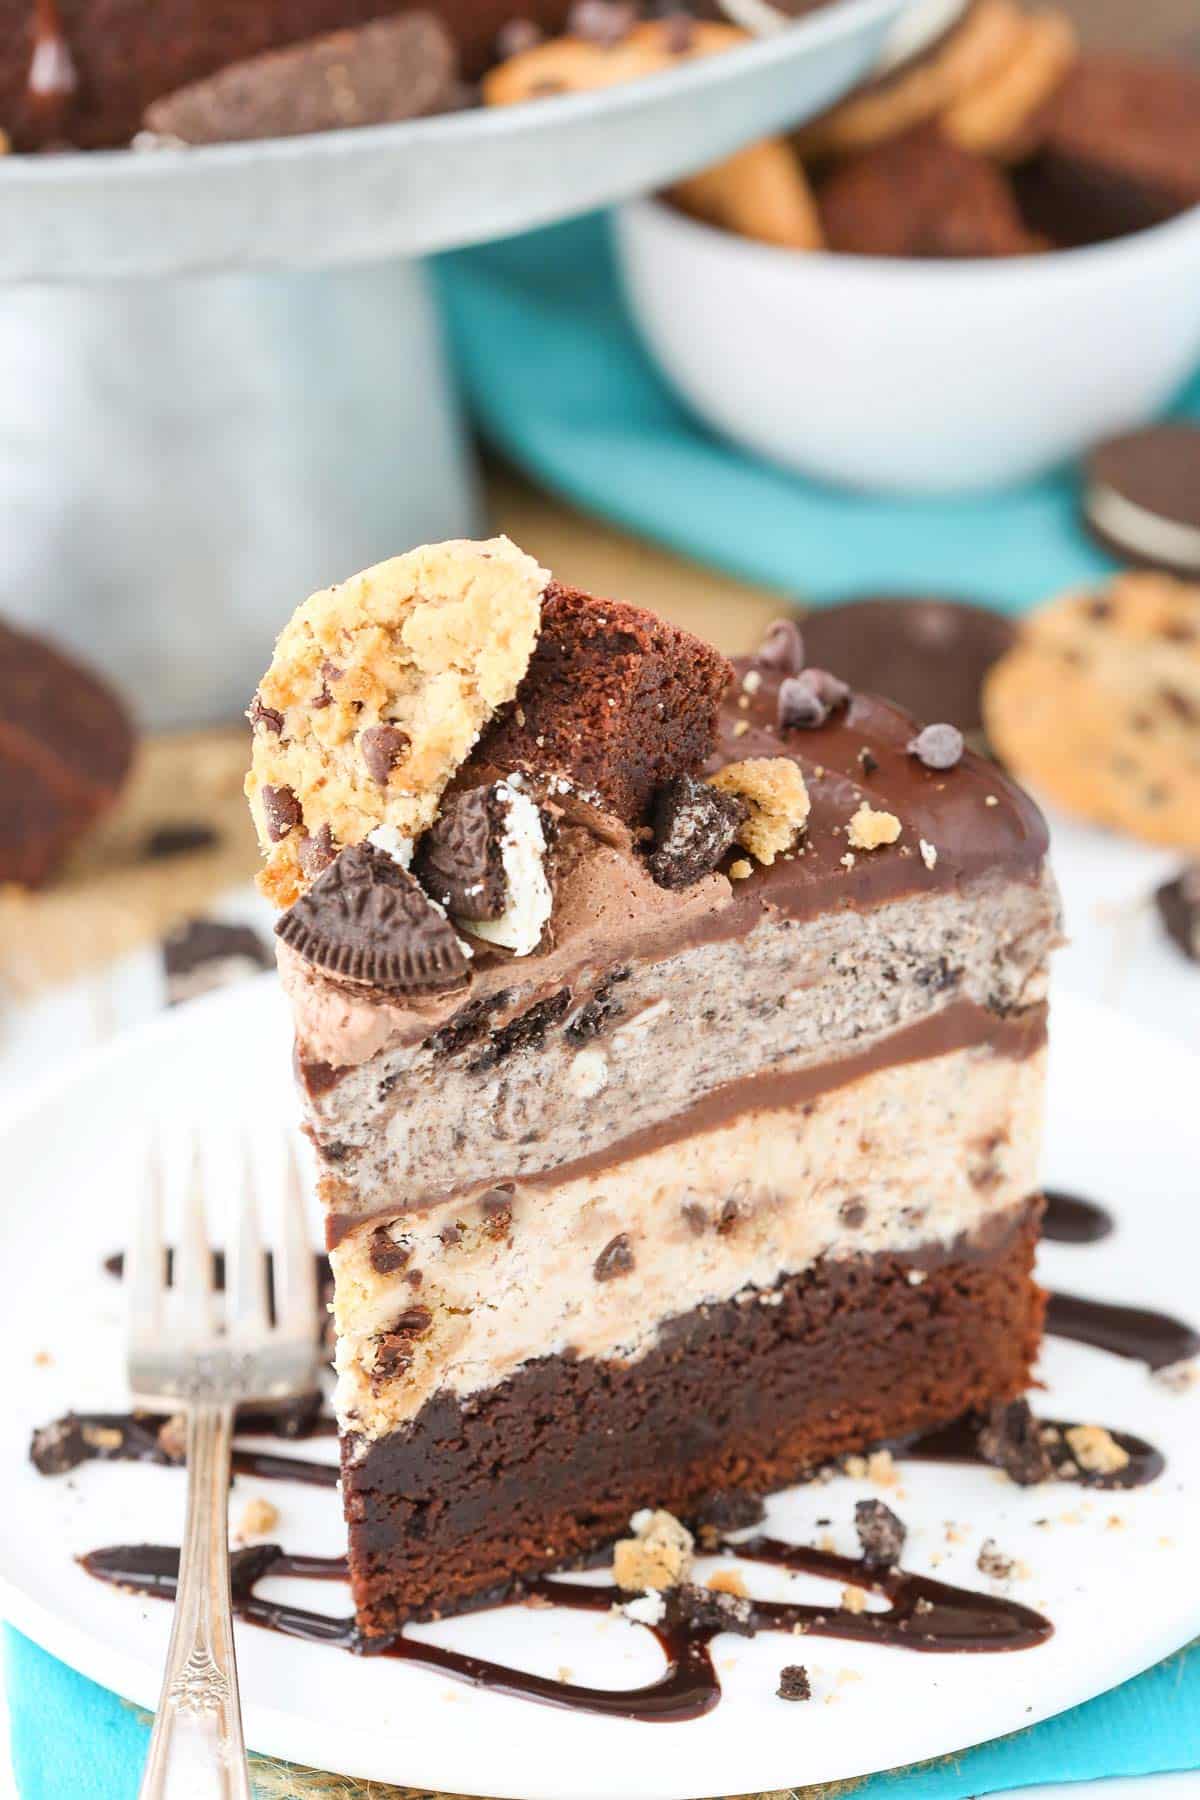
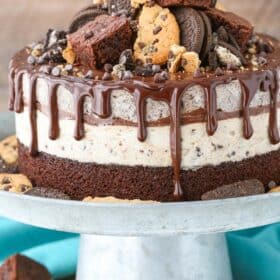
This Oreo Brookie Ice Cream Cake has a fudgy brownie base topped with layers of chocolate chip cookie ice cream, chocolate ganache, and Oreo ice cream. It’s finished with chocolate ganache and chocolate whipped cream. It’s a stunner and such a fun ice cream cake flavor!
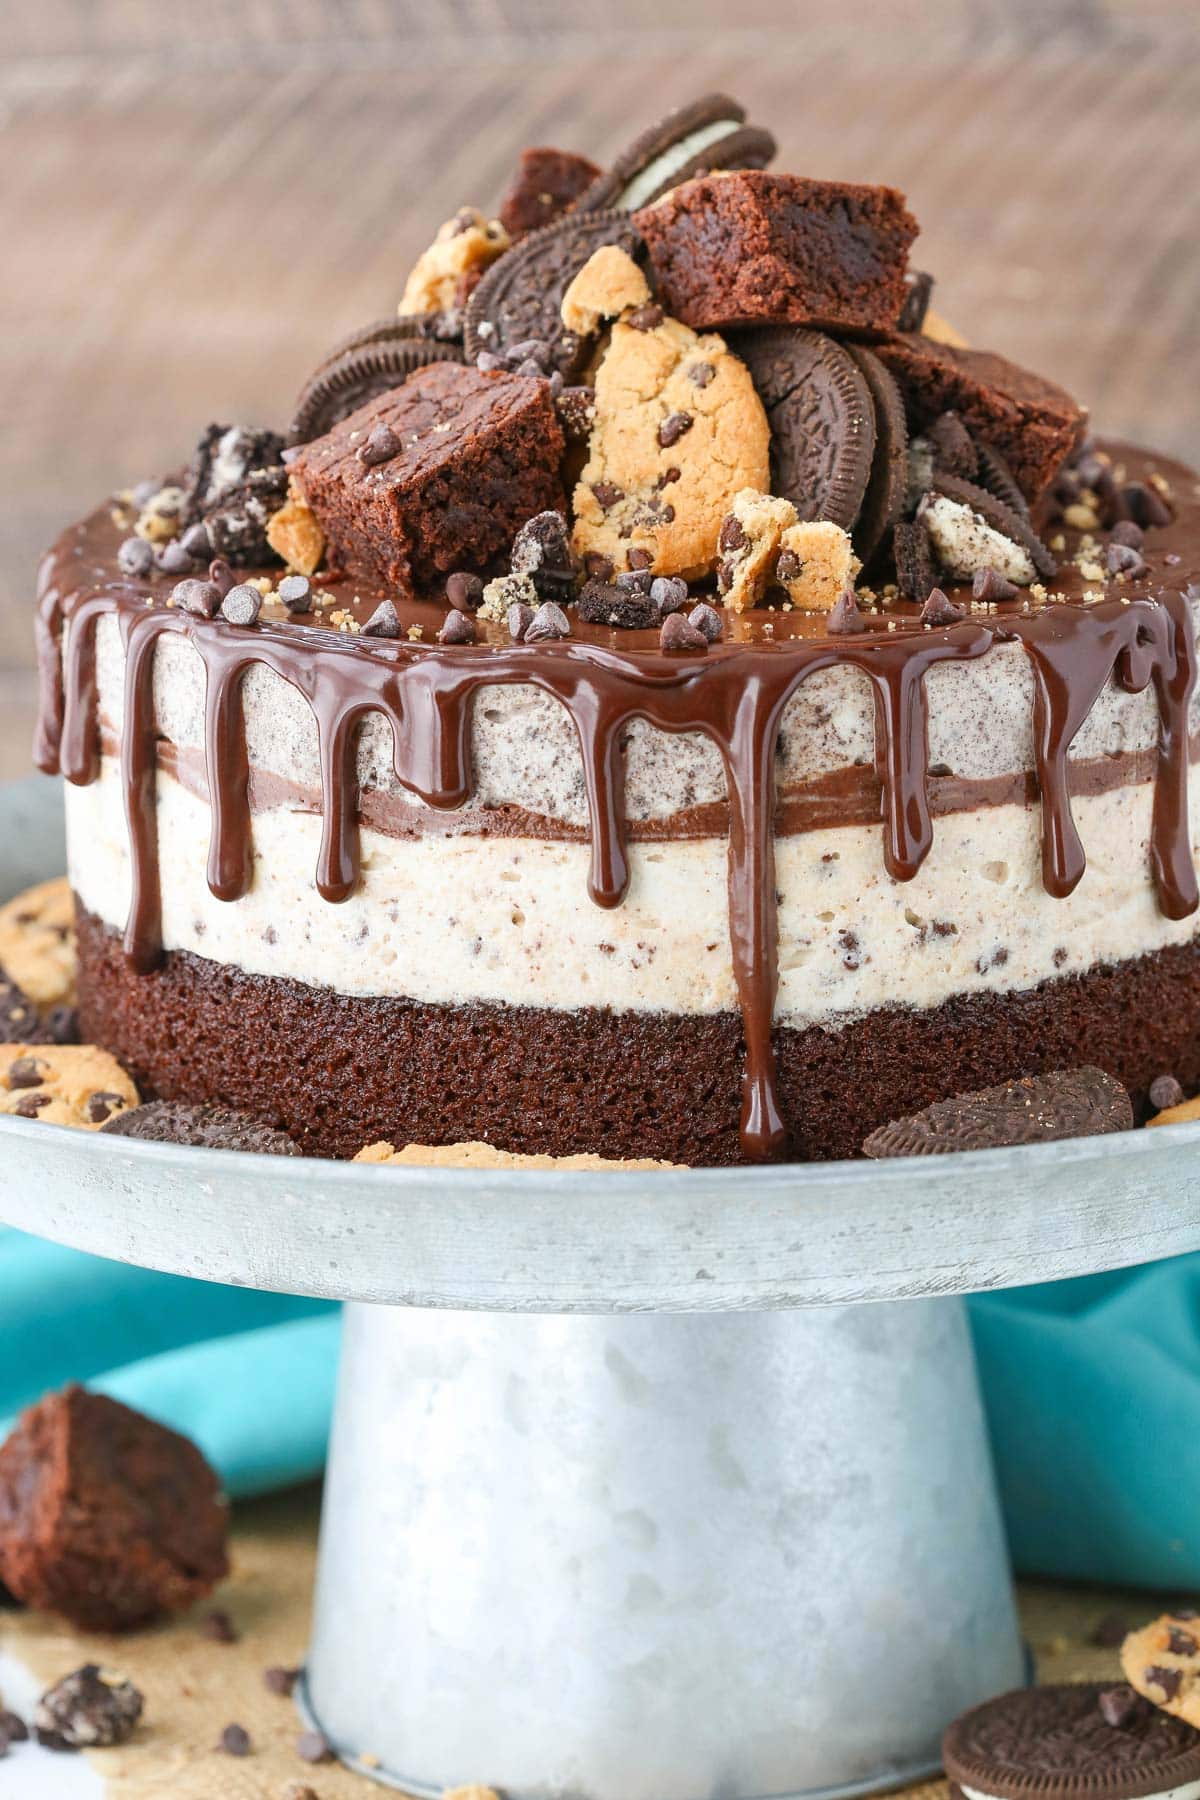
I am a BIG fan of ice cream cakes. From my wildly popular and well-loved copycat Dairy Queen ice cream cake to my original Snickers Brownie Ice Cream cake, I’ve got so many flavor variations. I’ve loved ice cream cakes since I was a kid, so now creating fun new flavors brings me joy. This Oreo Brookie Ice Cream Cake is one of my more untraditional ice cream cakes – from the flavor to the brownie base. There’s no actual cake in sight. But for someone who loves brownies, cookies and Oreos (and who doesn’t?!), it’s the perfect combination.
What Is A Brookie?
A brookie is a delectable hybrid between a chocolate chip cookie and a brownie. To make a brookie, you drop generous chunks of cookie dough throughout brownie batter and bake it all together. The end result is a delicious bar that offers soft, chewy brownies and chocolate chip cookies all in one bite.
You can take brookies to the next level by adding chunks of Oreos into the mix to create an Oreo Brookie. So good!
I’m a big Oreo brookie fan, and this ice cream cake has all the right flavors! Just imagine sinking your fork into this cake. It sounds almost too good to be true, right? If you’re looking for more brookie dessert recipes, try my Oreo Brookie Cheesecake, Oreo Brookie Layer Cake and Oreo Brookie Tiramisu!

Why You’ll Love Oreo Brookie Ice Cream Cake
There is so much to love about this decadent, head-turning dessert. Here are some of the reasons you absolutely have to try it.
- Dynamic. Brownies, chocolate chip cookies, Oreos, whipped cream, and ice cream all in one fabulous dessert? There are so many different delicious flavors and textures going on here. Did I mention the silky smooth layers of chocolate ganache?!
- Homemade no churn ice cream. It’s easy to make your own flavors with no-churn ice cream, and it’s quick without having to use an ice cream maker. I love the ice cream base used here – it’s creamy and tastes great (no, you don’t taste the cream cheese!).
- Crowd-pleaser. Ice cream cake is one of those things you don’t see people make from scratch very often. So bringing this cake to a party is sure to earn you a gold star. Heads will be turning, jaws will be dropping, and mouths will be watering.
Ingredient Notes
Here are some notes and substitutions for ingredients needed to make this ice cream cake. Be sure to scroll to the recipe below for all ingredients and exact measurements.
- Brownie mix – You will need a brownie mix plus any ingredients listed on the box to prepare them. If you’d rather make the brownie from scratch, I recommend my easy brownie recipe.
- Cream cheese – Use full-fat, brick-style cream cheese. Give it time to soften to room temperature. If it is too cold, it will have a hard time mixing smoothly with the other ingredients and you’ll find yourself with lumpy ice cream.
- Sugar – I use a mix of white and brown sugar. The brownie sugar adds a bit more cookie-like flavor to the ice cream.
- Heavy whipping cream – The heavy cream must be cold otherwise it will not whip up and hold volume properly.
- Mix-ins – You’ll need chocolate chip cookies, mini chocolate chips and Oreo Cookies to flavor the ice cream layers. Feel free to make your own chocolate chip cookies, or buy them.
- Semi-sweet chocolate chips – For the ganache. I recommend sticking with semi-sweet chocolate. Other types of chocolate would need to adjust for more or less cream.
- Additional Toppings – To decorate the cake like I did, you’ll need brownie chunks, Oreos, chocolate chip cookies and mini chocolate chips. Buy some brownies to chop, bake a couple extra, or leave them off. Totally up to you!
Cake Collar, Springform Pan or Cake Pan?
You can use a springform pan, cake collar or cake pan to assemble the ice cream cake. The recipe is written with an 8×3-inch springform pan, since my assumption is that most people will use that. But a cake collar is simple and straight-forward, so I would recommend it if you have one. That said, if you don’t want to have buy another thing, you can use the springform pan or a cake pan.
- Springform pan – With this options, you’ll line the sides of your clean, dry 8-inch springform pan with parchment paper that should stick up above the top edge of the pan, since the cake will probably be a little taller than your pan (see example). You can also put a cardboard cake circle in the bottom of the pan, if you’d like.
- Cake collar – This is the easiest method. Place the brownie base on a cake board, wrap the cake collar around the brownie and secure it in place. Now you can start layering the cake. Once it has been assembled and frozen, you’ll need to remove the cake collar before decorating and serving the cake.
- Cake pan – In order to be able to remove the assembled cake from the pan, you’ll need to line it with clear plastic wrap that extends out past the edges of the cake pan. Now you can add a lining of parchment paper and a cake board just as you would with the springform pan (you’ll place them right on top of the plastic wrap that’s already inside the pan). Once the cake has been assembled and frozen, you’ll use the clear plastic wrap like handles to lift the cake out of the pan.
Tips for a Successful Ice Cream Cake
It might seem intimidating to make an ice cream cake from scratch, but I promise you can do it! Just follow the recipe card carefully and pay close attention to these simple tips and tricks.
- Cool. Allow the brownie to cool completely before assembling the cake. Otherwise, the ice cream will melt right off.
- Room temperature cream cheese. The cream cheese for the ice cream should be softened to room temperature. Cold cream cheese will not mix smoothly with the other ingredients and you’ll end up with lumpy ice cream.
- Cold heavy whipping cream. Unless you want flat, runny ice cream, be sure that the heavy cream is very cold before you start whipping it. If it’s not, it won’t hold volume properly.
- Fold gently. When folding the whipped cream into the ice cream base, do so gently in two parts. This will help prevent you from knocking the air (and thus the structure) out of your whipped cream and ultimately your ice cream.
- Freeze thoroughly. Do not skimp on the freezing time here, folks. The cake needs to sit in the freezer for at least 6 hours and be completely frozen before you remove it from the pan and attempt decorating the top. If the cake isn’t completely frozen, it will fall apart.
- Soften before serving. Allow the cake to sit out for about 20 minutes before slicing and serving. I suggest using a long knife dipped in hot water to slice the cake. Clean the knife with a wet cloth and dip it in the hot water between slices.
Storage Information
This ice cream cake must be stored in the freezer. If you’re making the cake in advance, it can be stored in the freezer for 1-2 weeks. You’ll want to make sure the cake is fully frozen before wrapping or covering it. If your cake has been left at room temperature for any length of time and you need to store leftovers, allow it to firm up in the freezer for a couple of hours. Then wrap the frozen cake or leftovers in a double layer of plastic wrap and return it to the freezer.
Watch How To Make Oreo Brookie Ice Cream Cake
More Ice Cream Cake Recipes
Oreo Brookie Ice Cream Cake
save this recipe
Enter your email & we’ll send it to your inbox. Plus get new recipes from us every week!
Ingredients
Brownie Base
- 18.4 oz box brownie mix (plus ingredients on box)
No Churn Ice Cream
- 12 ounces (339g) cream cheese (room temperature)
- ¼ cup (56g) granulated sugar
- ½ cup (72g) brown sugar
- 3 tablespoons(45ml) milk
- 1 tablespoon vanilla extract
- 1 ½ cups (420ml) heavy whipping cream (cold)
- ¾ cup (86g) powdered sugar
- ¾ cup (100g) chocolate chip cookie crumbs
- 6 chocolate chip cookies (chopped)
- ¼ cup (45g) mini chocolate chips
- ¾ cup (90g) Oreo crumbs
- 6 Oreos (chopped)
Chocolate Ganache
- 9 ounces (254g) semi-sweet chocolate chips (divided)
- ¾ cup (180ml) heavy whipping cream (divided)
Chocolate Whipped Cream and Additional Toppings
- ½ cup (120ml) heavy whipping cream (divided)
- 2 tablespoons (15g) powdered sugar
- 2 tablespoons (14g) natural unsweetened cocoa powder
- Brownies
- Oreos
- Chocolate Chip Cookies
Instructions
Make the brownie base
- Grease an 8×3 inch springform cake pan and line the bottom of it with parchment paper to allow for easy removal. (See note below if you don’t have a springform pan.)
- Make brownie batter according to instructions on back of box and bake in prepared pan.
- When brownie is done baking, allow to completely cool.
- Once cool, remove the brownie base from the pan.NOTE: When it's time to assemble the cake, you'll be using the same 8-inch springform cake pan you used to bake the brownie in. Take the time to wash and dry it now so that the pan is ready when you begin assembling the cake.
Make the ice cream layers
- When the brownie base is cool, make the ice cream. In a large mixer bowl, combine the softened cream cheese, sugar and brown sugar and mix until smooth.
- Add the milk and vanilla extract and mix until smooth. Set aside.
- In another mixer bowl, add the cold heavy whipping cream and powdered sugar and whip on high speed until stiff peaks form.
- Gently fold about 1/3 of the whipped cream into the cream cheese mixture until combined, then fold in the remaining whipped cream.
- Divide the ice cream mixture evenly between two bowls.
- To one bowl, add the chocolate chip cookie crumbs, chopped chocolate chip cookies and mini chocolate chips. Fold to combine. Set aside.
- To the other bowl, add the Oreo crumbs and chopped Oreos. Fold to combine. Set aside.
Make the first batch of ganache
- Make a small batch of chocolate ganache to use as a layer between the different flavors of ice cream. Add 3 ounces of the chocolate chips to a small bowl (see my tips for making chocolate ganache).
- Then heat 1/4 cup of the heavy whipping cream in a small microwave safe bowl until it begins to boil. Pour the hot cream over the chocolate chips and allow the mixture to sit undisturbed for 3-4 minutes. Whisk until smooth and set aside.
Build the cake
- Line the sides of your clean, dry 8-inch springform pan with parchment paper. The parchment paper should stick up above the top edge of the pan, since the cake will probably be a little taller than your pan (see example). If you want, put a cardboard cake circle in the bottom of the pan. (See note below for directions of how to prep a standard 8-inch cake pan or use a cake collar.)
- Place the cooled brownie base back into the prepared pan.
- Add the chocolate chip cookie ice cream to the top of the brownie and spread into an even layer.
- Cover with a layer of chocolate ganache and spread into an even layer.
- Add the Oreo ice cream to the top of the ganache and spread into an even layer.
- Freeze the cake for 6-8 hours or overnight until frozen through.
To finish the cake
- Once the cake is fully set and frozen, prepare the toppings for the cake. Chop or crumble brownies, Oreos and chocolate chip cookies. Set aside.
- Make the second larger batch of chocolate ganache by placing the remaining 6 ounces of chocolate chips into a small bowl.
- Heat the remaining 1/2 cup of heavy whipping cream in a small microwave safe bowl until it begins to boil, then pour it over the chocolate chips. Allow the mixture to sit undisturbed for 3-4 minutes, then whisk until smooth. Set aside.
- Make the chocolate whipped cream by adding the heavy whipping cream, powdered sugar and cocoa powder to a large mixer bowl. Whip on high speed until stiff peaks form.
- Place the chocolate whipped cream into a piping bag and set aside.
- Now you can remove the frozen cake from the pan and peel away the outer wrapping of parchment paper (or plastic wrap or cake collar, if used).
- Drizzle the ganache around the edge of the cake. I used a squeeze bottle, but you could also use a spoon. See my Chocolate Drip Cake post for tips.
- Once you have a ring of drizzled ganache around the outside of the top of the cake, fill in the center of this ring with ganache until the top of the cake is fully covered. Use an offset spatula to smooth out the ganache into an even layer.
- Pipe a small dome of chocolate whipped cream onto the center of the top of the cake. The whipped cream will act as a sort of glue to help fix your other toppings in place.
- Cover the dome of chocolate whipped cream with additional brownie chunks, Oreos, chocolate chip cookies and chocolate chips.
- Place cake in the freezer and keep well covered until ready to serve. Allow it to sit out at room temperature and soften for about 20-30 minutes before cutting slices. Serve, then return leftovers to the freezer as soon as possible. Best if eaten with about 7 days, but could be kept frozen for up to 2 weeks.
Notes
- Why do I need a springform pan? An 8×3 inch springform pan is ideal for building this cake. The sides of the pan detach from the bottom of the pan making it easy to remove the cake once it’s been assembled and frozen.
- Can I use a different 8 inch cake pan? If you do not have an 8×3 inch springform pan, you can use a standard 8 inch cake pan. In order to be able to remove the assembled cake from the pan, you’ll need to line it with clear wrap that extends out past the edges of the cake pan. Next, add a lining of parchment paper and a cake board as described above for a springform pan. (You’ll place them right on top of the plastic wrap that’s already inside the pan). Now you are ready to continue building the cake. Once it has been assembled and frozen, you’ll be able to use the clear wrap like handles to lift the cake out of the pan. Just remove the plastic wrap and parchment paper before decorating and serving the cake.
- Can I use a cake collar to build the cake? Yes! In lieu of using a parchment paper lined springform pan or standard cake pan to build the cake, you can also use a cake collar as I did. Place the brownie base on a cake board and then on a serving plate. Wrap the cake collar around the brownie and secure in place. Now you are ready to continue building the cake. Once it has been assembled and frozen, you’ll need to remove the cake collar before decorating and serving the cake.
- Storage information. This cake must be stored in the freezer. You’ll want to make sure the cake is fully frozen before wrapping it in a double layer of plastic wrap or placing it in a cake carrier. Best if eaten with about 7 days, but could be kept frozen for up to 2 weeks.
Nutrition
The nutrition facts provided are calculated using a third-party tool and are estimates only. Actual nutritional content may vary based on the ingredients and brands you use, as well as portion sizes. For accurate results, please consult a registered dietitian or nutritionist.













I want to make this Oreo Brooke ice cream cake but they need to be miniature cakes like 2.5 inches for a competition. I have ring molds but I can also order food collars. What we would be the best way to assemble this? Making ahead of time? And what tools would be the best to assemble it with since they will be miniature desserts?
I really don’t make miniature desserts like that, so it’s hard for me to advise. I’m sorry. Good luck with the competition!
I made this for my boyfriends Birthday. It came out Beautifully. It was a big hit!
So glad you enjoyed it!
I have a sweet tooth but this is beyond. It is so overly saturated with sugar it is nauseating. I had one small slice and felt ill. I’d be embarrassed to give the cake to anyone. Creating this pile of sugar was a waste of money and time.
Hi.. First want to tell you that it’s looking so amazing. I want to try fir my husband’s birthday. Wanna try with no churn ice as v t not much fan of cream cheese but my question is I want to take this wn v r gng out for dinner asv want to cut in restaurant.. So is it possible thty my ice cream will start melting as it mgt take time to cut. I m from India so the temperature here is not cold
Hi, I am new to Ice Cream cakes and I worry that my birthday cake for a good friend will be ruined because he wants Vanilla Buttercream and all the recipes I find have whipped cream?
Which is better so I do not ruin a birthday ice cream cake, please respond, thank you
Carmen G
Hi this looks amazing. I was wondering if I make this with yellow cake, ice cream of course and buttercream frosting. My question is: will using buttercream frosting/American frosting be a problem since this will sit in freezer for two days before the birthday party?
Please let me know, thank you
This looks awesome and I want to make it. Does the brownie freeze or does it stay moist?
It does freeze, but because the cake uses no churn ice cream, you can let it all sit out for 15 to 20 minutes before serving and it’ll be fine.