Learn how to make these festive decorated Christmas Cupcakes! With four different ways to decorate them, they are easy to make and so cute for Christmas parties! Make your cupcakes and buttercream, and decorate based on the instructions and video and these will be a favorite in no time!
Easy Christmas Cupcake Designs
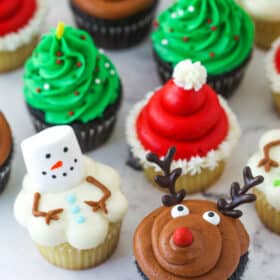
Decorating beautiful cupcakes doesn’t have to be hard. There’s no fondant here and some parts can even be made ahead. We’ll use sprinkles, chocolate, marshmallows, gel icing color, piping tips and a few other things to make delicious and impressive cupcakes! Here are the 4 designs we’ll make:
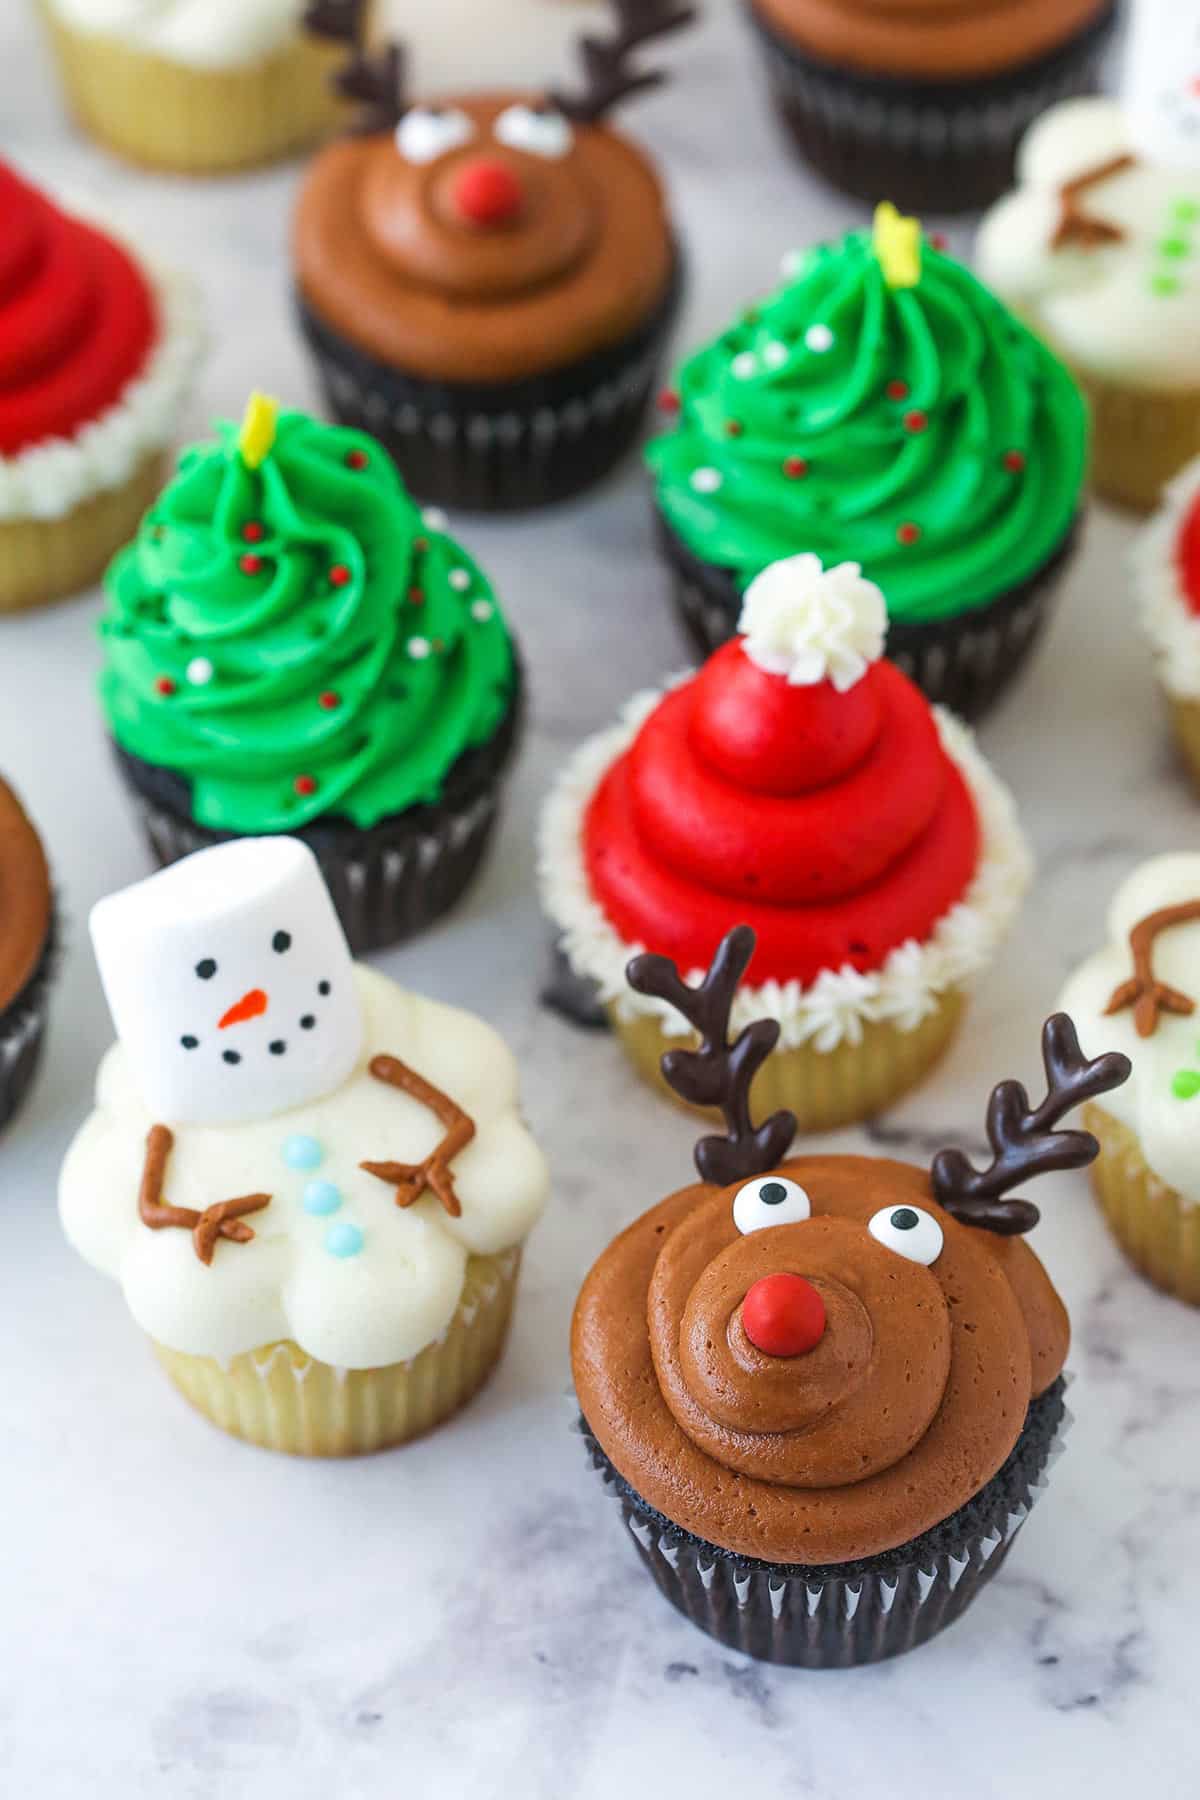
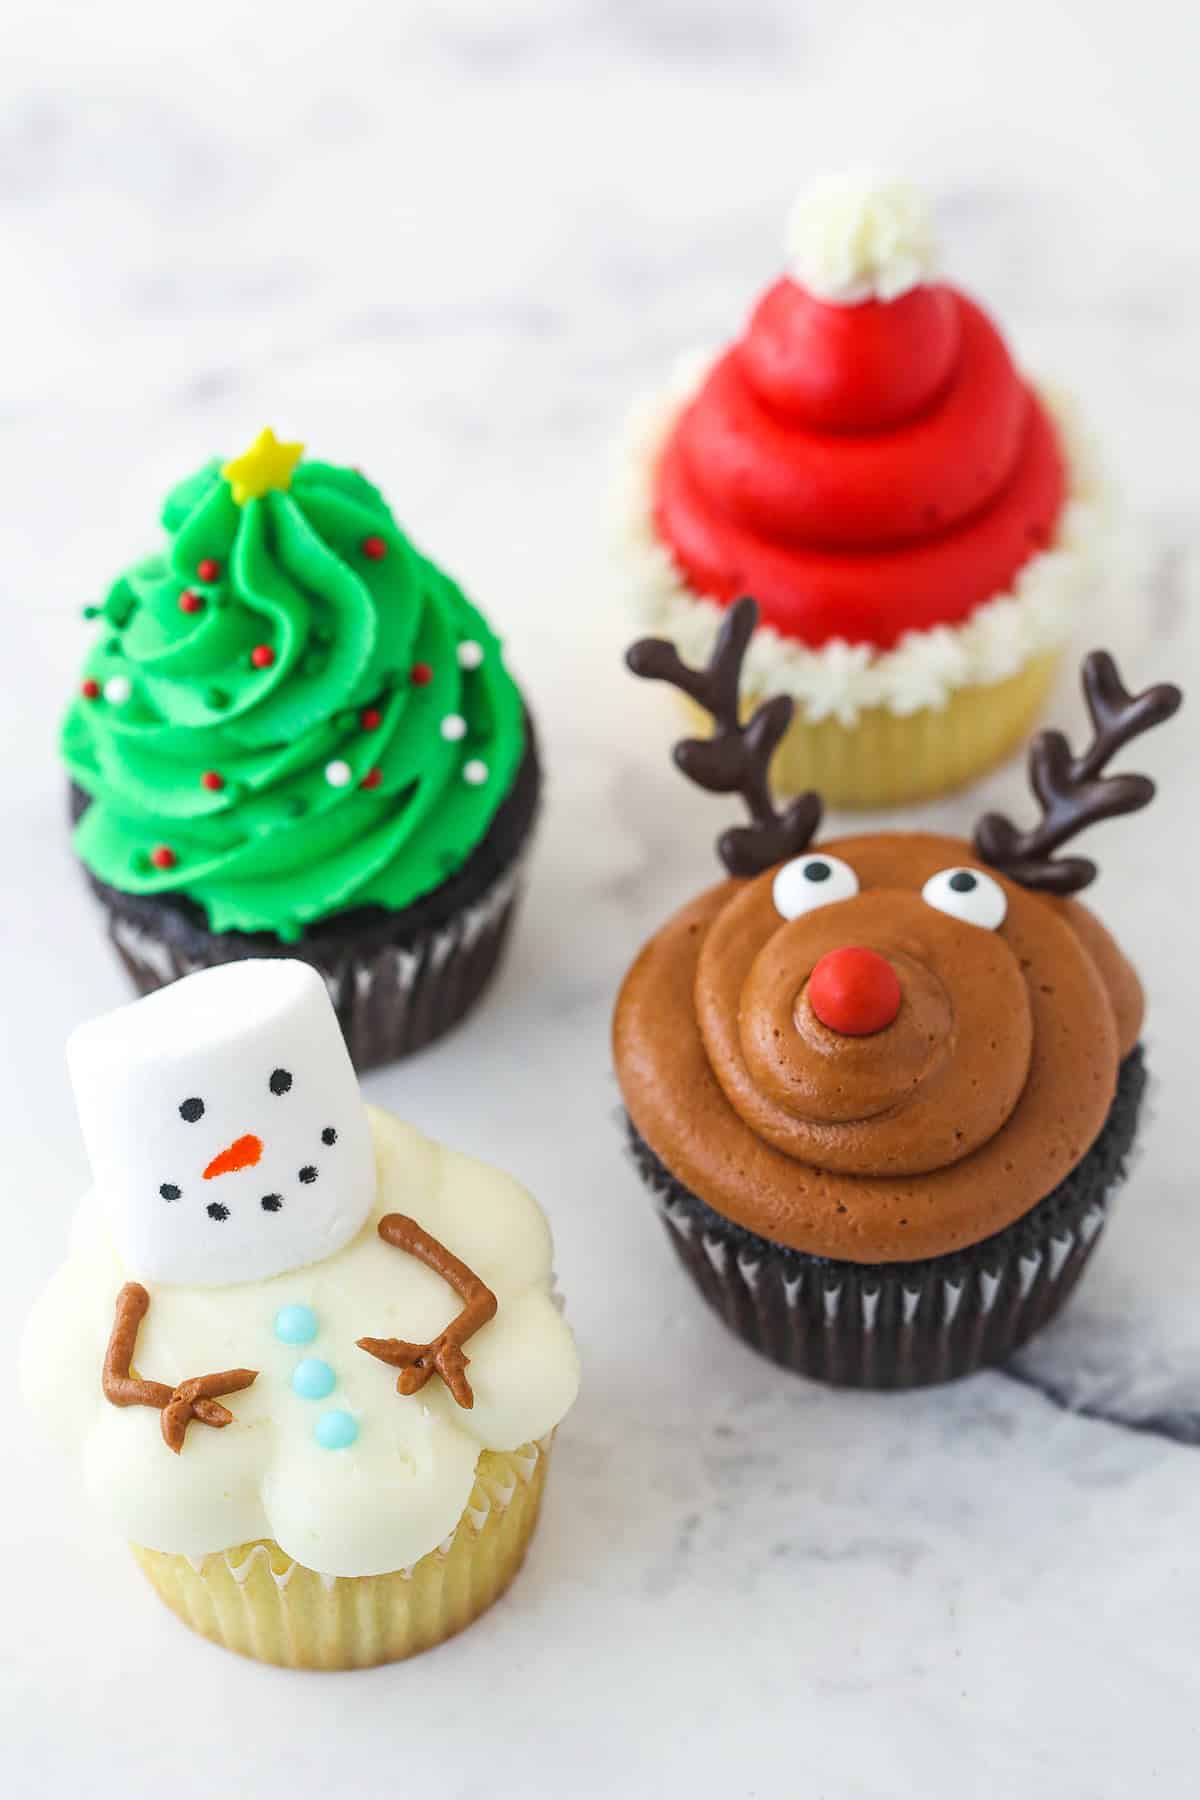
- Christmas Trees
- Melting Snowman
- Reindeer
- Santa Hat
How to Make Christmas Cupcakes
Make your cupcakes and let them cool completely. Then make your buttercream. Grab your supplies, and you’re ready to go. These cupcakes will be ready to party in no time!
Make The Cupcakes
The beauty of these cupcakes is that you can use any base cupcake you like. I used a combination of my Vanilla Cupcakes and Chocolate Cupcakes, but there are endless cupcake recipes to chose from. More great Christmas cupcake options would be the Red Velvet Cupcakes, Eggnog Cupcakes or Marble Cupcakes.
Make The Buttercream
It’s going to be best to use a sturdy and thick vanilla buttercream here. You want to use vanilla so that you can color it properly, and you want it sturdy so that you can pipe your designs easily and the decorations will hold up. I scaled up my classic Vanilla Buttercream recipe, but for something a little less sweet, Ermine Frosting would work as well.
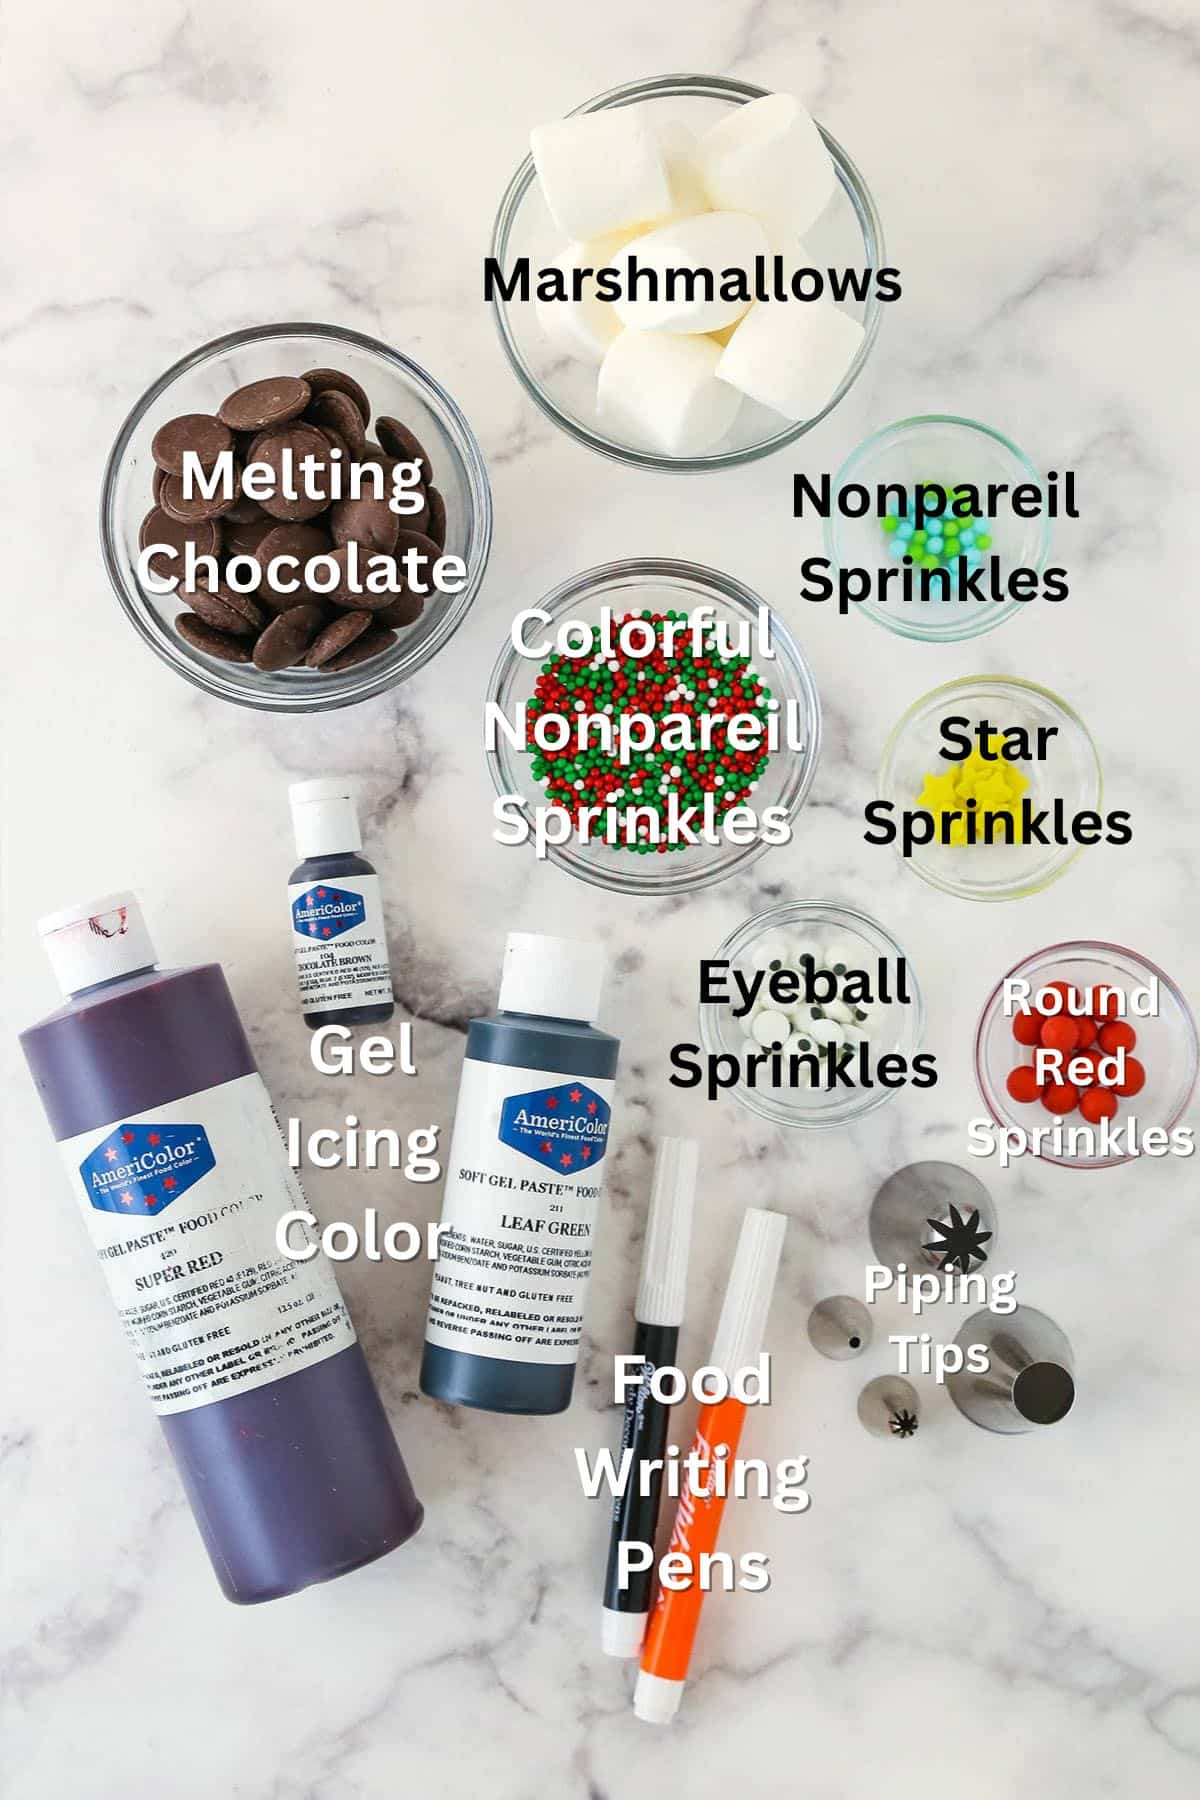
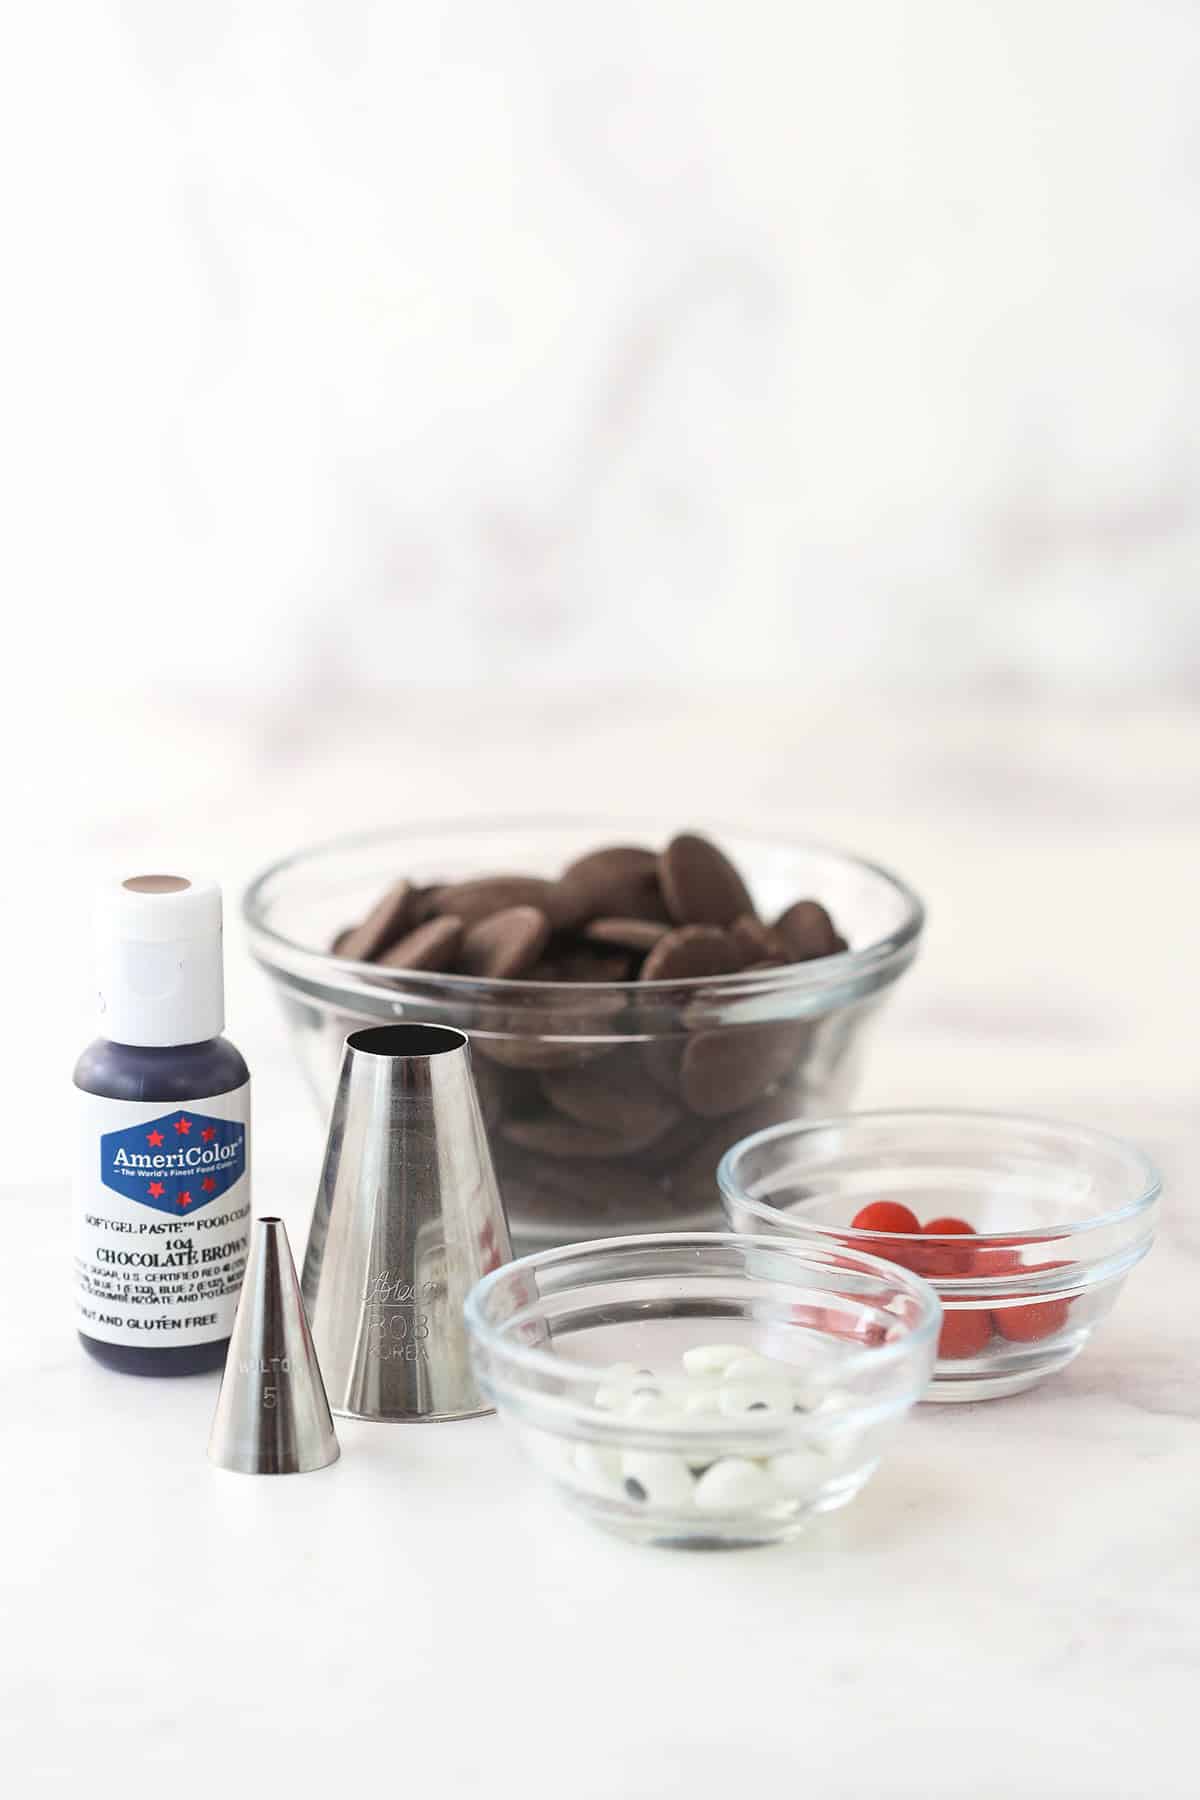
Supplies For Decorating
For these cupcakes, you’ll need:
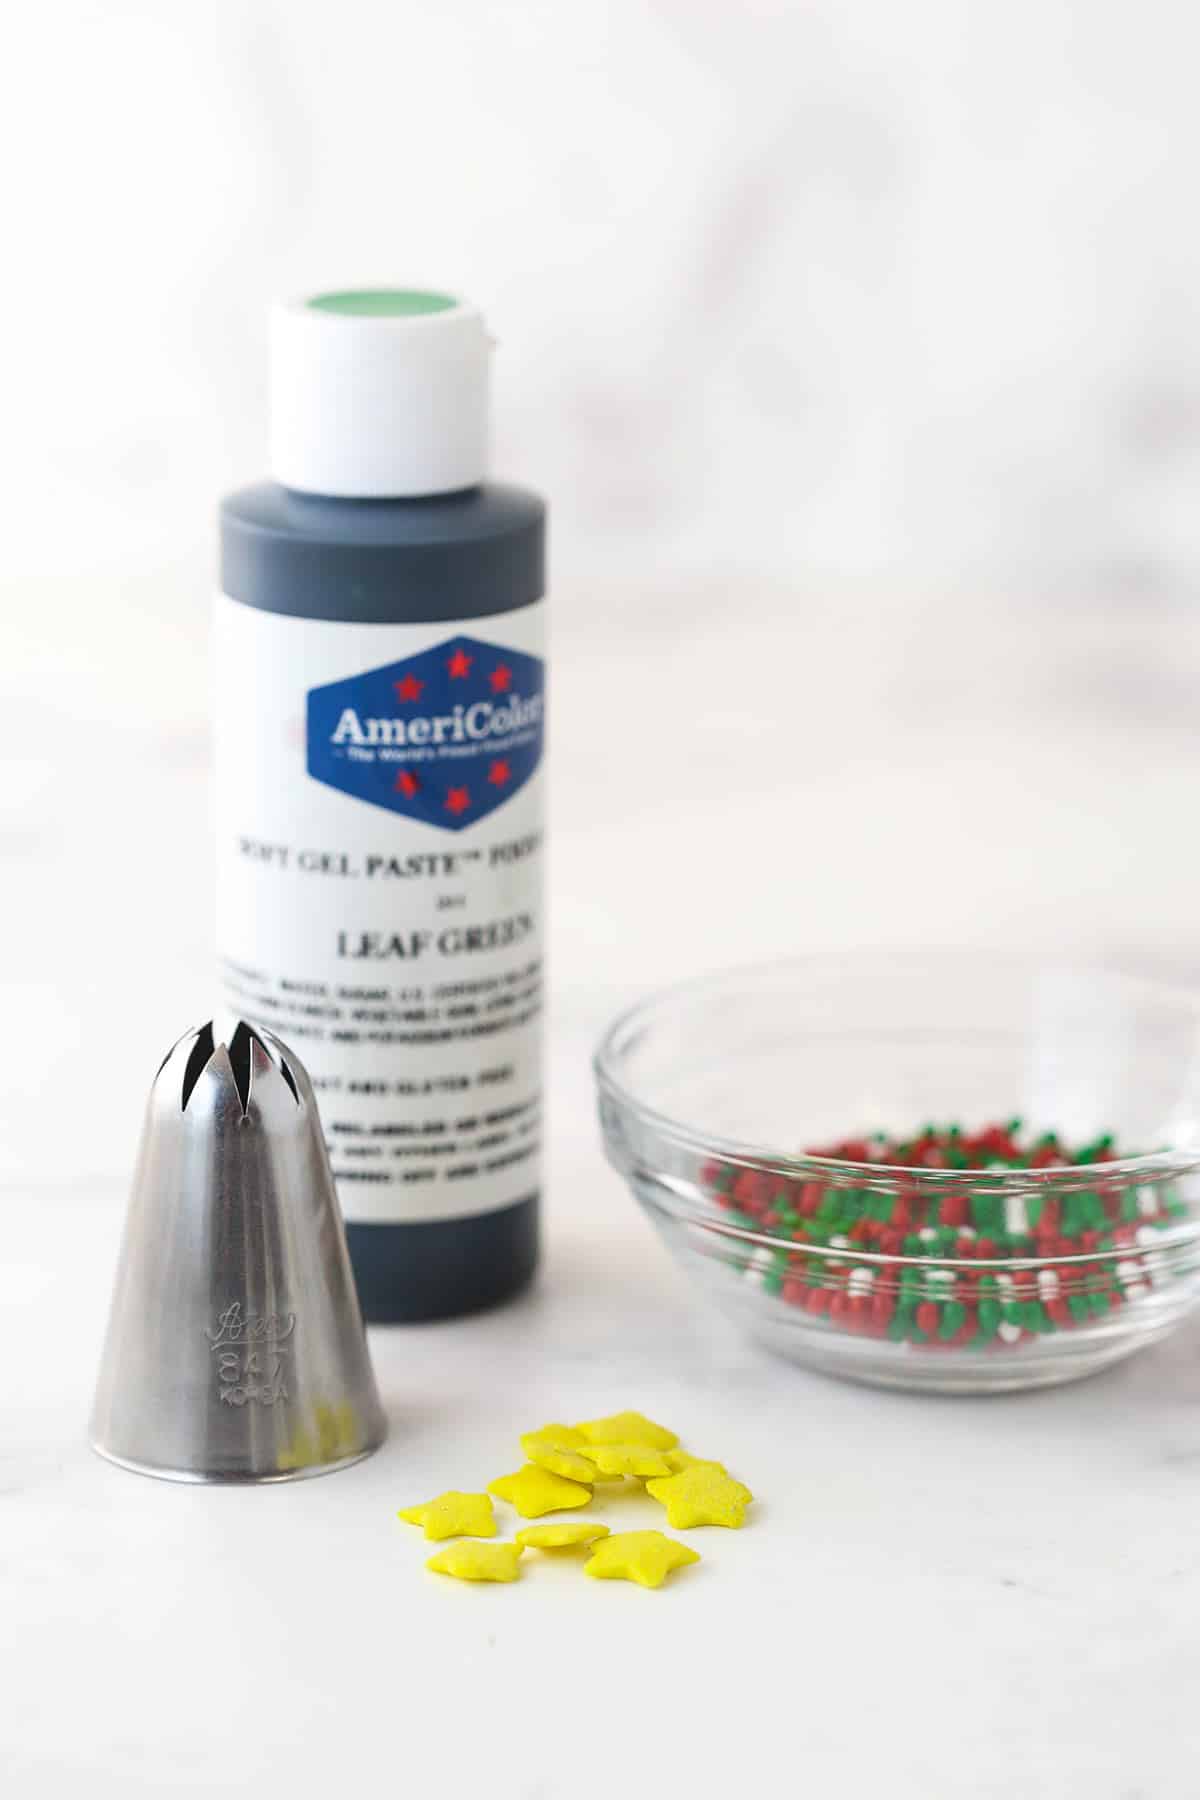
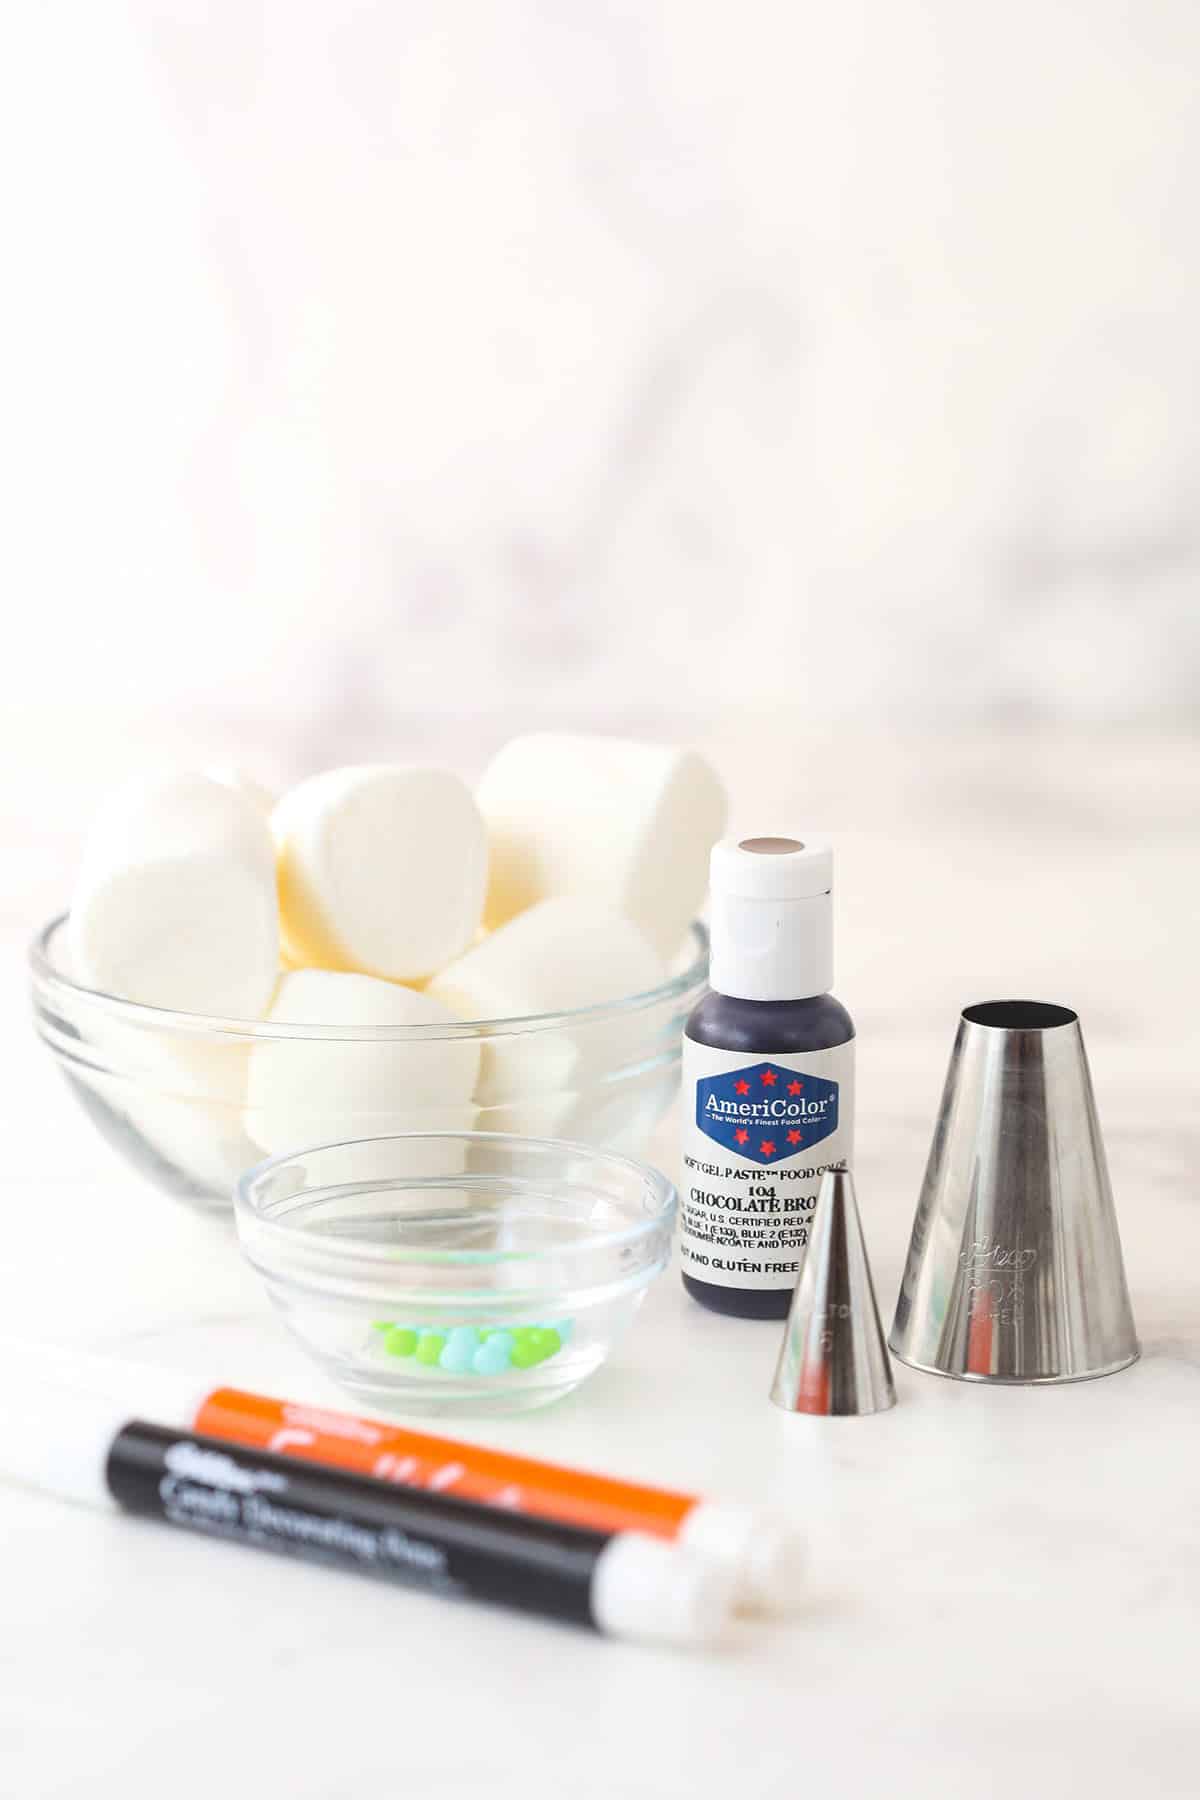
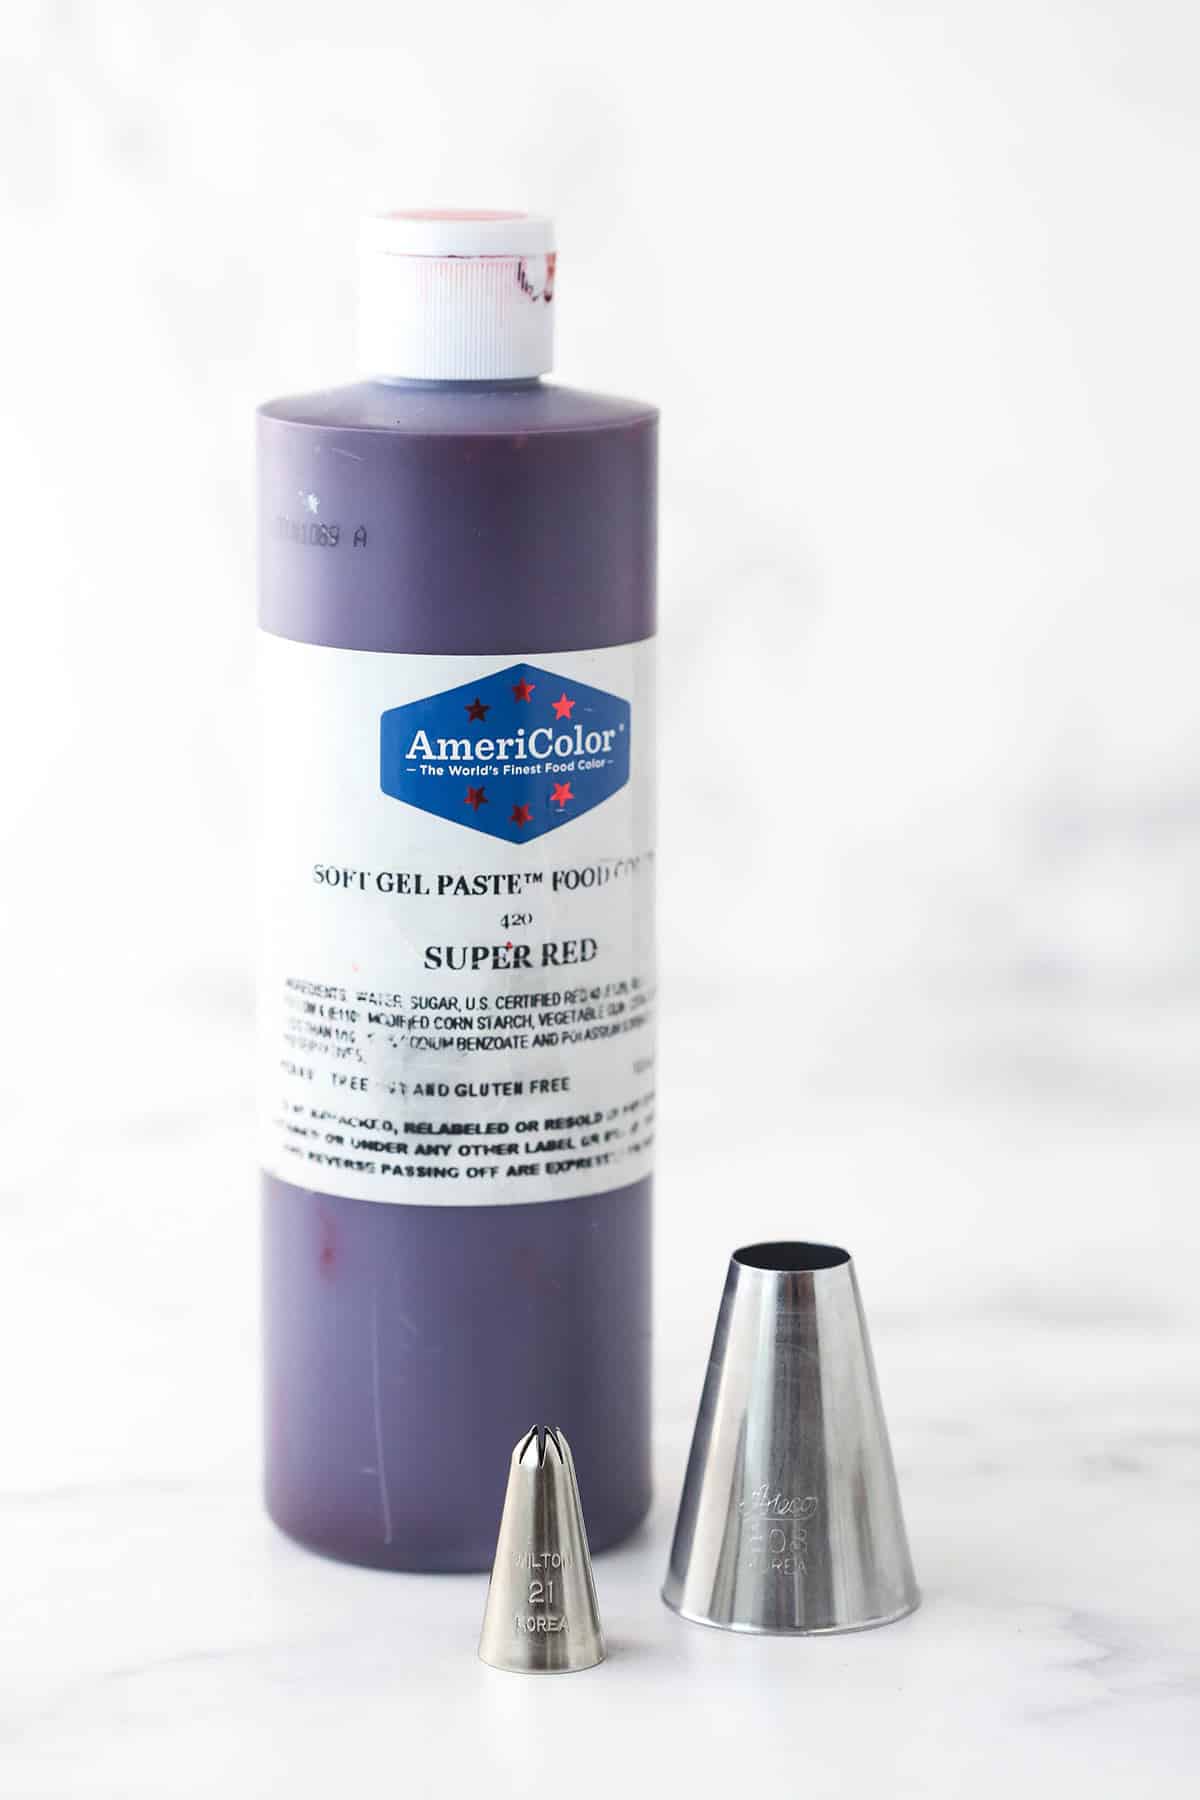
- Gel Icing Colors: I used red, green and chocolate brown. I used Americolor brand this time around, but often use Wilton too.
- Food Writer Pens: I used orange and black for the snowman face. I used Wilton ones, but can’t find the orange on online, so I’ve linked to an Ateco set
- Marshmallows: Regular size, non minis or jumbo marshmallows.
- Melting Chocolate: I used the Ghirardelli melting chocolate, but Wilton Candy Melts, almond bark, etc. should work fine too.
- Parchment Paper
- Piping Tips: You’ll need 4 kinds of piping tips to make all of the designs. The Ateco 808 tip, Ateco 847 tip, Wilton 5 tip and Wilton 21 tip.
- Couplers: You’ll need a couple of piping tip couplers to go with your piping tips.
- Piping Bags
- Sprinkles: Eyes and red noses are needed for the reindeer. Stars and something decorative is needed for the Christmas tree. These sets would also work. Some kind of large nonpareils or round shaped sprinkle is ideal for the buttons on the snowman.
How to Decorate Christmas Cupcakes
After you make your buttercream and get your supplies together, you can color your buttercream according to the colors you need for each design. Because of the taller piping on the Christmas Tree and Santa Hat cupcakes, you’ll use a touch more of those two colors. I recommend dividing the buttercream evenly between 4 bowls and then removing a little bit from two of the bowls to add to the other two bowls, so that those have a little more. Color the two with a little extra frosting in the green and red colors, leave one white and color the other brown. You should have plenty of buttercream. Once you have your colors ready to go, follow the directions below for each design.
Tips for Coloring Frosting
- Use gel food coloring, not liquid food coloring. Gel food coloring is thicker and more concentrated, so you need less of it and it won’t thin out your frosting. Liquid food colors make it much harder to get bold colors without too much liquid being added.
- Frosting color darkens over time. Keep in mind that the colors will get darker and bolder as they sit. You don’t need to go overboard with the red and green, once they seem like they aren’t getting any darker, go ahead and stop. They will likely darken to the right color as they sit.
Christmas Trees
For these Christmas Tree cupcakes, you’ll use the Ateco 847 piping tip, star sprinkles and something decorative for the tree. I used red, green and white nonpareils, but feel free to use something else. These are simplest design of the 4.
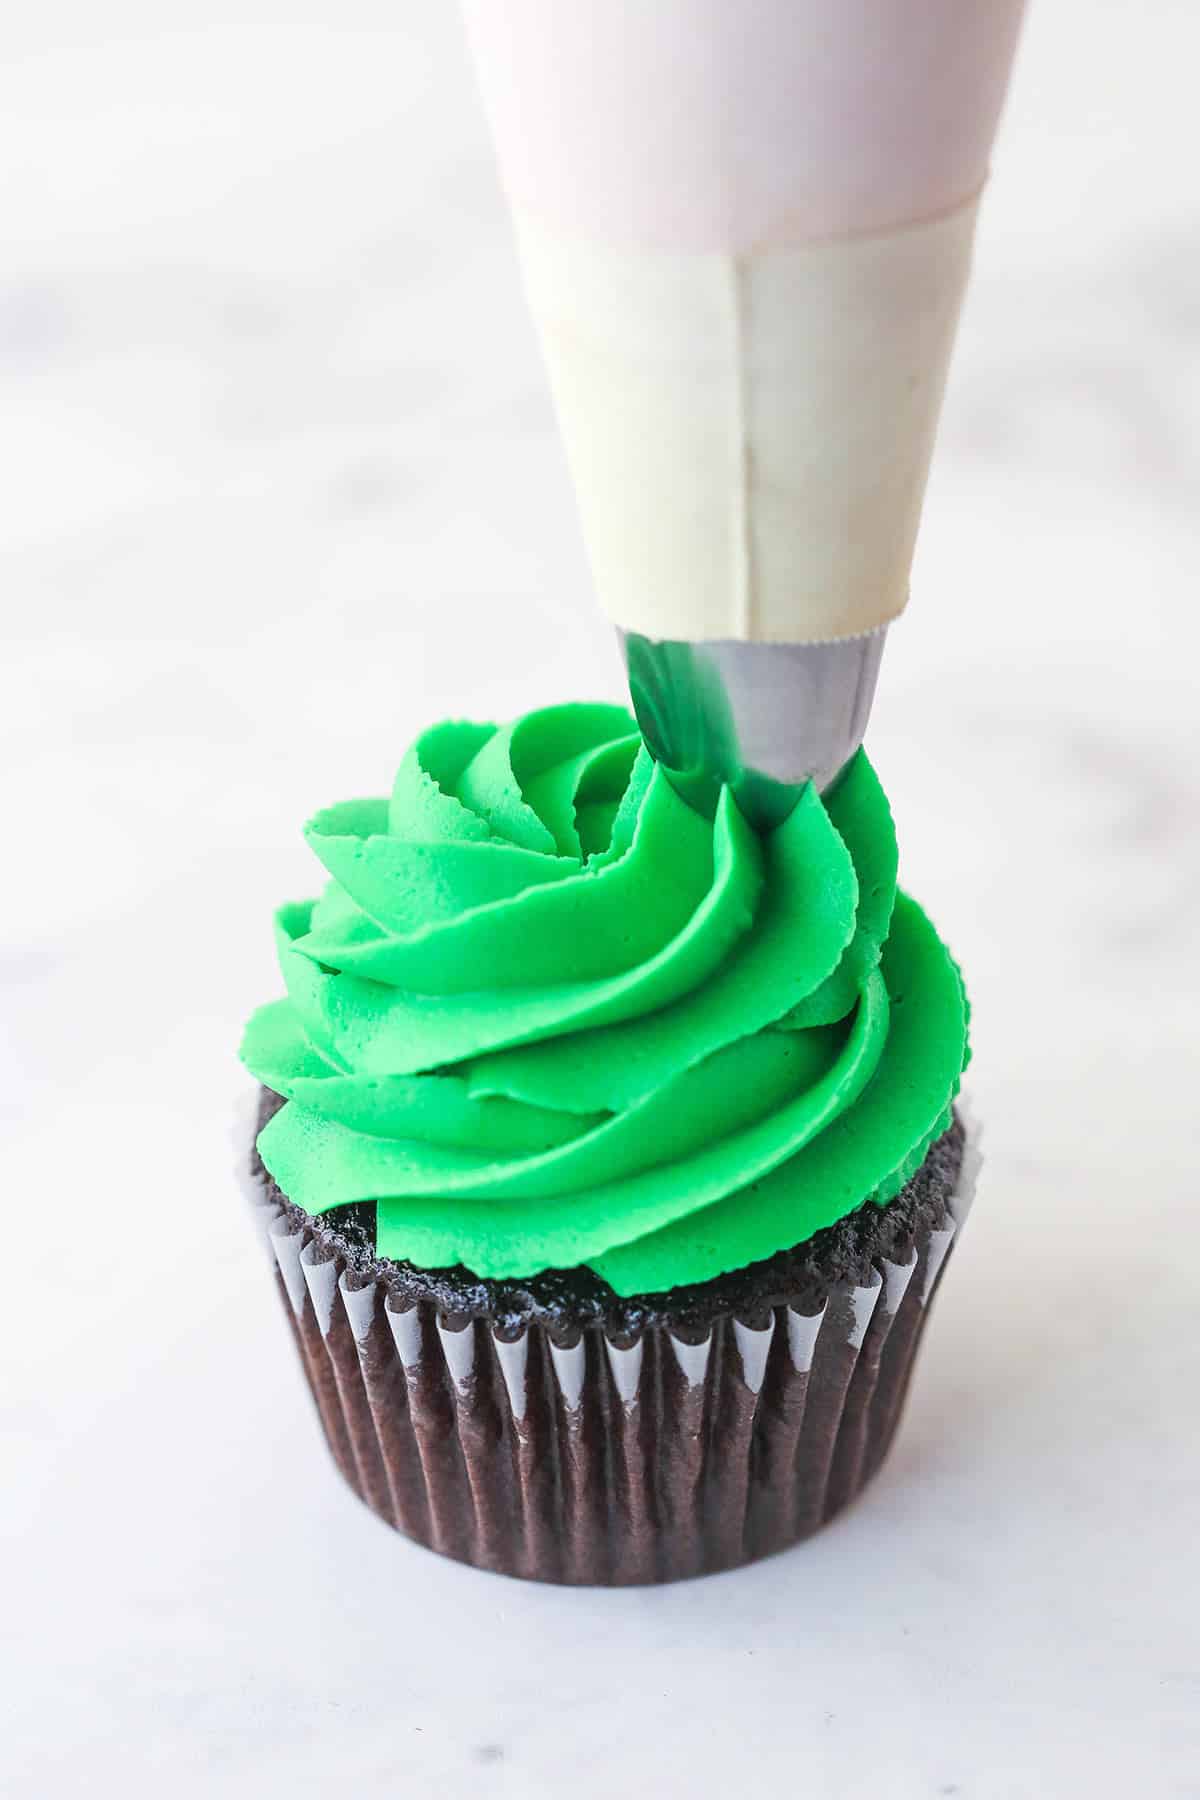
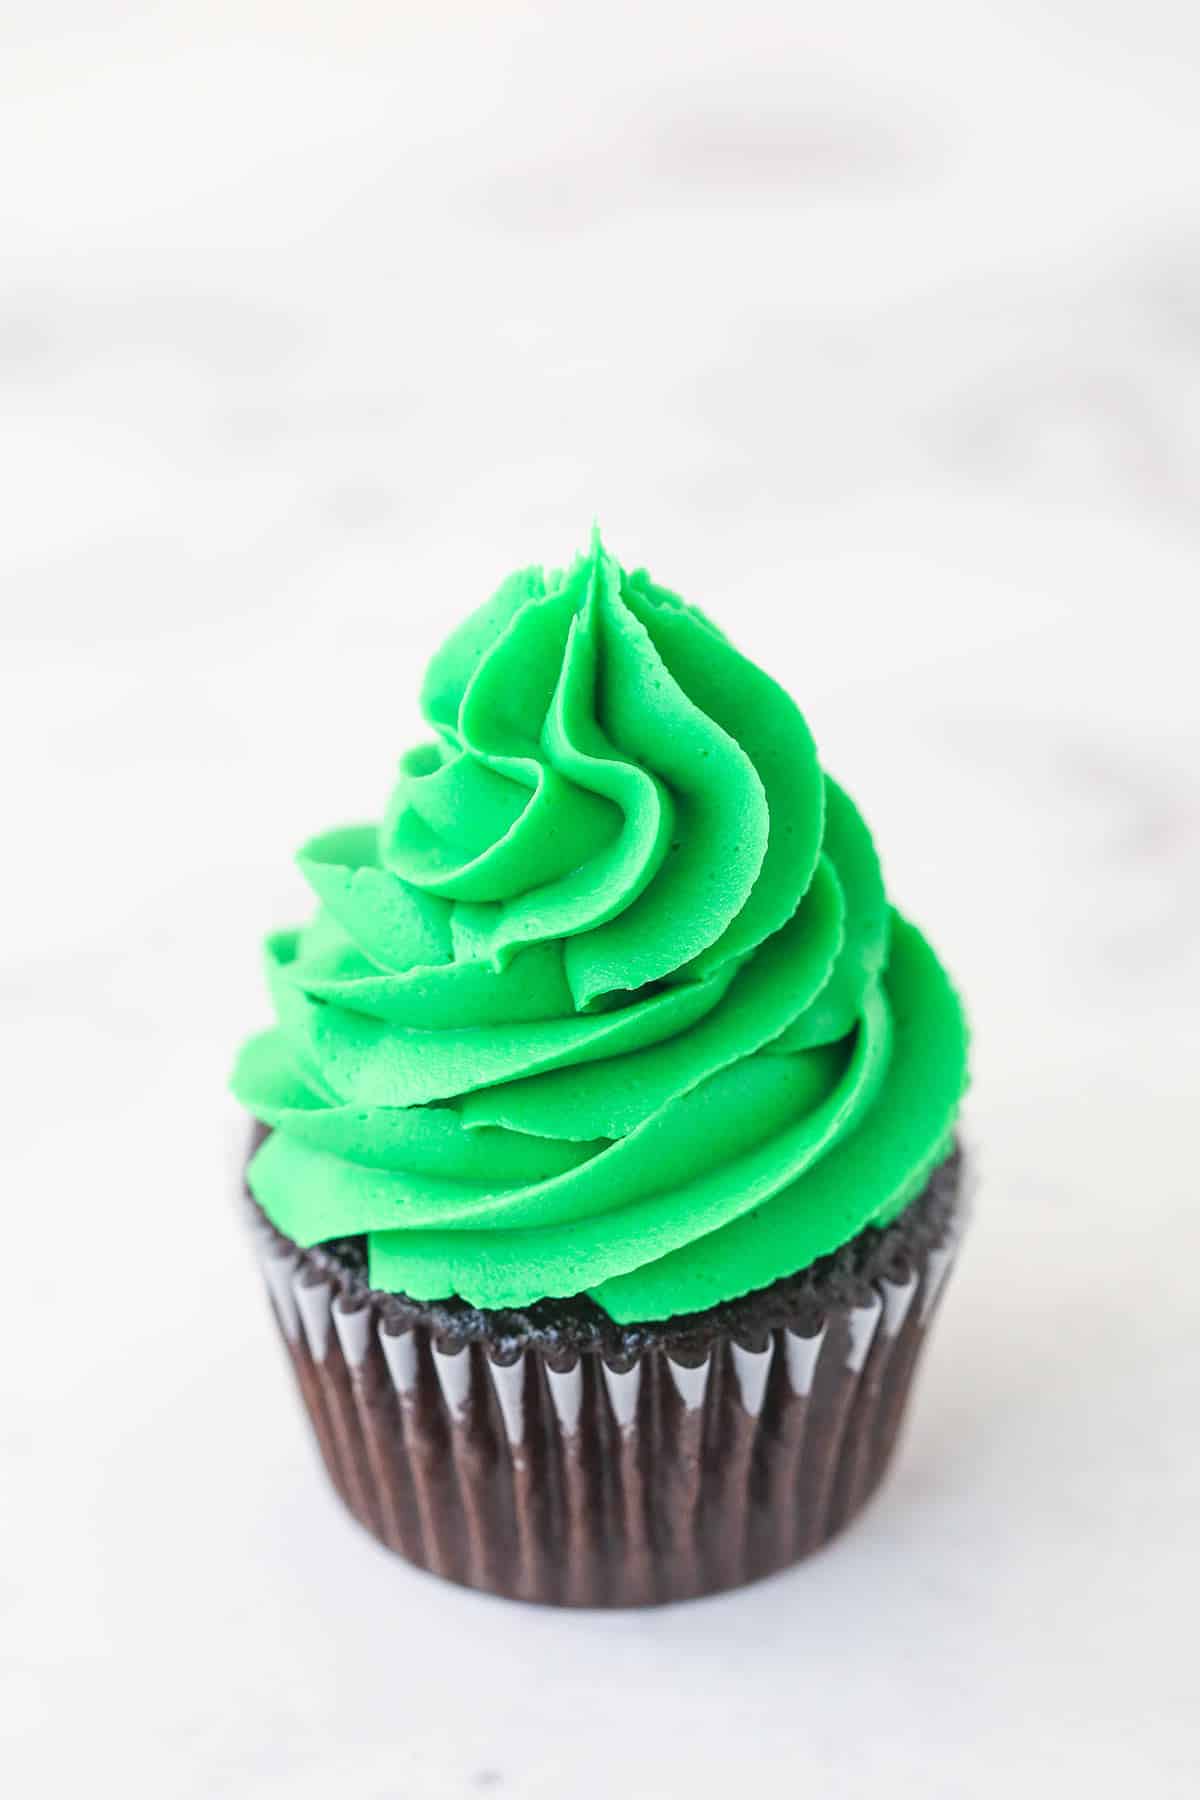
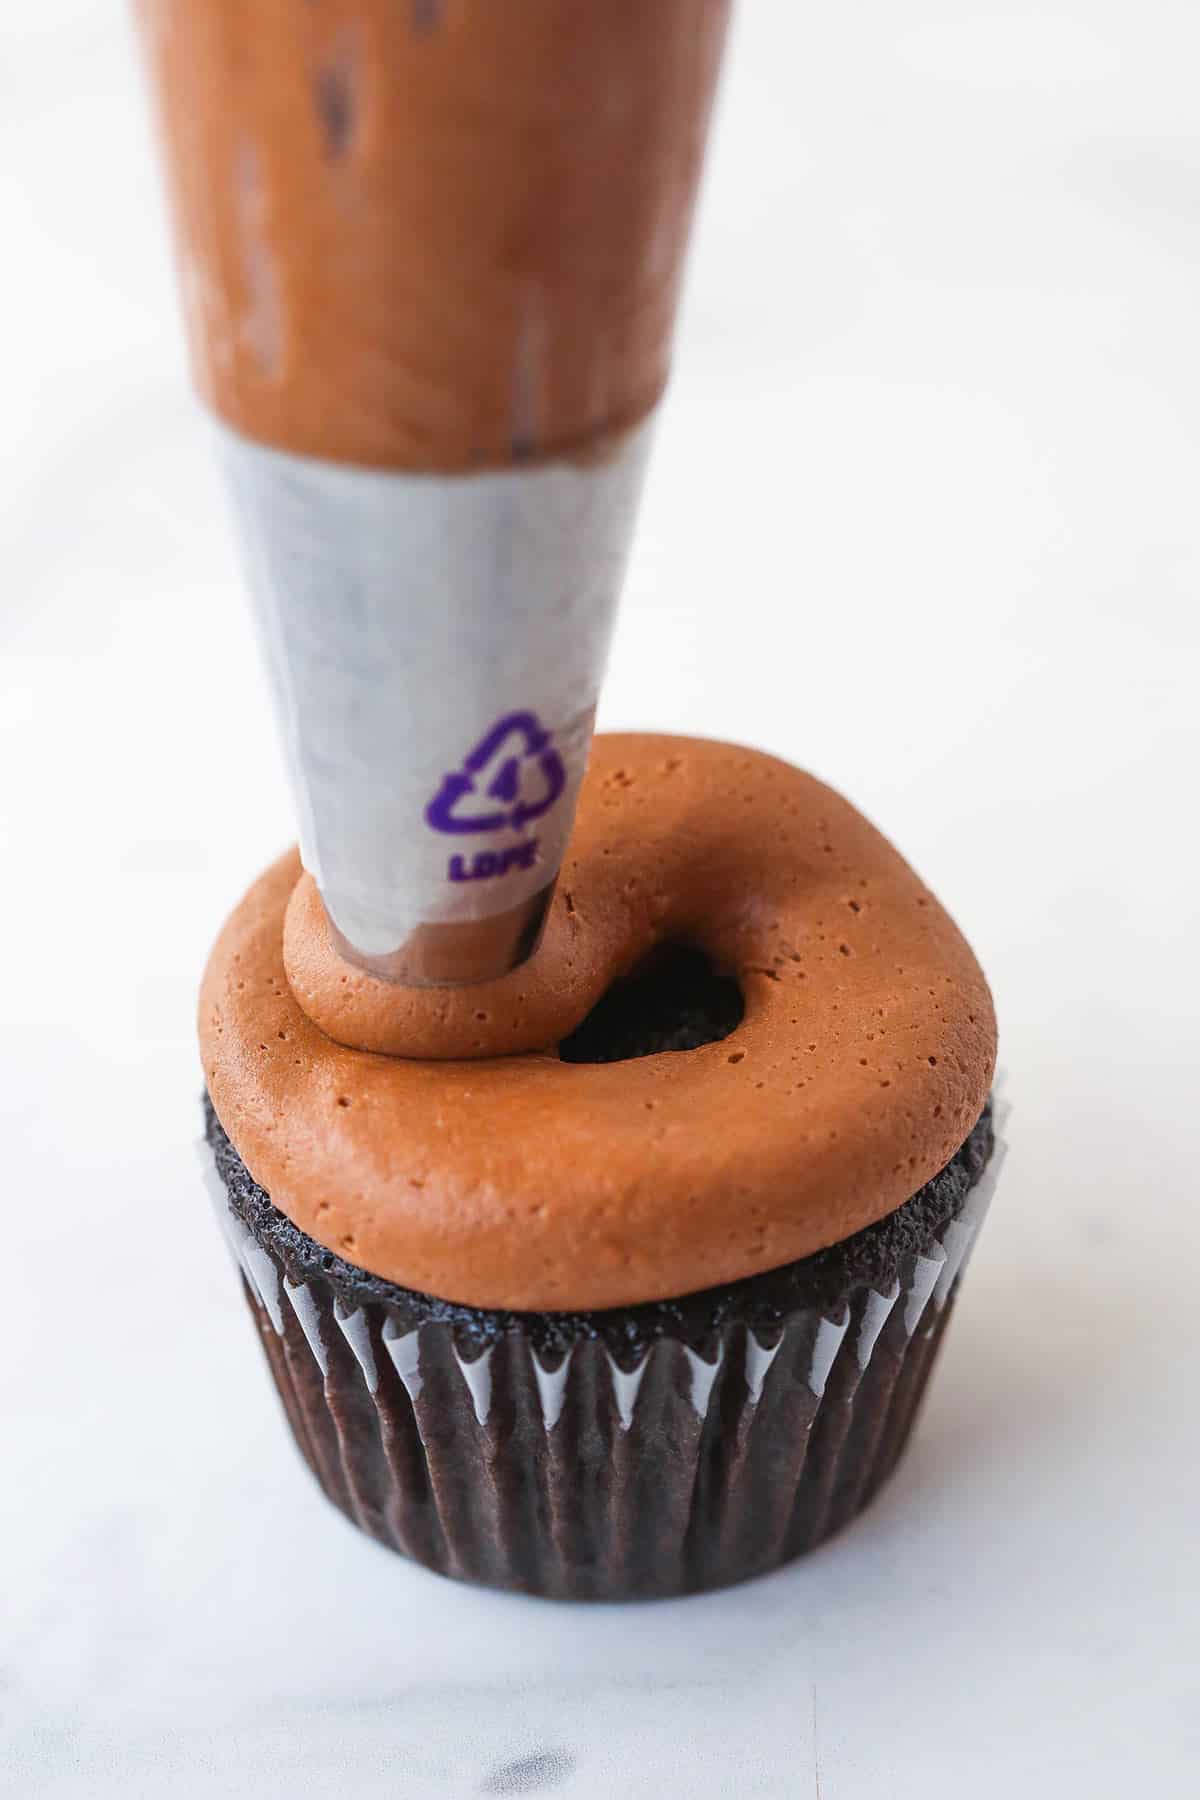
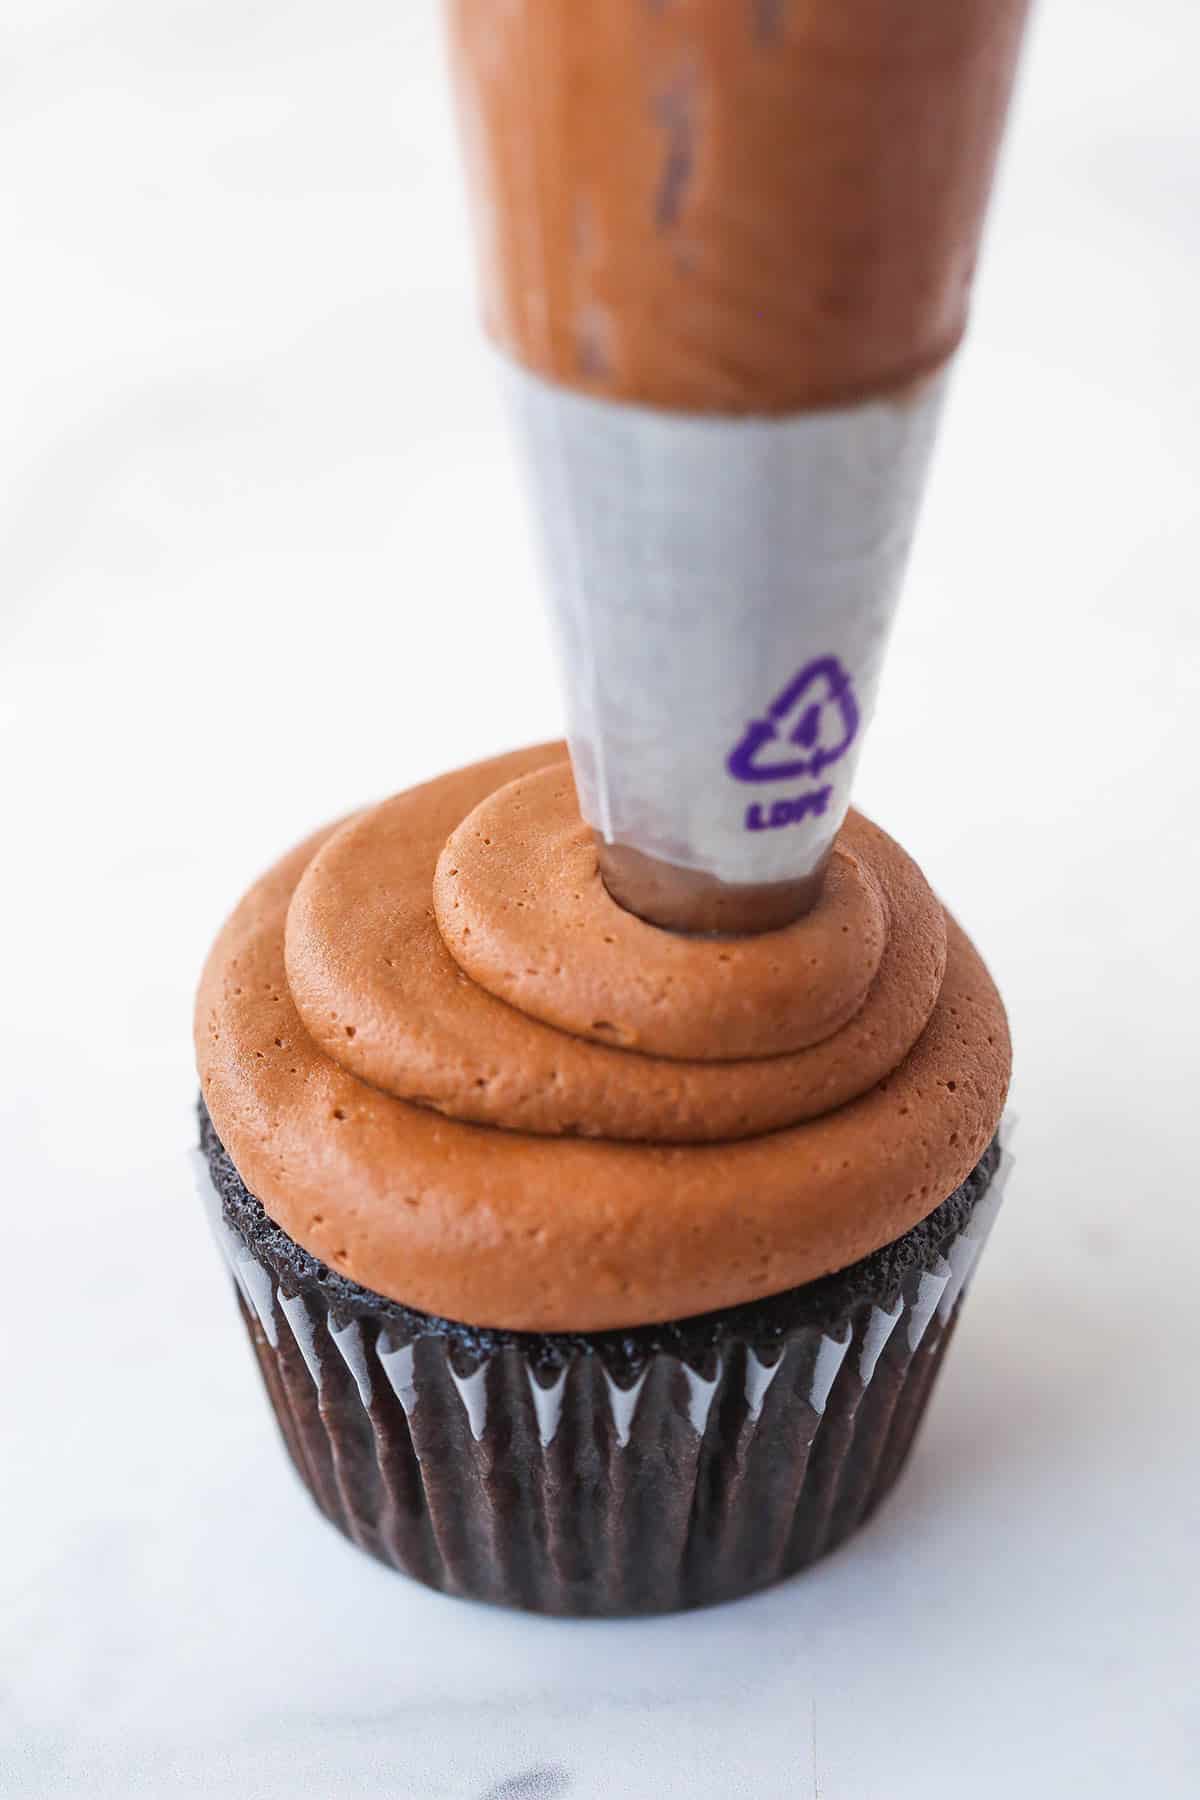
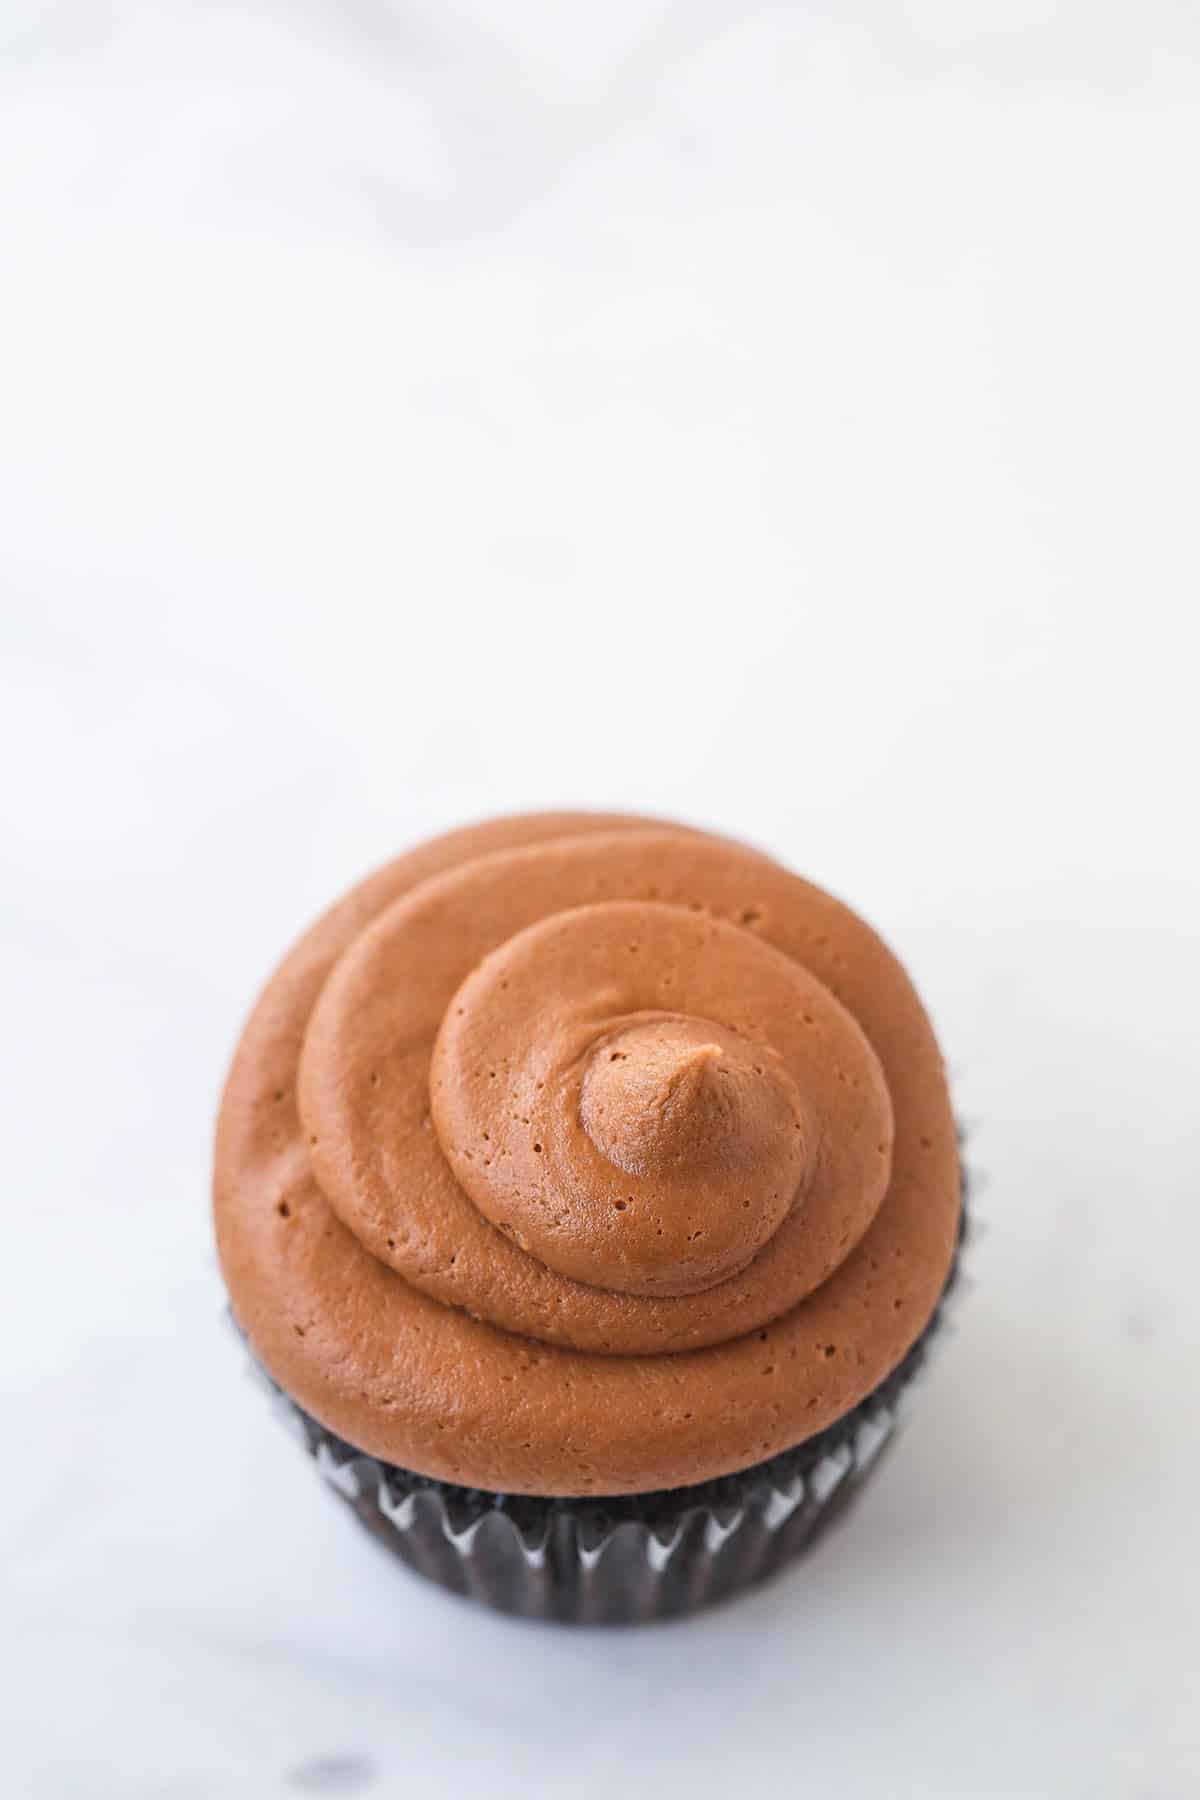
- Add Swirl: Start by adding a large, tall swirl of buttercream to the top of the cupcake using Ateco tip 847. Start piping on the outside of the cupcake and as you complete a full circle, move the piping bag slightly inward to create the next circle rotation. Continue piping, moving inward for three full rotations, plus a small tip on top. Release the pressure and pull the bag away.
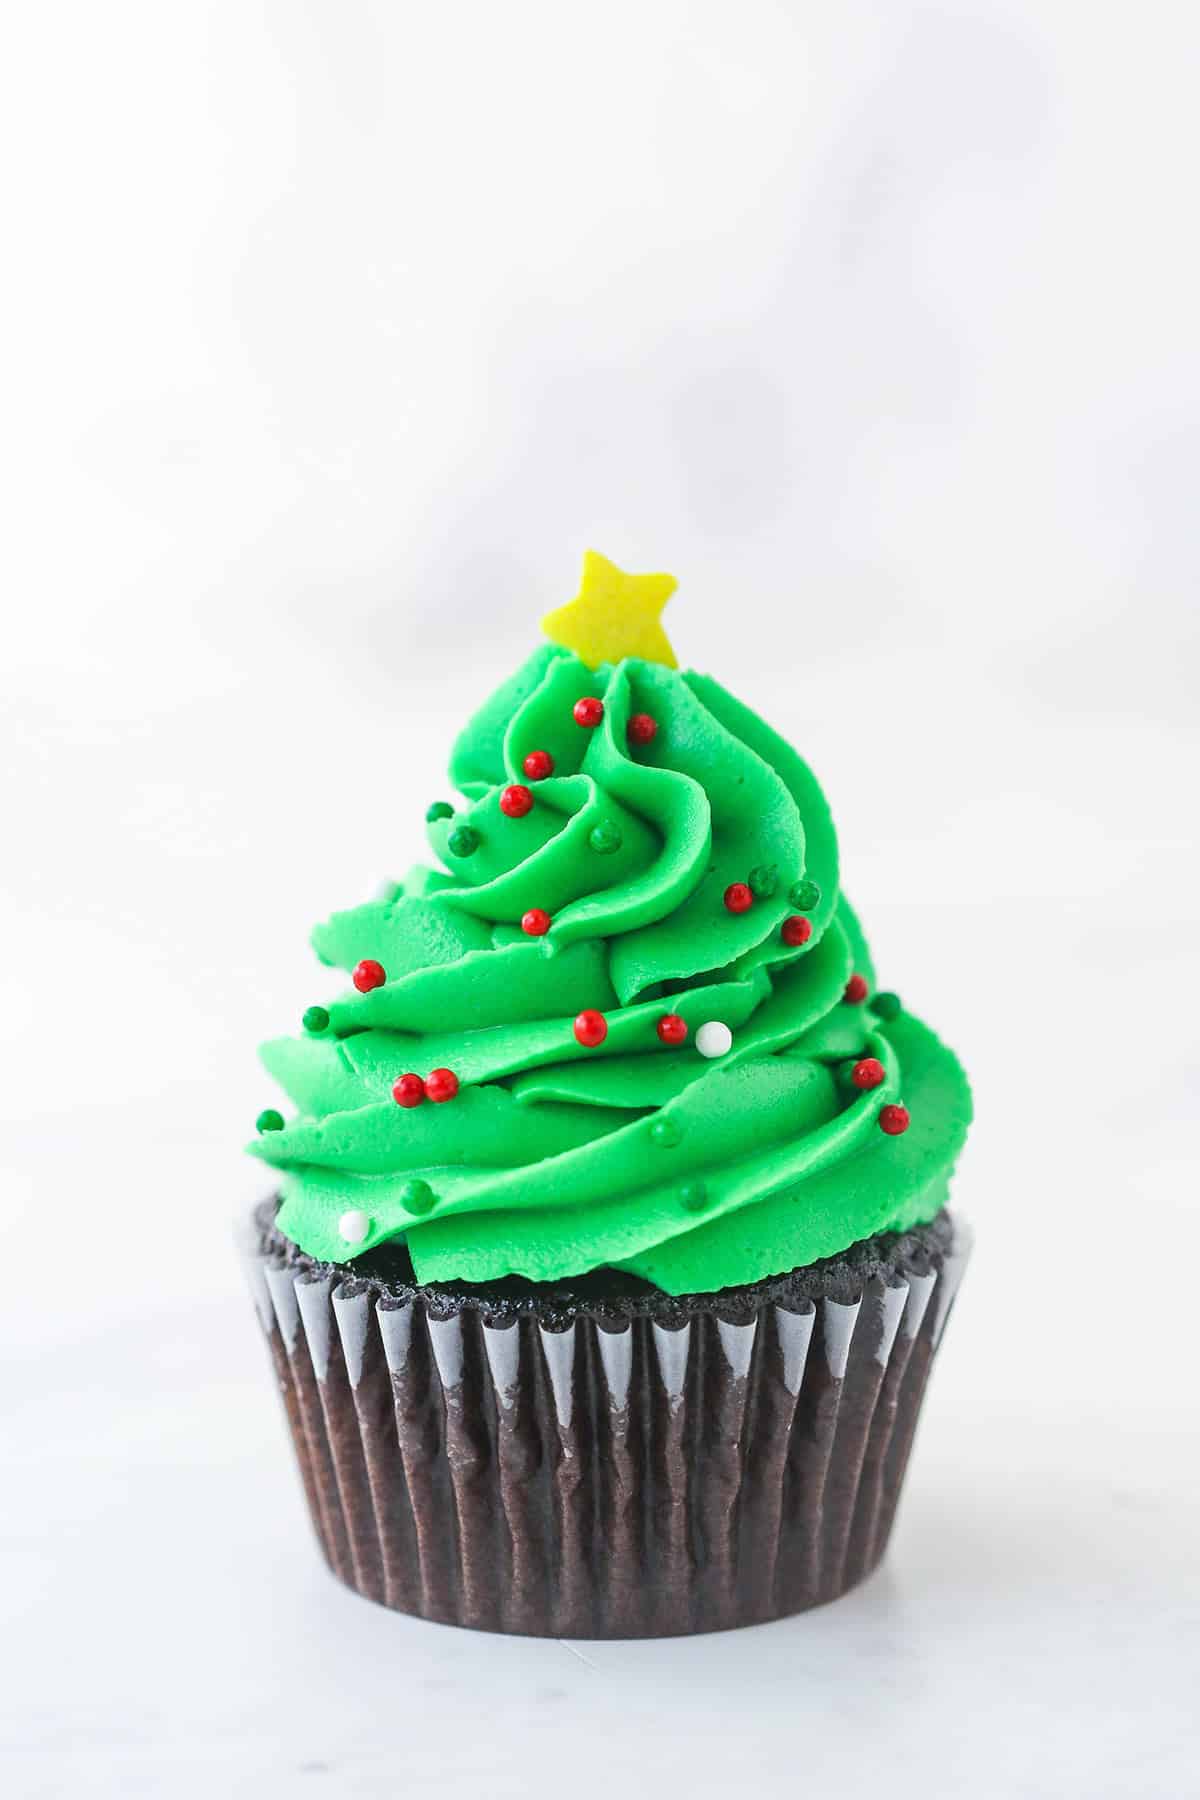
- Decorate the “Tree”: Once you’ve added the frosting to the cupcake, go ahead and add the decorations (the star and decorative nonpareils) before moving on to the next cupcake. The buttercream will crust as it sits and the sprinkles won’t stick as well. And that’s it! A super simple cupcake that looks so fun and festive.
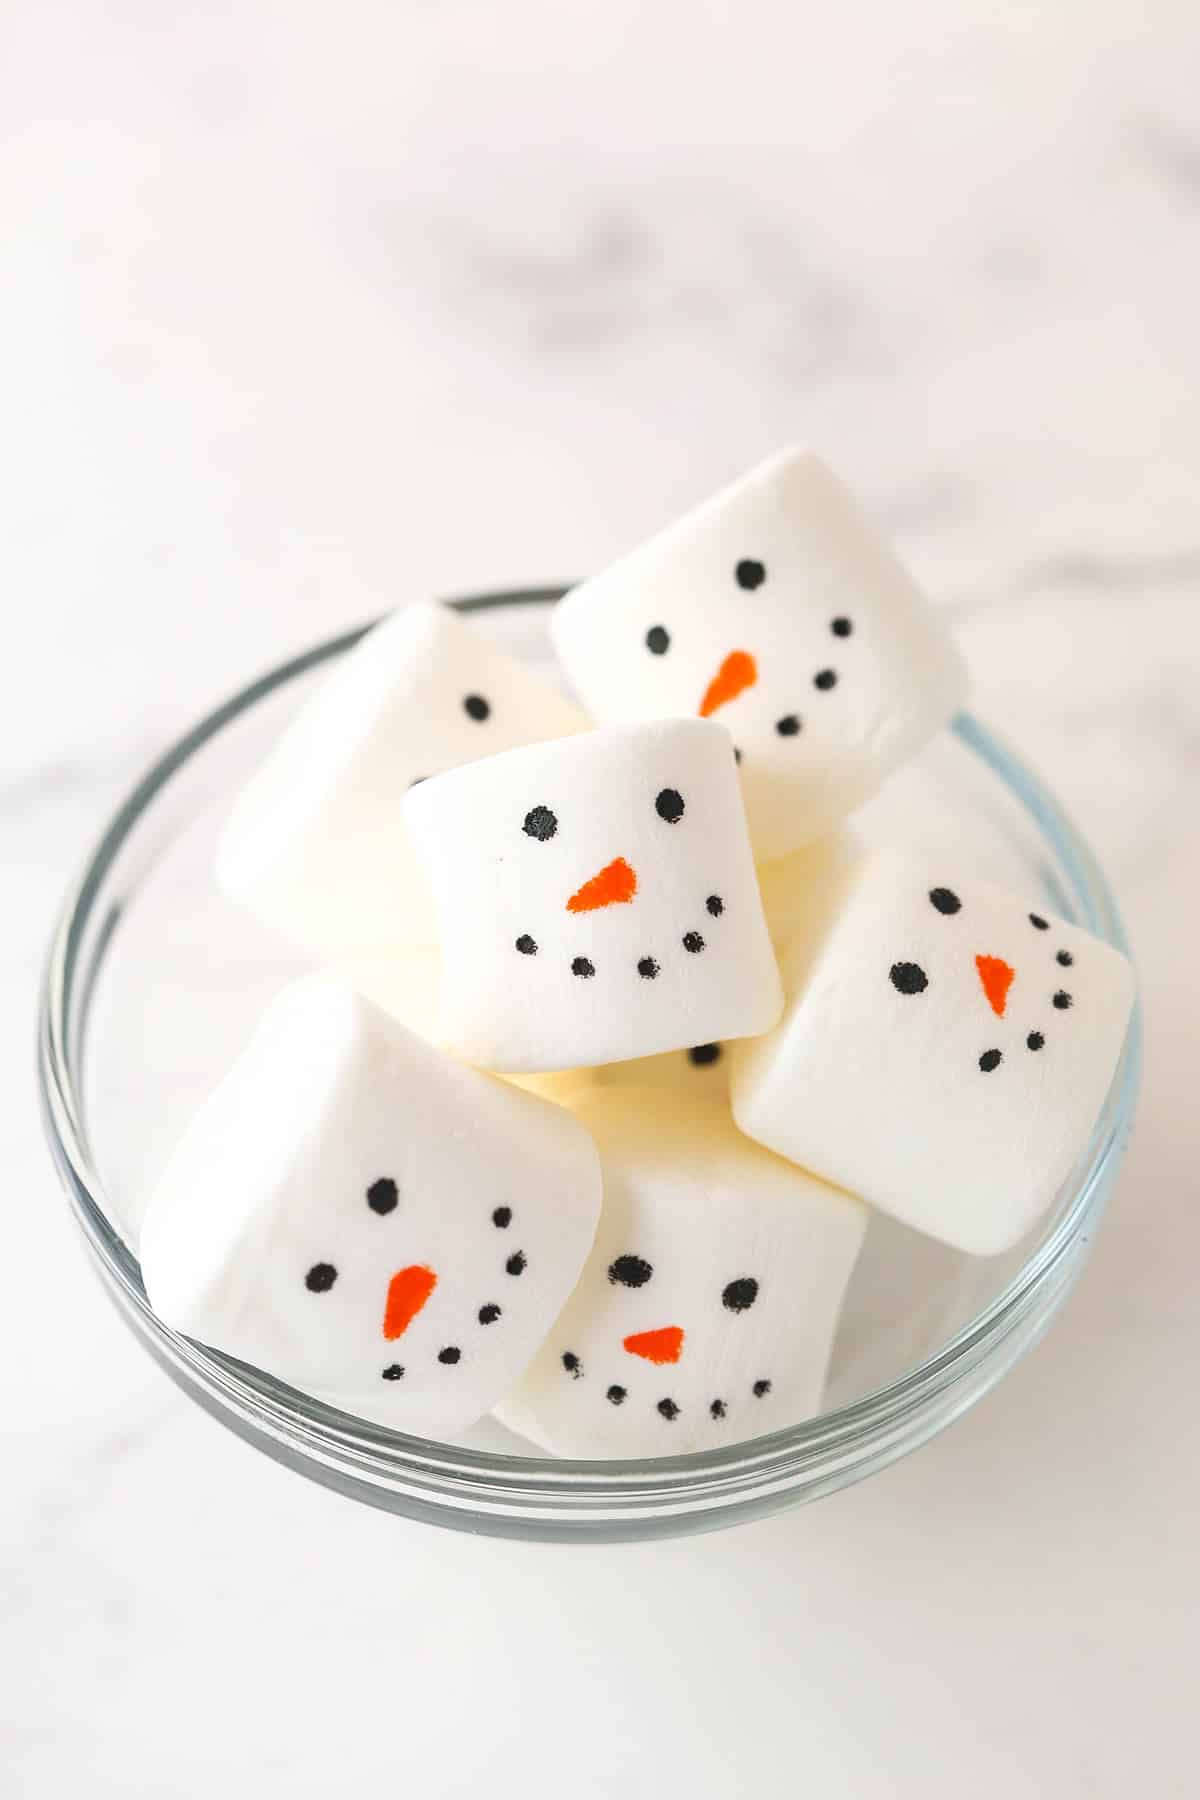
Melting Snowman
For the melting snowman cupcakes, you’ll need the marshmallows, food writer pens, red/green/other color large nonpareils and the Ateco 808 tip and Wilton 5 tip.
- Create Snowman Faces: The first thing to do is to add the faces to the marshmallows with the food writer pens. You can do this ahead of time, if you’d like, and store the marshmallows for when you’re ready to decorate later.
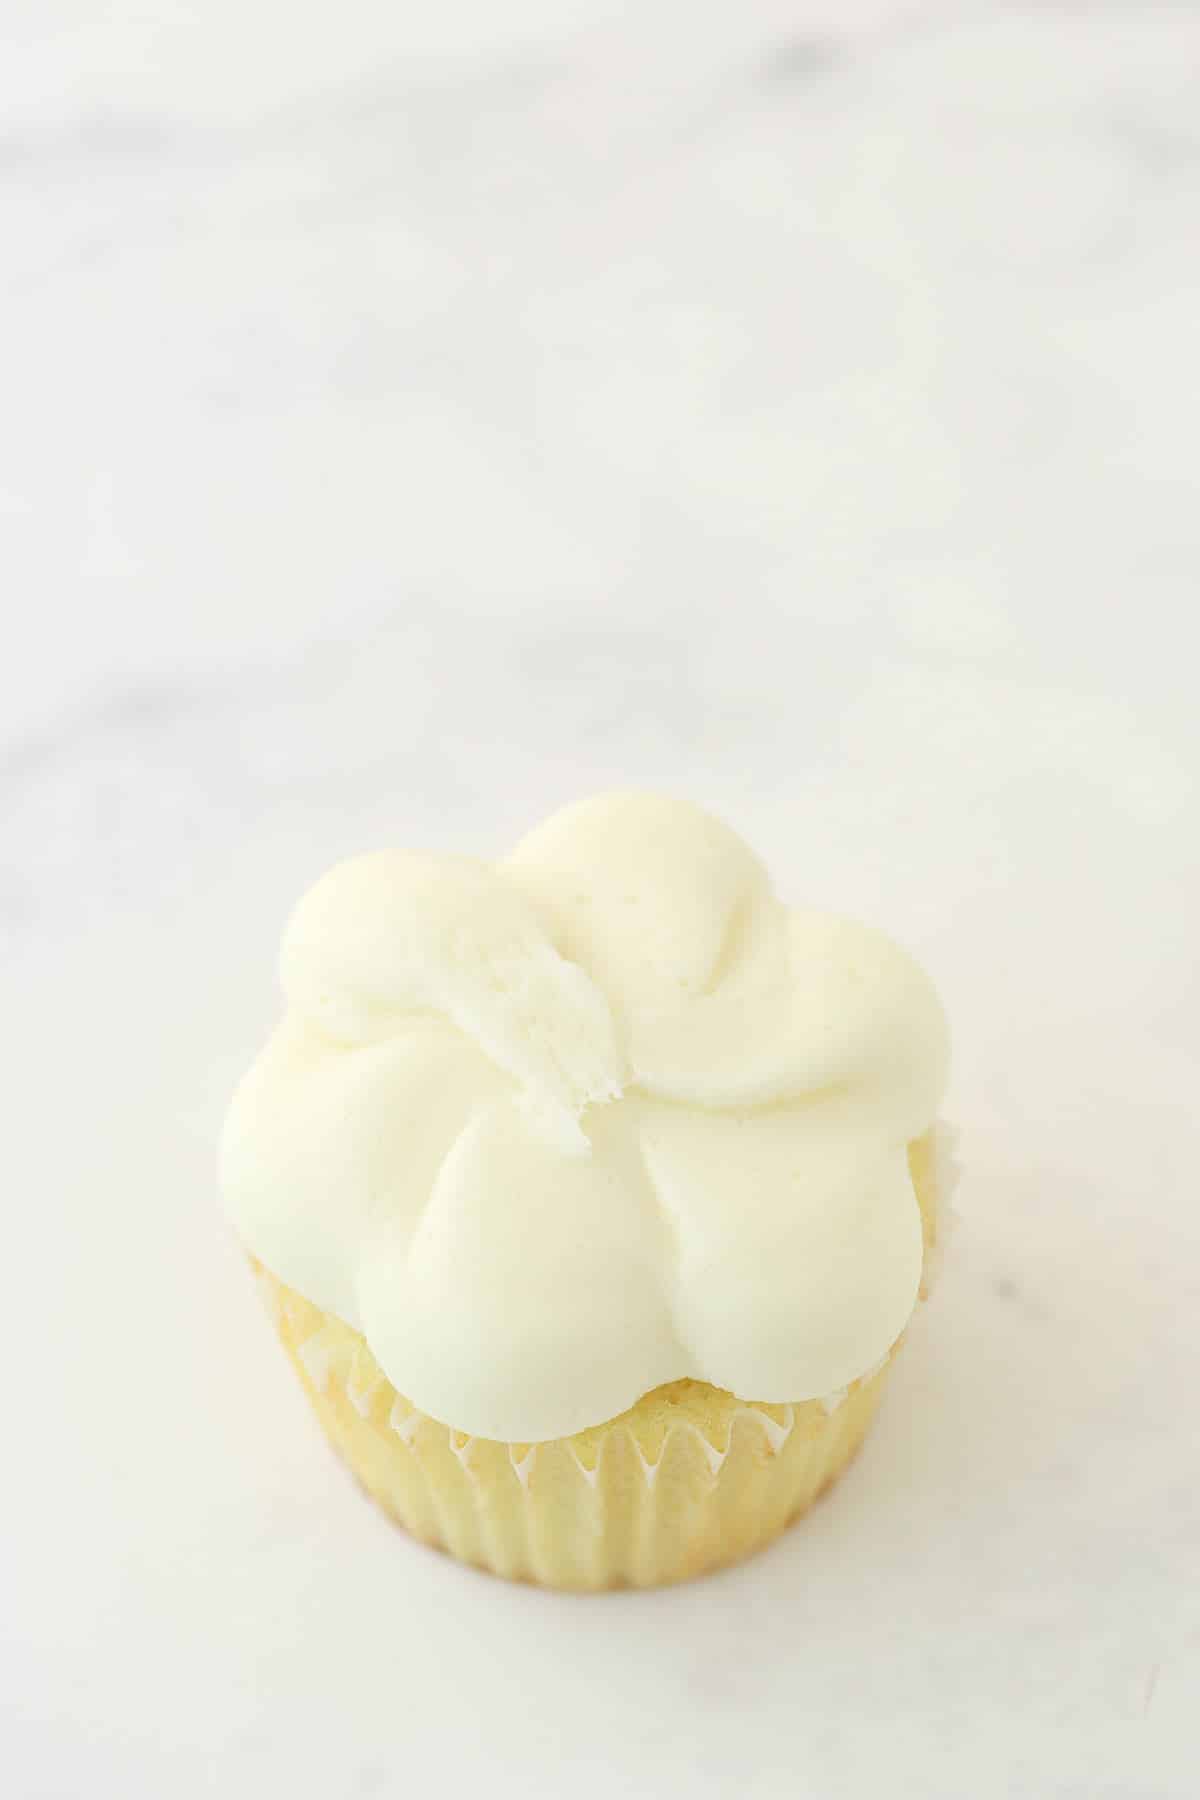
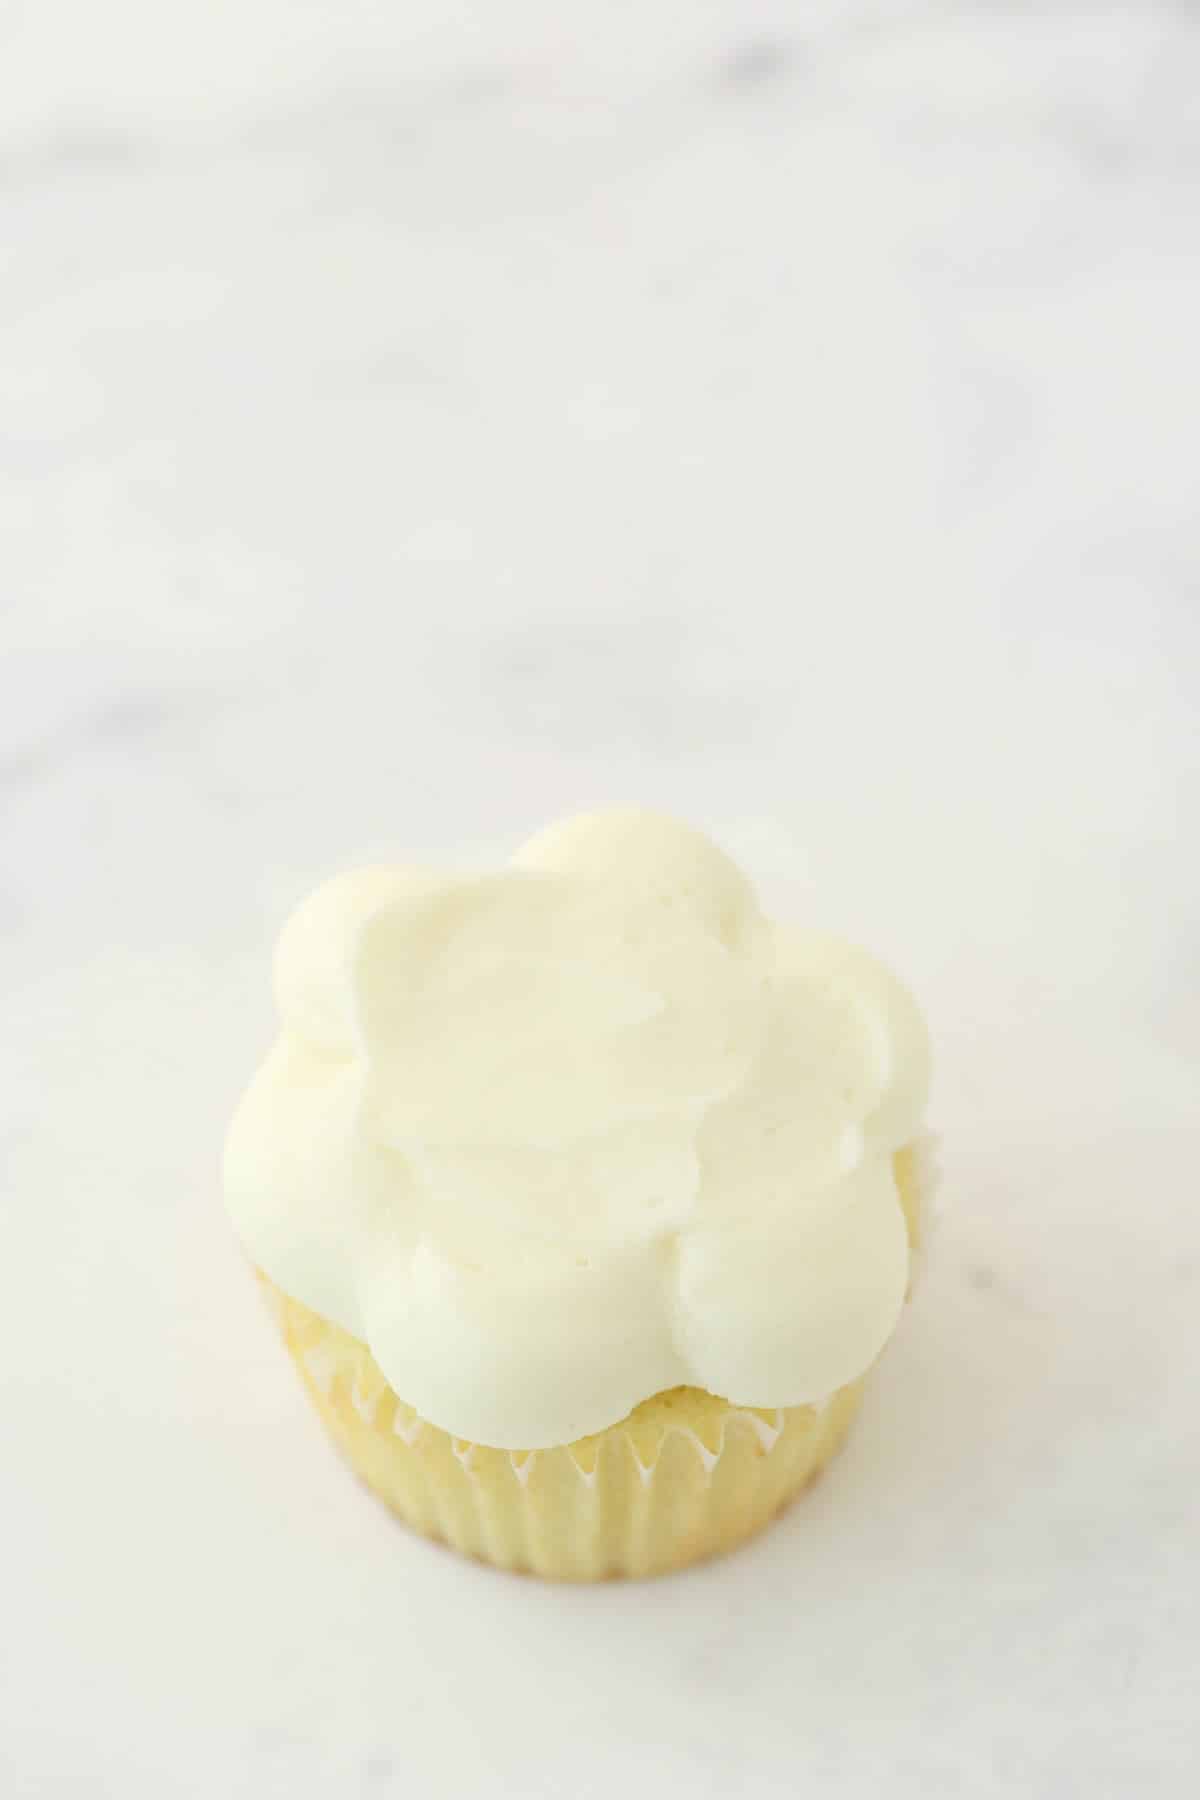
- Add Buttercream: Add the buttercream to the cupcake using the Ateco 808 tip in almost a bit of a flower design, making one “petal” at a time as you move around the outside of the cupcake in one smooth motion.
- Smooth Top: Use an offset spatula or something similar to smooth out the top.
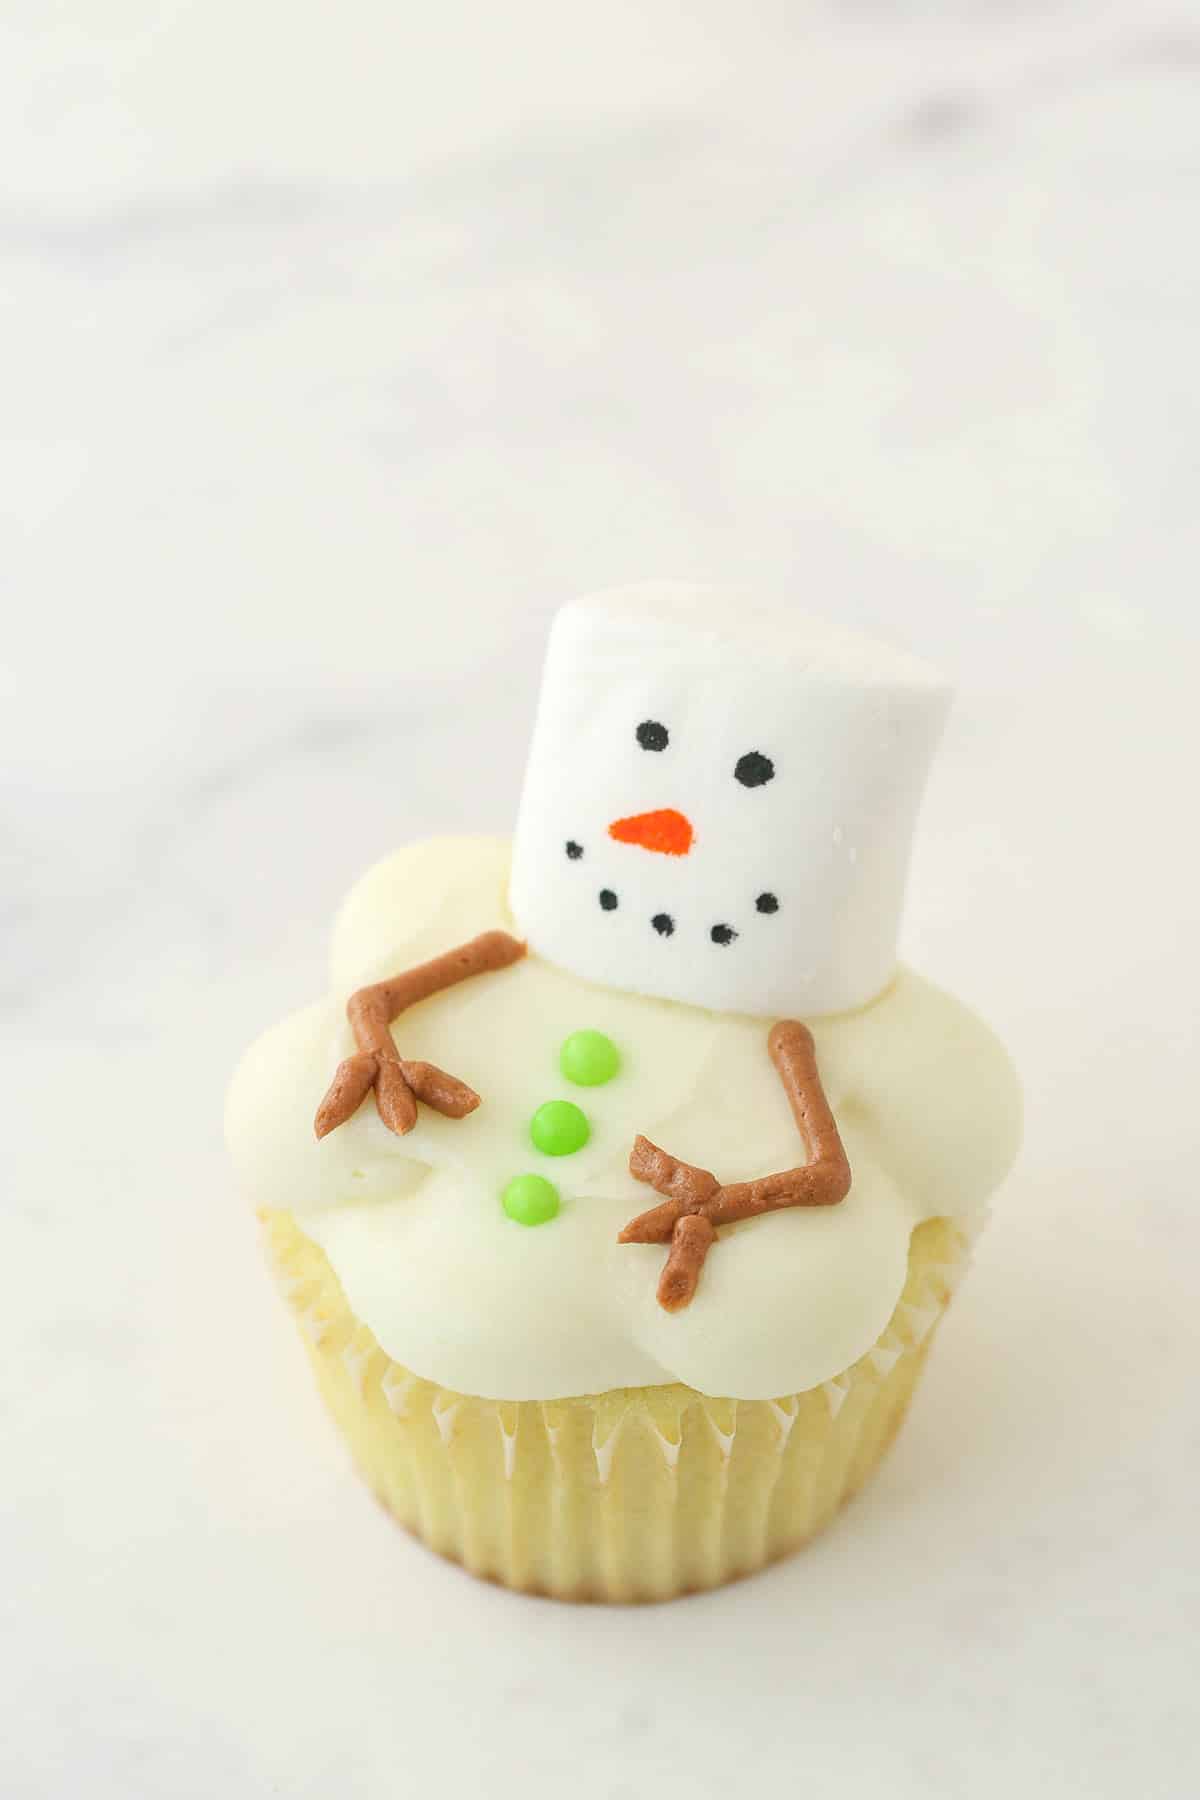
- Add Decorations: Add the face towards the back side of the cupcake, then add the buttons down the middle. Finally, pipe the arms onto the cupcake using the Wilton 5 tip and some brown buttercream.
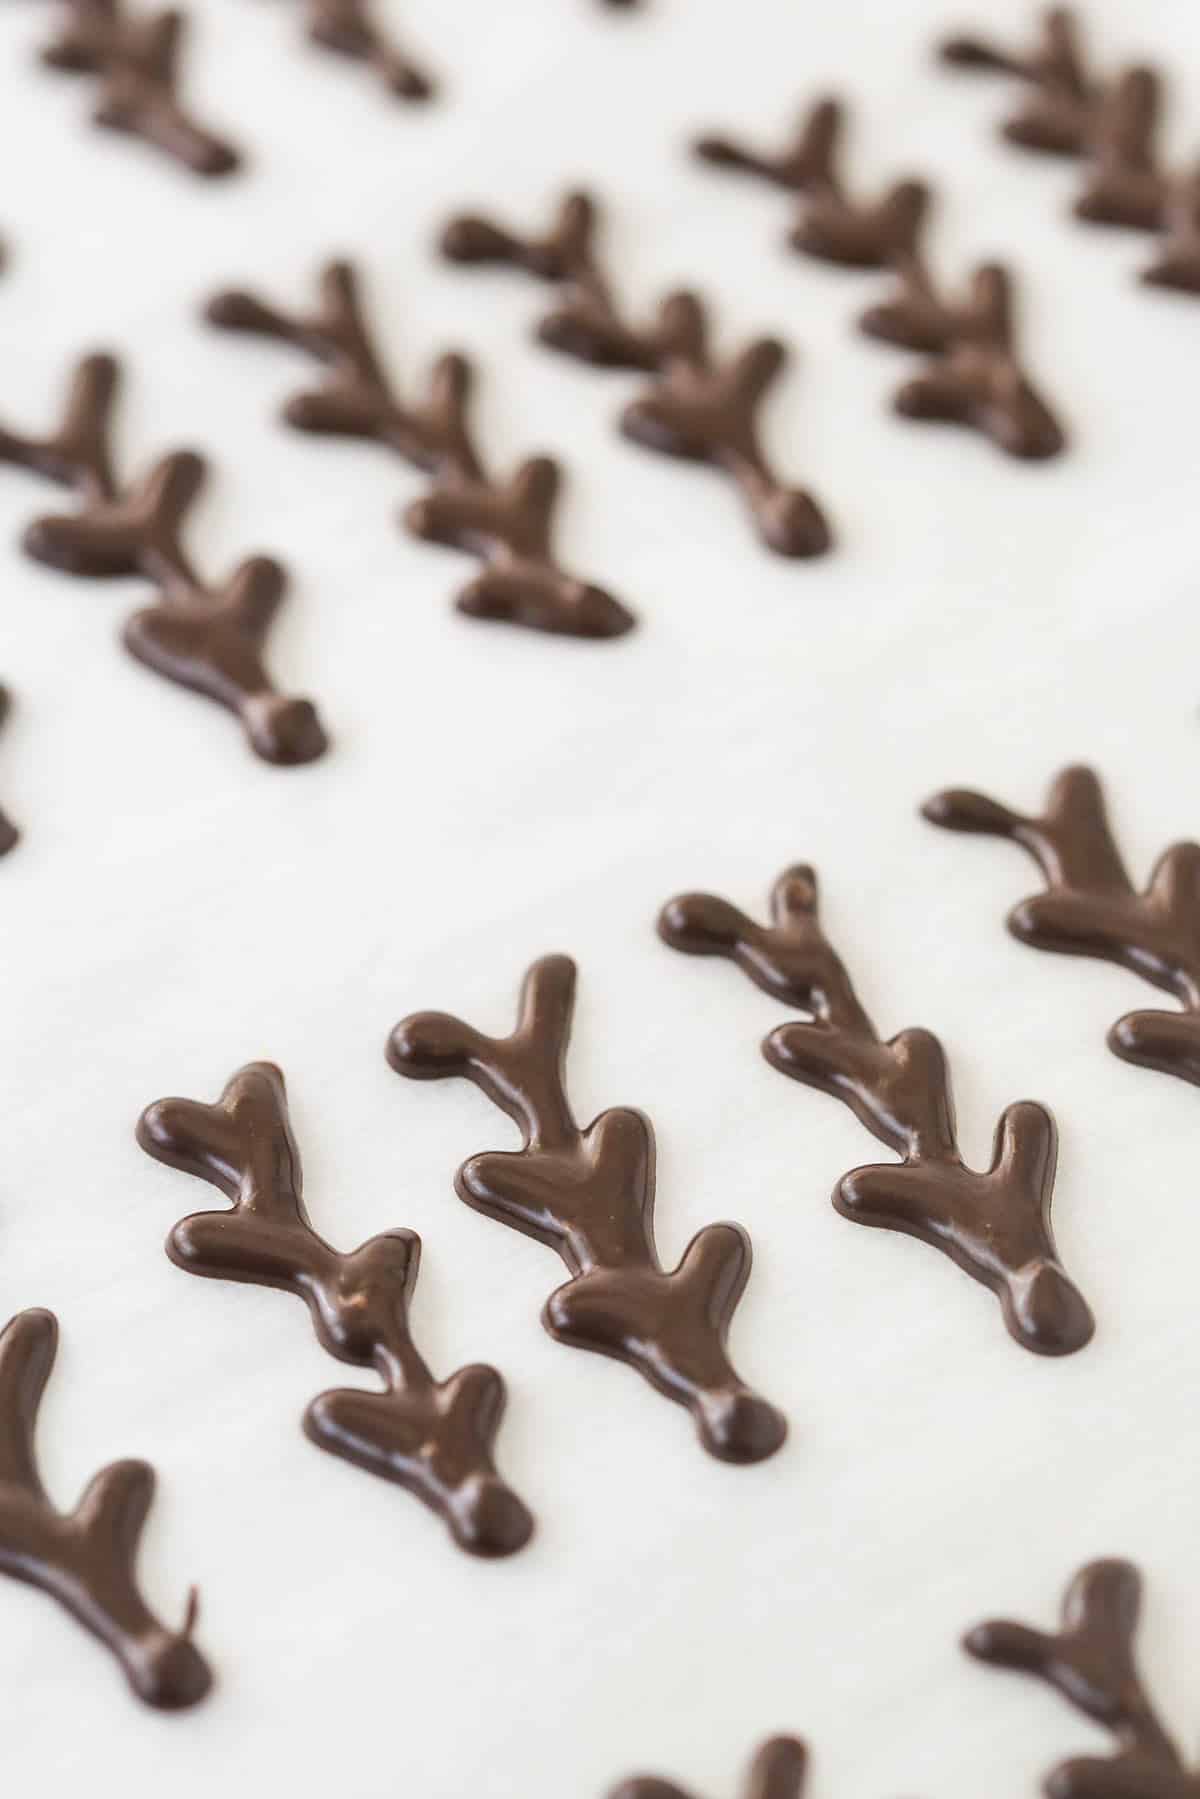
Reindeer
For the reindeer cupcakes, you’ll need the melting chocolates, Ateco 808 tip, Wilton 5 tip, parchment paper and the eye and nose sprinkles.
- Make Antlers: To start, you’ll make the antlers with the melting chocolate. Melt the chocolate and add it to a piping bag with the Wilton 5 tip. Pipe the antlers onto a piece of parchment paper and let them dry. You’ll need two antlers per reindeer, so decide how many reindeers you want and make the right number of antlers. These are another part of these cupcakes you could make ahead. Store the dry and firm antlers in an air tight container until ready to use.
- Pipe Buttercream Swirl: To add the buttercream for the reindeer, use the Ateco 808 tip. You’ll pipe a swirl of frosting onto the cupcake, but you want to make a flattened swirl, not a super tall swirl. You’ll also want to offset the swirl a bit so that the place where the piping tip stops is where the “snout” of the reindeer is, which should be just below center, not right in the center.
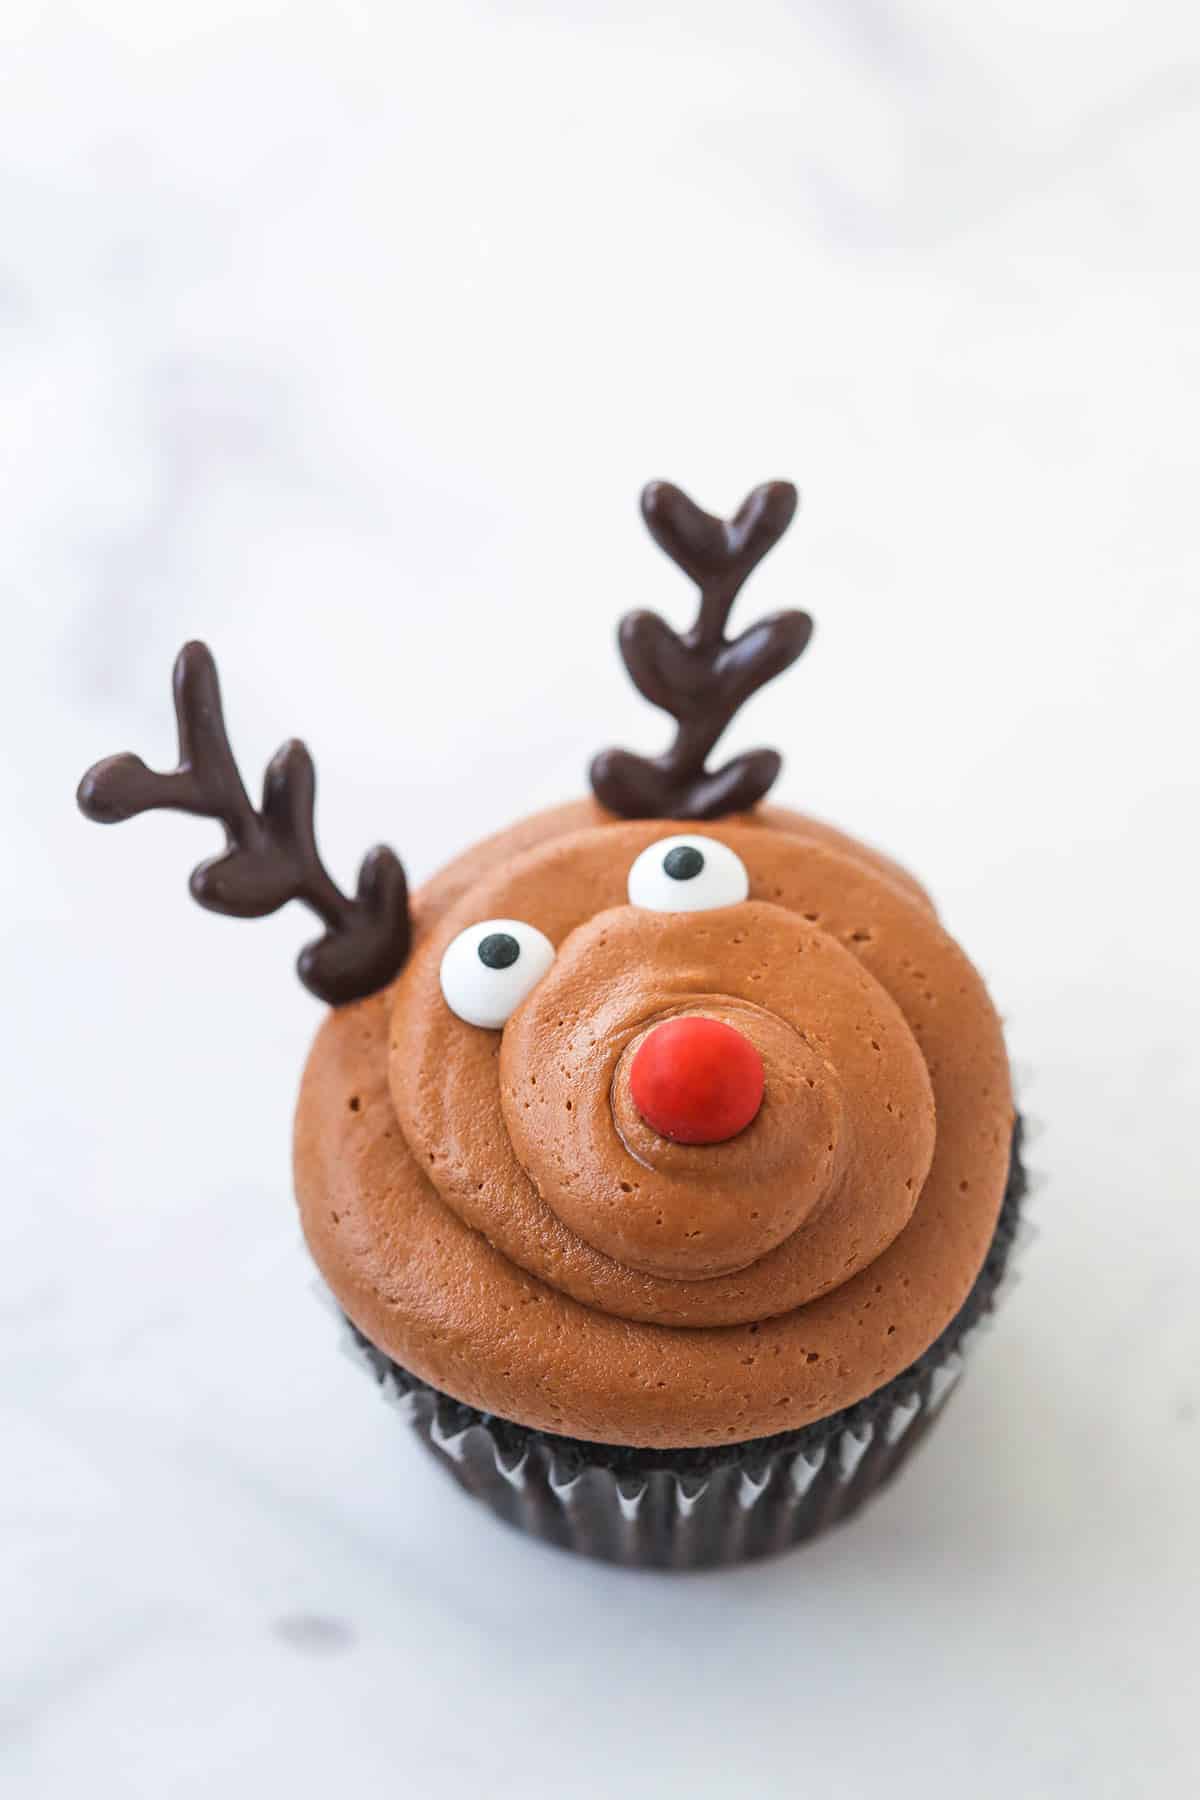
- Add Decorations: Place the red nose sprinkle right on the place where the piping tip was removed. Place the eyes at the top of the “snout” and and then add the antlers at the top. Such a cute little guy!
Santa Hat
The santa hat cupcakes require very little in terms of supplies. You’ll need the Ateco 808 tip and the Wilton 21 tip. Similar to the christmas tree cupcakes, you’ll start by adding a swirl to the cupcakes.
- Add Buttercream Swirl: Add a large, tall swirl of buttercream to the top of the cupcake using Ateco tip 808. Start piping on the outside of the cupcake and as you complete a full circle, move the piping bag slightly inward to create the next circle rotation. Continue piping, moving inward for three full rotations, plus a small tip on top. Release the pressure and pull the bag away. Leave a little bit of space around the base of the frosting to allow space to pipe the fluffy trim around the bottom.

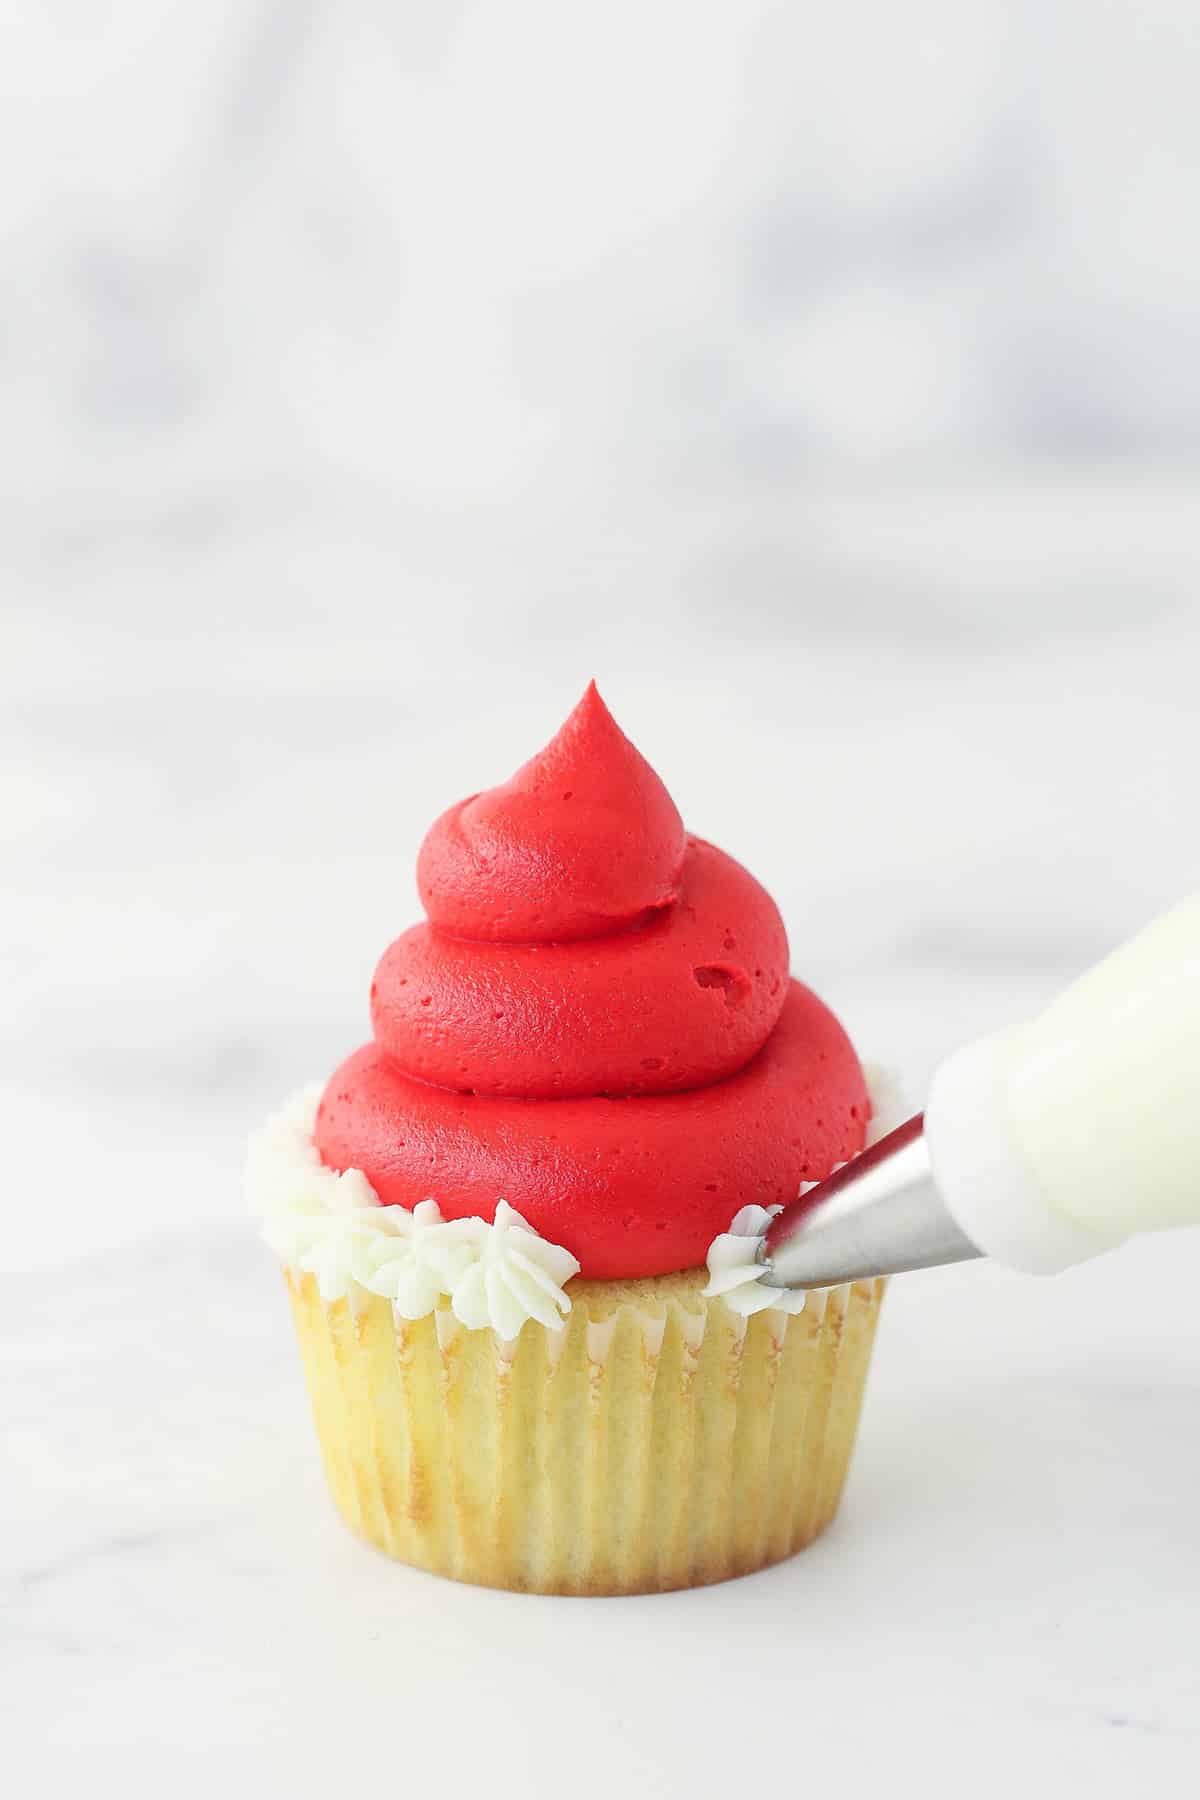
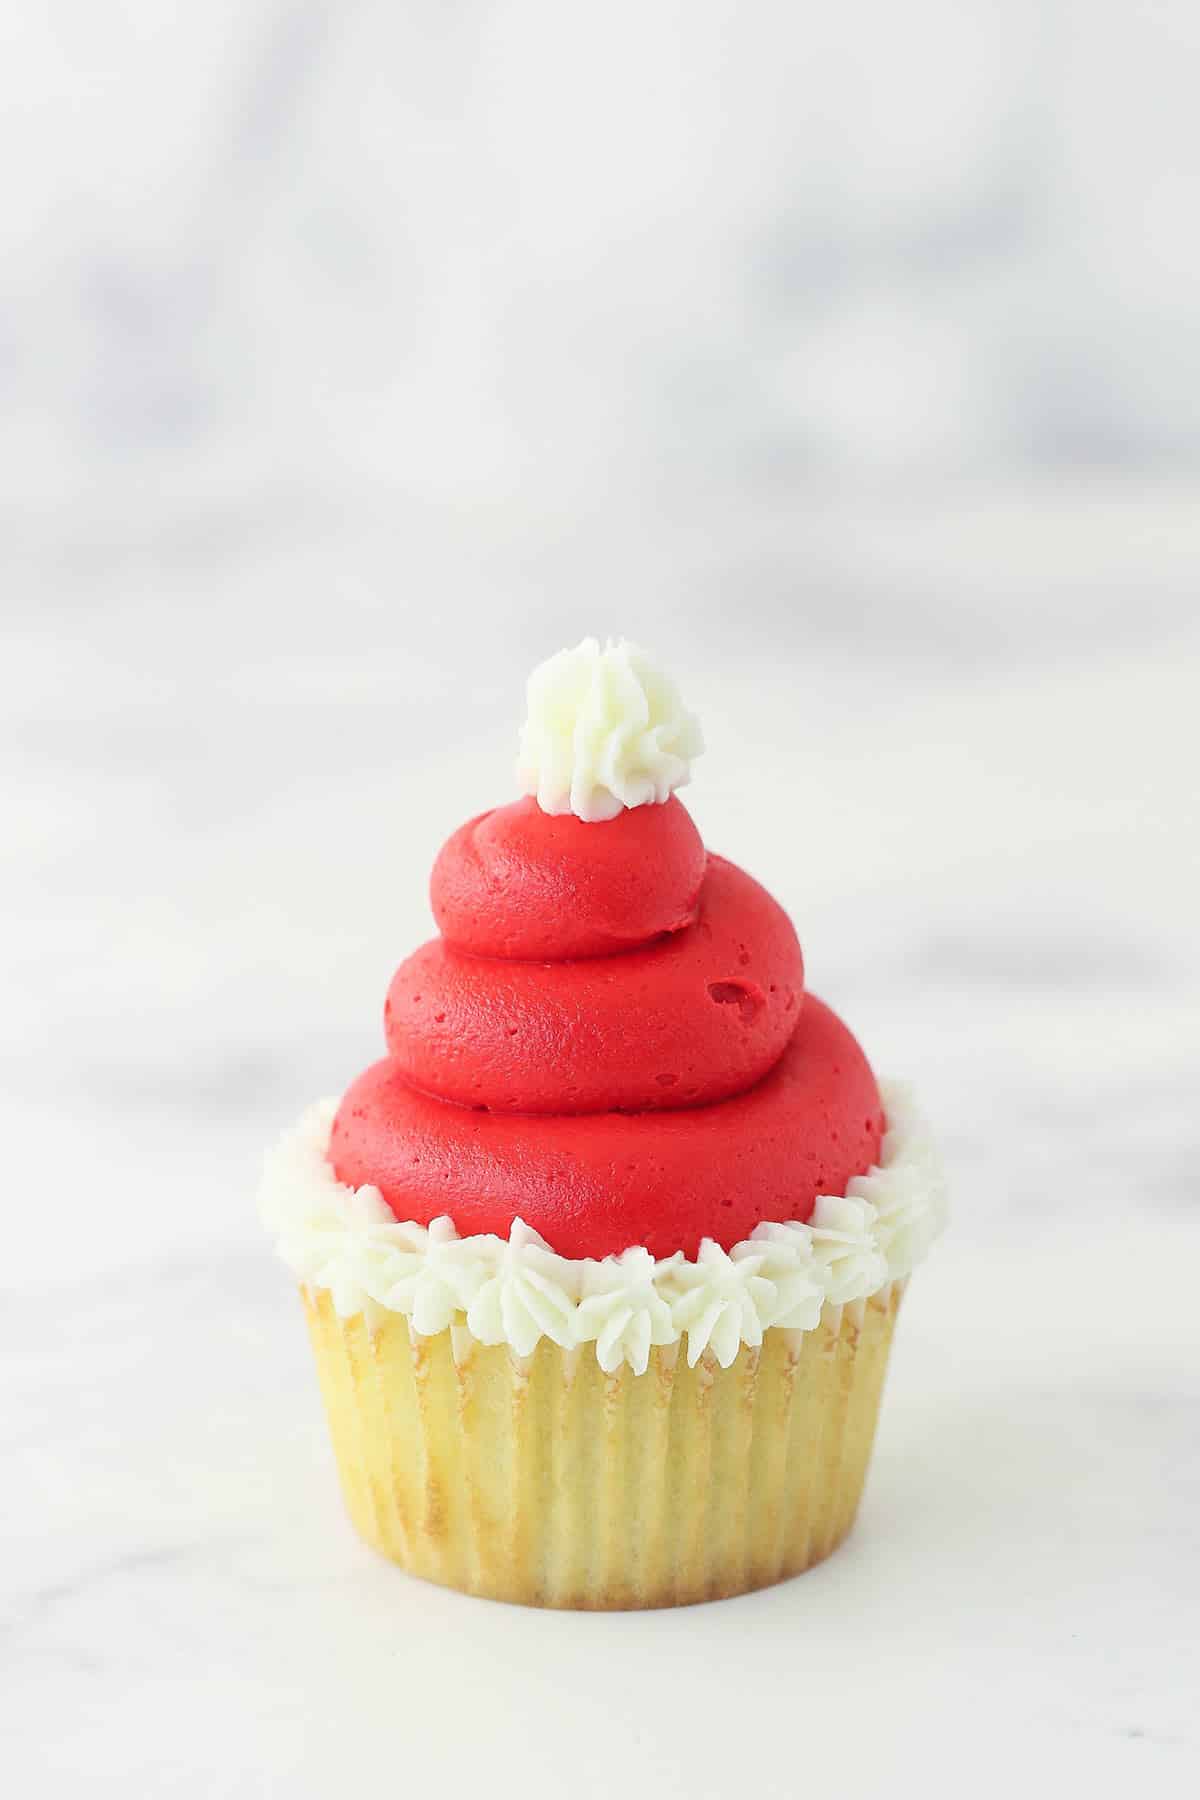
- Add Fluffy Trim: Use the Wilton 21 tip to pipe dollops of frosting around the base of the buttercream swirl.
- Add Fluffy Ball: Finally pipe the fluffy “ball” onto the top. And you’re done! Now you have some fabulous decorated Christmas cupcakes! Santa would be proud.
Watch How to Make Christmas Cupcakes
Easy Christmas Cupcakes
- Prep Time: 2 hours
- Total Time: 2 hours
- Yield: 12 cupcakes 1x
- Category: Dessert
- Method: Oven
- Cuisine: American
Description
Learn how to make these festive decorated Christmas Cupcakes! With four different ways to decorate them, they are easy to make and so cute for Christmas parties! Make your cupcakes and buttercream, and decorate based on the instructions and video and these will be a favorite in no time!
Ingredients
12 cupcakes (I used a mix of vanilla cupcakes and chocolate cupcakes)
Vanilla Buttercream*
- 2 cups (448g) unsalted butter, room temperature
- 8 cups (460g) powdered sugar
- 2 tsp vanilla extract
- 4–6 tbsp (60-90ml) heavy cream or milk
- Salt, to taste
Tree Cupcakes
Melted Snowman
- Brown gel icing color
- Marshmallows
- Food writing pens (black and orange)
- 2 piping bags
- Ateco 808 tip
- Wilton 5 tip
- 1 coupler
- Large nonpareil sprinkles (for buttons)
Reindeer Cupcakes
- Brown gel icing color
- 4 oz melting chocolate
- 2 piping bags
- 1 coupler
- Wilton 5 tip
- Ateco 808 tip
- Eyeball sprinkles
- Large round red sprinkles (for nose)
Santa Hat Cupcakes
- Red gel icing color
- 2 piping bags
- 1 coupler
- Ateco 808 tip
- Wilton 21 tip
Instructions
Make the buttercream:
- Add the butter a large mixer bowl and beat until smooth and creamy.
- Add about half of the powdered sugar and mix until smooth and well combined.
- Add the vanilla extract and 3 tablespoons of cream and mix until smooth and well combined.
- Add the remaining powdered sugar and mix until smooth and well combined.
- Add more cream until desired consistency is reached, then add salt to taste. The salt adds flavor and helps cut down the sweetness. I recommend starting with a little less than 1/8 tsp and adding from there.
Color the buttercream:
- Divide the buttercream into 4 bowls. I add a little bit more to two of the bowls for the green and red, since those two colors are piled high and you’ll need a little more of them.
- Color the two with a little extra frosting in the green and red colors, leave one white and color the other brown. Keep in mind that as the buttercream sits, the colors will darken.
To make Christmas tree cupcakes:
- Add the Ateco 847 tip to a large piping bag. Fill with green buttercream.
- Start piping by applying even pressure to the piping bag and adding a large, tall swirl of buttercream to the top of the cupcake. Start piping on the outside of the cupcake and as you complete a full circle, move the piping bag slightly inward to create the next circle rotation. Continue piping, moving inward for three full rotations, plus a small tip on top. Release the pressure and pull the bag away.
- Once you’ve added the frosting to the cupcake, go ahead and add the decorations (the star and decorative nonpareils) before moving on to the next cupcake. The buttercream will crust as it sits and the sprinkles won’t stick as well.
To make the snowman cupcakes:
- The first thing to do is to add the faces to the marshmallows with the food writer pens. Use the markers to add the eyes, nose and mouth. You can do this ahead of time, if you’d like, and store the marshmallows for when you’re ready to decorate later.
- Add the Ateco 808 tip to a large piping bag. Fill with white buttercream. Start piping by applying even pressure to the piping bag and add the buttercream to the cupcake in almost a bit of a flower design, making one “petal” at a time as you move around the outside of the cupcake in one smooth motion.
- Use an offset spatula or something similar to smooth out the top.
- Add the face towards the back side of the cupcake, then add the buttons down the middle.
- Finally, add the Wilton 5 tip to a medium sized piping bag fitted with a coupler. Fill with brown buttercream (from the reindeer cupcakes) and pipe the arms onto the cupcake using the Wilton 5 tip.
To make the reindeer cupcakes:
- To start, you’ll make the antlers with the melting chocolate. Melt the chocolate and add it to a piping bag fitted with a coupler and the Wilton 5 tip. Pipe the antlers onto a piece of parchment paper and let them dry. You’ll need two antlers per reindeer, so decide how many reindeer you want and make the right number of antlers. These are another part of these cupcakes you could make ahead. Store the dry and firm antlers in an air tight container until ready to use.
- To add the buttercream for the reindeer, add the Ateco 808 tip to a large piping bag. Fill with brown buttercream. Apply even pressure to the piping bag and pipe a swirl of frosting onto the cupcake. You want to make a short/flat swirl, not a super tall swirl. You’ll also want to offset the swirl a bit so that the place where the piping tip stops is where the “snout” of the reindeer is, which should be just below center, not right in the center.
- Place the red nose sprinkle right on the place where the piping tip was removed. Place the eyes at the top of the “snout” and and then add the antlers at the top.
To make the Santa hat cupcakes:
- Add the Ateco 808 tip to a large piping bag. Fill with red buttercream. Start piping by applying even pressure to the piping bag and adding a large, tall swirl of buttercream to the top of the cupcake. Start piping on the outside of the cupcake and as you complete a full circle, move the piping bag slightly inward to create the next circle rotation. Continue piping, moving inward for three full rotations, plus a small tip on top. Release the pressure and pull the bag away. Leave a little bit of space around the base of the frosting to allow space to pipe the fluffy trim around the bottom.
- Add the Wilton 21 tip to a medium sized piping bag fitted with a coupler. Fill with white buttercream. Pipe dollops of frosting around the base of the buttercream swirl. Pipe the fluffy “ball” onto the top.
Serve your cupcakes at room temperature. Because the eyeball colors begin to bleed after sitting for too long and other colors from the sprinkles can also bleed, I recommend serving these the day they are decorated. If you have leftover cupcakes, they can sit at room temperature for up to 24 hours, but should be refrigerated after that for up to 3-4 days. Store them in an air tight container and serve at room temperature.
Notes
- Amount of buttercream: The buttercream recipe makes about 5 cups of buttercream. If you are making less cupcakes or are only doing the snowman or reindeer designs, you won’t need as much since those two designs don’t pile the frosting as high. Feel free to adjust as needed, just make sure the frosting is still stiff enough to hold the decorations and stay in place.
- Melting chocolate: 4 oz would be enough to make 12 pairs of antlers. Feel free to use less if you are making fewer reindeer cupcakes. I find that if you melt too little chocolate, it can be hard to work with and pipe, so I would recommend using at least 2 oz.
Categories:
Cakes and Cupcakes, Christmas, Holidays, Recipes, Recipes with video, Sweets and Treats,


Ooops, please don’t reply to my previous email. I found your links, sadly Amazon no longer carries either of your suggestions.