If you’re a chocolate cake fan, you have to try this Devil’s Food Cake! It’s moist, fudgy and full of rich chocolate flavor! This classic cake is hard to beat!
This post is sponsored by Challenge Butter, but all opinions are my own.
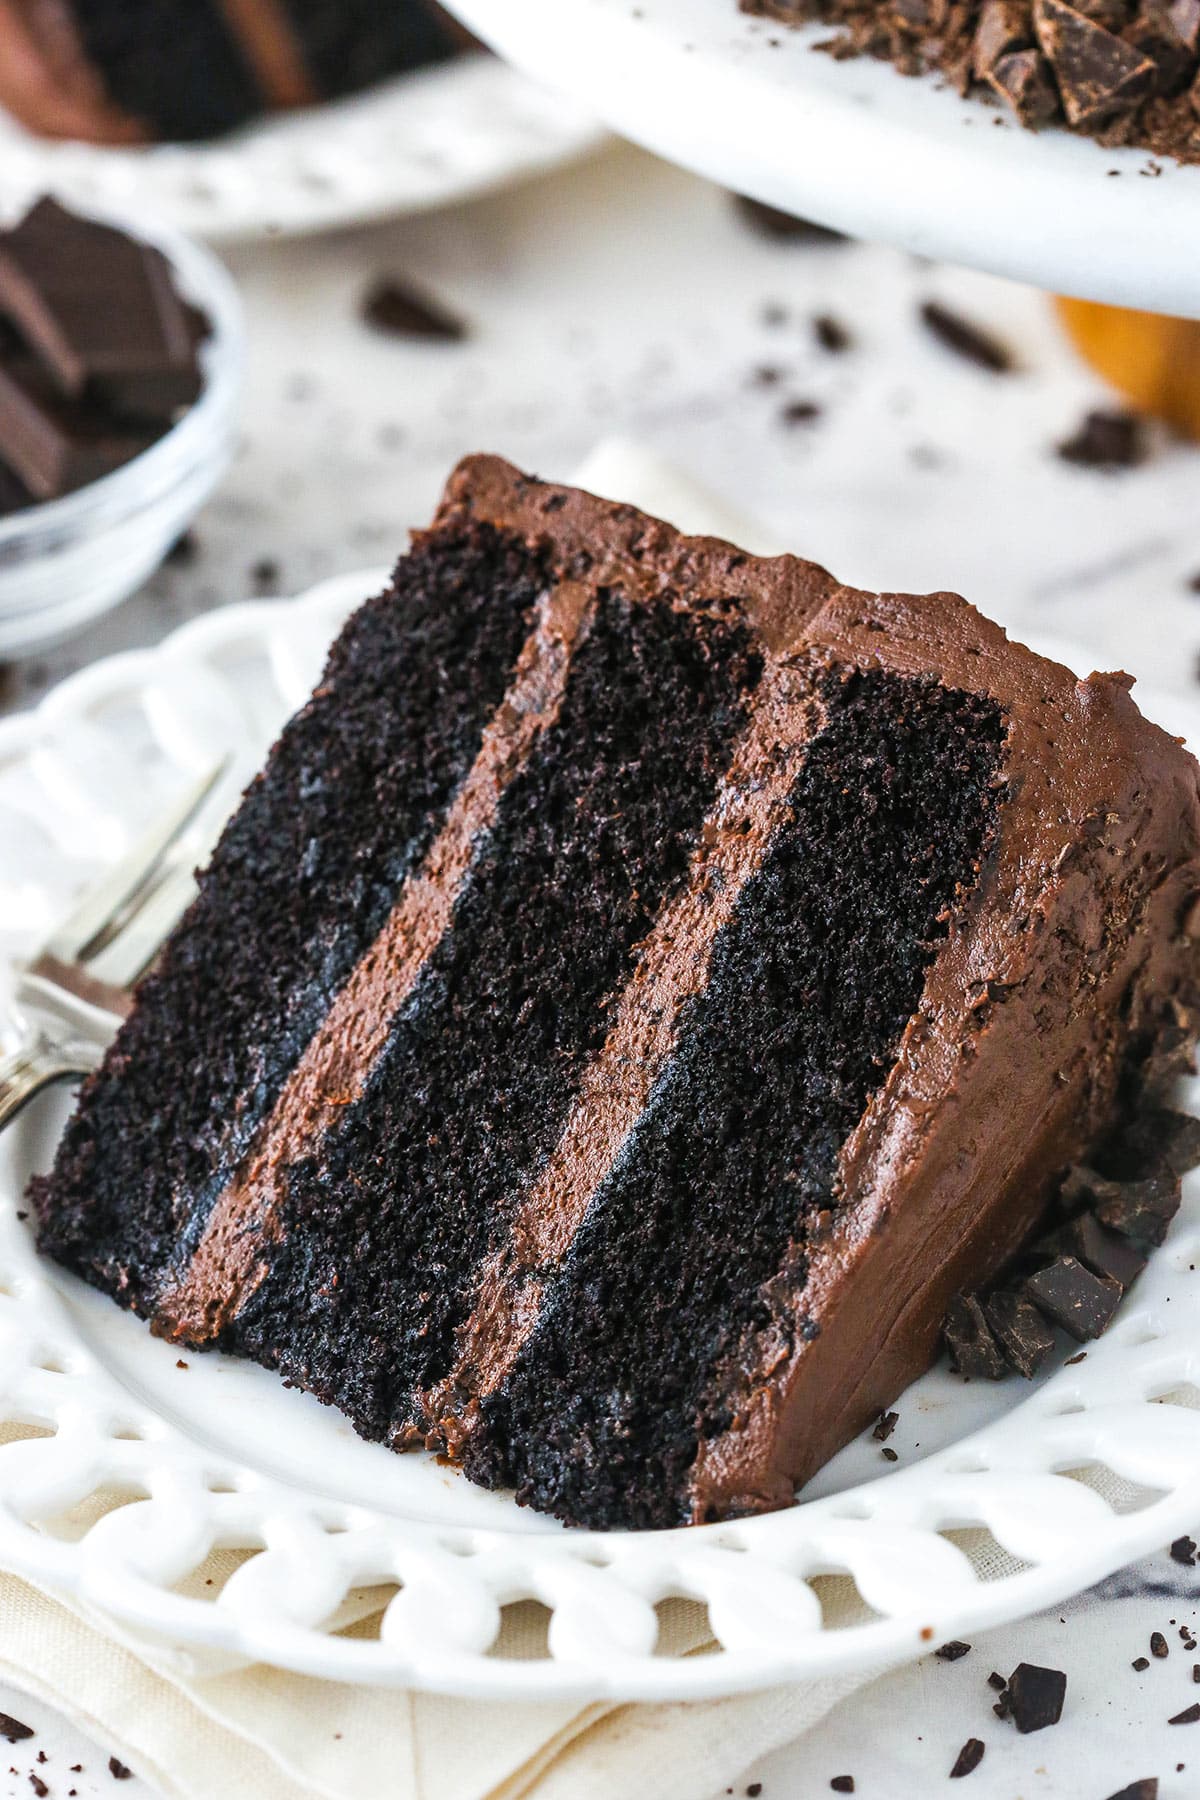
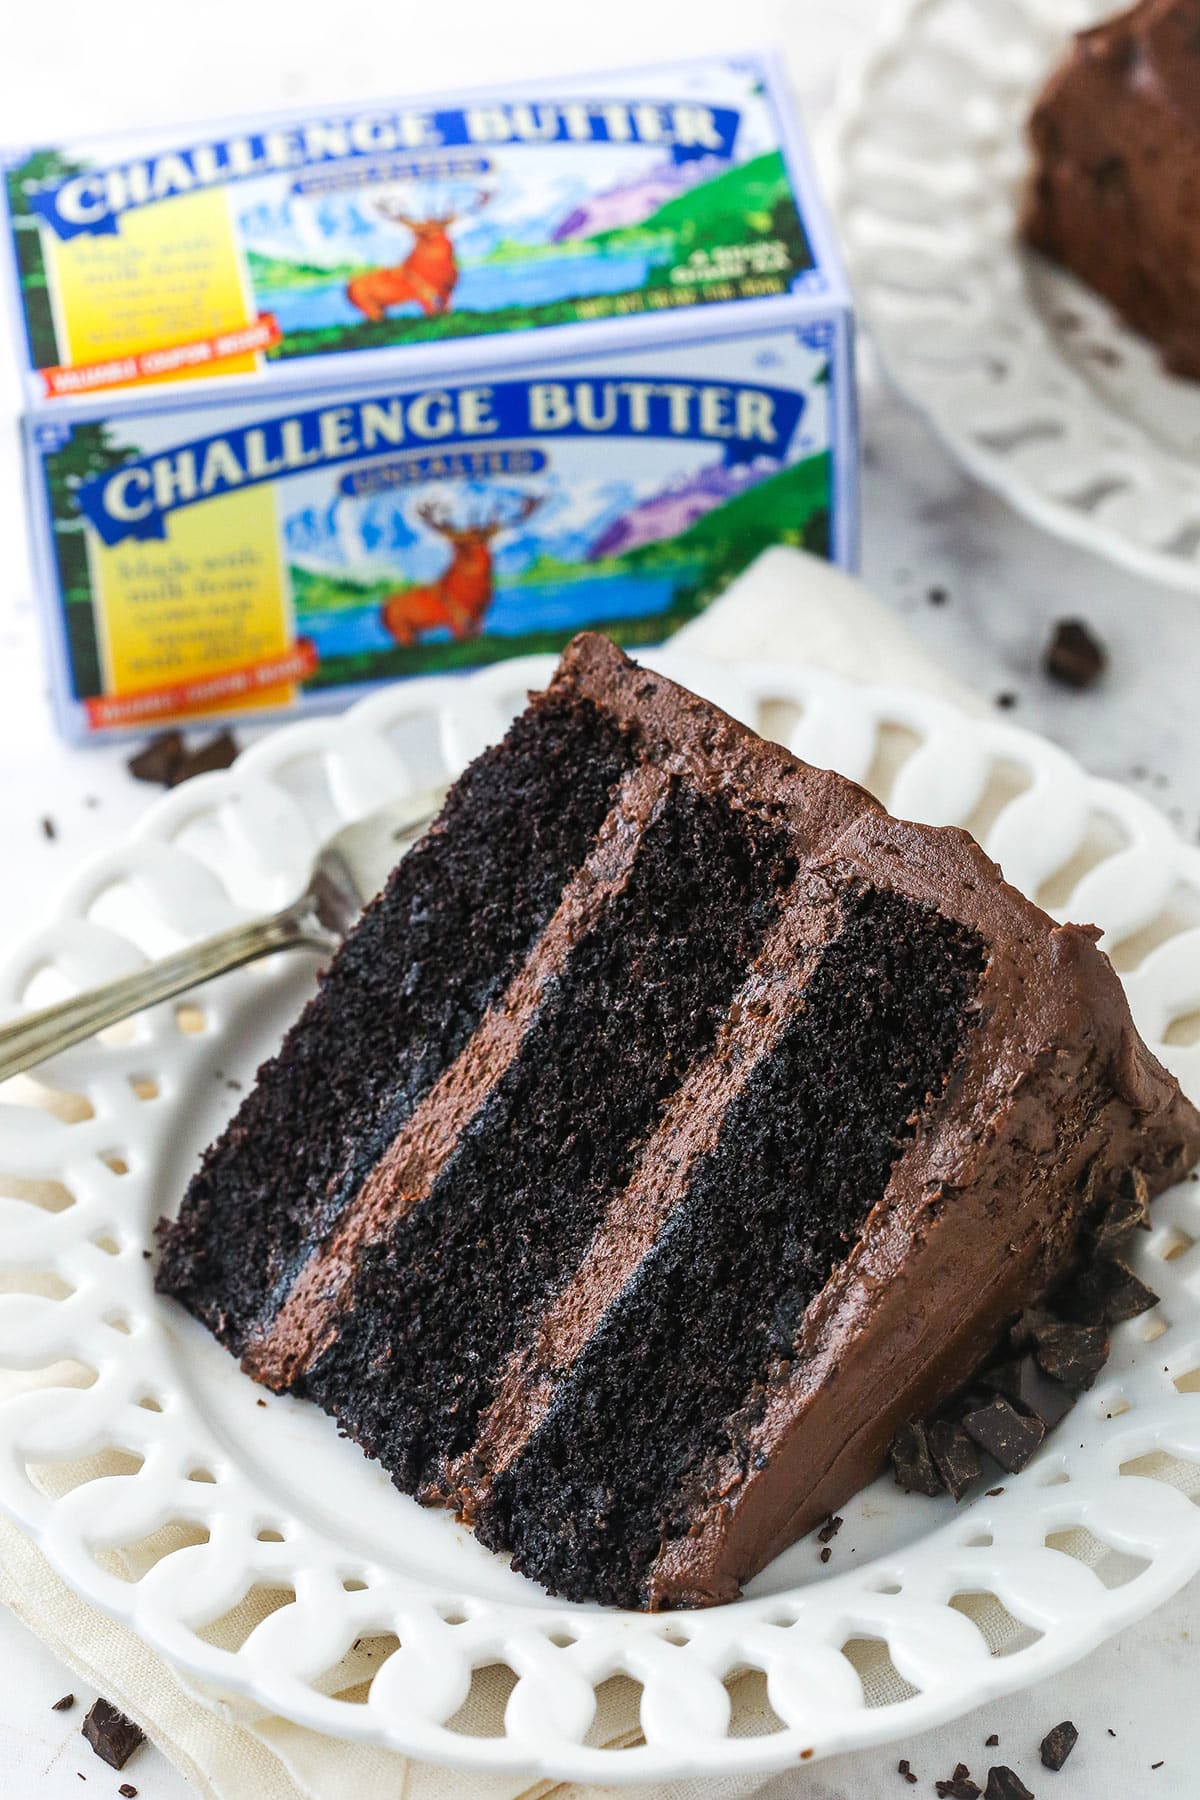
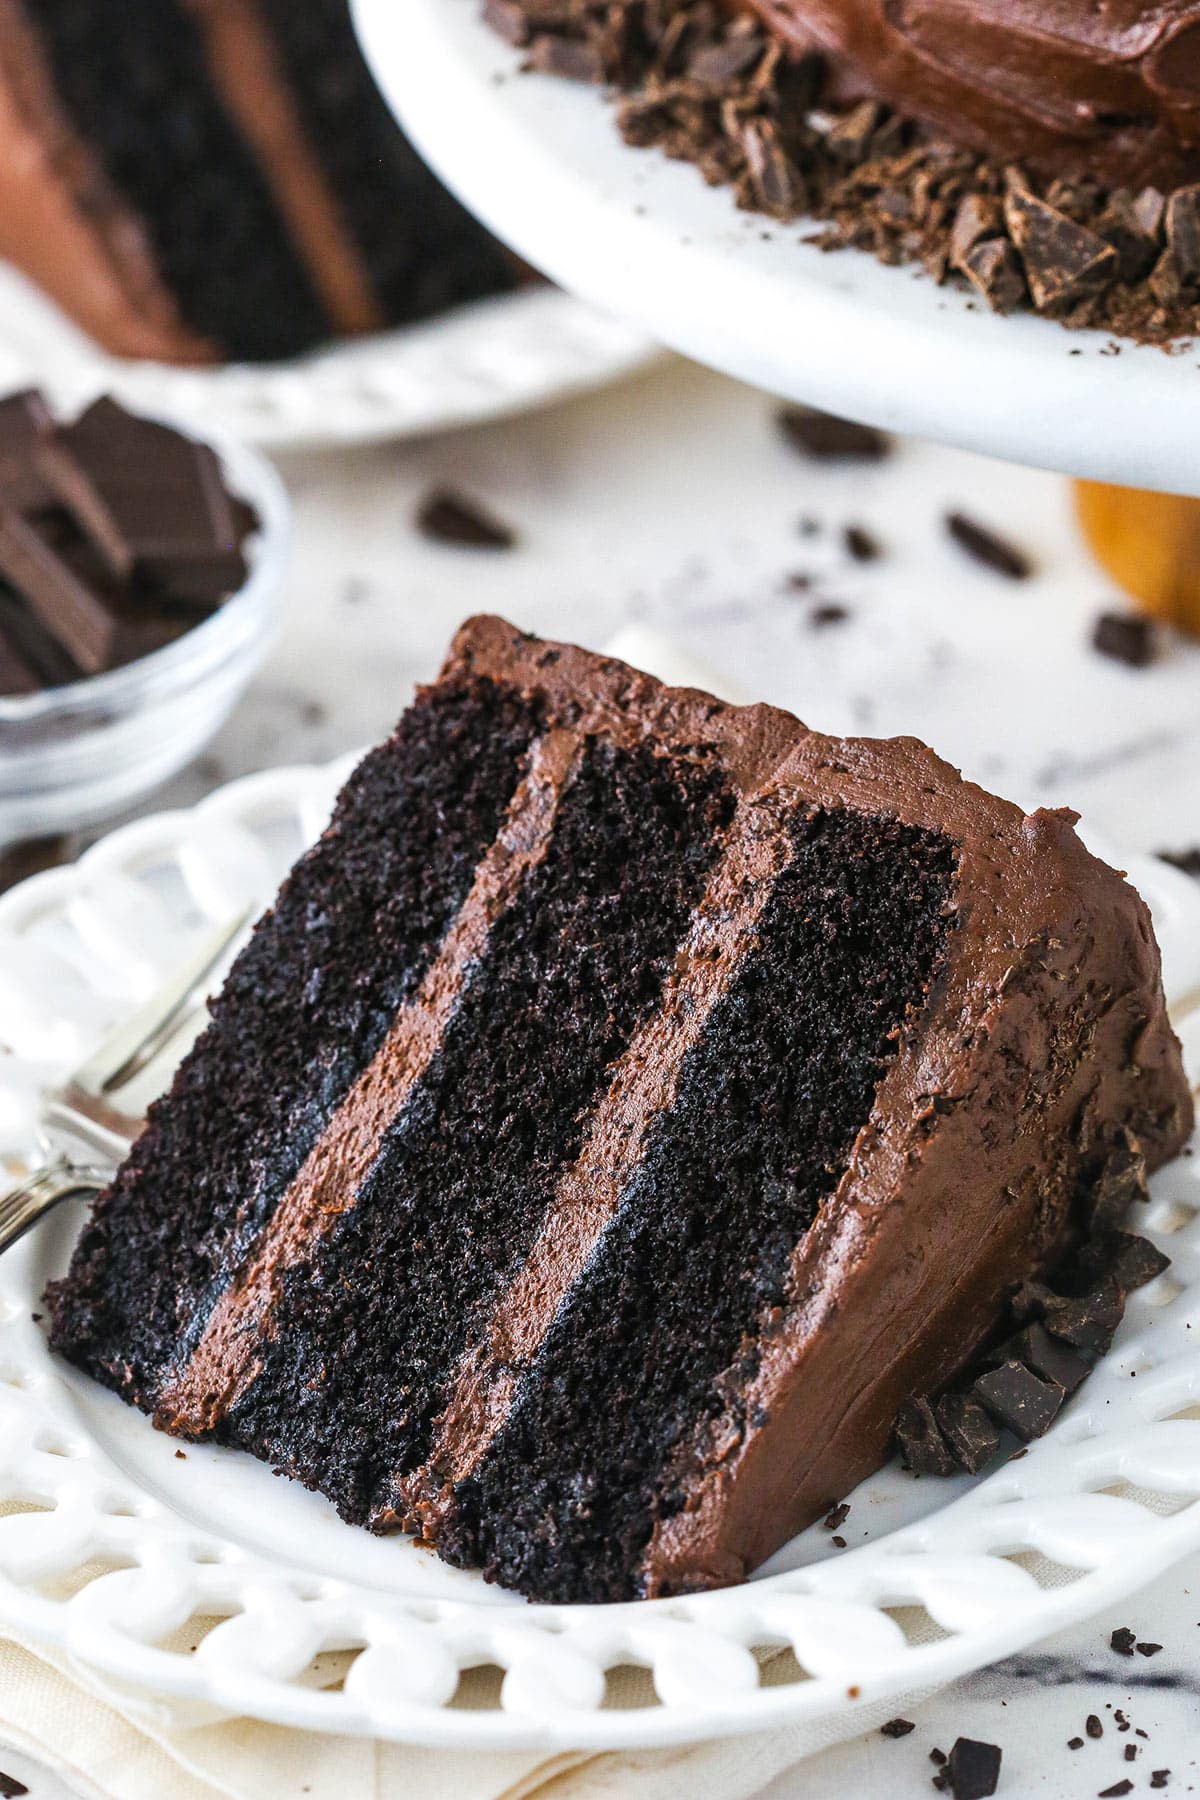
I have totally fallen in love with this cake. The texture and flavor are divine and absolutely worth every moment of effort. I say that with a lot of weight behind it, since my regular chocolate cake recipe is one that I love so much. That one is rich and chocolatey too, but this one takes it to another level. This isn’t just chocolate cake. This cake has a tighter crumb that makes it a little more dense. It truly is a fudgy, rich chocolate experience.
What is Devil’s Food Cake?
Devil’s Food Cake has been around since the late 1900s and is known for being a deeply dark chocolate cake. Typically it uses dutch-processed cocoa powder, baking soda, sour cream and coffee to contribute to the dark color and deep flavor of the cake.
Dutch-process cocoa is processed with an alkali to neutralize its acidity, giving it a darker color and deeper flavor. But because of the lower acidity, you need to add other acid to activate the baking soda. That’s where the sour cream and coffee come in. The coffee also intensifies the chocolate flavor.
What’s the difference between Devil’s Food Cake and Red Velvet Cake?
Devil’s Food Cake is truly a chocolate cake. Red Velvet Cake has a touch of chocolate flavor from a bit of cocoa that’s added, but isn’t intensely chocolate. Instead, red velvet typically uses buttermilk and vinegar to give it’s classic tangy flavor.
Ingredients You’ll Need
I’m often asked about substitutions, but for the best results, you’ll want to use these ingredients.
For The Cake
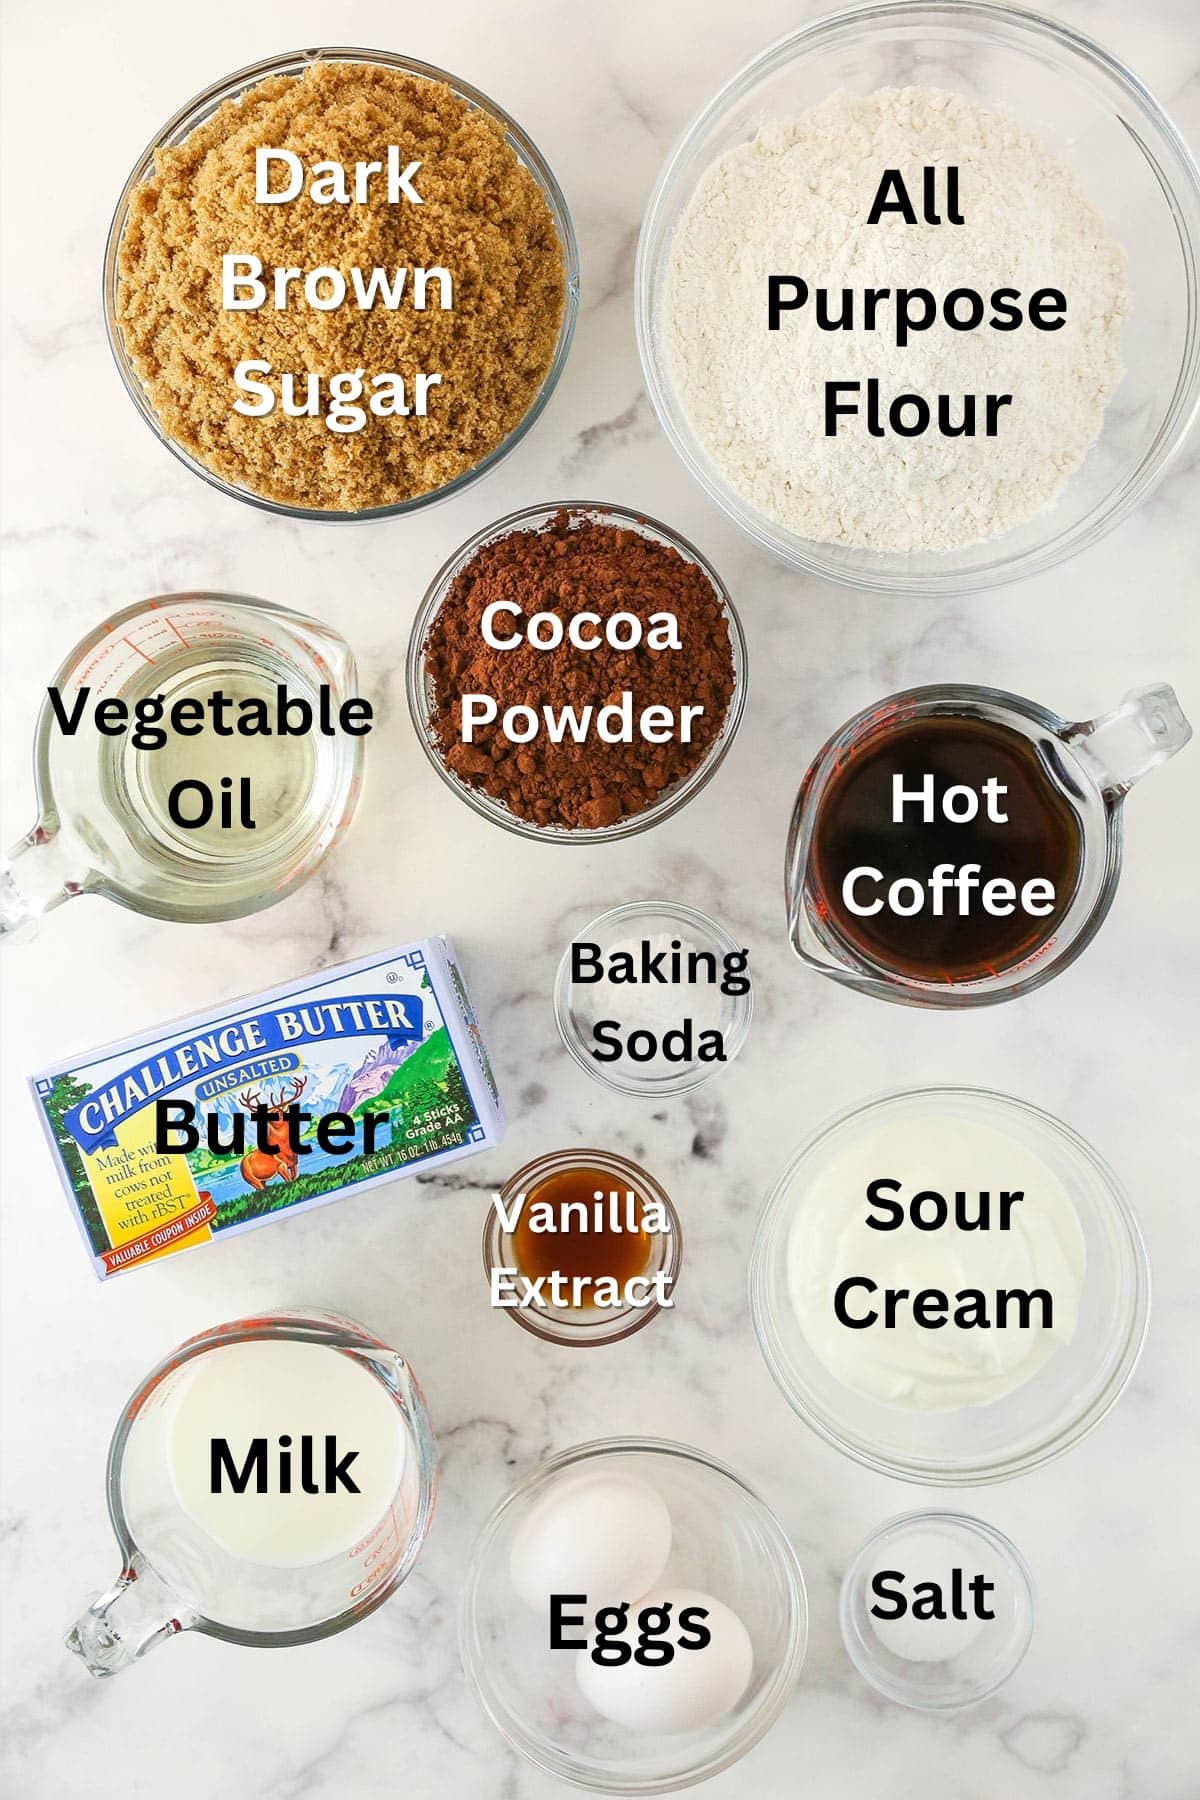
- All Purpose Flour
- Cocoa Powder: This cake uses Dutch-processed cocoa powder, not regular unsweetened cocoa powder. You’ll want to make sure to use the right kind to get the best results.
- Baking Soda: This interacts with the sour cream and other acidic ingredients to help the cake rise properly.
- Salt: For flavor. A must-have.
- Unsalted Butter: Always important for great flavor. I used my favorite Challenge Butter. Challenge Butter is a high quality butter that goes from farm to fridge in just two days, ensuring that it’s nice and fresh. It has no added hormones, artificial flavors or fillings, so you can feel good about feeding it to your family. If you haven’t tried it before, you definitely need to. The flavor is wonderful.
- Vegetable Oil: For an extra moist cake.
- Dark Brown Sugar: While you could use light brown sugar, the dark brown gives even more flavor and moisture to the cake.
- Vanilla Extract
- Eggs: Be sure to use large eggs.
- Sour Cream: Full fat sour cream is best. The sour cream adds acidity needed for the cake to rise properly.
- Milk: For added moisture and fluffiness.
- Coffee: Hot coffee amplifies the chocolate flavor.
For The Buttercream
- Unsalted Butter: I also used my Challenge Butter here.
- Semi Sweet Chocolate: Chopped, so that it’ll melt more evenly.
- Cocoa Powder: Using Dutch-processed cocoa powder again.
- Powdered Sugar: For volume and consistency.
- Salt
- Heavy Whipping Cream: For getting the right consistency.
- Additional Chocolate: Chopped, for decorating
How to make Devil’s Food Cake
To Make the Cake Layers:
Prep: Prepare three 8 inch cake pans with parchment paper circles in the bottom and grease the sides. Preheat oven to 350°F (176°C).
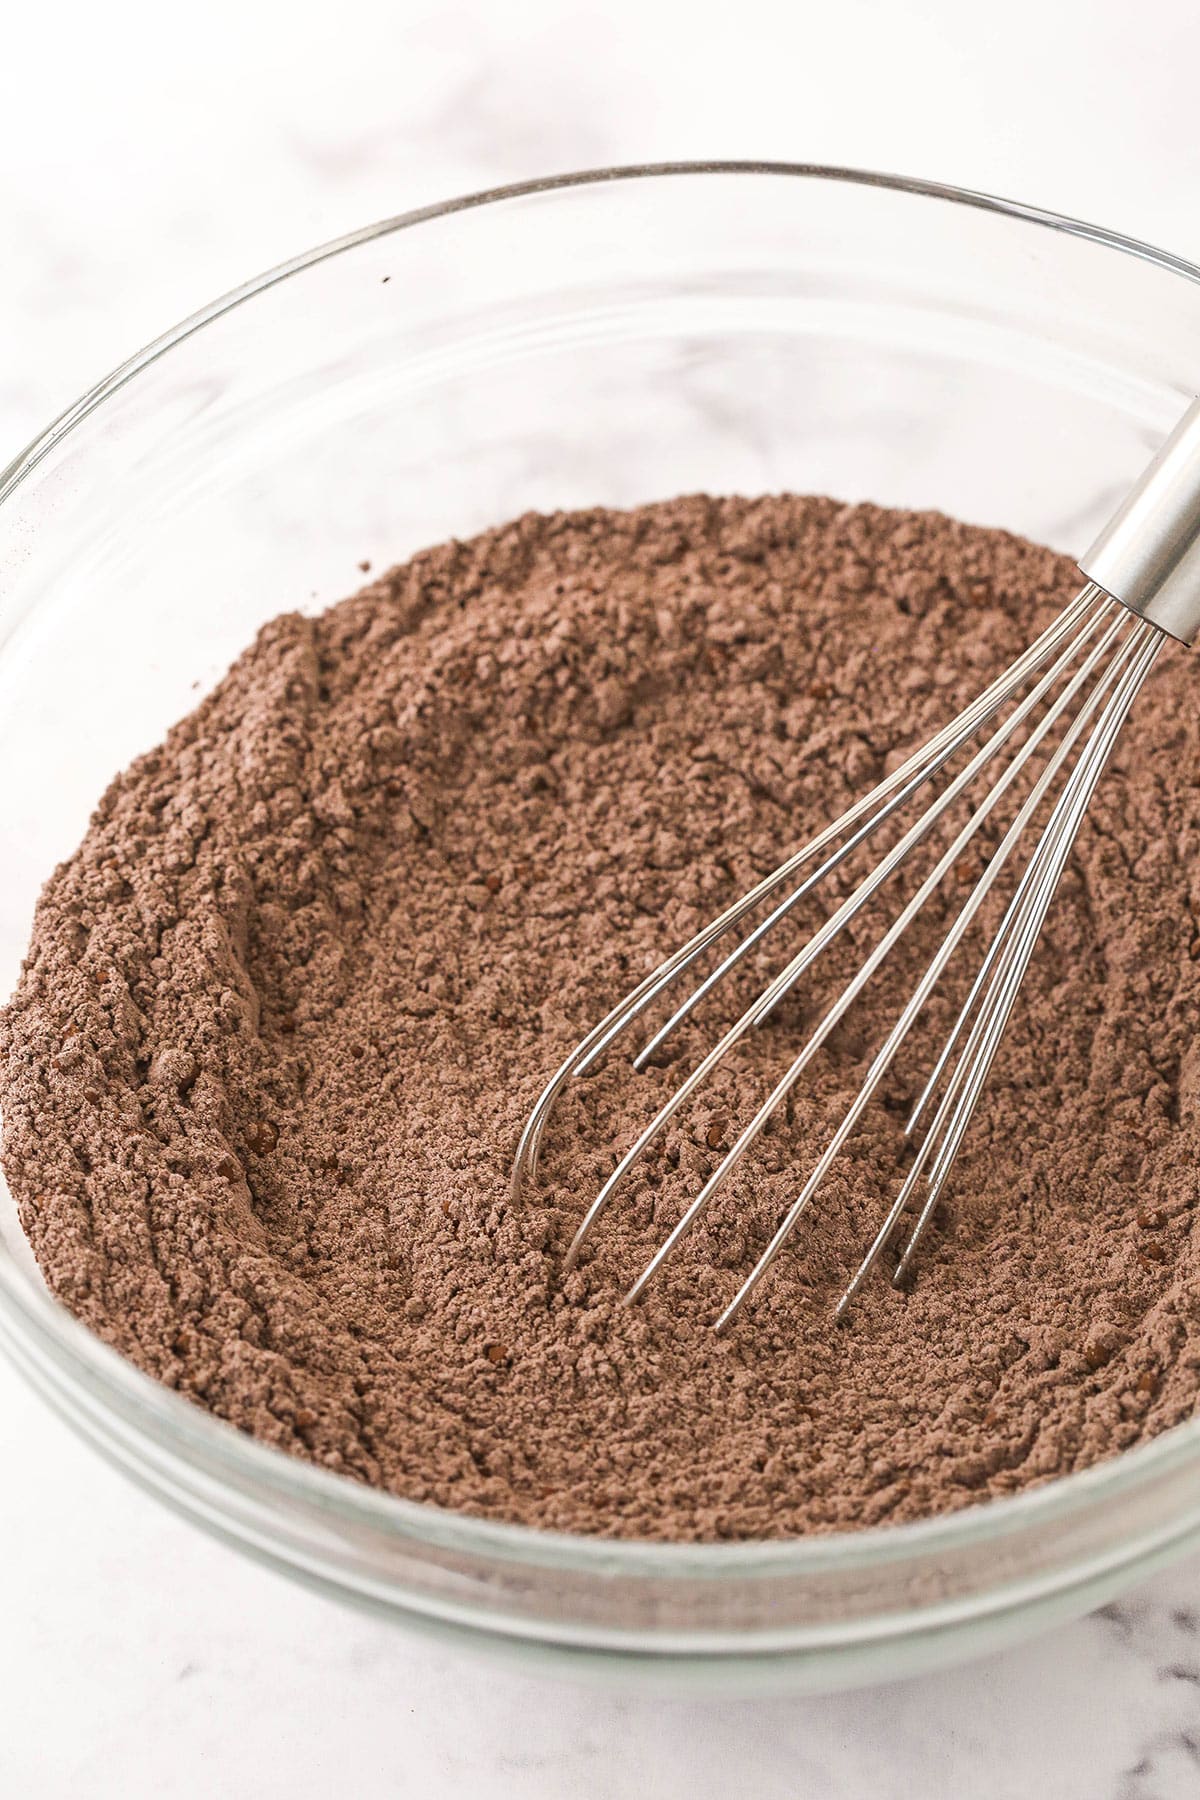
Combine Dry Ingredients: Combine the flour, cocoa powder, baking soda and salt in a medium sized bowl and set aside.
Begin With Creaming: Add the butter, oil, brown sugar and vanilla extract to a large mixer bowl and beat together on medium speed until light in color and fluffy, about 2-3 minutes. Do not skimp on the creaming time.
Add Additional Wet Ingredients: Add the eggs one at a time, mixing until mostly combined after each. Scrape down the sides of the bowl as needed to be sure all ingredients are well incorporated. Add the sour cream and mix until well combined. Add the milk and mix until well combined. The batter may look a little stringy or separated. That’s ok.
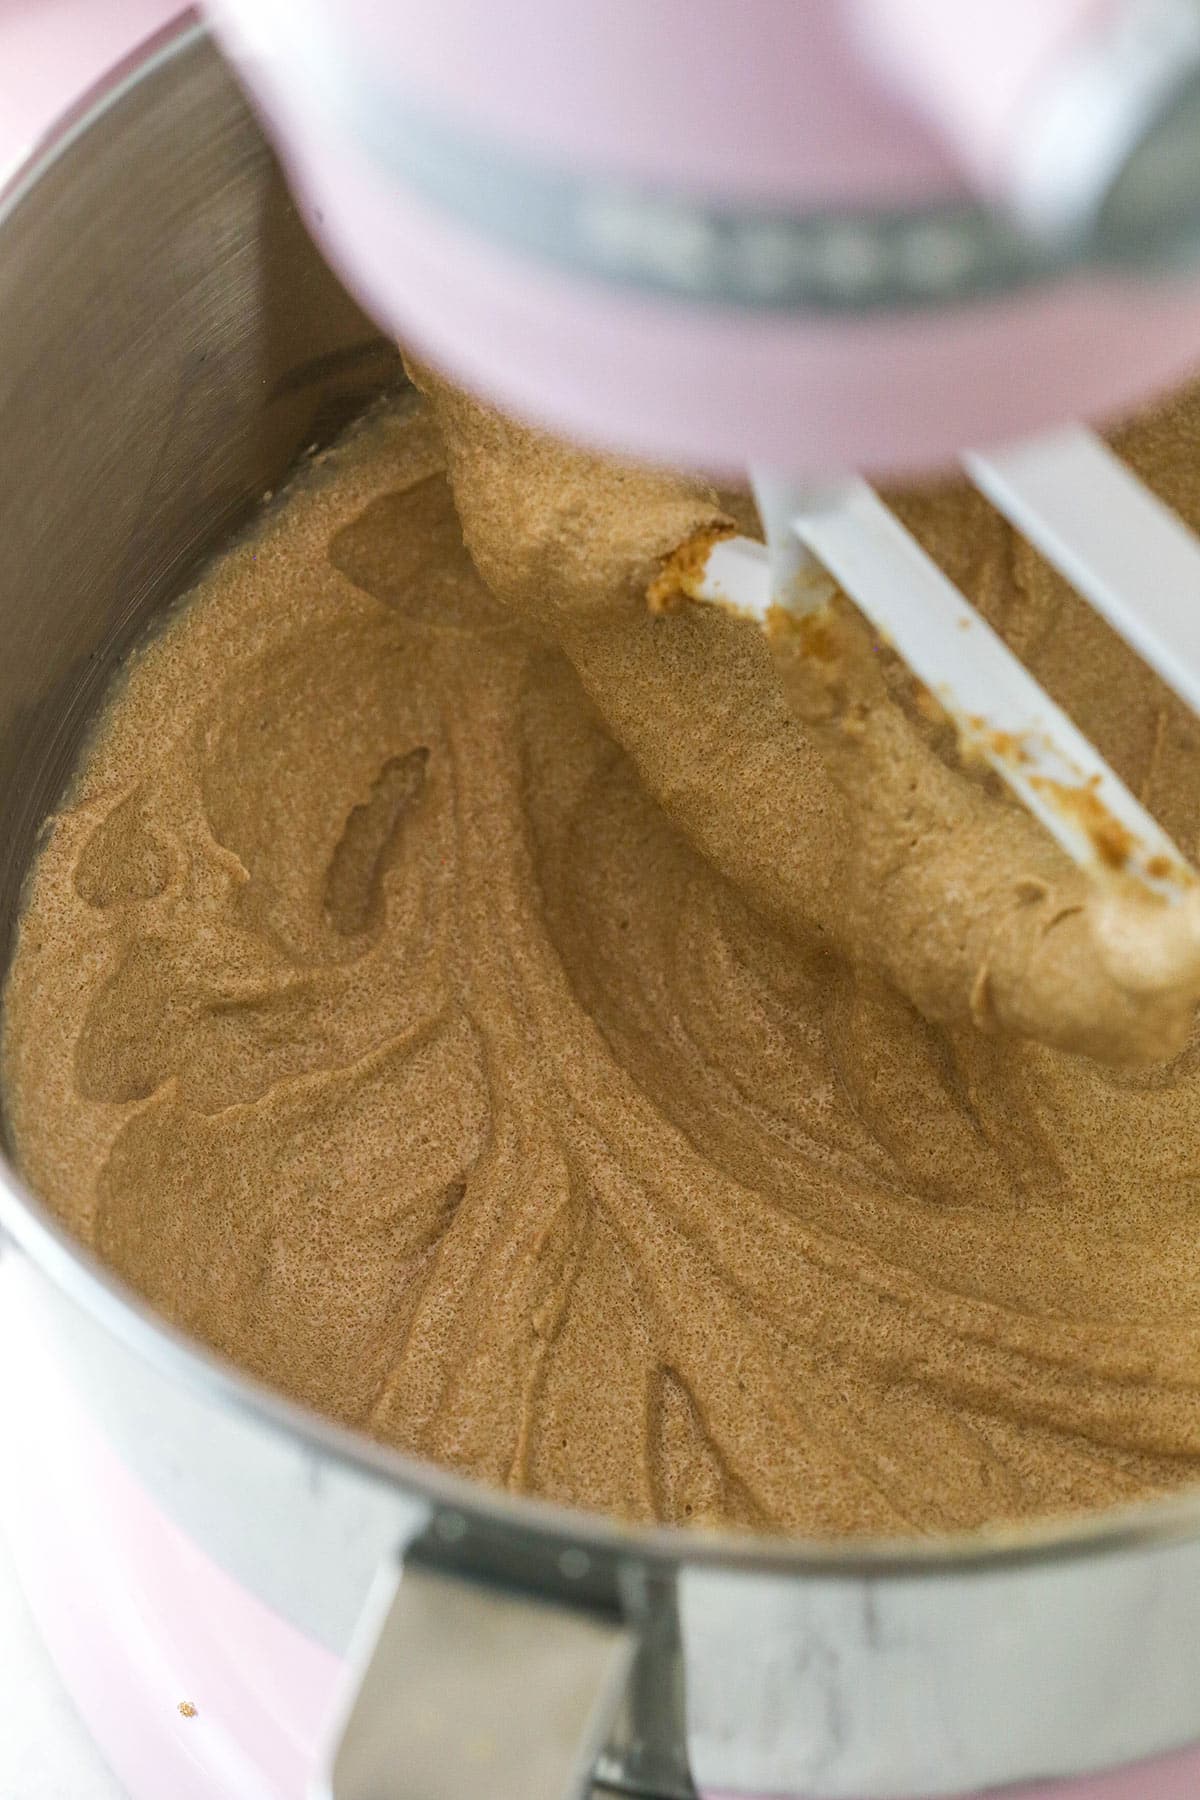
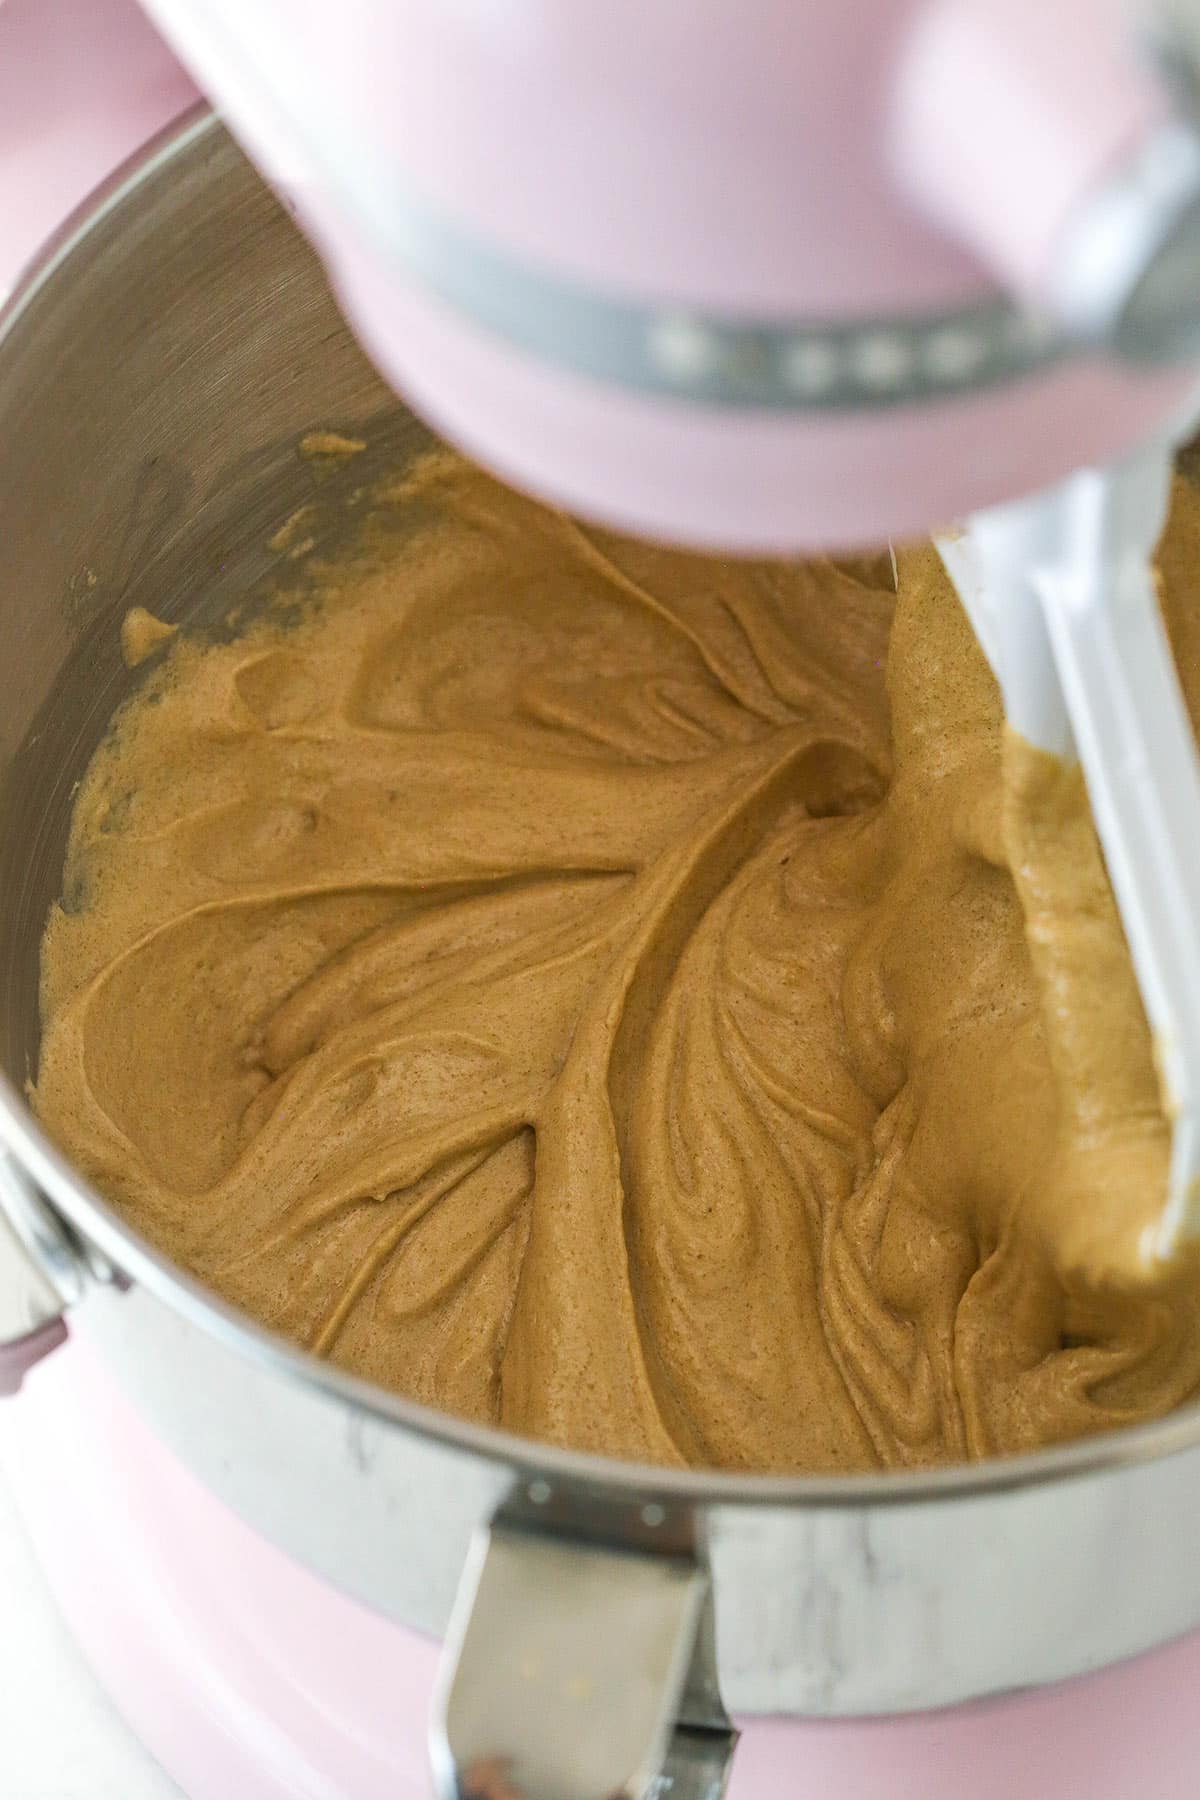
Alternate Dry Ingredients and Coffee: Add half of the dry ingredients to the batter and mix until mostly combined. Carefully add half of the coffee and mix until well combined. Add the remaining dry ingredients and mix until well combined and smooth. Scrape down the sides of the bowl as needed to be sure all ingredients are well incorporated. Add the remaining coffee and mix until well combined and smooth. Scrape down the sides of the bowl as needed to be sure all ingredients are well incorporated. Do not over mix the batter.
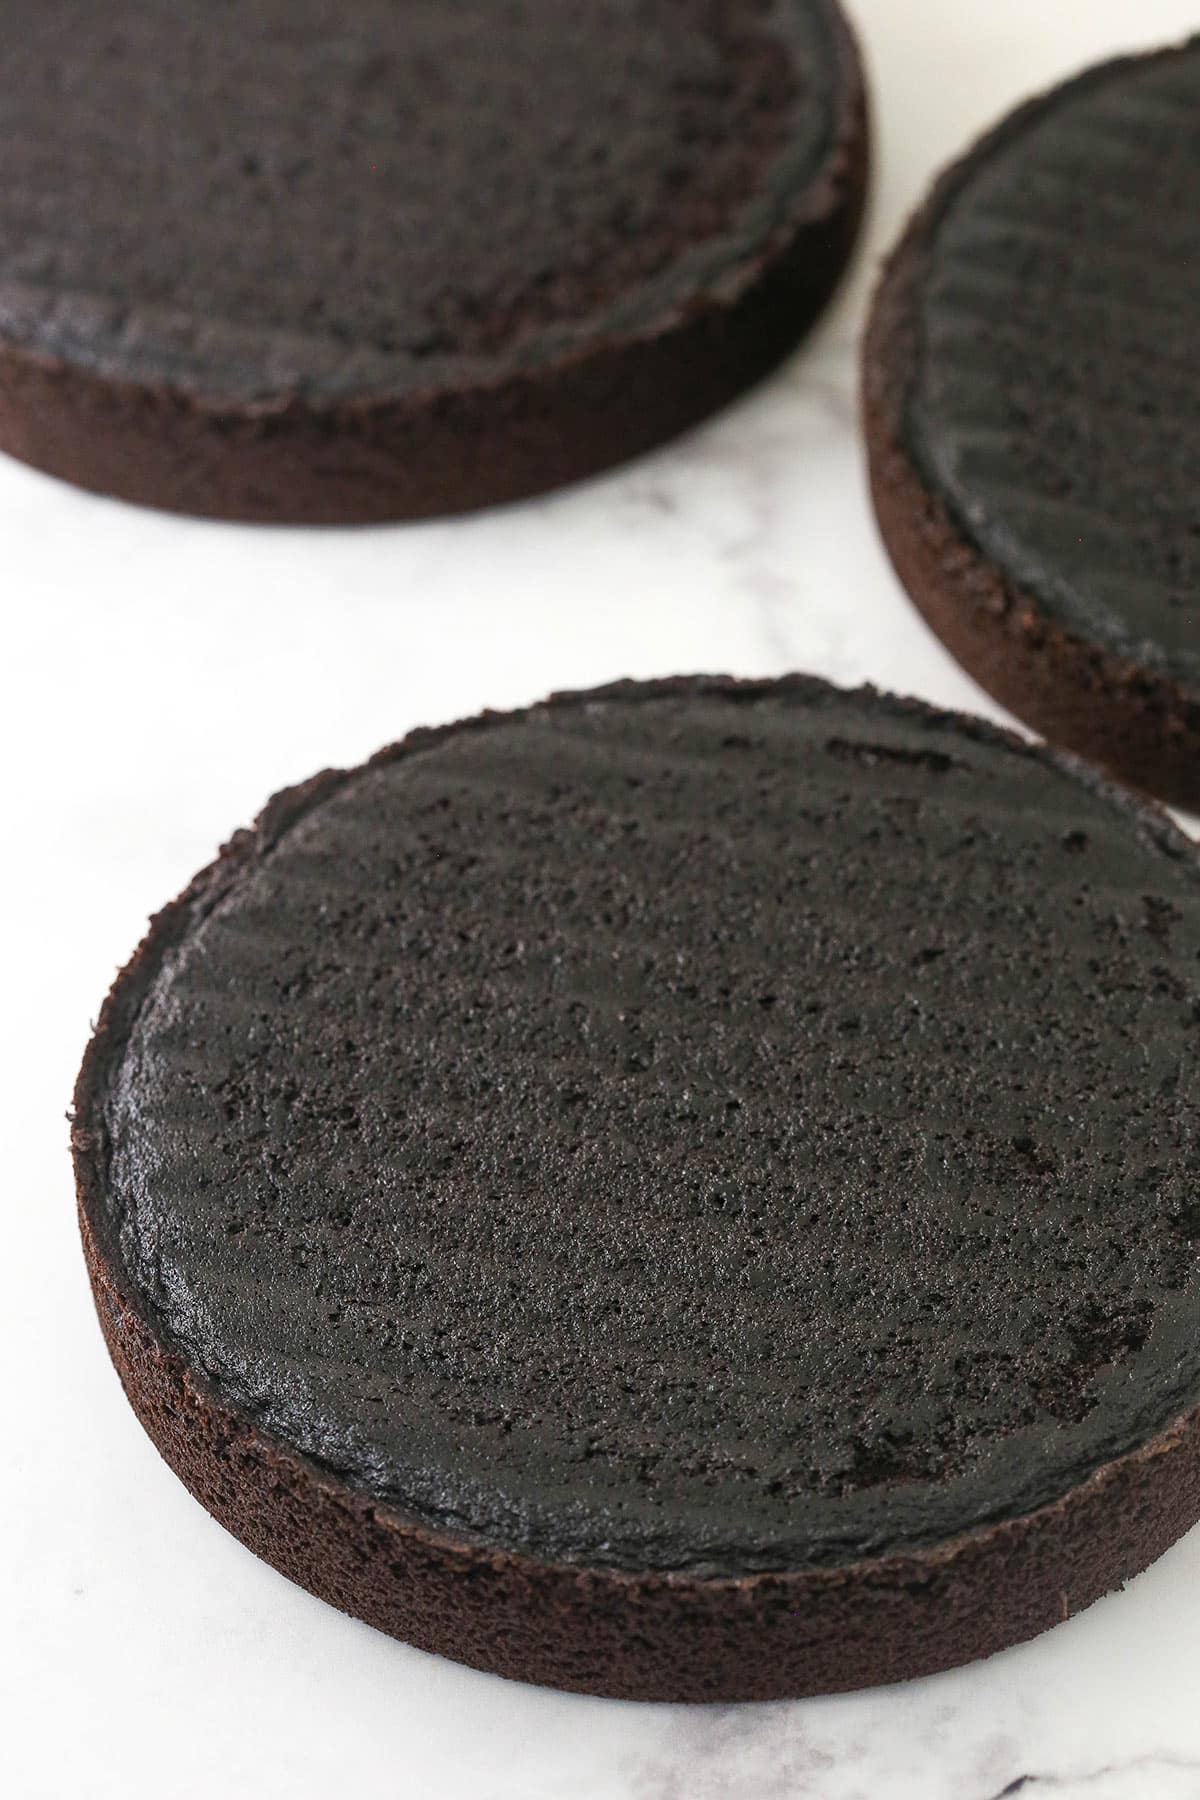
Bake and Cool: Divide the batter evenly between the cakes pans and bake for 23-27 minutes, or until a toothpick comes out with a few crumbs. Remove the cakes from the oven and allow to cool for about 2-3 minutes, then remove to cooling racks to cool completely.
To Make the Chocolate Buttercream:
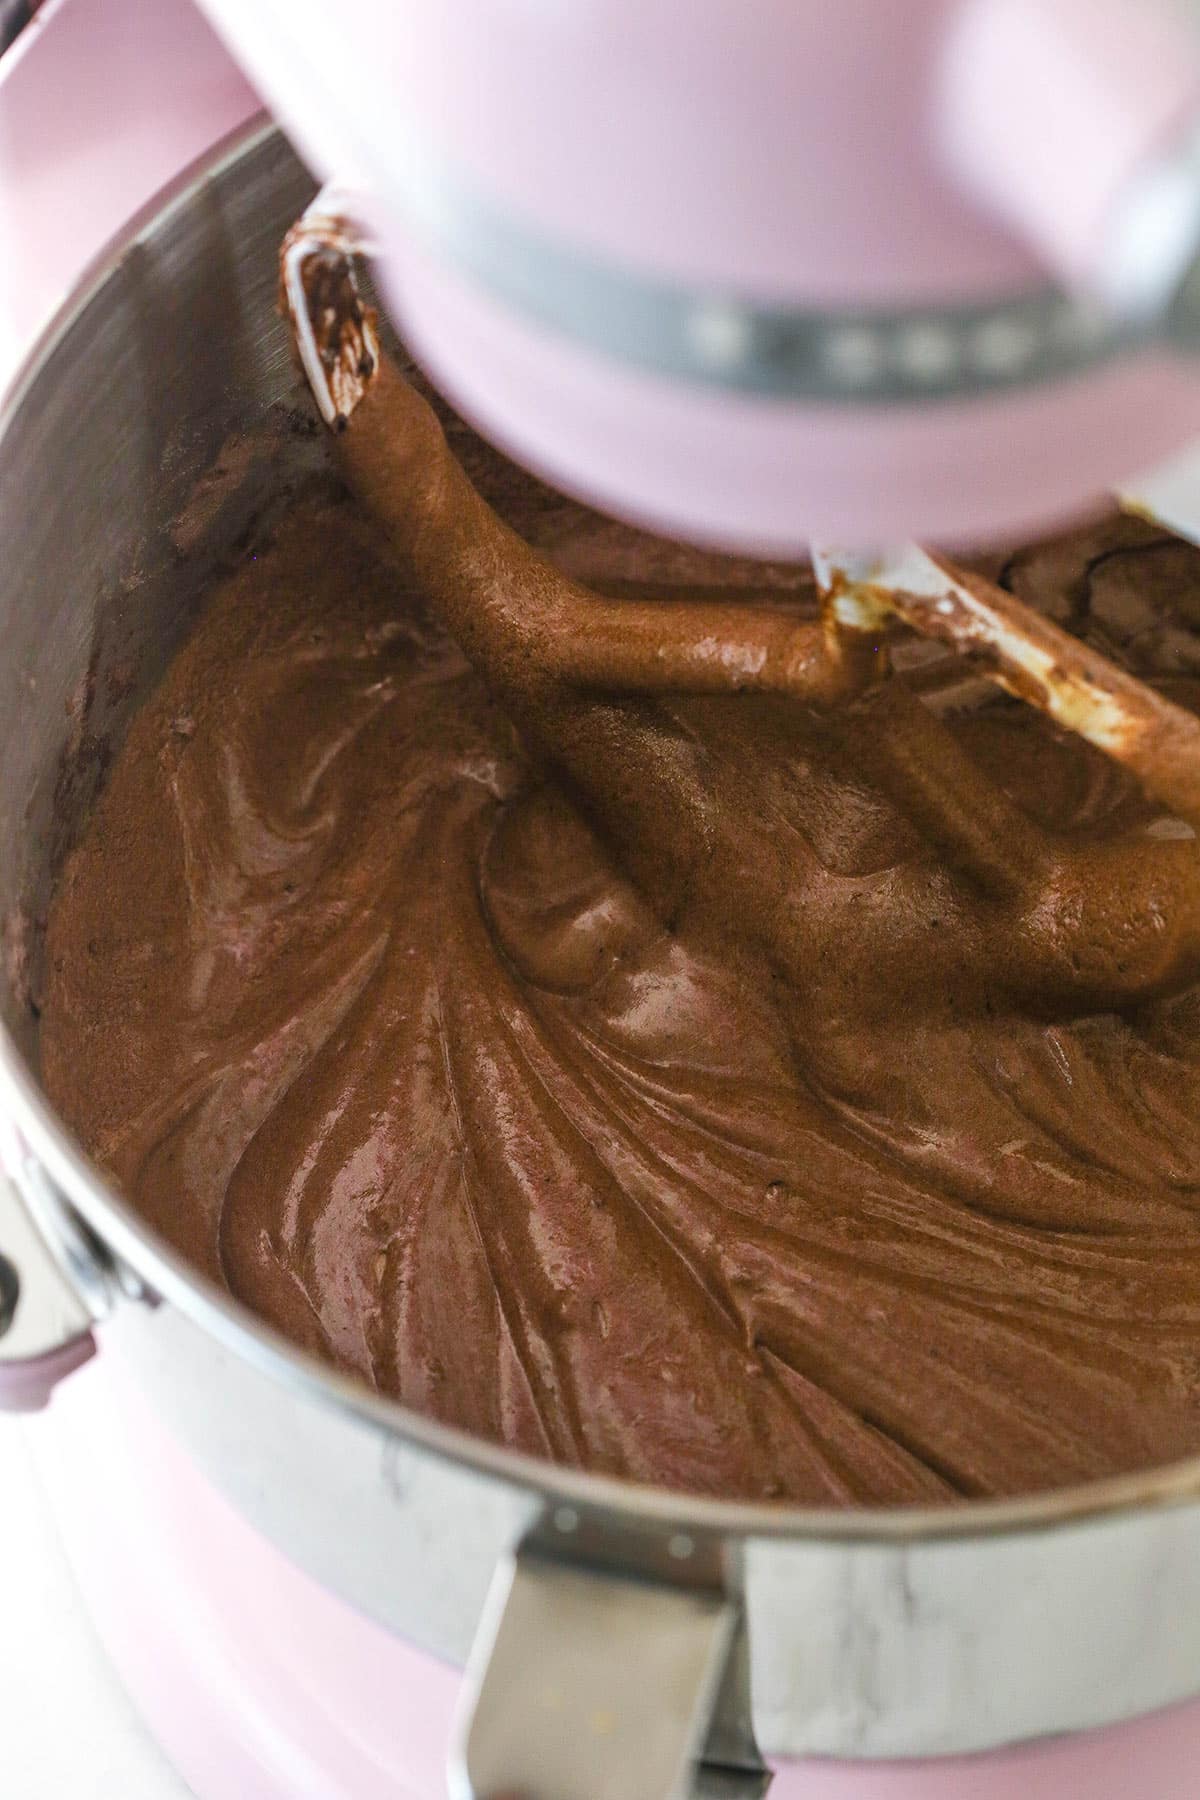
Beat Butter: Add the butter to a large mixer bowl and beat until smooth and creamy.
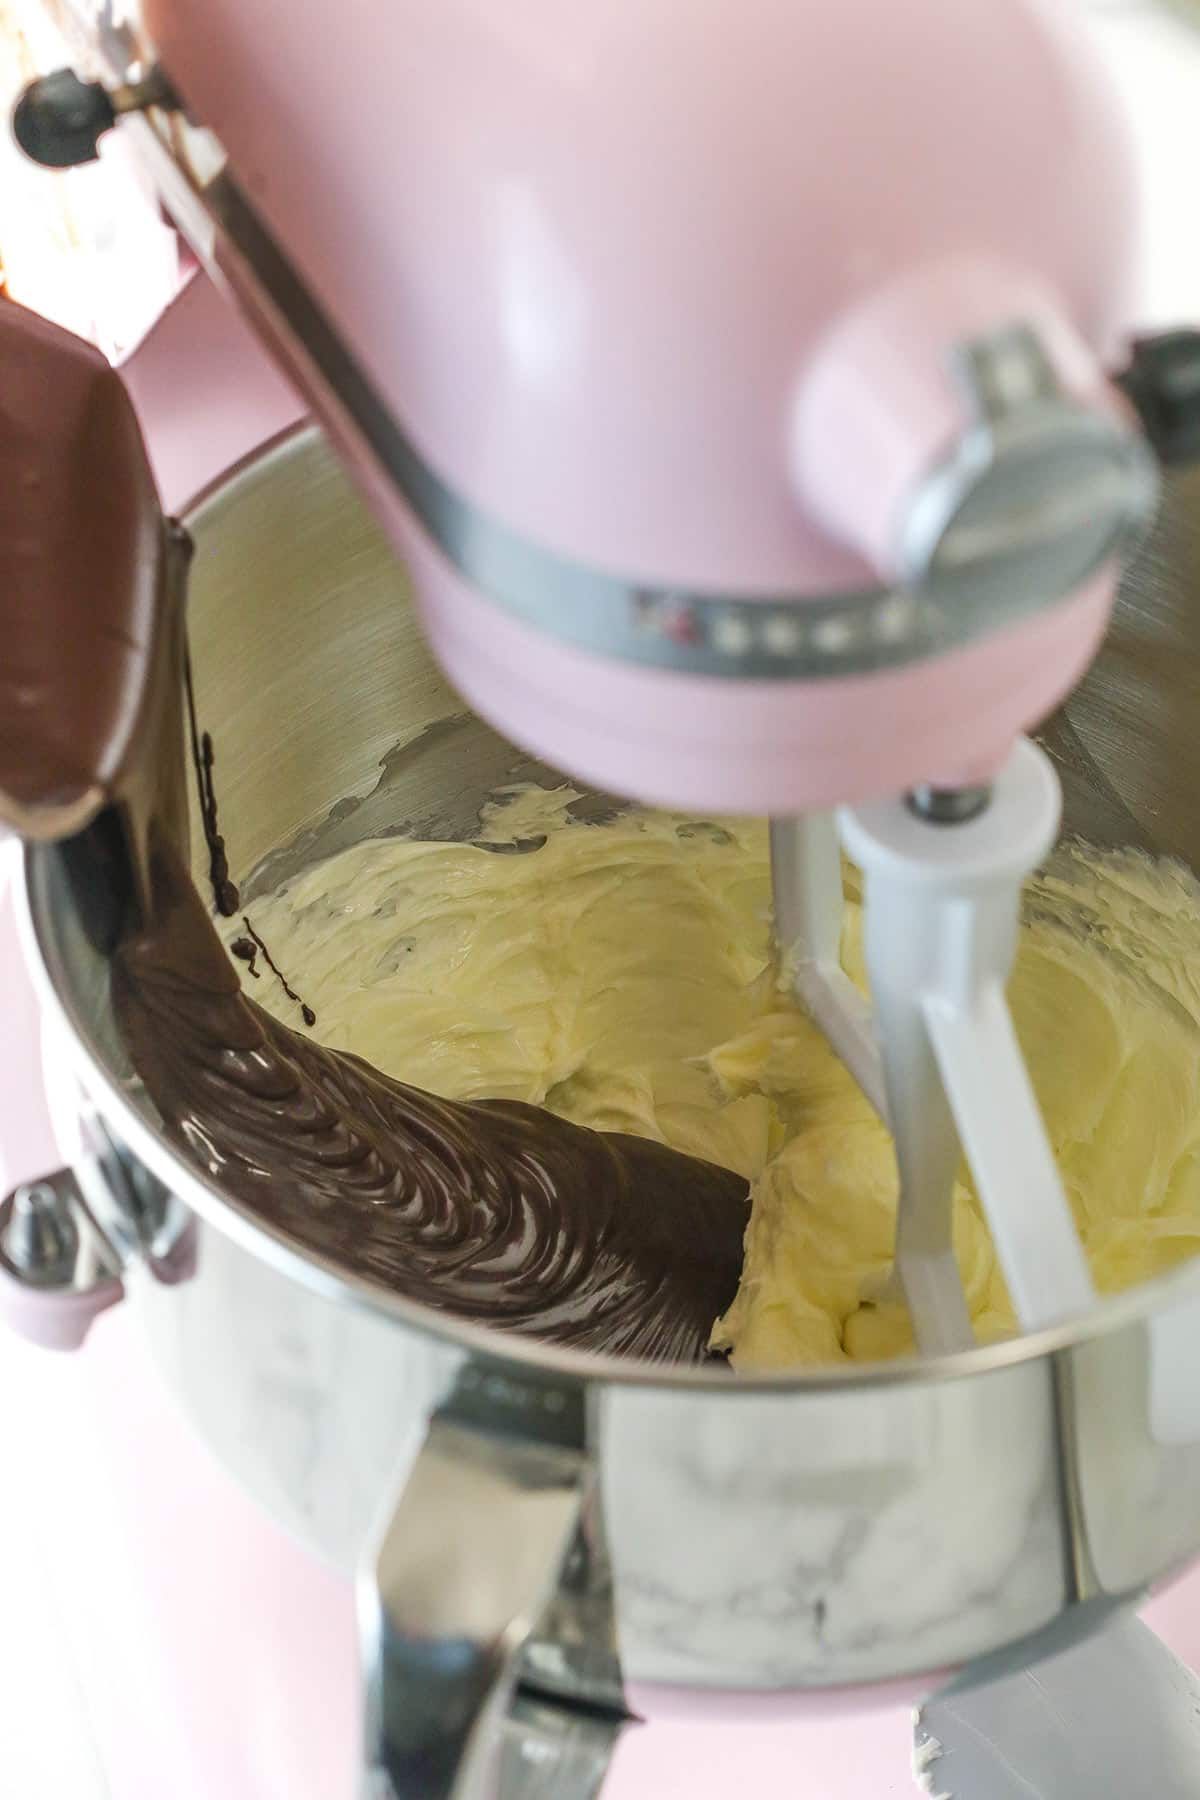
Slowly Add Melted Chocolate: Add the melted chocolate in three parts, mixing until well combined after each addition. Adding the melted chocolate slowly will help avoid having chunks of chocolate form.
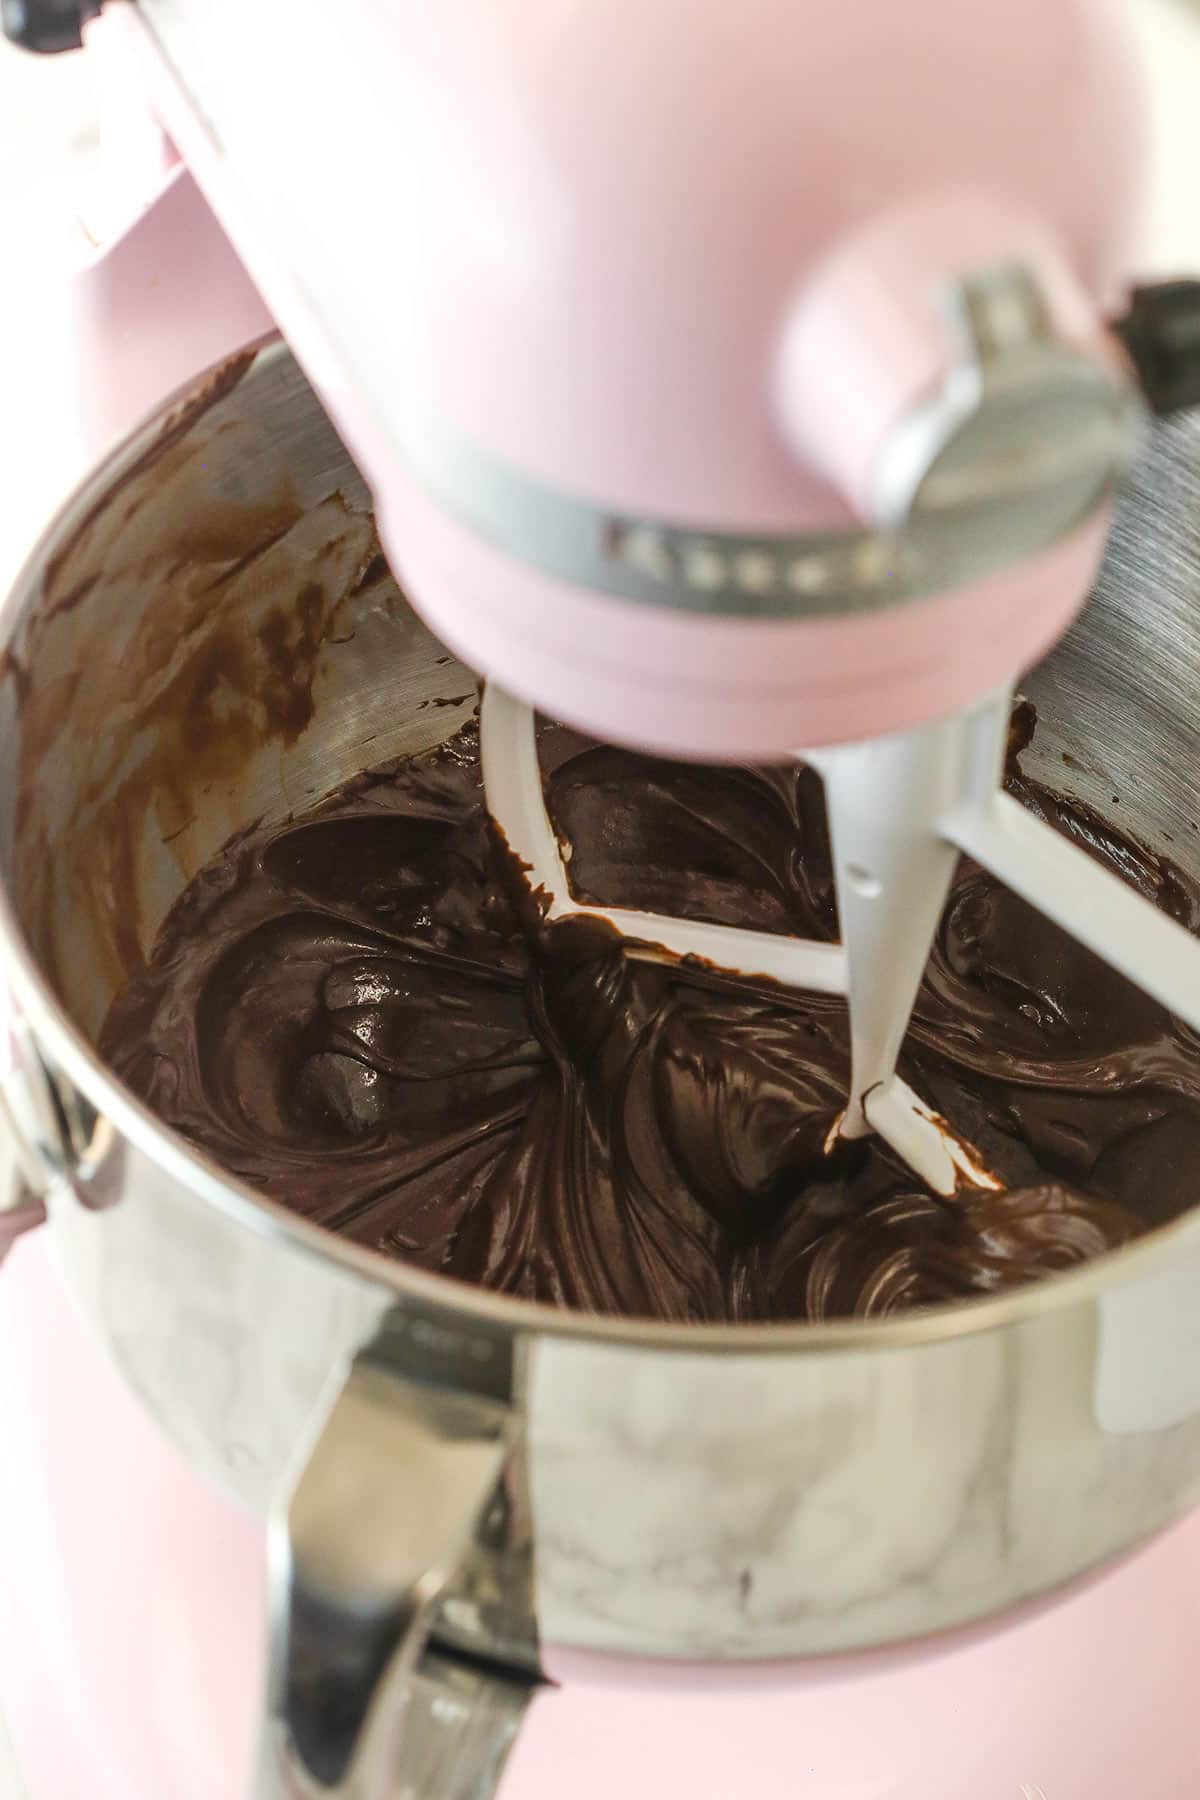
Add Cocoa and Powdered Sugar: Add the cocoa powder and about half of the powdered sugar and mix until well combined
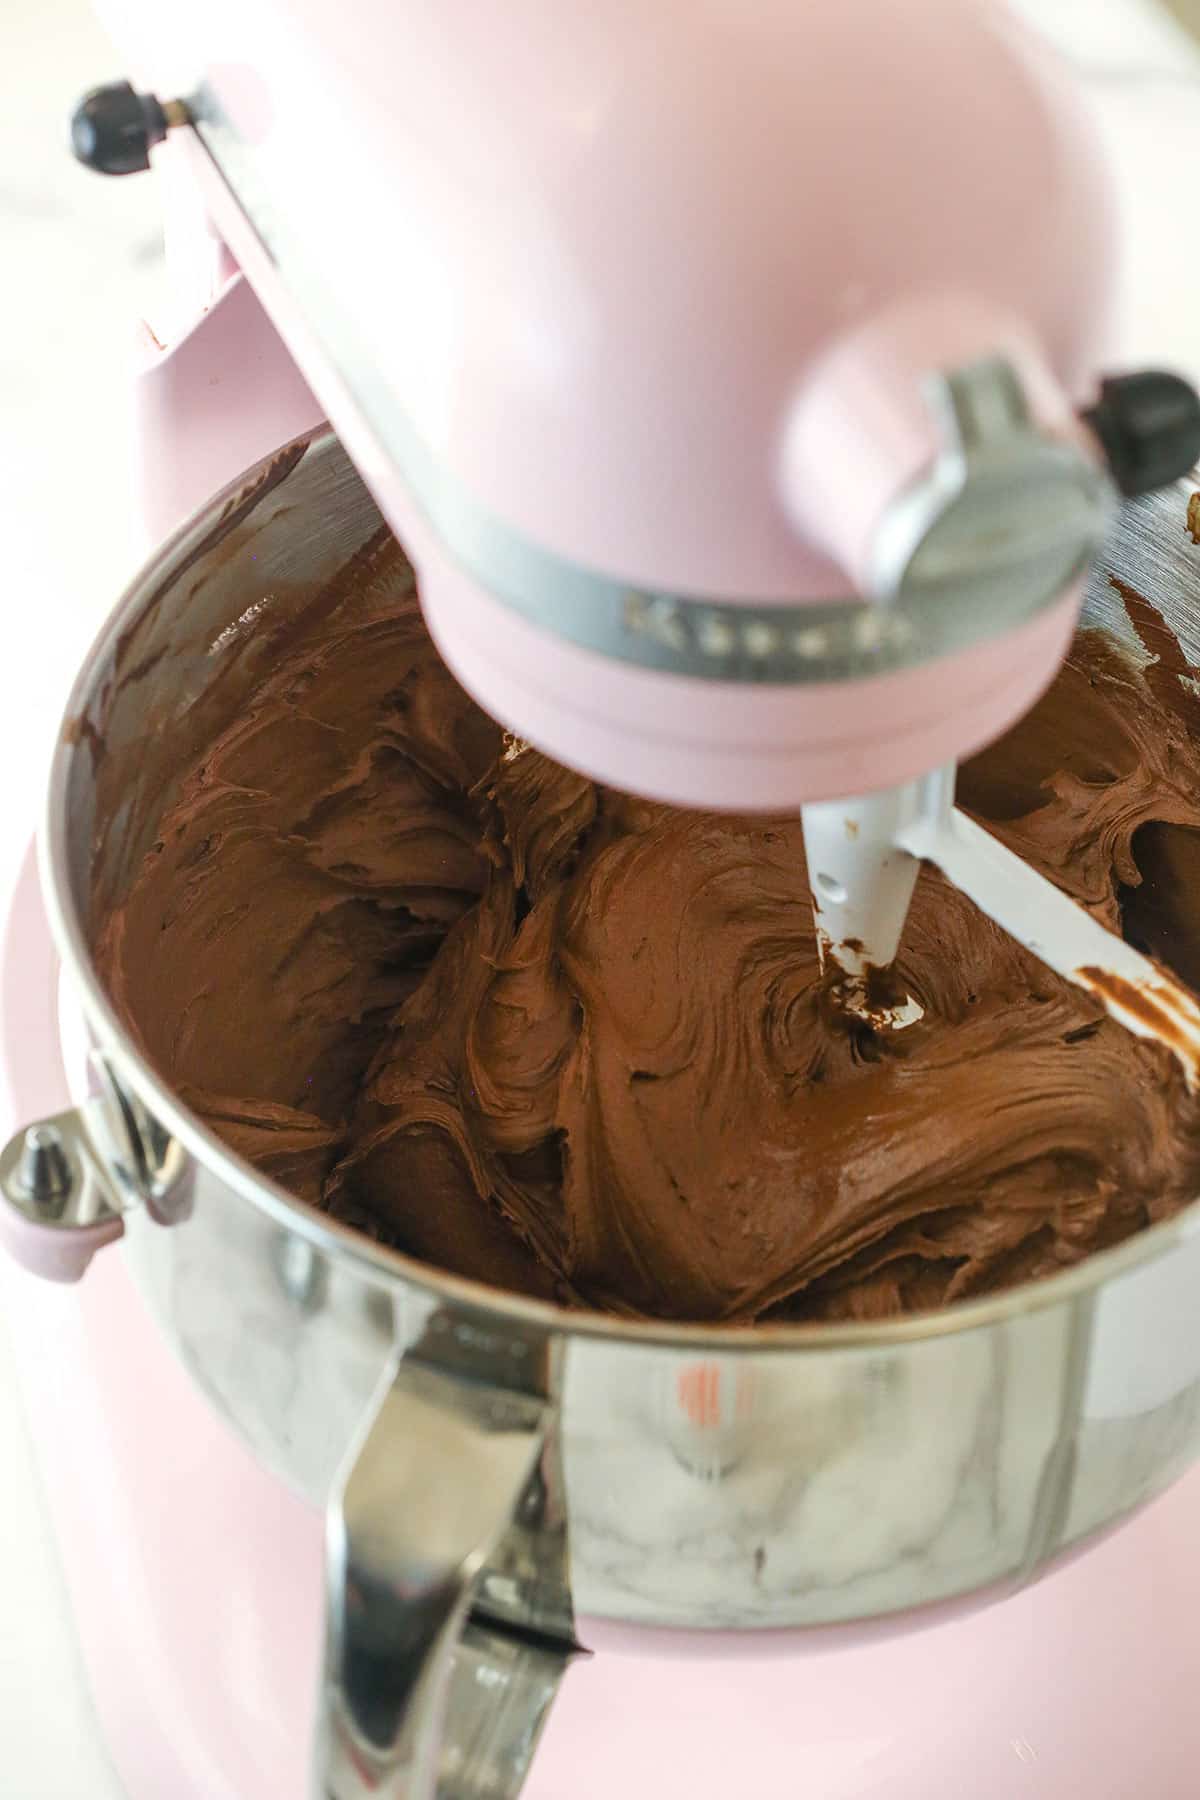
Add Cream: Add the salt and half of the heavy cream and mix until well combined.
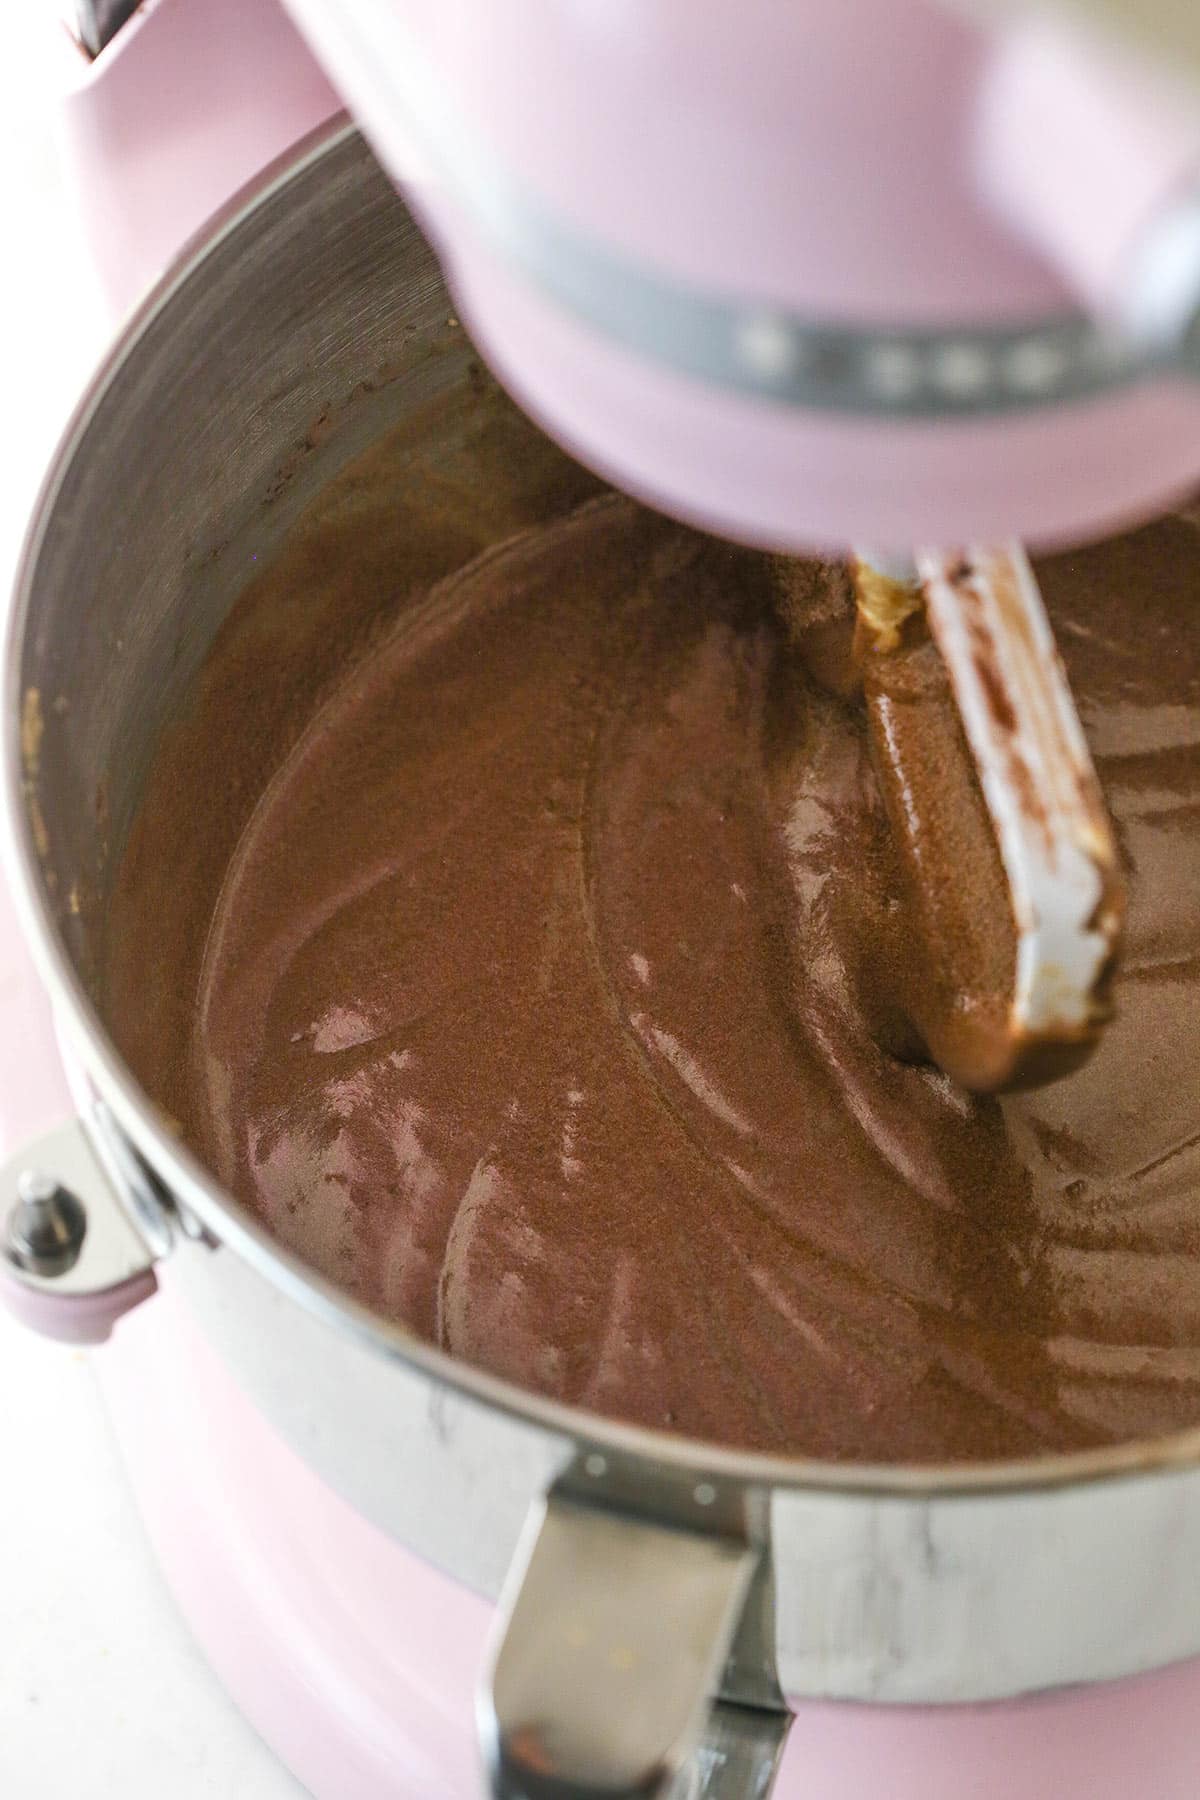
Add Additional Powdered Sugar and Cream: Add the remaining powdered sugar and mix until smooth. Add the remaining heavy cream as needed to get the right consistency of frosting.
To Build the Cake:
Level Cake Layers: To put the cake together, use a large serrated knife to remove the domes from the top of the cakes so that they’re flat. These cakes don’t have a large dome, but I like to make sure they’re completely flat.
Layer Cake With Buttercream: Place the first cake on a serving plate or a cardboard cake round. Spread about 1 cup of frosting evenly on top of the cake. Add the second layer of cake and another cup of frosting.
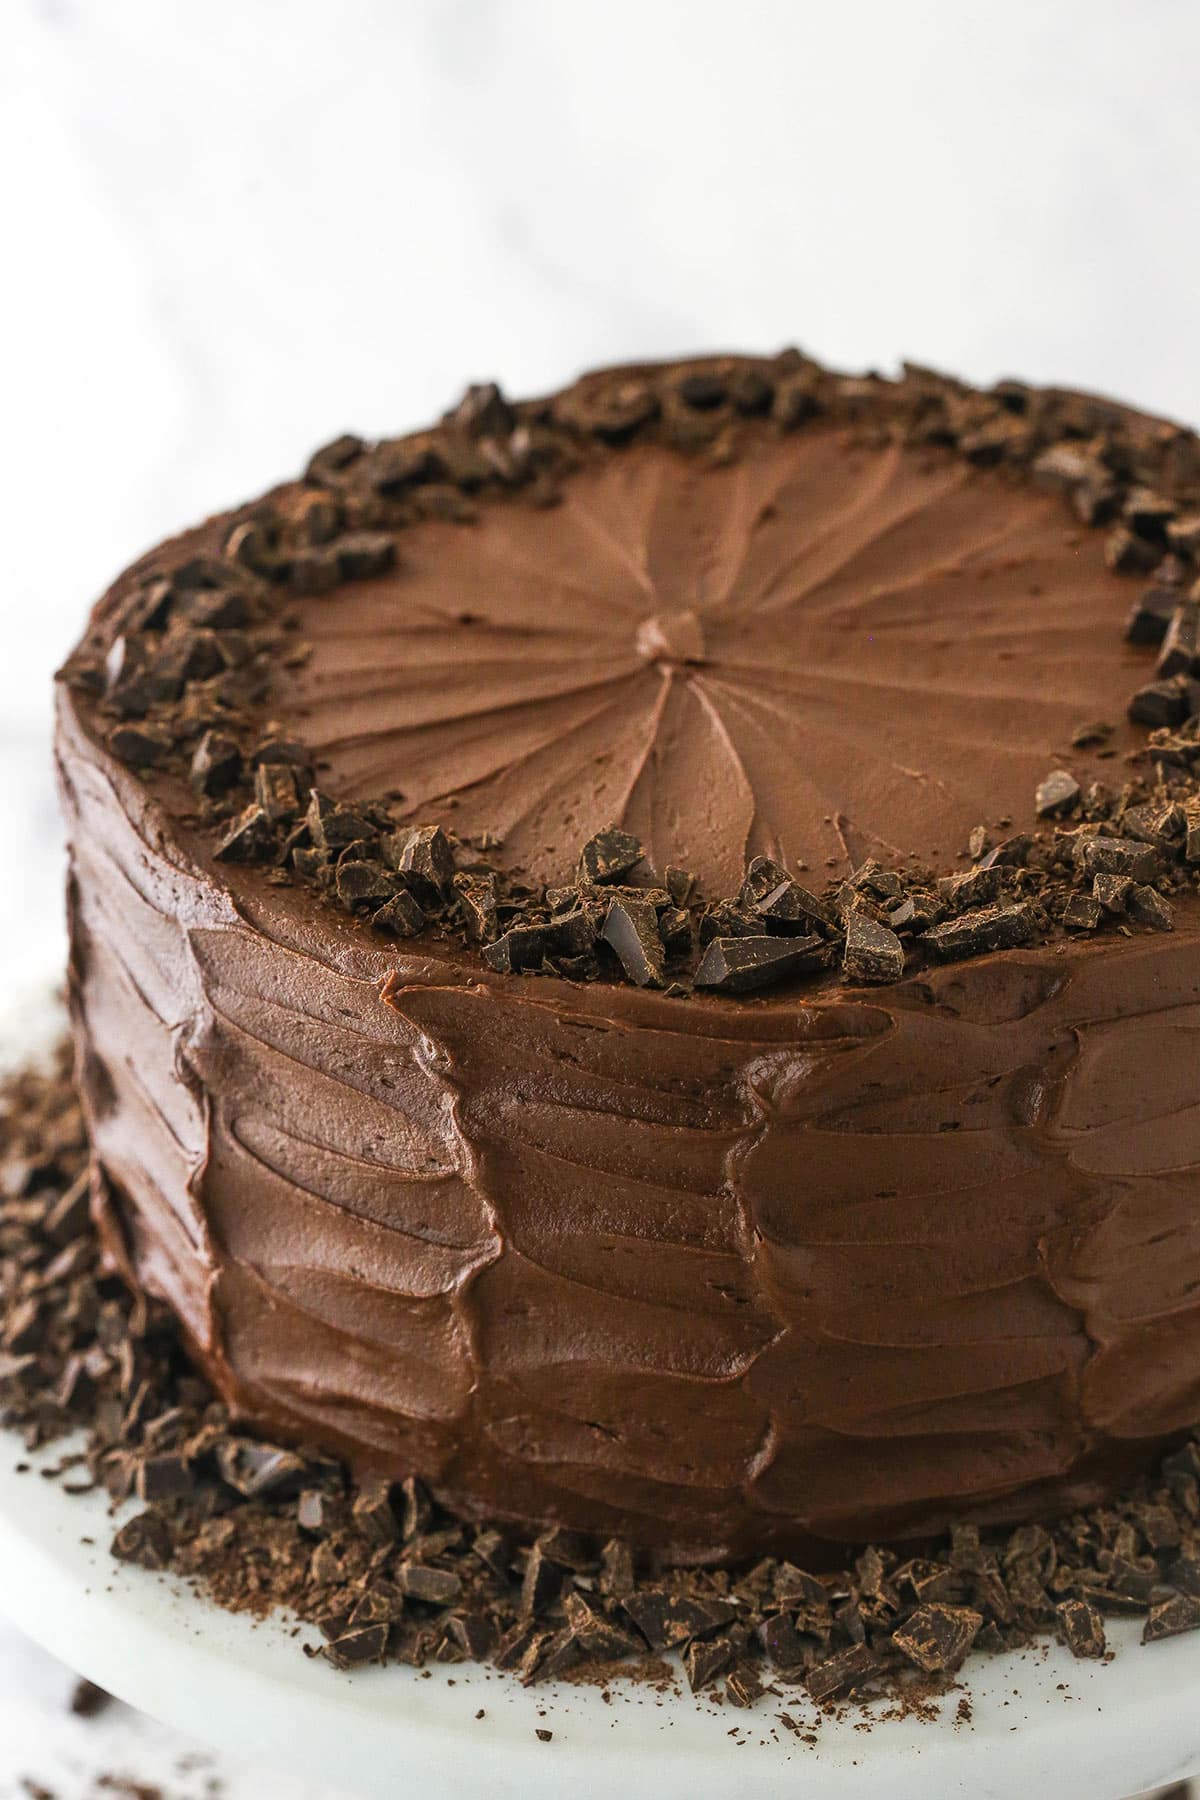
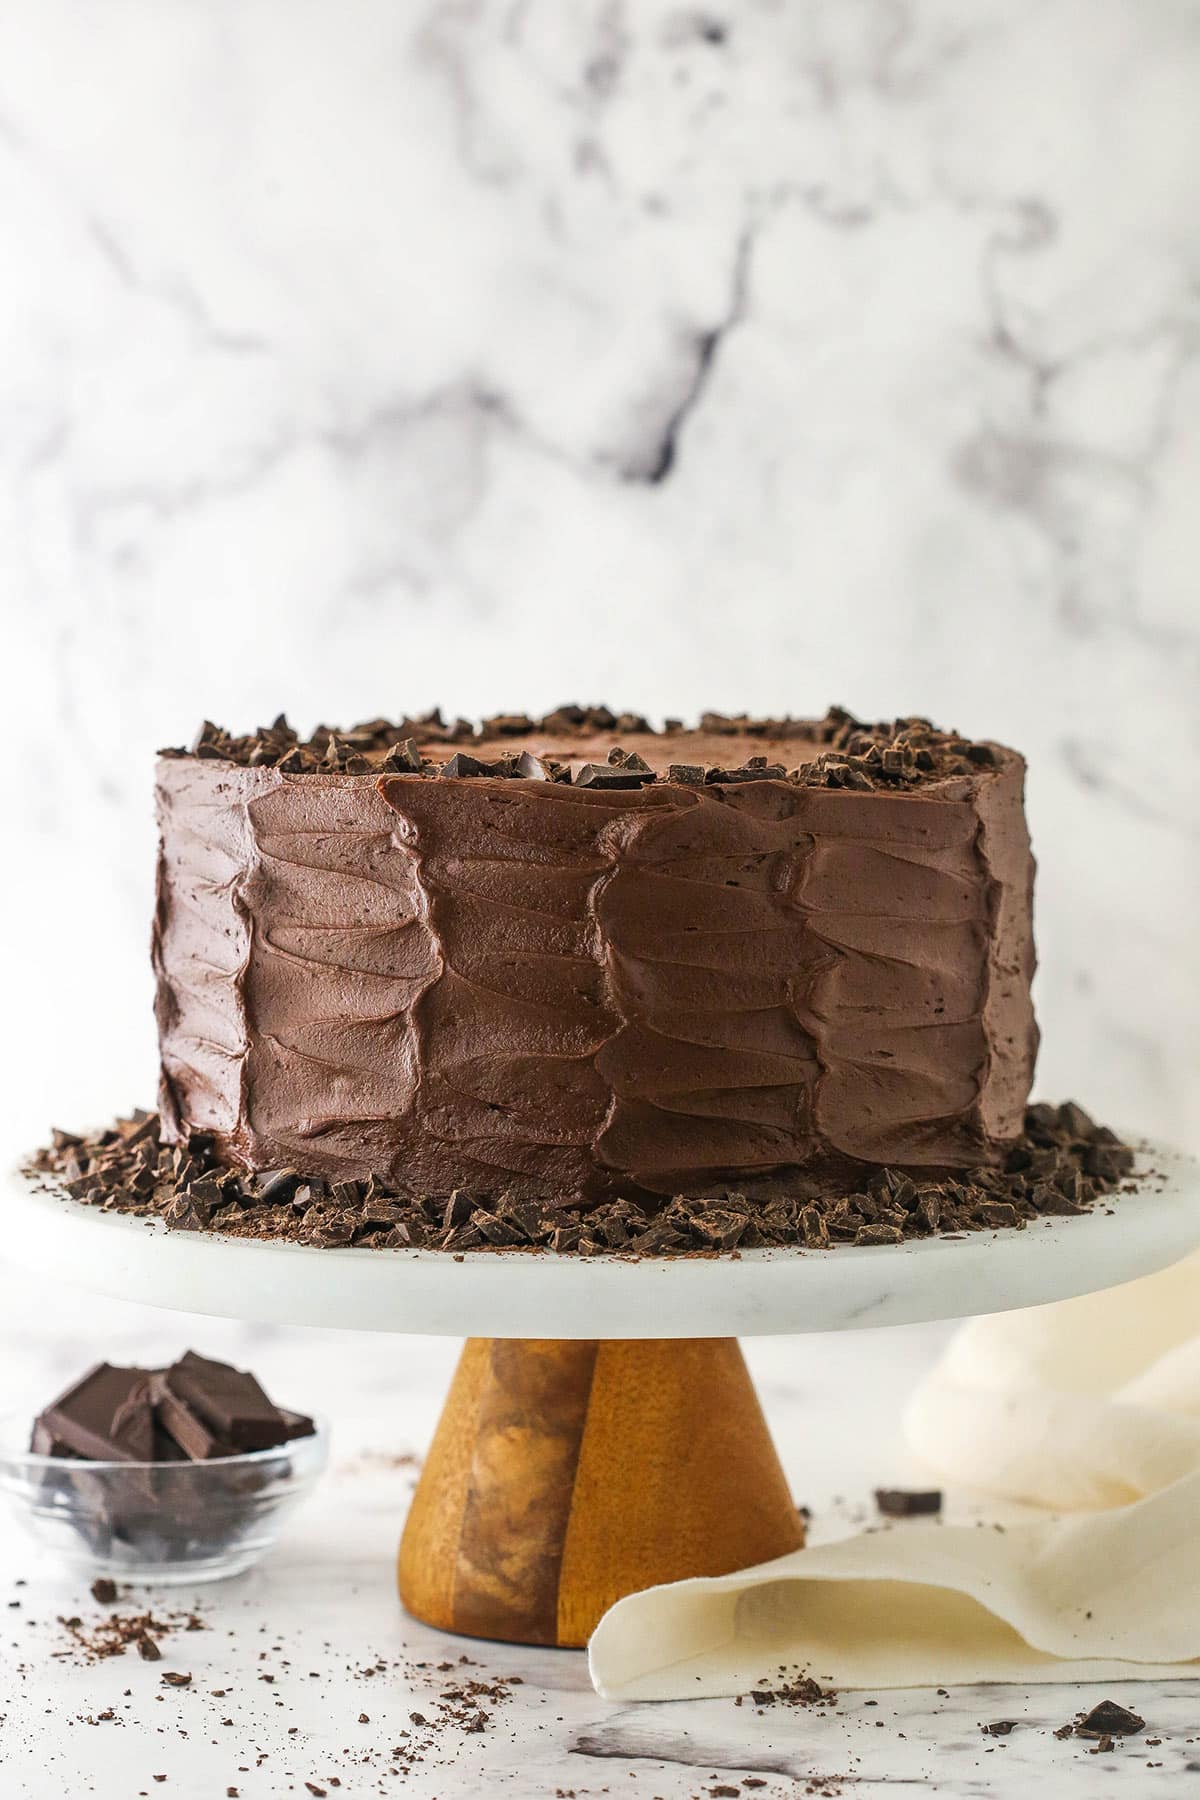
Frost Cake And Add Decor: Top the cake with the remaining layer and frost the outside of the cake. Refer to my tutorial for frosting a smooth cake, if needed. Use an offset spatula to create designs in the side of the cake’s frosting, if desired. To see how I do the design shown, see the video below. Sprinkle additional chopped chocolate around the outer edge of the cake, if desired, then serve.
How to Store Devil’s Food Cake
Store this cake in an airtight container. It can be stored at room temperature and should be eaten within 3-4 days, for best results.
Can I Freeze This Cake?
You can freeze the cake layers prior to frosting the cake. Wrap them well in plastic wrap, then foil and place in a freezer safe bag for up to 3 months. Thaw the cakes in the fridge prior to frosting.
Pro Tips for The Best Cake
- Cream Properly: Don’t over or under cream the butter, oil and brown sugar. It adds air to the batter that helps it rise. Generally, beating for 2-3 minutes on medium speed should be plenty. You should be able to see the color of the mixture lighten in color and get more fluffy.
- Avoid Over-Mixing: Don’t over-mix your batter after adding the dry ingredients. The gluten can over-develop, giving you a tough cake.
- Weigh Dry Ingredients: Nothing will dry your cake out faster than adding too much flour. I always recommend a food scale to weight your ingredients. If you don’t have one and don’t want one, stir up your flour to fluff it up, then spoon the flour into your measuring cup before leveling it off. DO NOT pack the flour down into the cup.
- Sift The Cocoa Powder: This batter is relatively thin. Sifting the cocoa powder will help you not end up with lumps of cocoa in your batter.
- Add Melted Chocolate Slowly: When making the buttercream, add the melted chocolate in parts so that it doesn’t clump and give you a lumpy buttercream.
Watch How To Make It

Devil’s Food Cake
- Prep Time: 1 hour 15 minutes
- Cook Time: 23 minutes
- Total Time: 1 hour 38 minutes
- Yield: 12–14 slices 1x
- Category: Dessert
- Method: Oven
- Cuisine: American
Description
If you’re a chocolate cake fan, you have to try this Devil’s Food Cake! It’s moist, fudgy and full of rich chocolate flavor! This classic cake is hard to beat!
Ingredients
Cake Layers
- 2 cups plus 2 tbsp (276g) all purpose flour
- 3/4 cup (85g) dutch-processed cocoa powder, sifted
- 2 tsp baking soda
- 1 tsp salt
- 1/2 cup (112g) unsalted Challenge Butter, room temperature
- 1/2 cup (120ml) vegetable oil
- 2 cups (450g) dark brown sugar
- 1 1/2 tsp vanilla extract
- 2 large eggs
- 1/2 cup (115g) sour cream
- 1/2 cup (120ml) milk
- 1 cup (240ml) hot coffee
Chocolate Buttercream
- 1 1/2 cups (336g) unsalted Challenge Butter, room temperature
- 16 oz semi sweet chocolate, chopped, melted and slightly cooled
- 5 tbsp (35g) dutch-processed cocoa powder
- 6 cups (690g) powdered sugar
- 1/2 tsp salt
- 10–12 tbsp (150-180ml) heavy whipping cream
- Additional chocolate, chopped, for decoration
Instructions
To Make the Cake:
- Prepare three 8 inch cake pans with parchment paper circles in the bottom and grease the sides. Preheat oven to 350°F (176°C).
- Combine the flour, cocoa powder, baking soda and salt in a medium sized bowl and set aside.
- Add the butter, oil, brown sugar and vanilla extract to a large mixer bowl and beat together on medium speed until light in color and fluffy, about 2-3 minutes. Do not skimp on the creaming time.
- Add the eggs one at a time, mixing until mostly combined after each. Scrape down the sides of the bowl as needed to be sure all ingredients are well incorporated.
- Add the sour cream and mix until well combined.
- Add the milk and mix until well combined. The batter may look a little stringy or separated. That’s ok.
- Add half of the dry ingredients to the batter and mix until mostly combined.
- Carefully add half of the coffee and mix until well combined.
- Add the remaining dry ingredients and mix until well combined and smooth. Scrape down the sides of the bowl as needed to be sure all ingredients are well incorporated.
- Add the remaining coffee and mix until well combined and smooth. Scrape down the sides of the bowl as needed to be sure all ingredients are well incorporated. Do not over mix the batter.
- Divide the batter evenly between the cakes pans and bake for 23-27 minutes, or until a toothpick comes out with a few crumbs.
- Remove the cakes from the oven and allow to cool for about 2-3 minutes, then remove to cooling racks to cool completely.
To Make the Chocolate Buttercream:
- Add the butter to a large mixer bowl and beat until smooth and creamy.
- Add the melted chocolate in three parts, mixing until well combined after each addition. Adding the melted chocolate slowly will help avoid having chunks of chocolate form.
- Add the cocoa powder and about half of the powdered sugar and mix until well combined
- Add the salt and half of the heavy cream and mix until well combined.
- Add the remaining powdered sugar and mix until smooth.
- Add the remaining heavy cream as needed to get the right consistency of frosting.
To Assemble the Cake:
- To put the cake together, use a large serrated knife to remove the domes from the top of the cakes so that they’re flat. These cakes don’t have a large dome, but I like to make sure they’re completely flat.
- Place the first cake on a serving plate or a cardboard cake round.
- Spread about 1 cup of frosting evenly on top of the cake.
- Add the second layer of cake and another cup of frosting.
- Top the cake with the remaining layer and frost the outside of the cake. Refer to my tutorial for frosting a smooth cake, if needed.
- Use an offset spatula to create designs in the side of the cake’s frosting, if desired. To see how I do the design shown, see the video above.
- Sprinkle additional chopped chocolate around the outer edge of the cake, if desired, then serve.
- Store in an air-tight container. The cake is best if eaten within 3-4 days.
Nutrition
- Serving Size: 1 slice
- Calories: 909
- Sugar: 101.9 g
- Sodium: 456.5 mg
- Fat: 48.2 g
- Carbohydrates: 123 g
- Protein: 7.6 g
- Cholesterol: 105.4 mg


Can you use use gluten free flour?
I haven’t tried it, but I would think the one-to-one gluten-free all-purpose flour would be fine.
Hi, the recipe says 1 cup /240 ml hot coffee please can you clarify how many teaspoons of coffee to mix in 240 ml water. Many thanks
I just brew coffee in my machine. If you’re using instant, I’d look at your container to see how much coffee it says to add to 1 cup of water.
Hi Lindsay! Thank you for such a great recipe, I made this cake and it was super delicious, moist and soft. However, every time I baked it in layers, they raise properly but at the end of the baking time the cakes sink in the middle. I followed all the steps and I’m baking at the right temperature, my oven is a convection oven with fan. What could be causing my cakes to sink like that? Could you help me? Thank you!!!!
I’m sorry you’re having trouble with it. I also have a convection oven with fan, but just use the bake setting. It can be tough to troubleshoot from a distance, but here are a couple of possibilities. Sure sure not to over mix the batter after adding the flour. Also, be sure you are fully creaming the butter, oil and sugar. It should be obviously lighter in color and fluffy in texture. Be sure that the baking soda you used it still good and was measured accurately. Too much baking soda can cause the layers to fall when they come out of the oven. Also, are you using Dutch-process cocoa or another kind? Outside of those things, there may be something else happening, but it’s hard to say without being there. I hope that helps!
Could I replace the milk with buttermilk in this recipe?
I can’t remember if I tested it or not. It’s possible that the added acidity of the buttermilk could throw things off and it may not work well.
This looks so good! Can I make it in 2 layers instead? Would I have to adjust baking time?
You could make just 2 layers, it just may be a touch more dense. And yes, you’d need to bake them for a little longer.
This looks so delicious! It may not matter, but since I’m not an expert on coffee, what coffee brand did you use for this cake? Or when you’re making chocolate recipes?
I would just use whatever coffee you drink.
Could you bake this in a 9 x 13 inch pan?
I haven’t tried it that way so it’s hard to say for sure.
hi! where i live its not easy to get sour cream, what ingredient can i use instead? thanks!
I didn’t test it with some thing else, so I can’t guarantee the results. Sour cream is acidic and is needed to help activate the baking soda in the cake. You could try swapping it out with yogurt or buttermilk, but like I said it’s hard to guarantee the result since I haven’t tested it myself.
Hi Lindsay! We really love your other chocolate cake recipe. I’m all about the tighter crumb, denser, fudgy chocolate cake so I think I’m really going to love this one too. I noticed in the video you put 2 cakes on the top rack and one on the bottom. Was wondering if your using convection when baking this way and if so, what temperature? I bake them all on one rack using conventional but wondered if you do something different. And, your American buttercream recipe is the only one I use. This chocolate one looks amazing.
I’ve always used convection ovens but on the bake setting. I bake this one at 350° F and the other one at 300° F. In my old ovens, I was able to make the third layer on the bottom rack of the oven, but in my new one I actually bake them all on one middle rack in the oven. Ovens really can vary. I hope that helps. And I hope you enjoy the cake!
What can be used in place of the coffee?
Generally it can be replaced with hot water. But if you read through the blog post, it talks about how this recipe uses Dutched cocoa, which is not as acidic as regular cocoa. As a result, you need other acids to activate the baking soda. In this recipe, that’s the sour cream and the coffee. I didn’t test it with water, but if you use hot water, the cake may not rise as well.
when a recipe ask for coffee I omit it and replace it with water . sometimes I use hot chocolate
Are there any required changes to recipe to make cupcakes?
I didn’t test it as cupcakes, but I would think it would be fine without any changes other than adjusting the bake time.
Hi, i only have 6inch pans. How long would you bake it for do you think? Going to try this one for hubby’s birthday.
I’m not sure. You could divide it between 4 pans for shorter layers that don’t bake as long. You could also cut the recipe in half and bake in 6 inch pans.