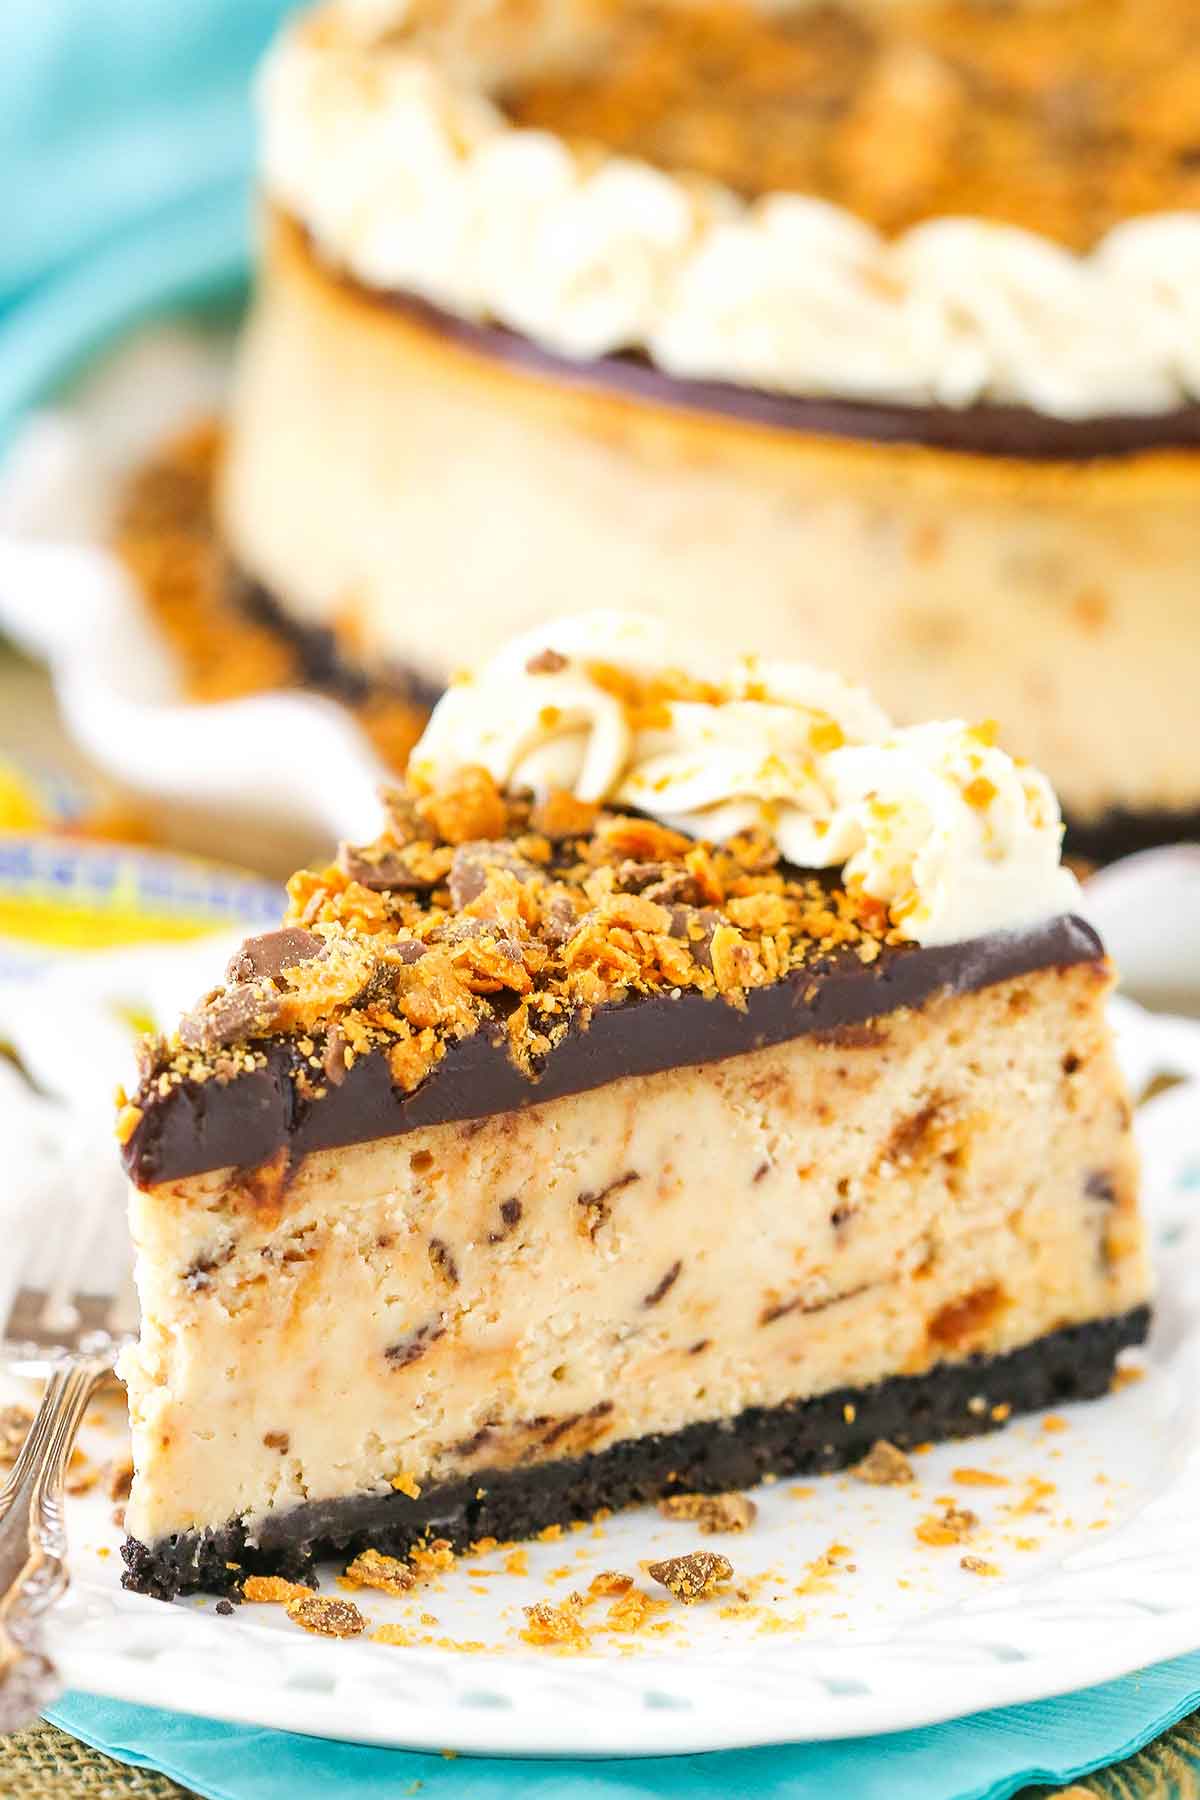
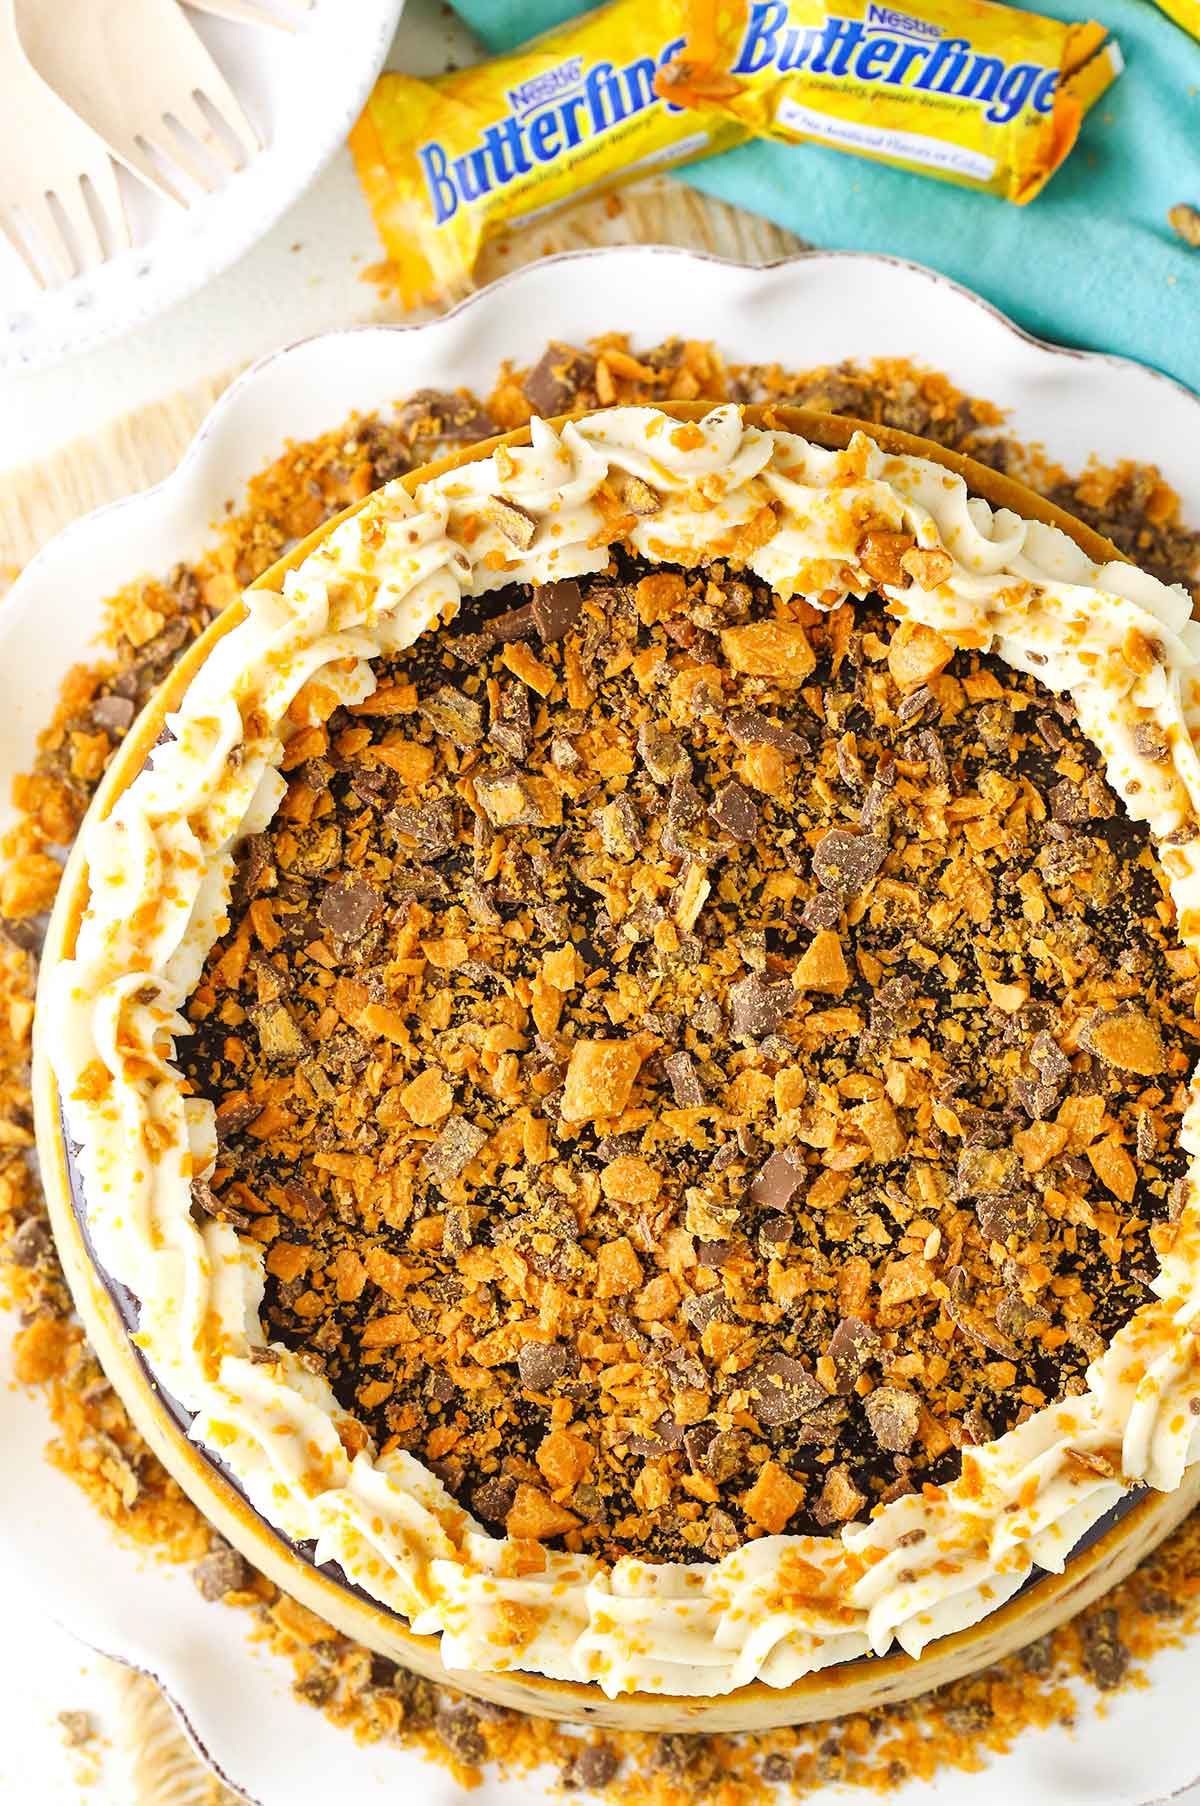
This Butterfinger Cheesecake is a rich, thick and creamy peanut butter cheesecake filled with chopped Butterfingers in an Oreo crust topped with chocolate ganache and more Butterfingers!
Despite having twin babies at home, the hubs and I are trying to do our best do enjoy some of the things we’ve always enjoyed. Quality things like watching The Bachelor and binge watching new series.
We’ve recently discovered that Netflix actually has some pretty solid movies and series. We can’t catch up on new shows as quickly as we used to, but we make a solid effort when we can. Since we have to man the baby monitor, binge-watching is our biggest thrill and we gladly take it. 🙂
Speaking of big thrills, cheesecake has been one of my big baking thrills lately. If there’s one dessert I’ve been loving making, it’s cheesecake. I’ve had so many new flavors and ideas popping in my head, it’s been hard to keep up. There are just do many things you can do! But of course I can’t share cheesecake alone, so I’m doing my best to pace myself.
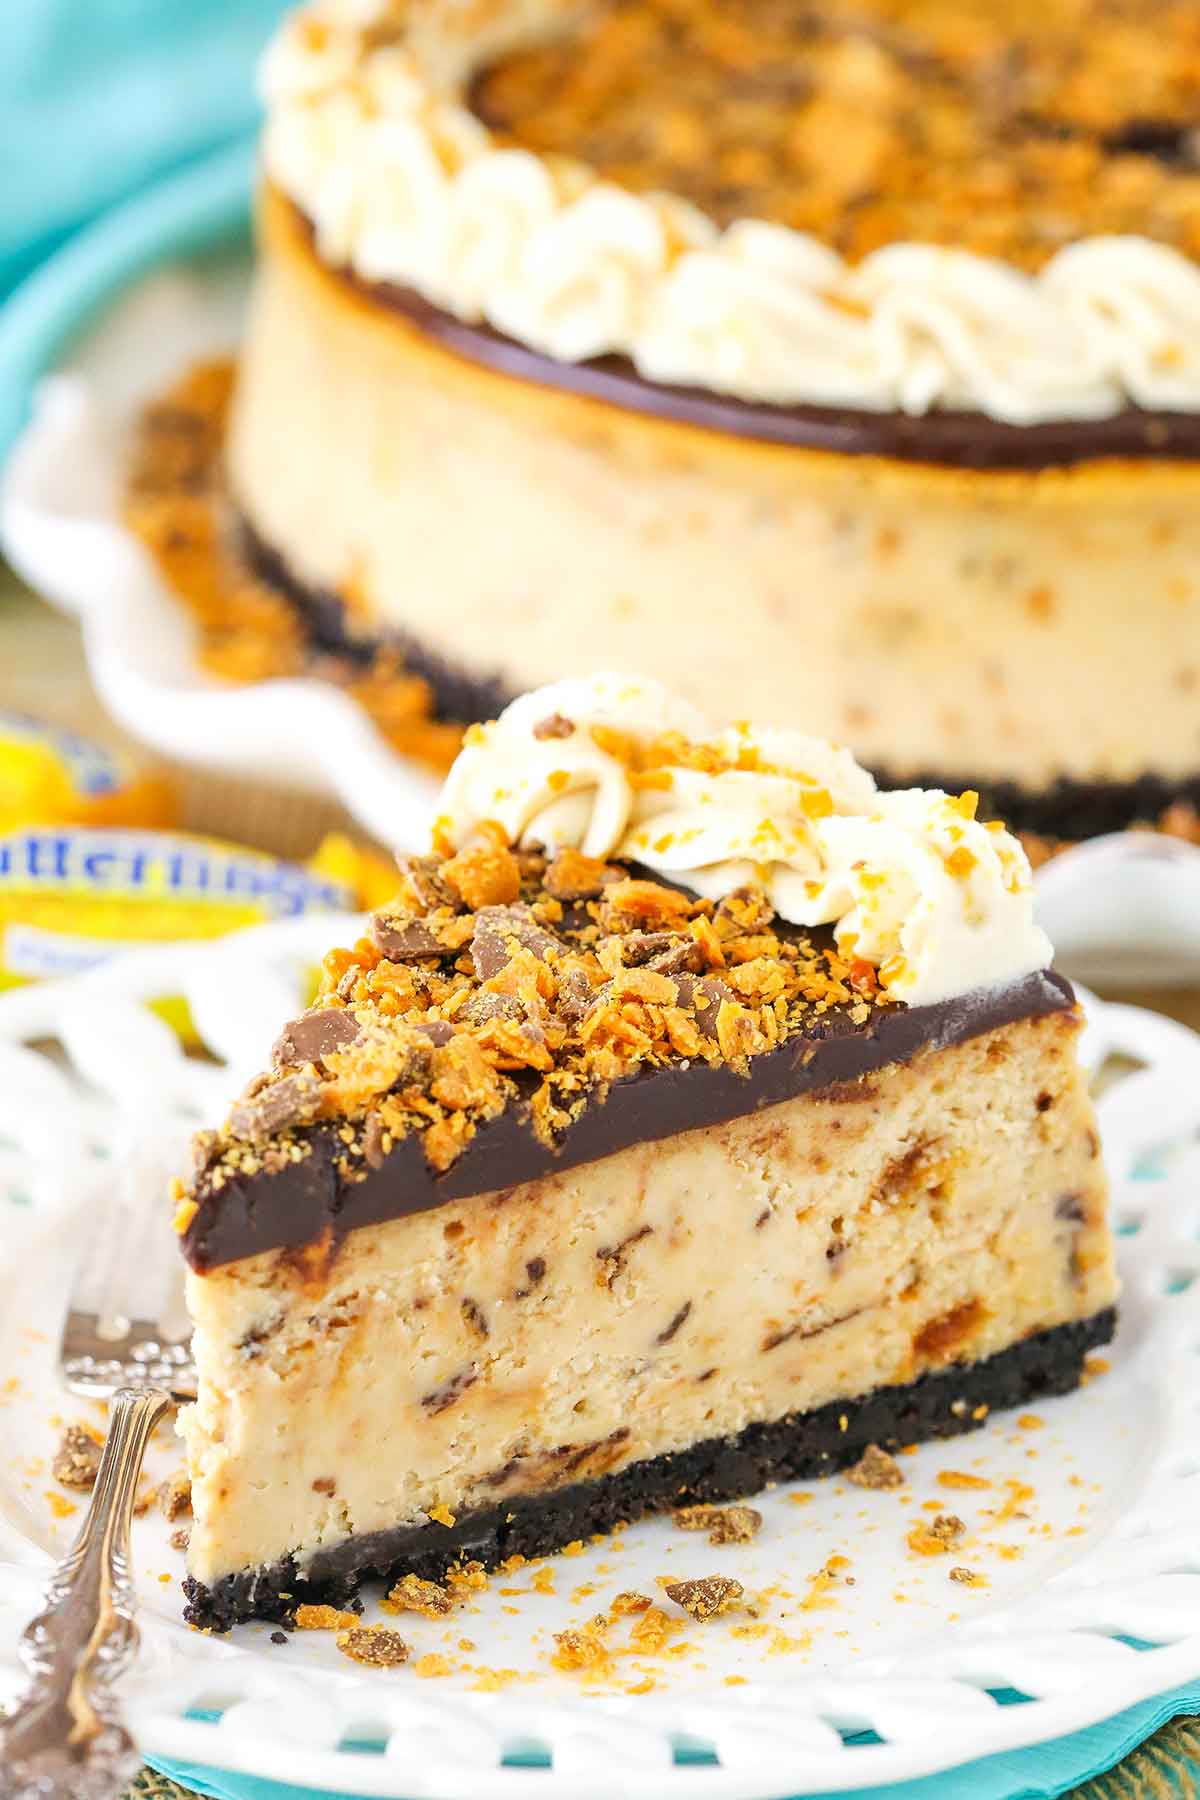
Today is all about the peanut butter and butterfingers. Surprisingly, I don’t actually have a baked peanut butter cheesecake on the blog yet. That changes today with a cheesecake that is wonderfully delicious and rich. The specks of baked Butterfingers throughout the cheesecake entice with every bite!
How to make Butterfinger Cheesecake
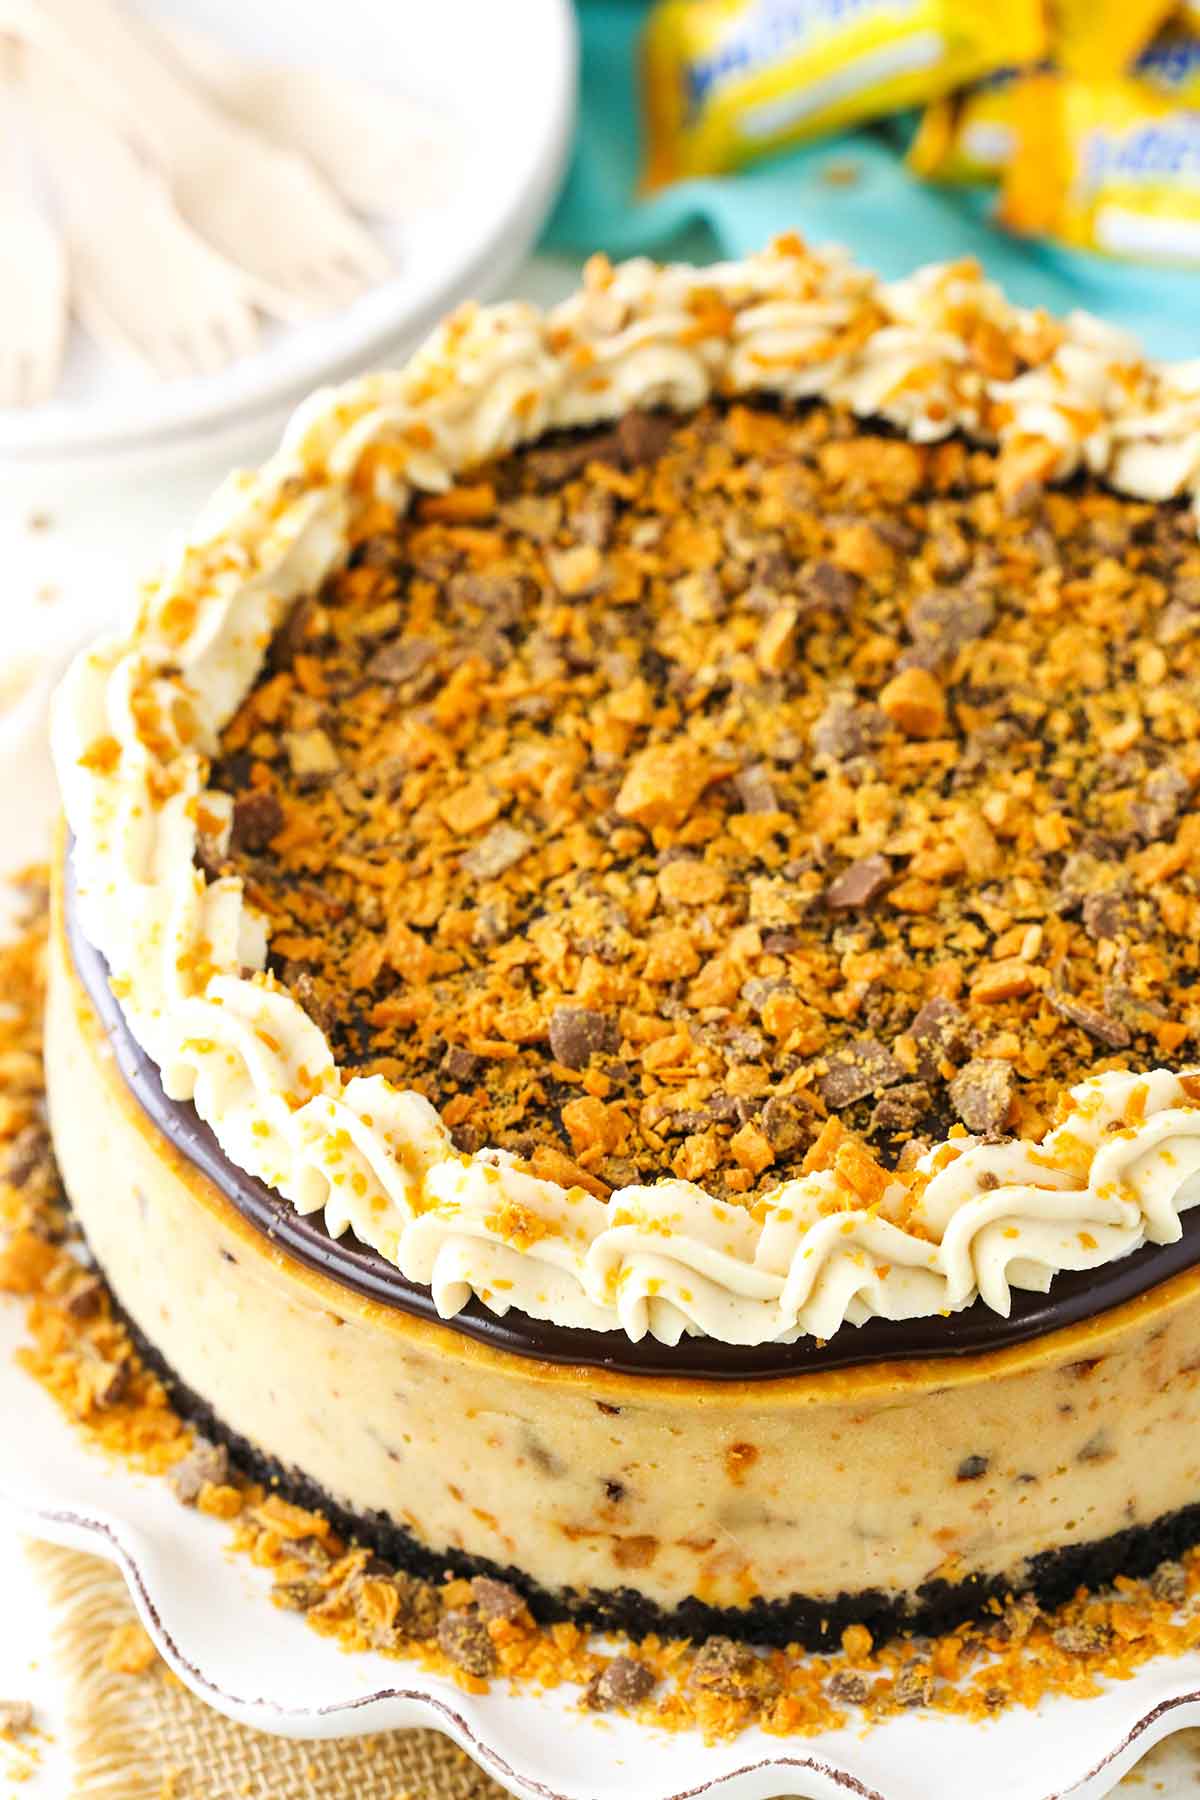
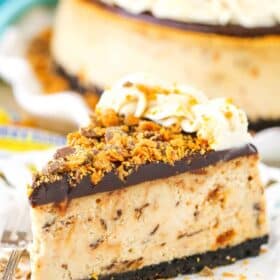
The base of this Butterfinger cheesecake is an Oreo crust – one of my favorites. The chocolate naturally goes perfect with this candy bar flavored cheesecake. Bake the crust prior to adding the filling so that it holds together better.
The peanut butter cheesecake filling is full of plenty of peanut butter flavor, with a full half cup of peanut butter and 1 1/2 cups of chopped butterfingers. Any cheesecake with that many butterfingers (12 fun-sized bars!) had got to be good! It’s made with plenty of the usual ingredients as well – cream cheese, sugar, sour cream and eggs.
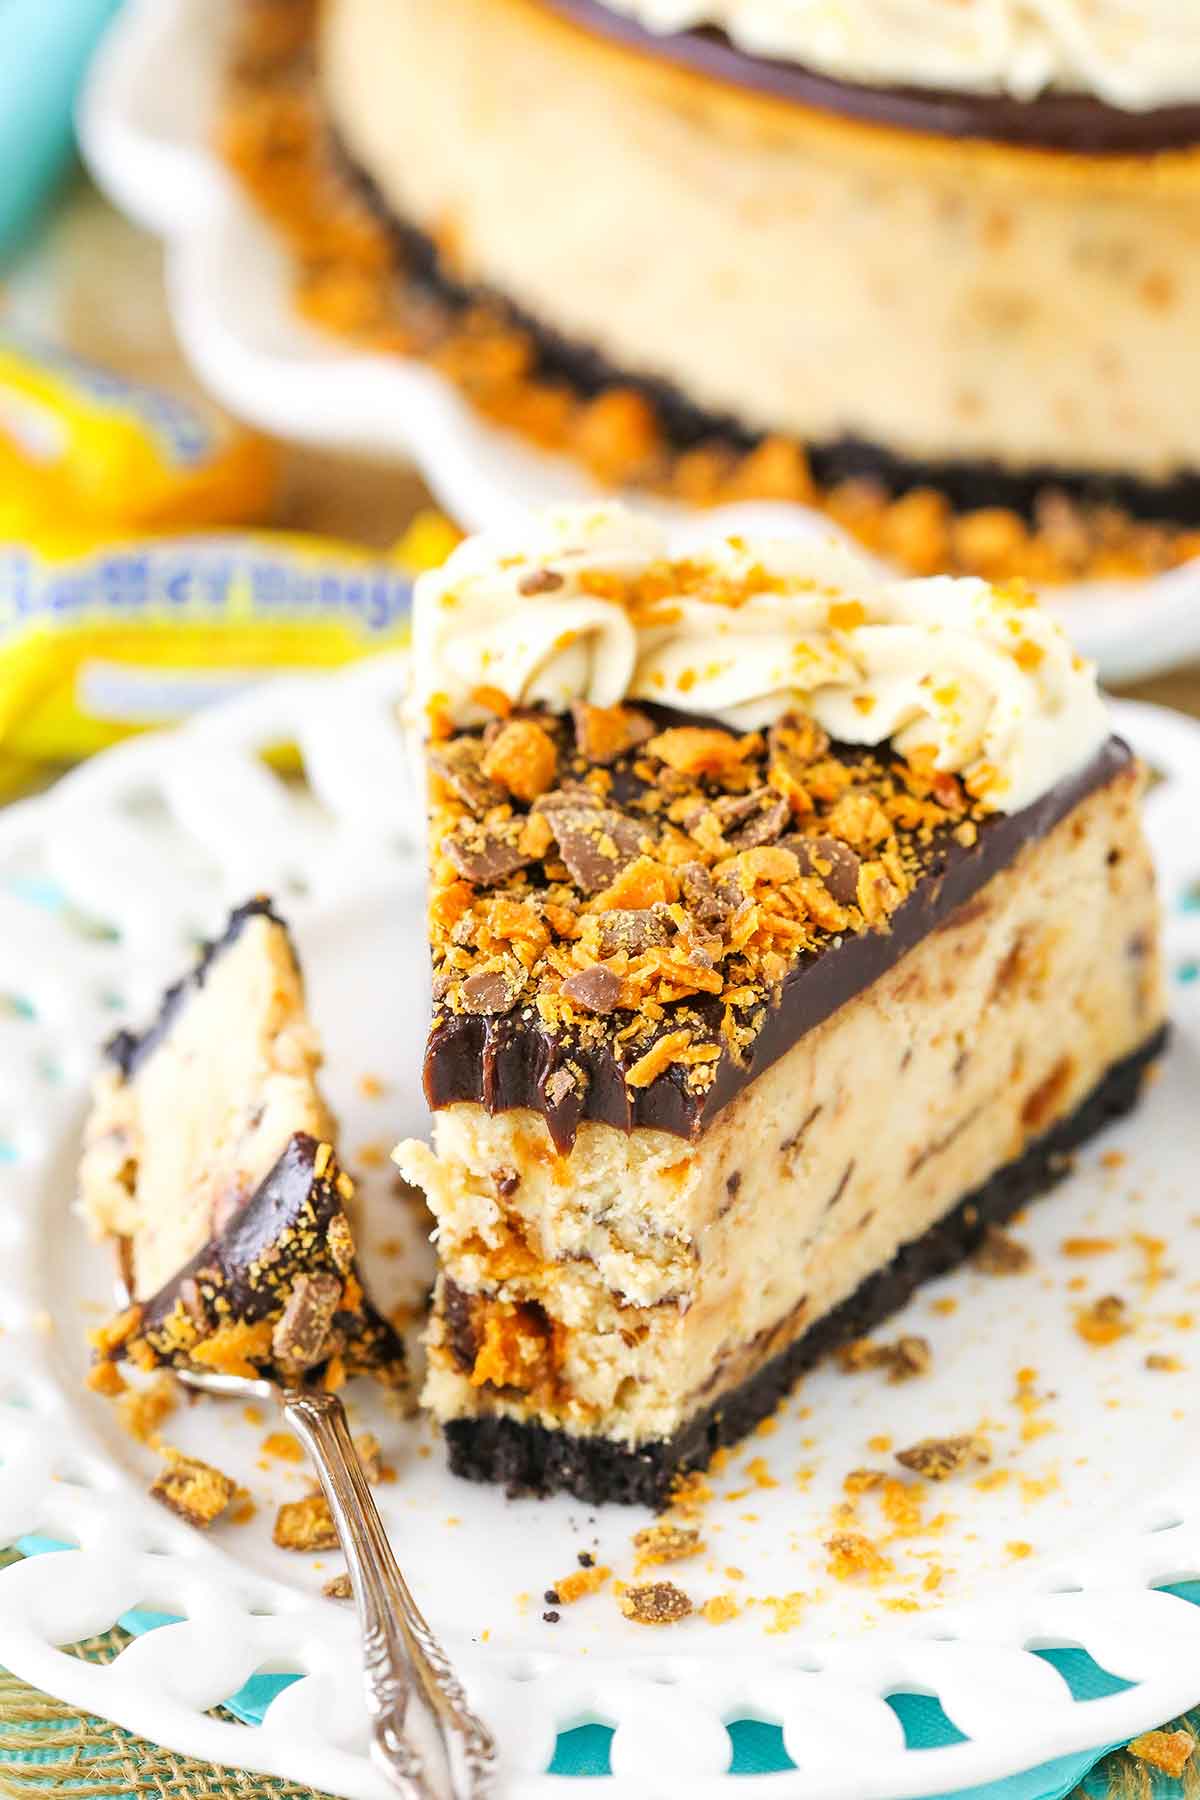
Once everything is combined, it’s baked in a water bath. I know water baths can be a pain, but they are definitely worth it. You end up with a more creamy cheesecake that doesn’t crack, dry out or sink in the middle.
After the cheesecake has baked and cooled, it’s topped with chocolate ganache, more chopped butterfingers and some peanut butter whipped cream! The final Butterfinger cheesecake is thick, creamy and delicious! The peanut butter, pops of Butterfinger candy, chocolate topping and peanut butter whipped cream all combine to make a rich cheesecake with lots of texture and flavor. A new hit!

You might also like:
Butterfinger Cupcakes
Fudgy Brownies with Crunchy Butterfingers Crust
No Bake Reeses Peanut Butter Cheesecake
Mini Reeses Peanut Butter Cheesecake
Loaded Peanut Butter Layer Cake
Butterfinger Cheesecake
- Prep Time: 45 minutes
- Cook Time: 2 1/2 hours
- Total Time: 3 hours, 15 minutes, plus cooling time
- Yield: 12–14 slices 1x
- Category: Dessert
- Method: Oven
- Cuisine: American
Description
This Butterfinger Cheesecake is a rich, thick and creamy peanut butter cheesecake filled with chopped Butterfingers in a chocolate Oreo crust. It’s topped with decadent layers of chocolate ganache, peanut butter whipped cream and more chopped Butterfingers!
Ingredients
Crust
- 2 1/4 cups (302g) Oreo crumbs
- 4 tbsp (56g) salted butter, melted
Filling
- 24 ounces (678g) cream cheese, room temperature
- 1 cup (207g) sugar
- 3 tbsp (24g) all purpose flour
- 3/4 cup (173g) sour cream, room temperature
- 1/2 cup (140g) peanut butter
- 1 tsp vanilla extract
- 4 large eggs, room temperature
- 1 1/2 cups (12 fun sized bars) chopped Butterfingers
Chocolate Ganache
- 6 oz semi-sweet chocolate chips
- 1/2 cup heavy whipping cream
Peanut Butter Whipped Cream
- 3/4 cup heavy whipping cream
- 1/2 cup (58g) powdered sugar
- 2 tbsp (35g) peanut butter
- 1/4 tsp vanilla extract
- Chopped Butterfingers
Instructions
Crust
- Preheat oven to 325°F (163°C). Line a 9-inch (23cm) springform pan with parchment paper in the bottom and grease the sides.
- Combine the crust ingredients in a small bowl. Press the mixture into the bottom of the springform pan.
- Bake the crust for 10 minutes, then set aside to cool.
- Cover the outsides of the pan with aluminum foil so that water from the water bath cannot get in (see how I prepare a pan for a water bath). Set prepared pan aside.
Cheesecake
- Reduce oven temperature to 300°F (148°C).
- Chop Butterfingers and set aside.
- In a large bowl, beat the cream cheese, sugar and flour on low speed until well combined and completely smooth. Be sure to use low speed to reduce the amount of air added to the batter, which can cause cracks. Scrape down the sides of the bowl.
- Add the sour cream, peanut butter and vanilla extract and mix on low speed until well combined.
- Add the eggs one at a time, mixing slowly to combine after each addition. Scrape down the sides of the bowl as needed to make sure everything is well combined.
- Stir in chopped Butterfingers.
- Pour the cheesecake batter evenly into the crust.
- Place the springform pan inside another larger pan. Fill the outside pan with enough warm water to go about halfway up the sides of the springform pan. The water should not go above the top edge of the aluminum foil on the springform pan.
- Bake for 1 hour 25 minutes. The center should be set, but still jiggly.
- Turn off the oven and leave the door closed for 30 minutes. The cheesecake will continue to cook, but slowly begin to cool as well.
- Crack the door of the oven for 30 minutes to allow the cheesecake to continue to cool slowly. This process helps prevent cracking.
- Remove the cheesecake from the oven and water bath wrapping. Refrigerate until firm, 5-6 hours or overnight.
- When the cheesecake is cool and firm, remove from the springform pan and set on a serving plate.
To Decorate the Cheesecake
- Make the chocolate ganache by putting the chocolate chips in a heat proof bowl and set them aside.
- Pour the heavy whipping cream into another heat proof bowl and microwave it until it just begins to boil, then pour it over the chocolate chips.
- Allow chocolate and cream to sit for 2-3 minutes, then whisk until smooth.
- Pour the ganache onto the cheesecake and spread into an even layer.
- Next make the whipped cream. Add the heavy whipping cream, powdered sugar, peanut butter and vanilla extract to a large mixer bowl and whip on high speed until stiff peaks form.
- Fill a piping bag fitted with a piping tip with whipped cream. I used Ateco tip #844. Pipe shells of whipped cream around the edge of the cheesecake.
- Chop a few fun-sized Butterfingers for the topping and sprinkle over the cheesecake.
- Refrigerate cheesecake until ready to serve. Best when stored well-covered and eaten within 3-4 days.
Nutrition
- Serving Size: 1 Slice
- Calories: 583
- Sugar: 42.2 g
- Sodium: 373.6 mg
- Fat: 36.4 g
- Carbohydrates: 56.1 g
- Protein: 12.3 g
- Cholesterol: 116.4 mg
Enjoy!


Can you use a large foil roasing pan for the water bath?
Sure, that should be fine.
Hi, I noticed that most of your cheesecakes have one egg per package of cream cheese.This one has one more egg than cream cheese packages. Is that correct?
It depends on the recipe. Most of my full-sized cheesecakes have 4 eggs. Some only have 3 though. It just depends.
Do you take the cream out of the Oreos?
No, leave it in.
Another truly amazing cheesecake from Life, Love, and Sugar. I had low expectations… after all it is a candy bar cheesecake. We were shocked. This cheesecake is gourmet, delicious, and creamy. The peanut butter in the recipe works perfectly with the candy bars. Just the right amount of sweetness. My husband had three slices last night, then had to fight the urge to have a fourth. This cheesecake is a winner! Make it… NOW! ❤️🌈🤗
Thank you so much! I’m so glad you enjoyed it!
Do you make your own Oreo crumbs?
Yes
Can the whipped cream part be done with a hand mixer?
Technically yes. But some people seem to think this whipped cream ends up a little soft and I find that handmixers don’t whip cream to quite as stiff of a consistency. So just keep that in mind.
Great recipe. The only issue I had was the whipped cream. When done like the recipe says it was just runny and would not form peaks so threw it out and started over. Whipped my cream and little bit of sugar when peaks formed then added vanilla and only 1 tbsp of peanut butter.
I have this Butterfinger cheesecake twice. It is so good and I get so many compliments. It’s time consuming, but worth every second.
So glad you enjoy it!
It was a long process to make but it was definitely worth it!!! I made it for my husbands and he enjoyed every bite
So glad to hear that!
Turned out beautiful
I’m so glad to hear that!
Can the Butterfinger cheesecake be frozen??? I LOVE this recipe ! It is one of my family favorites!
So glad you enjoy it! Yes, freezing should be fine. Just wrap it well before you freeze it and thaw it fridge before using.
I made this for my family and it was delicious. They said this was the best cheesecake I’ve made yet. I will definitely be
making this again. When my kids have a birthday they request a cheesecake and I have been making 6 inch cheesecakes for them, do you know if there’s an easy way to reduce the ingredients for a smaller cheesecake?
So glad it was a hit! As for reducing the size, here’s my guide for that – https://www.lifeloveandsugar.com/guide-to-adjusting-cheesecake-sizes/
I am anxious to make this, it sounds delicious. I do have a question though about the chocolate ganache. Is there any easy way to cut the cake when ready to serve. It’s my understanding that the ganache can be hard to cut.
This ganache should not be hard to cut. It firms up, but it’s still plenty soft for cutting.
Hi — I have a question about the recipe directions. The instructions for the crust state to press the mixture into the bottom and up the sides of the springform pan. However, none of the beautiful phots show the crumb crust going up the sides of the cheesecake. Looking for your advice as to how to best put the crumb mixture into the pan — just on the bottom (as the photos show) OR up the sides of the pan? Thanks!
Sorry about that. I can fix the instructions. I would just do it in the bottom unless you really want it to go up the sides, and then the crust would be a little thinner on the bottom.
How do you chop the butterfingers? Do you run them through a food processor or with a knife?
I use a knife.
I love butterfinger abs I think I made this twice, but quick question. Can I put it in the freezer after the hour cool down to speed if the refrigerator time. I’m making it abs delivering it in the same day.
I haven’t done it myself to see if it alters the final texture at all, but it probably would be fine.
Great recipe! I had the same issue with the whipped cream…it was runny. I added flour to thicken it and put the temp in my refrigerator very low so that it could set. Worked like a charm!