This classic Boston cream pie is made with two layers of light vanilla sponge cake filled with rich vanilla pastry cream and topped with glossy, rich chocolate ganache. Contrary to the name, it’s a cake and not a pie! Easy to make and completely delicious, you are going to love it!

Why You’ll Love This Boston Cream Pie Recipe
Fluffy cake, pastry cream, and chocolate!? What’s not to love? This dessert is both light in texture and rich. The perfected combination. Let me fill you in on some of the things that make this Boston cream pie one of the best.
- Texture. I love the textural contrast of the layers of light, fluffy cake next to the smooth, luscious pastry cream. Who could say no to that?
- Taste. This is a vanilla and chocolate combination that is classic, simple and so perfect together. The light vanilla cake, rich vanilla pastry cream and chocolatey glaze marry together beautifully.
- Presentation. Elegant yet approachable, there’s no doubt that Boston cream pie is nice to look at. The way the glossy chocolate ganache drapes over the fluffy yellow cake layers and pastry cream makes for one inviting edible art piece.
- Surprisingly easy. It might seem intimidating to make pastry cream, cake, and chocolate ganache but, honestly, each of these components is actually super simple to throw together. You can do it!
What Is Boston Cream Pie?
Less of a pie and more of a cake, this classic American dessert originated in the 1800s in – you guessed it – Boston! It’s comprised of layers of vanilla sponge cake divided by a simple vanilla pastry cream. The dessert is topped with a luscious chocolate ganache and served cold. Why is it called a “pie”? Because long ago, cakes were actually baked in pie tins.

Recipe Ingredients
Here’s what you’ll need to make this easy Boston cream pie recipe and few notable tips. Be sure to scroll to the recipe card below for precise measurements.

- Egg yolks – Start with room-temperature eggs. Cold eggs will have a hard time mixing smoothly and easily into the other ingredients. Be sure to use large eggs, not medium or extra large.
- Cornstarch – This helps to thicken the pastry cream, along with the eggs.
- Milk – Milk forms the base of the pastry cream. A higher fat content will give you the creamiest texture. I recommend whole milk.
- Vanilla extract – For flavor. I recommend a good quality extract, since a lot of the flavor of your cream and overall cake comes from the vanilla.
- All-purpose flour – Be sure to measure it properly. Too much flour will give you a dry cake. I recommend a food scale, but you can also use the spoon and level method.
- Semi-sweet chocolate chips – Milk or dark chocolate chips would also work, but will change the consistency of your glaze. Milk chocolate will make it a little thinner and dark chocolate will make it a little thicker
- Corn syrup – This lends a prettier glossy finish to the chocolate glaze, but you can leave it out, if you want.
- Heavy whipping cream – Don’t replace this in the glaze with something else, like milk. It will thin out your glaze.
How to Make Boston Cream Pie
Here’s a quick overview of how to make Boston cream pie. Don’t forget to scroll to the recipe card below for more detailed instructions.
Make the pastry cream
- Beat. Beat the egg yolks together gently.
- Cook. Whisk together the sugar and cornstarch in a large saucepan and then whisk in the milk. Cook over medium heat until the mixture begins to thicken and simmer.
- Temper. Whisk a little bit of the milk mixture into the egg yolks. Add the egg mixture to milk mixture.
- Cook. Bring the pastry cream to a light boil and cook for 1 minute, stirring continuously.
- Finish it off. Remove the saucepan from the heat and stir in the butter and vanilla extract.
- Chill. Pour the pastry cream into a bowl, cover with clear wrap pressed against the top, and chill in the fridge for 1-2 hours.


Make the cake layers
- Prep. Line the bottoms of two 9-inch cake pans with parchment paper, grease the sides, and preheat the oven to 350°F.
- Combine the dry ingredients. Whisk together the flour, baking powder, and salt.
- Whip. Whip the eggs, sugar, and vanilla extract on high speed until pale and fluffy.
- Heat. Heat the milk and butter until the butter is melted and the mixture is very hot.
- Add dry ingredients. Fold half of the dry ingredients into the whipped egg mixture and then fold in the remaining dry ingredients.

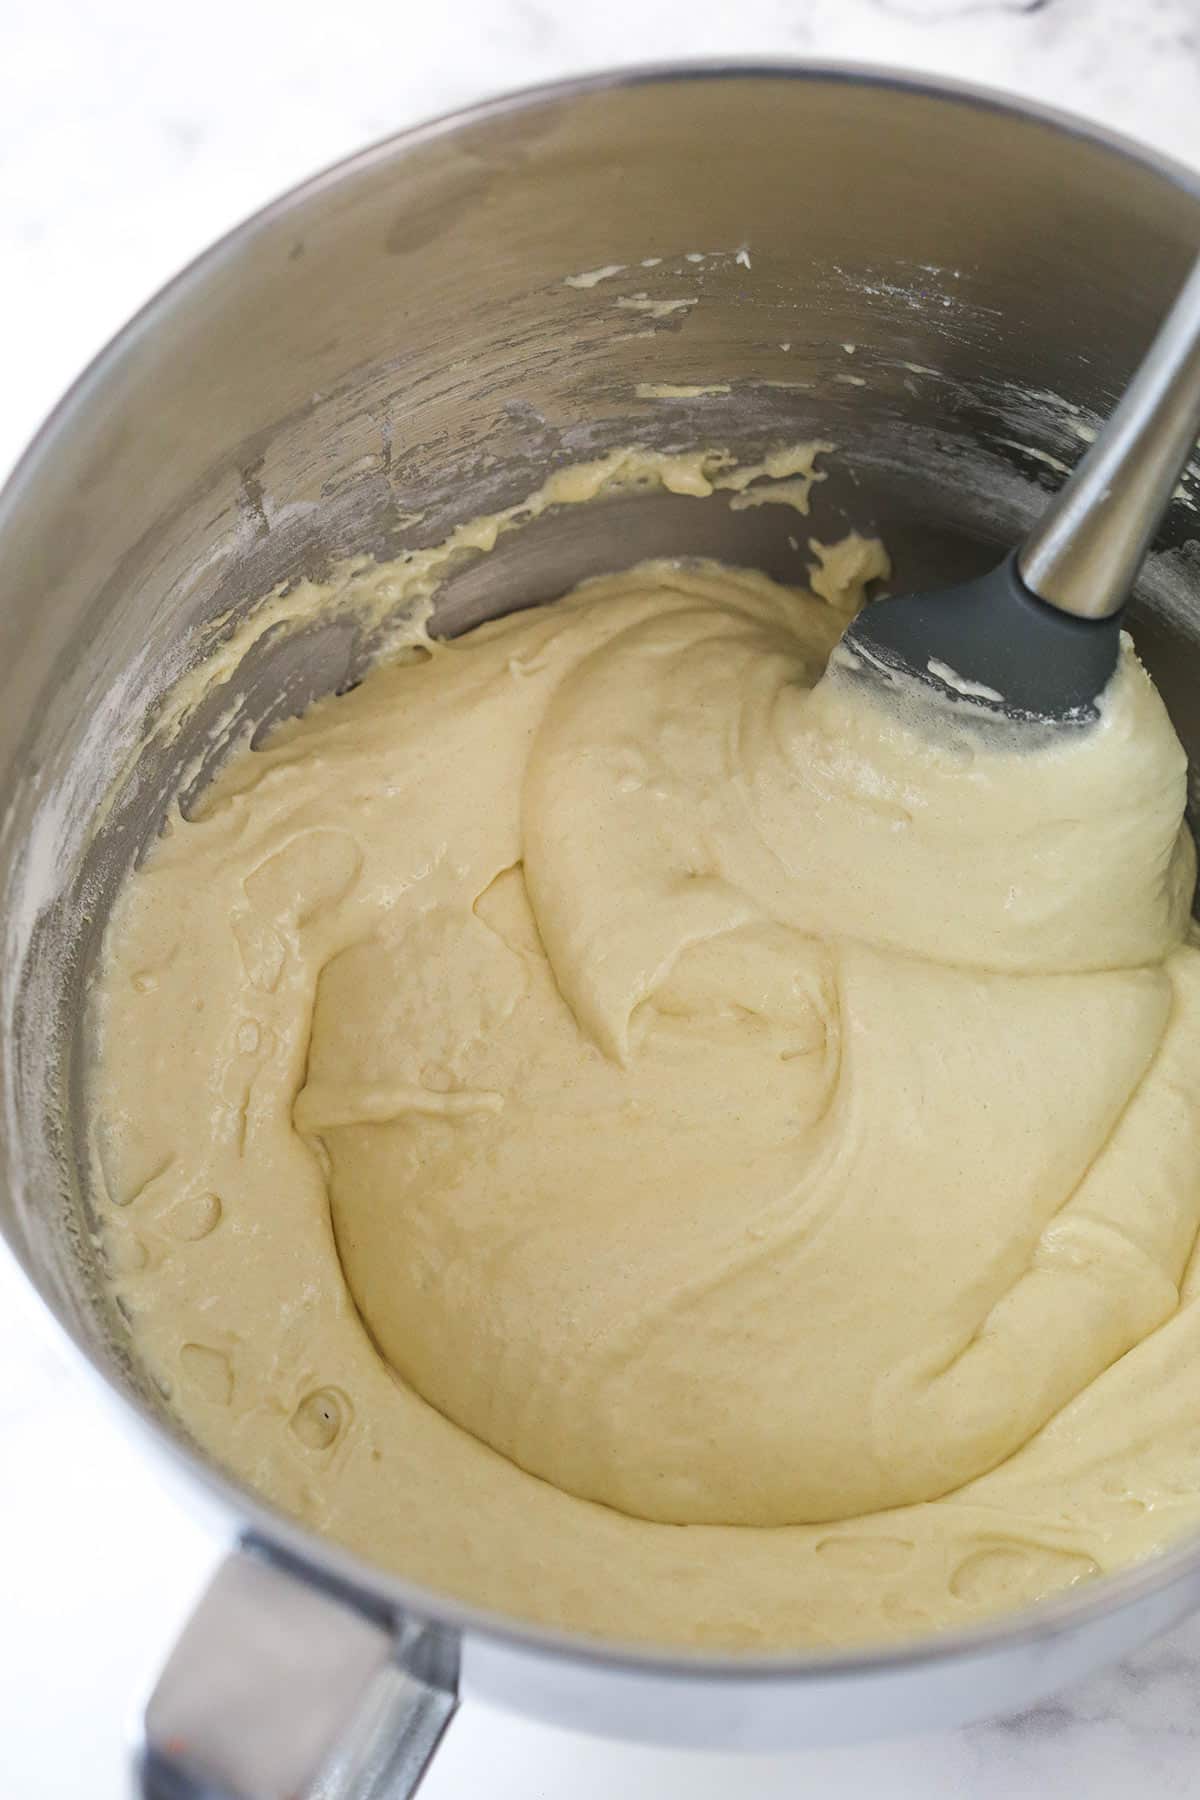
- Add hot milk. Gently whisk in the hot milk mixture.
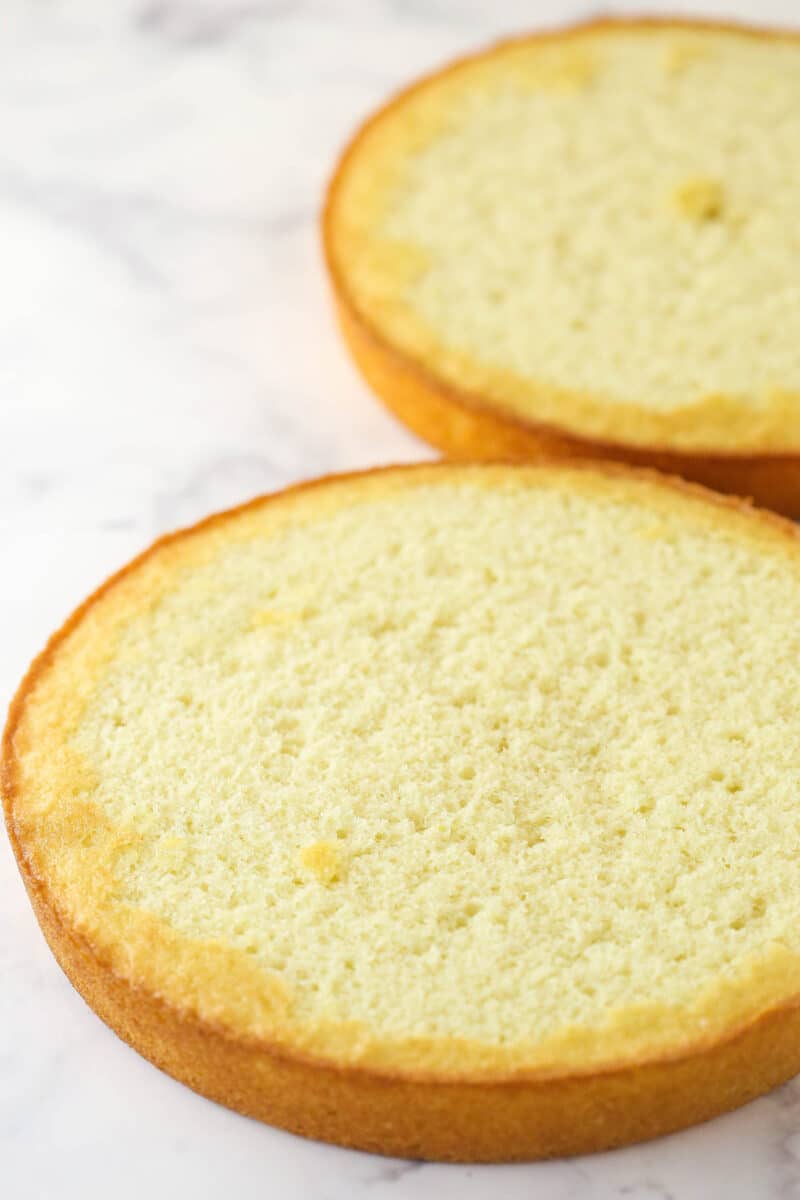
- Bake. Divide the batter between the cake pans and bake for 20-23 minutes.
- Cool. Allow the cakes to cool in their pans for 2-3 minutes before turning them out onto cooling racks to cool completely.

Put it all together
- Make the chocolate glaze. Combine the chocolate chips and corn syrup in a bowl. Heat the heavy cream until just boiling and pour it over the chocolate chip mixture. Allow to sit for 1-2 minutes, then whisk until smooth.
- Smooth. Give the pastry cream a stir to smooth it out.


- Assemble. Remove the domes from the tops of the cakes and place one cake on a serving platter. Spread the pastry cream over the cake layer and top it with the second cake layer. Pour the chocolate over the top of the cake, then spread out towards the edges.
- Chill. Refrigerate the cake until ready to serve.

Pro Tips for Making the Pastry Cream
Pastry cream isn’t hard to make, but it must be thickened properly to have success. The eggs must be tempered properly so that you don’t get scramble eggs and a lumpy cream. It also needs to be thickened enough, but not so much that the cornstarch and eggs break down. Keep these tips in mind for the best results.
- Careful with heat. Resist the temptation to turn up the heat in order to cook the pastry cream more quickly. Bring it to a boil slowly so that it gets a chance to thicken properly.
- Get the timing right. You want to cook the pastry cream long enough for the egg yolks to cook and work their thickening magic but not so long that the cornstarch starts to break down. Don’t boil it for too long.
- Temper. Pour a bit of the hot milk mixture into the egg yolks while whisking them together before folding the egg mixture into the bulk of the hot milk. This will keep the eggs from scrambling.
- Strain it. If you find your cream looks a little lumpy, you can strain it to remove the lumps prior to chilling it.
- Chill. The pastry cream will thicken while cooking, but still may seem a bit thin and not yet thick enough for the cake. It will firm up in the fridge. Let it chill for at least an hour or two, or until it develops an almost gelatin-like, thick texture.

More Tips for the Best Boston Cream Pie
- Room temperature eggs. When making the pastry cream and the cake, you will want to start with room-temperature eggs. Cold eggs will not mix smoothly and easily into the pastry cream, making it more difficult to achieve the desired, smooth result. When it comes to the cake batter, room-temperature eggs will hold volume better than cold ones, allowing you to achieve a lighter, fluffier cake.
- Whip whip whip. When whipping together the eggs, sugar, and vanilla for the cake batter, do so until the mixture has significantly lightened in color and has become fluffy. This process incorporates air into the mixture, giving you a wonderfully light and fluffy cake.
- Don’t over-mix. When combing the wet and dry ingredients for the cake batter, be careful not to over-mix. This can cause the glutens in the flour to overdevelop resulting in a dense, tough cake.
- Hot milk. It might seem superfluous to heat the milk and butter before adding them to the cake batter but don’t skip this step. It will help prevent the glutens from overdeveloping and you will, as a result, find yourself with a much more tender, fluffy cake.
- Cool. Allow the cakes to cool completely before assembling. Otherwise, the pastry cream and the ganache will melt.
- Stir. Before filling the cake, give the pastry cream a thorough stirring to smooth it out.

How to Store Boston Cream Pie
- Refrigerator. Seal the cake in an airtight cake carrier or something similar. If you don’t have one, pop the cake in the fridge for a few hours to firm up before wrapping it in a double layer of plastic wrap. You can also arrange slices of Boston cream in a single layer in an airtight container. However you choose to do it, you can store your leftovers in the fridge for up to 4 days.
- Freezer/Prepping ahead. I do not recommend freezing a full Boston Cream Pie. The pastry cream can split when it thaws, leaving you with a mess. If you’d like to freeze things for prepping ahead, you can make the cake layers ahead and freeze those, then thaw them in the fridge before using. You can also make the pastry cream a day or so ahead and then layer everything together prior to serving it.
More Boston Cream Desserts
If you like this classic Boston cream pie, you are going to love some of my other variations. Here they are.
Watch How to Make Boston Cream Pie
This recipe was updated 11/27/2023. For the original recipe from 2018, download this PDF.
Print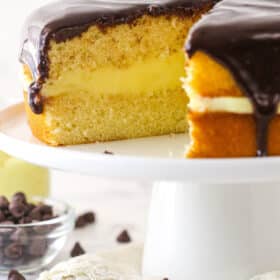
Boston Cream Pie Recipe
- Prep Time: 45 minutes
- Cook Time: 35 minutes
- Total Time: 1 hour 20 minutes
- Yield: 12–14 servings 1x
- Category: Dessert
- Method: Oven
- Cuisine: American
Description
This classic Boston cream pie is made with two layers of light vanilla sponge cake filled with rich vanilla pastry cream and topped with glossy, rich chocolate ganache. Contrary to the name, it’s a cake and not a pie! Easy to make and completely delicious, you are going to love it!
Ingredients
Pastry Cream
- 4 large egg yolks, room temperature
- 3/4 cup (155g) sugar
- 4 tbsp (32g) cornstarch
- 2 cups (480ml) whole milk, room temperature
- 2 tbsp (28g) unsalted butter
- 2 tsp vanilla extract
Sponge Cake
- 1 3/4 cups (228g) all-purpose flour (measured properly)
- 2 tsp baking powder
- 1/2 tsp salt
- 3 large eggs, room temperature
- 1 1/2 cups (310g) sugar
- 1 tbsp vanilla extract
- 3/4 cup (180ml) whole milk
- 1/2 cup (112g) unsalted butter
Chocolate Glaze
- 6 oz (1 cup) semi-sweet chocolate chips
- 2 tbsp corn syrup
- 1/2 cup (120ml) heavy whipping cream
Instructions
To make the pastry cream:
- Put the egg yolks in a medium sized bowl and gently beat them together. Set aside.
- Add the sugar and cornstarch to a large saucepan and whisk together until no more lumps of cornstarch remain, then add the milk.
- Cook, stirring continuously, over medium heat until mixture just begins to thicken and simmer. Be careful not to boil it.
- Add a little bit of the milk mixture to the egg yolks and quickly whisk together, then add the egg mixture to milk mixture, putting it all back in the pan. This process ensures that you don’t cook the egg yolks too quickly and get scrambled eggs.
- Place the pan back on the heat and bring to a light boil. You should see large bubbles popping on top. Allow to boil for 1 minute, stirring continuously. Don’t boil for too long, or you can overcook it and it’ll actually break down, rather than get thicker.
- Remove from heat and add the butter and vanilla extract. Stir until smooth, then pour into a bowl and cover with clear wrap pressed against the top so that it doesn’t get a film on top. If you find your cream is lump, you can strain it. Set in the fridge to cool completely, 1-2 hours.
To make the cake layers:
- Prepare two 9-inch cake pans with parchment paper circles in the bottom and grease the sides. Preheat oven to 350°F (176°C).
- Combine flour, baking powder and salt in a medium sized bowl. Set aside.
- Add the eggs, sugar and vanilla extract to a large mixer bowl and whip on high speed until pale, fluffy and thickened, about 4 minutes.
- While the eggs are whipping, heat the milk and butter until the butter is melted and the mixture is very hot. It doesn’t have to be boiling, but it should be very hot.
- Add half of the dry ingredients to the whipped egg mixture and gently fold together until mostly combined. Add the remaining dry ingredients to the egg mixture and gently fold together until just well combined.
- Add the hot milk mixture to the batter and gently whisk together until well combined.
- Divide the batter evenly between the prepared cake pans and bake for 20-23 minutes, or until a toothpick inserted in the middle of the cakes comes out clean.
- Remove the cakes from the oven and allow to cool for 2-3 minutes, then remove to a cooling rack to finish cooling.
To finish off the cake:
- When the pastry cream and cakes have cooled completely, make the chocolate glaze. Add the chocolate chips and corn syrup to a medium size bowl.
- Heat the heavy whipping cream just until it begins to boil, then pour over the chocolate chips and corn syrup. Allow to sit for 1-2 minutes, then stir until smooth.
- Remove the domes from the tops of the cakes and place one cake on a serving platter. Give the pastry cream a stir to smooth it out, then spread the pastry cream over the cake layer, leaving about an inch between the cream and the side of the cake for it to spread a bit, then top it with the second cake layer.
- Pour the chocolate over the top of the cake and spread it out towards the edges, letting some of the chocolate drip down the sides.
- Refrigerate cake until ready to serve. Store in an air-tight carrier, if possible. The cake is best if eaten within 3-4 days.
Notes
- Refrigerator storage. Seal the cake in an airtight cake carrier or something similar. If you don’t have one, pop the cake in the fridge for a few hours to firm up before wrapping it in a double layer of plastic wrap. You can also arrange slices of Boston cream in a single layer in an airtight container. However you choose to do it, you can store your leftovers in the fridge for up to 4 days.
- Freezing/Prepping ahead. I do not recommend freezing a full Boston Cream Pie. The pastry cream can split when it thaws, leaving you with a mess. If you’d like to freeze things for prepping ahead, you can make the cake layers ahead and freeze those, then thaw them in the fridge before using. You can also make the pastry cream a day or so ahead and then layer everything together prior to serving it
Nutrition
- Serving Size: 1 Slice
- Calories: 479
- Sugar: 39.1 g
- Sodium: 132 mg
- Fat: 23.8 g
- Carbohydrates: 57.7 g
- Protein: 10.6 g
- Cholesterol: 135.2 mg


This is the best recipe! I followed all the instructions and it turned out perfect! I made it for my husband’s birthday and it was a hit. I look forward to making it again.
Awesome! I’m so glad to hear that!
You haven’t given instructions on assembling the cake with the custard filling before the ganache goes on.
Well, that’s odd. I’ve fixed it. Thank you for letting me know!
Question! This recipe calls for 9inch pan. Would an 8 inch work? Just bake a little longer?
Yes, that would be fine.
For the custard, 2 tablespoons of butter is 28 grams, not 14. Other than that, very tasty and easy to make.
I’m glad you enjoyed it!
It STATES 28 grams…not 14. ??
I made this for a dinner with friends and it was great. Make sure to make early or the day before so the custard sets up. Delicious, will definitely make again!
Awesome! I’m so glad you enjoyed it!
I have a quick question do I soften the butter?
Thank you!
In the cake, it’s listed as being room temperature.
Did anyone have to bake the cake longer, not even a bit tan on the top after 25 minutes
Yes I had the same problem I baked the cakes for 25 minutes and then when I stuck the fork in it was still gooey. I wonder what happened?
You may just need a little longer bake time. All ovens vary.
This cake is absolutely delicious and easy to prepare. I am wondering if there is a trick to cutting the cake? I found it difficult to make clean cuts. Ty so much for a great recipe;
I’m so glad you enjoyed it! I also find it hard to make clean cuts. I tend to hold the knife at more of an upward angle, pressing the tip of the knife int the middle of the cake and moving out, rather than just pressing the whole knife down at the same time, if that makes sense. It’s kind of an angle thing for me. You could also try warming up the knife under hot water. I hope that helps!