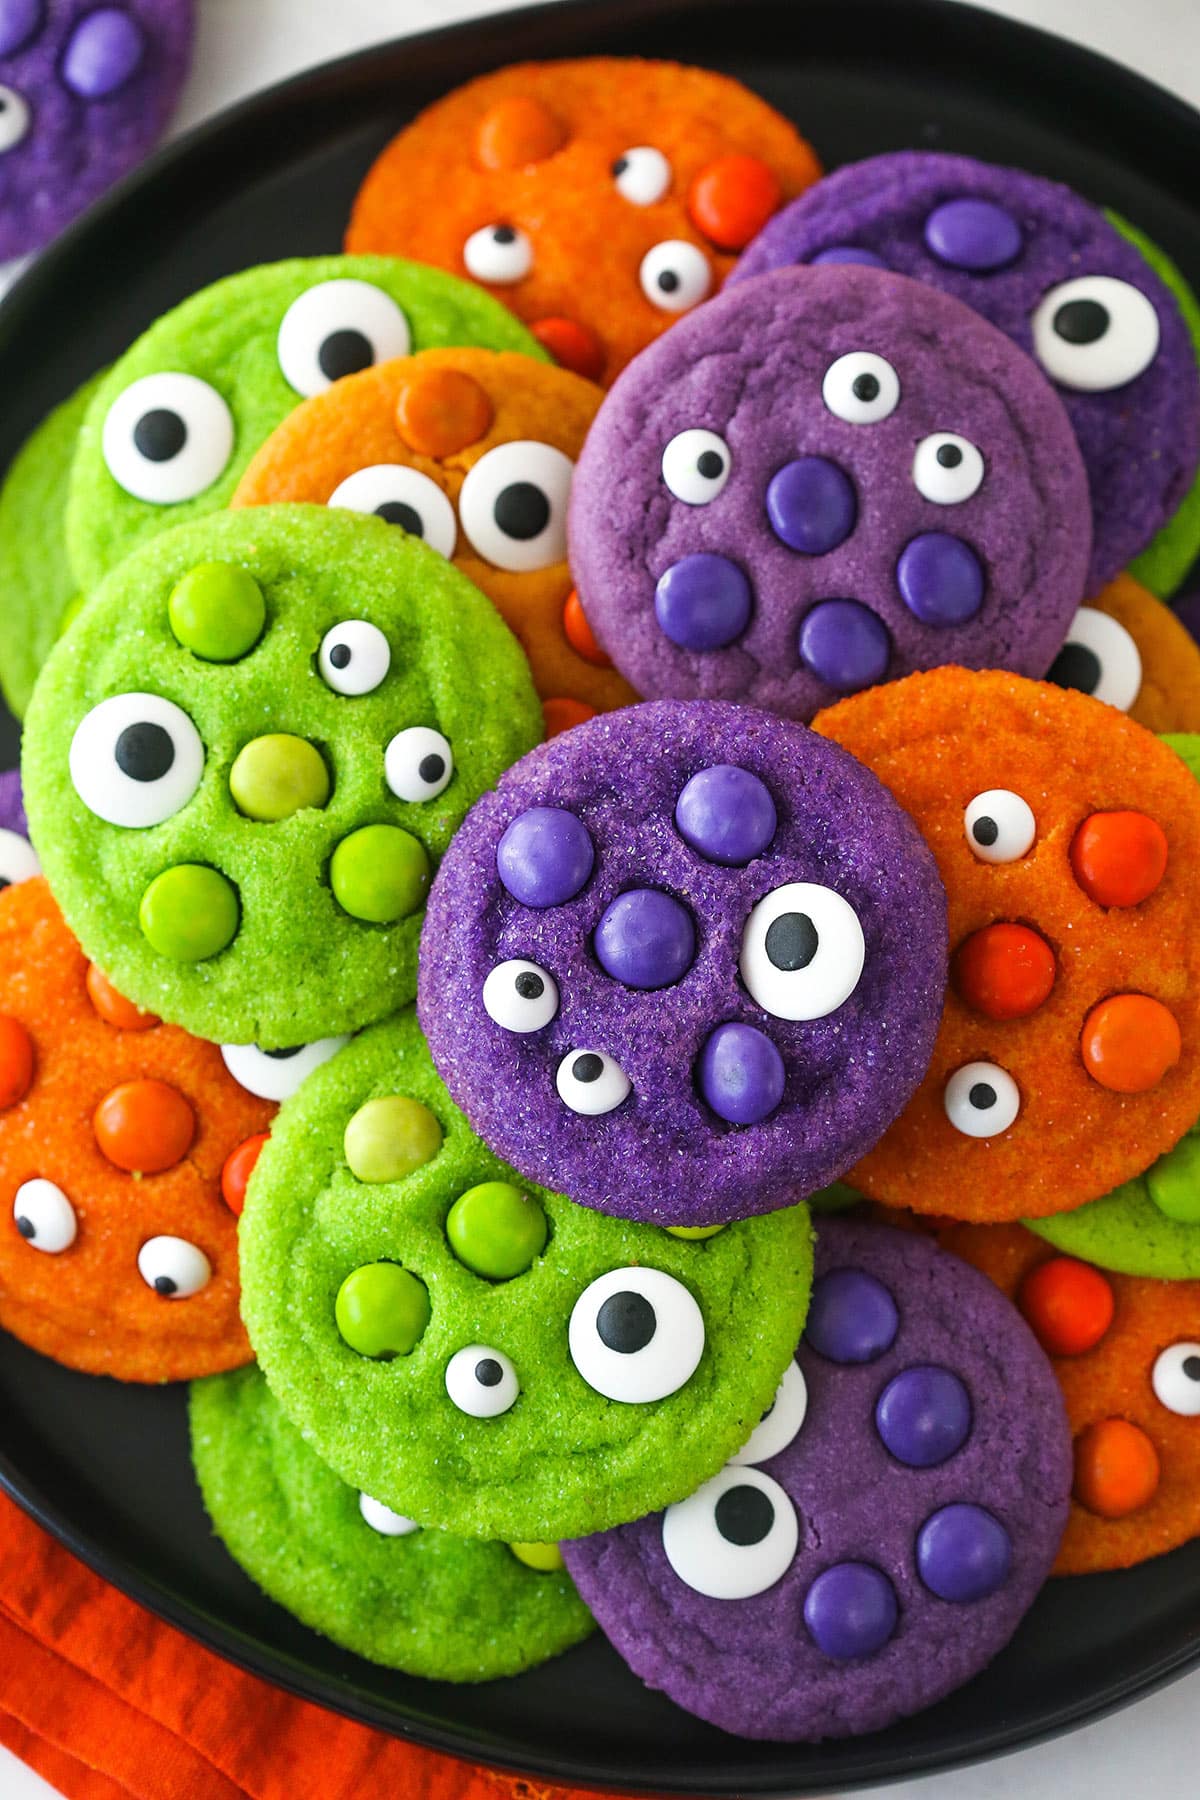
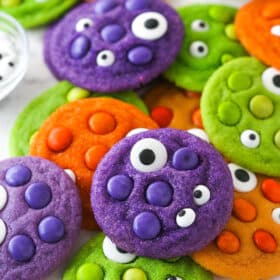
These EYE-catching Halloween monster cookies are super soft and chewy. Kids and grown ups alike will find them monstrously fun with their vibrant colors, M&Ms, and wacky eyeball sprinkles.

Fun Halloween Monster Cookies
It doesn’t get much more fun than these Halloween monster cookies. Kids absolutely love the monster faces! And this recipe starts with my super popular and well-loved sugar cookie recipe, so you know they’re as tasty as they are fun. The classic cookie recipe gets a Halloween glow up with the addition of bright Halloween colors. You can use any colors you like or even mix all 3 colors into each cookie. I really liked the way the purple, orange and green cookies popped on my serving tray. That’s the beauty of this easy recipe — there are so many ways to make the monster cookies your own and customize them however you’d like for Halloween.
I did a mix of cookies with and without the sanding sugar on the outside. I like the way the sanding sugar looks, but I found that the eyeballs and M&Ms stick better without it. The choice to use sanding sugar is all yours. Don’t get me wrong, they stuck to the ones with sanding sugar, just not as well. If you use the sanding sugar, just be sure to press the eyeballs and M&Ms into the cookie a little more.
The best part of these cookies is that they are super soft and chewy. They will retain their amazing texture and taste for days on end. You could eat one of these super fun Halloween cookies 4-5 days after baking them and feel like you just pulled it from the cooling rack. It’s glorious!

Why You’ll Love These Halloween Monster Cookies
I can confidently say that these are the best Halloween sugar cookies because they start with my original soft sugar cookie recipe! I tested the basic recipe more times than I care to admit, and the results don’t lie. Here’s what makes these monster cookies the best:
- Customizable. I love that you can change the colors, mix-ins and coating according to your taste. For example, these cookies would be fun to make in white, black and red. Or, you could mix the colors together to give the cookies a marbled look. If you don’t like M&Ms you could use skittles, candy corn, peanut butter cups, or any other candy you enjoy.
- Fun. The reaction you’ll get when loved ones see the clever monster design is priceless. You can expect giggles, chortles and snickers. Your little ghouls and goblins will be grinning from ear to ear!
- Soft and Chewy. Just when you thought their grins couldn’t get any bigger, they’ll take a bite and realize how soft and chewy and perfect these cookies really are. It’s scary how fast they’ll disappear; you might want to make a double batch right from the start!
- No Chilling. In addition to all of the above, these sugar cookies have another major bonus – the dough doesn’t need to be chilled! They spread perfectly on their own.

Ingredients You’ll Need For Monster Cookies
The dough and toppings for these monster Halloween cookies are made with several ingredients. Here are a few tips to keep in mind when preparing this recipe. Check out the recipe card toward the bottom of this post for the full amounts.
- Flour – An important part of a creating a chewy cookie is finding the right amount of flour to balance out the moisture content of the cookies. It can be tricky to get the balance right, but it’s well-achieved in this recipe. I use all-purpose flour and recommend measuring accurately with a food scale. If you don’t have one, you can also use the spoon and level method.
- Baking soda & baking powder – After all the testing I did, I found that my favorite sugar cookies used a combination of baking soda and baking powder. Recipes that only use baking powder will be thicker and more cake-y, while recipes that only use baking soda will be thin and chewy. A combination of both leaveners will create cookies that have the ultimate taste and texture.
- Salt – This amplifies the other flavors in the cookies.
- Unsalted butter – Use room temperature unsalted butter so that you can control the salt content of your cookies.
- Granulated sugar & light brown sugar – The right balance of white and brown sugar is another major component of getting the perfect sugar cookie. Part of what makes a cookie chewy is high moisture content. Brown sugar has more moisture than white sugar, because it contains a little bit of molasses. You only need a little brown sugar to make the cookies spread the right amount and retain their softness.
- Egg – For binding the dough together.
- Vanilla – The classic sugar cookie flavor! Use a high-quality brand for the best results.
- Gel icing colors – I used green & yellow, orange, and purple in my cookies. I highly recommend using gel icing color because it’s super concentrated, and you’ll only need a little to achieve vibrant colors. I especially like this 8 pack of Wilton gel icing colors because of the shade of their violet gel.
- Sanding sugar – If you choose to use sanding sugar for the outside of the cookies, it gives them a pretty shine and a bit of crunch when you bite into them. Just remember to press the M&Ms and eyeballs into the cookie a little deeper to make sure they stick. I used green, orange, and purple sanding sugar.
- Candy – Eyeball sprinkles & M&Ms give the cookies their monster look.

How to Make Monster Halloween Cookies
These cookies are very easy to make. Check out the step-by-step photos for a quick overview of the directions. More comprehensive directions can be found in the recipe card below.
Prepare the Dough
- Heat Oven & Prep Pans: Preheat oven to 350°F (180°C). Line baking sheets with parchment paper or silicone baking mats.
- Combine Dry Ingredients: Combine the flour, baking soda, baking powder and salt in a medium sized bowl and set aside.
- Cream Butter & Sugar: Cream the butter and sugars together in a large mixer bowl on medium speed until light in color and fluffy, 2-3 minutes.
- Add Egg: Add the egg and mix until well combined.
- Add Vanilla: Add the vanilla extract and mix until well combined.
- Mix In Dry Ingredients: Add the dry ingredients and mix until the dough is well combined.


Prep The Cookie Dough Balls
- Divide & Color The Dough: Divide the cookie dough evenly between three bowls. Color each bowl of dough a different color.
- Make Cookie Dough Balls: Create 1 1/2 tablespoon sized balls of cookie dough.
- Roll In Sanding Sugar: Roll each ball in the optional sanding sugar to coat.


Bake Cookies
- Place On Baking Sheet: Set the balls on the baking sheet.
- Bake: Bake cookies for 7-8 minutes. Remove just before the edges begin to turn golden.
- Remove From Oven: Remove from the oven and immediately press eyeballs and M&Ms into the cookies, as desired.
- Cool: Allow to cool on baking sheets for 4-5 minutes before transferring to a wire rack to cool completely.


Tips for Success
These simple suggestions will help guide you through the process of making these cookies. Don’t forget to give them a read!
- Measure Your Flour Correctly. Too much flour can give you cookies that don’t spread well and are dry. I always recommend a food scale to ensure accuracy, but if you don’t have one you can use the spoon and level method. Read more about measuring your flour accurately here.
- Don’t Over-Mix the Dough After You Add The Flour. It can over-develop the gluten and cause the cookies to not spread as nicely or be tough.
- Make Sure Your Butter Is At The Right Temperature. Room temperature is different from house to house. You’ll know your butter is just right if you press on it and you’re able to make a slight imprint.
- Only Use 2 Tablespoons Of Brown Sugar. It adds just enough additional moisture to the cookies to help them spread correctly and stay soft and chewy for days!
- Make The Cookie Dough Balls 1 1/2 Tablespoons Each. This is the perfect size if you want your cookies to spread nicely. If you change the cookie ball size, you’ll need to adjust the baking time and the thickness might be effected.
- Should You Use Sanding Sugar or Not? Sanding sugar will give the cookies a sparkly shine and slight crispness when you bite into the cookies. However, it does make it slightly more difficult for the M&Ms and candy eyeballs to stick to the freshly baked cookies. If you choose to use sanding sugar, be sure to press the toppings in a bit deeper than usual to give them a better chance of sticking.
- How will You Know the Cookies are Done Baking? My cookies were perfectly baked at 7 minutes, but keep an eye on them to see how they do in your oven. I recommend removing them when they have spread nicely, the center looks just barely done (don’t overcook them), and the edges weren’t quite golden yet.
- Cool The Cookies Properly. Don’t worry if the centers of the cookies are still quite soft when you take them out of the oven, they will firm up as they cool. Allow them to cool on the baking sheet for at least 4-5 minutes before moving them to a cooling rack. Trying to move them too soon will result in broken or misshapen cookies.
How to Store and Freeze Monster Sugar Cookies
- Counter: Store these cookies on the counter in an airtight container for up to 4 or 5 days.
- Freezer: After the cookies come to room temperature, pack them in a Ziplock bag and freeze them. You can thaw them in the fridge when you’re ready to eat them. Just be aware that condensation can cause the colors on the M&Ms and eyeballs to bleed.
More Fun Halloween Treats
- Bat Oreo Cookie Balls
- Mini Candy Corn Cheesecakes
- Dirt Cookie Cups
- Easy Mummy Rice Krispie Treats
- Candy Corn Icebox Cake
- Spiderweb Chocolate Tart
- Spooky Halloween Marble Cake
- Monster Cookie Cake
Monster Halloween Cookies
- Prep Time: 45 minutes
- Cook Time: 7 minutes
- Total Time: 52 minutes
- Yield: 32 cookies 1x
- Category: Dessert
- Method: Oven
- Cuisine: American
Description
These EYE-catching Halloween monster cookies are super soft and chewy. Kids and grown ups alike will find them monstrously fun with their vibrant colors, M&Ms and wacky eyeball sprinkles.
Ingredients
- 2 3/4 cups (358g) all-purpose flour (measured correctly)
- 1 tsp baking soda
- 1/2 tsp baking powder
- 1/2 tsp salt
- 1 cup (224g) unsalted butter, room temperature
- 1 cup + 2 tbsp (233g) granulated sugar
- 2 tbsp (28g) light brown sugar
- 1 large egg
- 2 tsp vanilla extract
- Green, Orange and Purple gel icing color
- Green, Orange and Purple sanding sugar, optional
- Eyeballs
- M&Ms
Instructions
- Preheat oven to 350°F (180°C). Line baking sheets with parchment paper or silicone baking mats. Set aside.
- Combine the flour, baking soda, baking powder and salt in a medium sized bowl and set aside.
- Cream the butter and sugars together in a large mixer bowl on medium speed until light in color and fluffy, 2-3 minutes. You should be able to see the change in color happen and know it’s ready.
- Add the egg and mix until well combined.
- Add the vanilla extract and mix until well combined.
- Add the dry ingredients and mix until the dough is well combined. It will be thick and shouldn’t be sticky. Do not over mix. Once it’s well combined, use a rubber spatula to help it come together to form a more cohesive ball.
- Divide the cookie dough evenly between three bowls. Color one with green gel icing color, one with orange gel icing color and one with purple gel icing color. The less coloring you add, the better. You don’t want to add too much more moisture or your cookies will spread too much.
- Create 1 1/2 tablespoon sized balls of cookie dough. Gently roll into a ball, then roll each ball in the optional sanding sugar to coat. I find that the sanding sugar can make it harder for the eyeballs and M&Ms to stick later, so you don’t have to use it. Set the balls on the baking sheet.
- Bake cookies for 7-8 minutes. The cookies will spread and the centers will look soft, but should look done. Remove just before the edges begin to turn golden. Don’t over bake.
- Remove from the oven and immediately press eyeballs and M&Ms into the cookies, as desired. The heat from the warm cookies will melt the candy coatings just a bit and help them adhere to the cookies.
- Allow to cool on baking sheets for 4-5 minutes before transferring to a wire rack to cool completely.
Nutrition
- Serving Size:
- Calories: 133
- Sugar: 9.6 g
- Sodium: 80.6 mg
- Fat: 6.4 g
- Carbohydrates: 18 g
- Protein: 1.4 g
- Cholesterol: 21.3 mg


Can I roll this dough out and use cookie cutters to create Halloween themed cookies like pumpkins, bats and such?
This cookie dough spreads, so it’s no idea for that. I’d try my regular cutout cookies. You could color the dough, if you like.
Could I use chocolate chips instead of the m&ms . If so do I mix them into the dough before going in oven .
Sure! And you could do it either way. If you want the chocolate chips more mixed throughout, you can add them before you bake them.
My coloring did not turn out as deep and bright as yours. Used gel color too
It could be that you didn’t add as much as I did or used slightly different colors. The brand can also sometimes make a difference. I used Americolor and Wilton.
I think your nutrition counts may be a little off lol
Yep! Fixed!