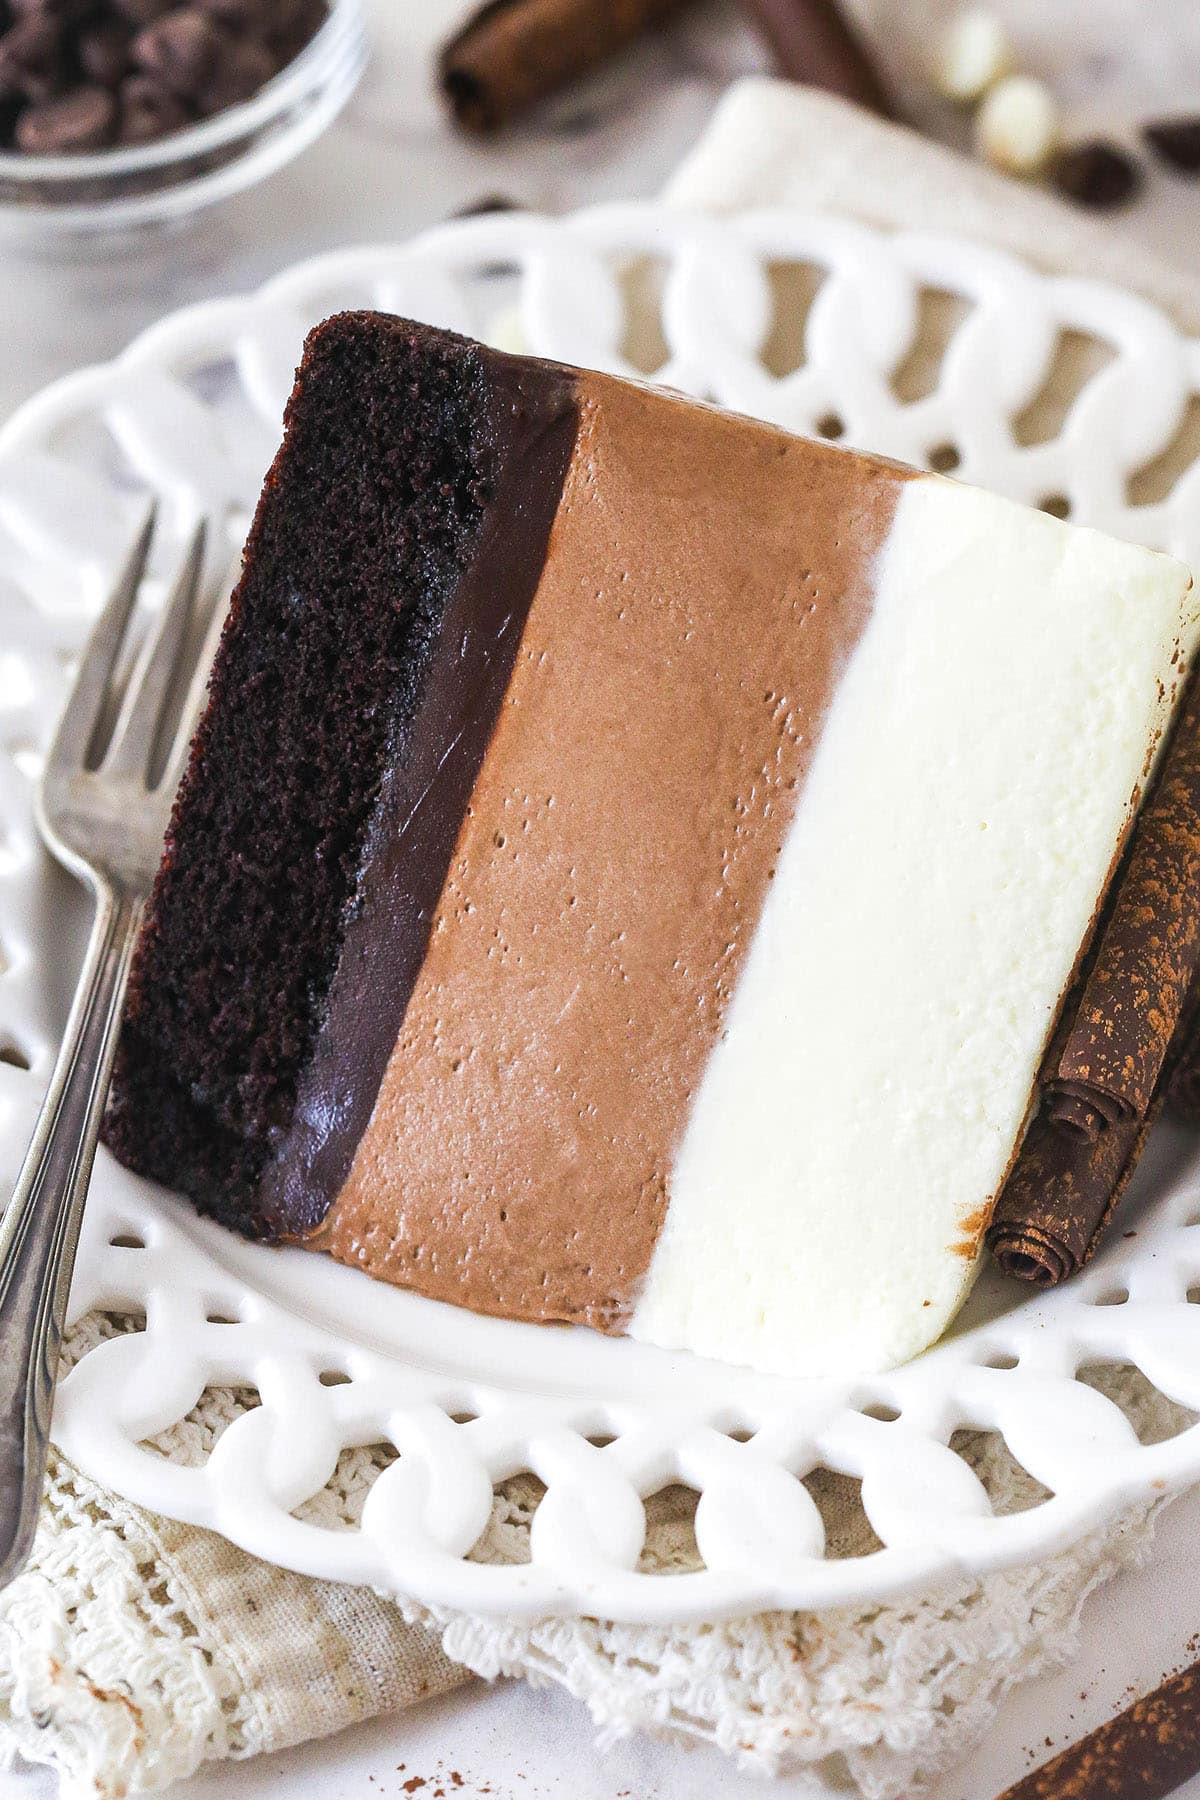
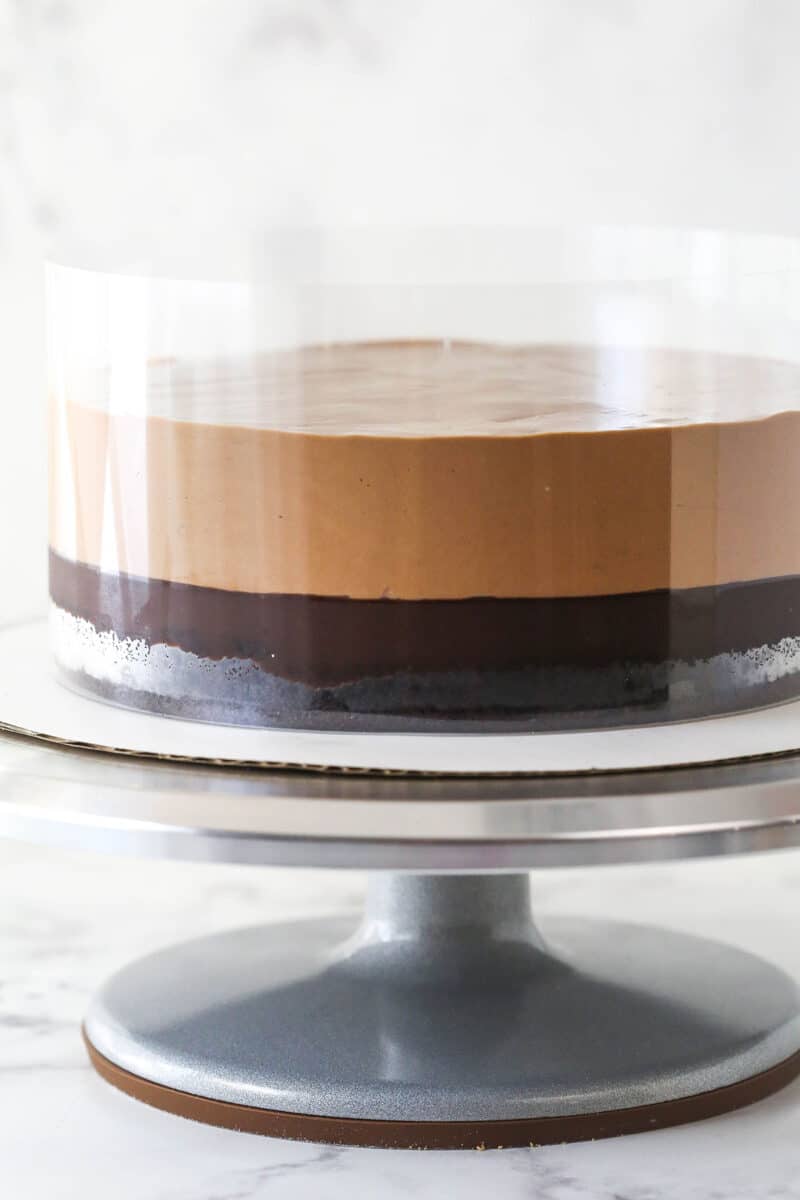
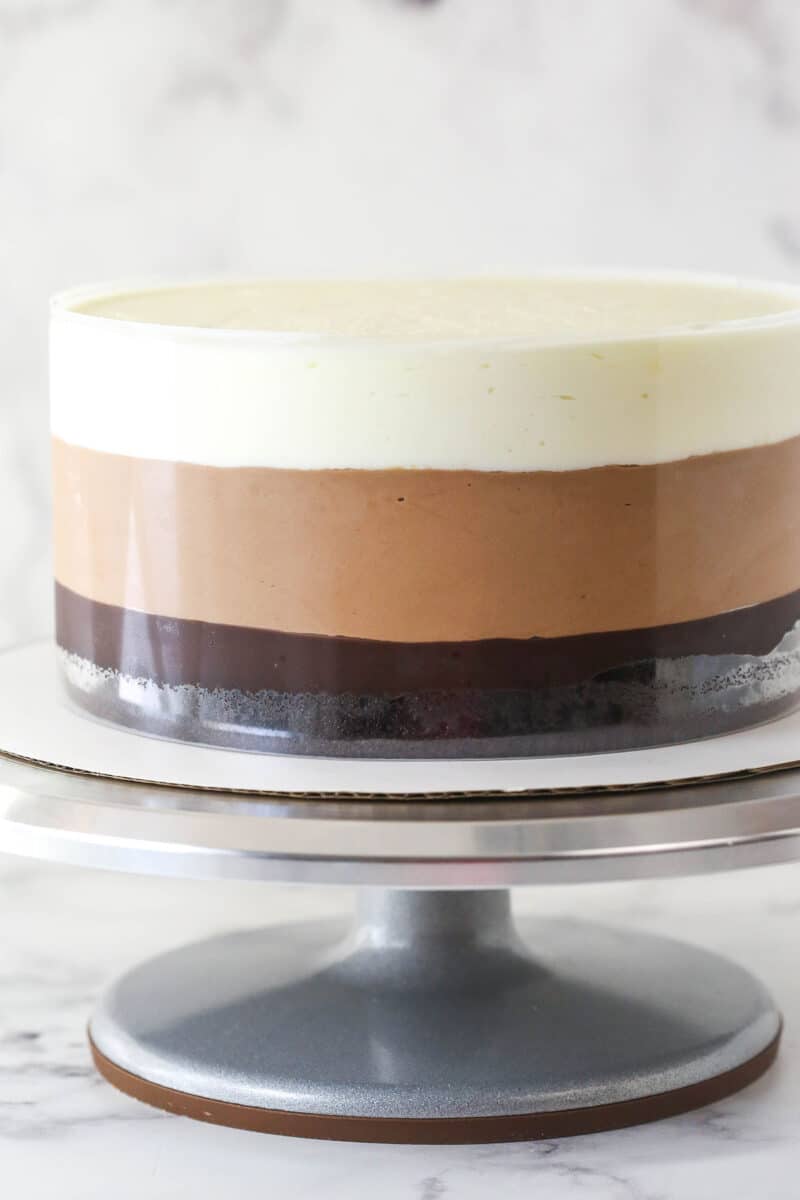
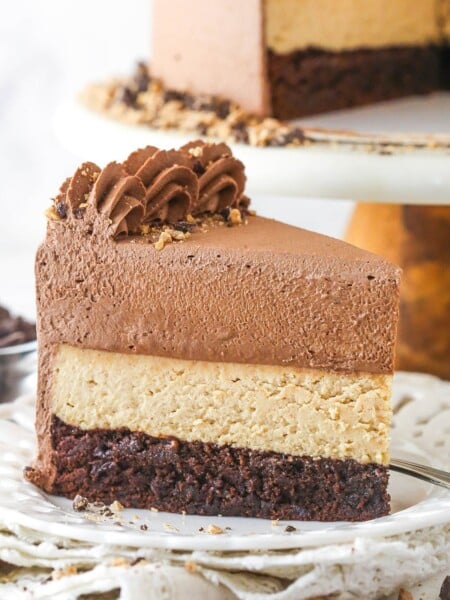
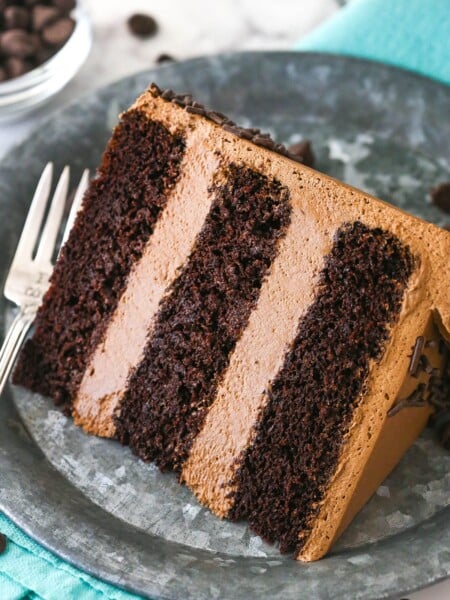
Smooth and creamy layers of chocolate and white chocolate mousse, rich chocolate fudge, and a moist chocolate cake make up this insanely decadent Triple Chocolate Mousse Cake. It’s a show-stopping dessert perfect for any chocolate lover.

I’ve been making this triple chocolate mousse cake for years now – I first made it for the 4th anniversary of running this blog (this year will be 14 years!). Since then, I’ve made a few tweaks and decided to give the recipe an update. So what’s changed? If you’ve make this cake before, you may notice that the chocolate cake bottom layer has been updated. The cake has been simplified and it’s now more moist, a little less dense, and has even more chocolate flavor. And I know it’s hard to see a recipe you love change, but trust me. I wouldn’t change it if it wasn’t truly so much better the new way.
It was such an incredible cake before but I daresay that it’s even better now. The combination of the cake, chocolate fudge and mousse layers is just the perfect mix of flavors and textures. It’s truly hard to resist! If you’ve never tried it before, now’s your chance!

Why This Mousse Cake Steals The Show
- 4 amazing layers. There are 4 layers in this gorgeous cake – the moist dark chocolate cake, chocolate ganache, chocolate mousse, and white chocolate mousse. Each layer brings its own flavor and texture AND it looks so stunning once removed from the pan.
- ALL the chocolate. This cake really earns the “triple chocolate” name. There is dark chocolate in the bottom cake layer, semi-sweet chocolate in the fudge and mousse layers, and white chocolate in the top mousse layer. It’s always a hit with the chocolate lovers!
- Rich & decadent. As a whole, this triple chocolate mousse cake just feels and tastes so rich and decadent. It’s a great special occasion dessert. There’s the moist cake layer, the airy but firm mousse, and the rich, gooey chocolate fudge. So good!
Recipe Ingredients and Notes
There’s a long list of ingredients in this recipe, but many are the same thing used in multiple places. Here are some notes about why certain ingredients are important and if certain swaps can be made. You can find the full list and exact measurements for each ingredient in the recipe card below.

- Dutch-processed cocoa powder – I highly recommend sticking with the Dutch-process cocoa. If you use regular cocoa powder, your cake layer won’t rise as much and will be denser.
- Brown sugar – I don’t recommend swapping the brown sugar for regular sugar. The molasses in the brown sugar is acidic and reacts with the baking soda. Without it, your cake will be denser and have large holes.
- Melted butter and vegetable oil – Using both helps to keep the cake moist and flavorful.
- Salt – Enhances the flavors already present. Don’t leave it out.
- Egg white – Used in the cake layer, you just need one egg white for such a small amount of batter. Fortunately, you can use the yolk for the chocolate mousse.
- Milk – I’d recommend 2% or whole milk for the cake layer.
- Hot water – This helps to “bloom” the cocoa powder and deepens the chocolate flavor. You could also use hot coffee.
- Semi-sweet chocolate chips – Use a quality brand, like Ghirardelli, for the best flavor. I don’t recommend using another type of chocolate, as that could make your various layers more thin or thick, depending on what you swap it for. For best results, stick with semi-sweet.
- Light corn syrup – Helps ensure a smooth, creamy texture in the fudge and keeps it from getting too firm when cold.
- Egg yolks – Egg yolks help to thicken the mousse and add richness.
- Heavy whipping cream – Keep it cold before whipping it, or it won’t whip properly.
- Unflavored powdered gelatin – I use Knox brand. It’ll firm up the white chocolate mousse. Without it, it won’t set properly.
- White chocolate chips – Like the semi-sweet chocolate, you want to use a quality brand for the best flavor.
How To Make Triple Chocolate Mousse Cake
Each layer of this cake takes a few steps to prepare but none of them are difficult. Just leave yourself lots of time to prepare the cake and make sure to read through the full instructions and tips ahead of time. You can find the printable version of the instructions in the recipe card below.
Make the chocolate cake
Place a parchment paper circle in the bottom of the pan and grease the sides. Preheat the oven to 350°F. Combine the dry ingredients in a bowl and set aside.
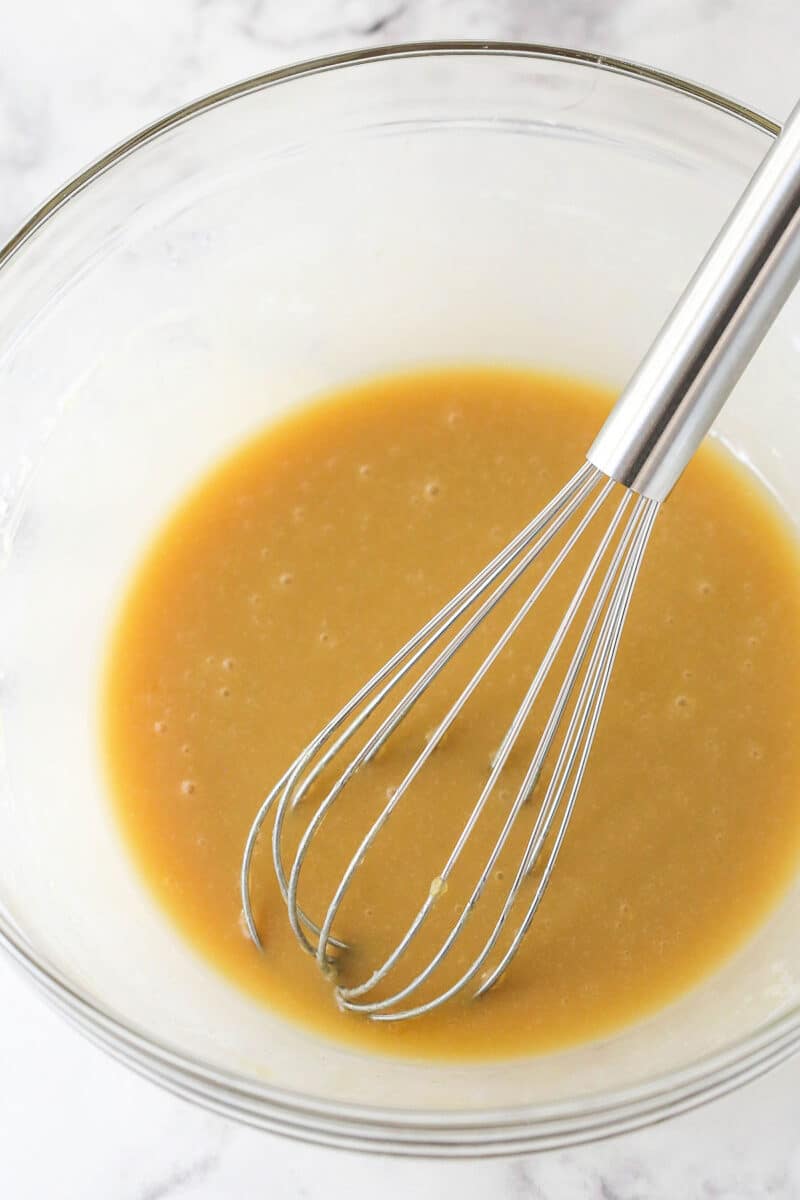
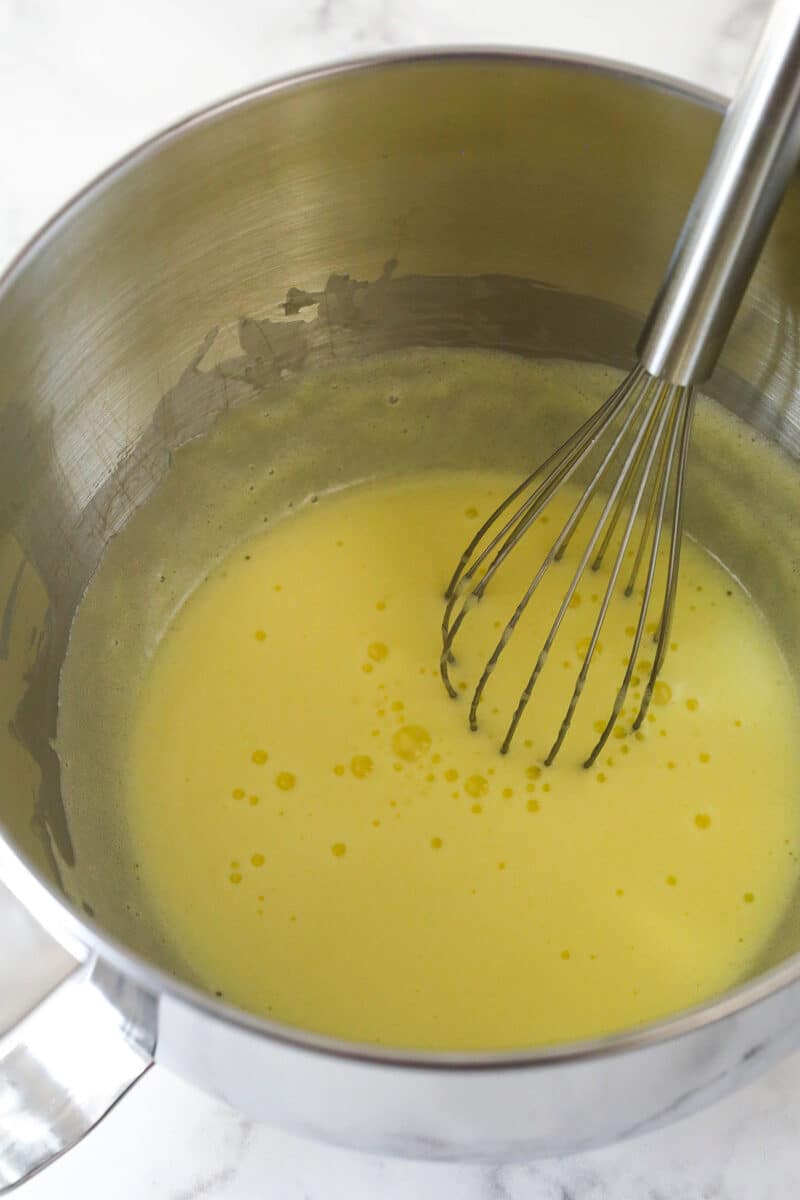
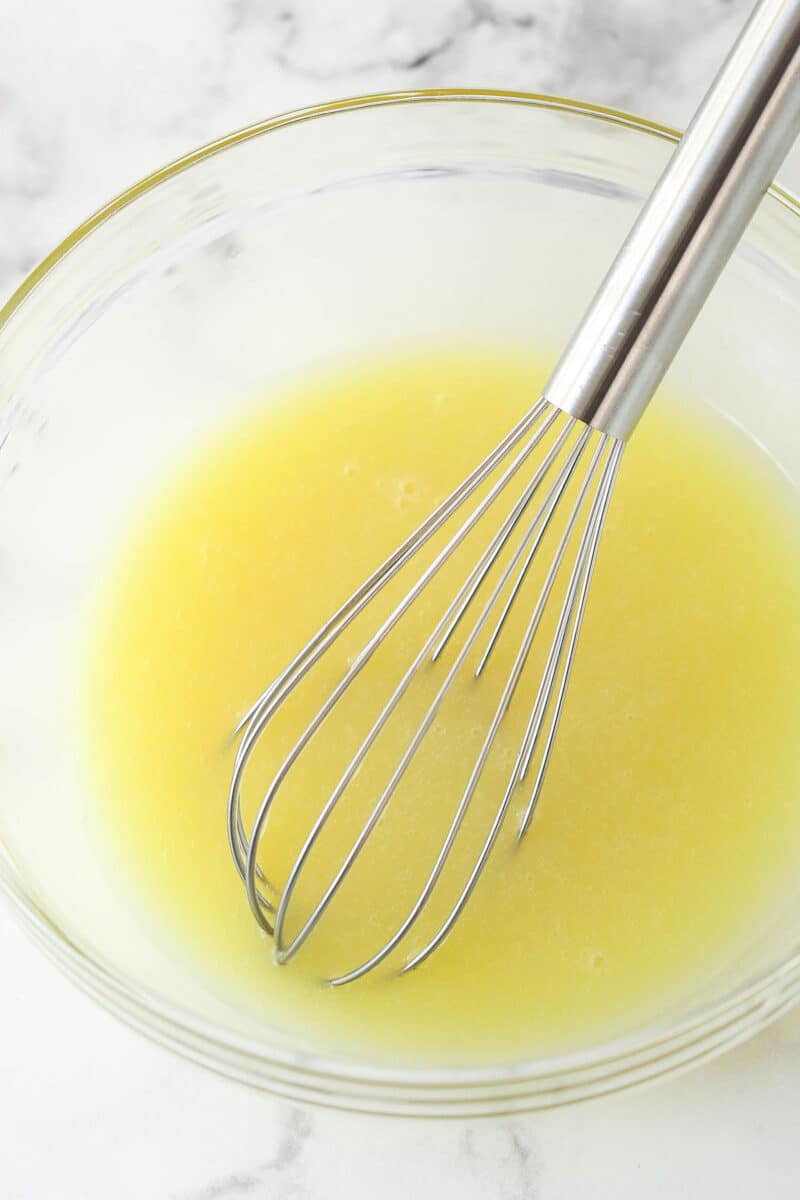
mix the melted butter, oil, sugar, and vanilla until well combined then add the egg white and sour cream. Once combined, stir in the milk.

Add the dry ingredients and mix until just combined
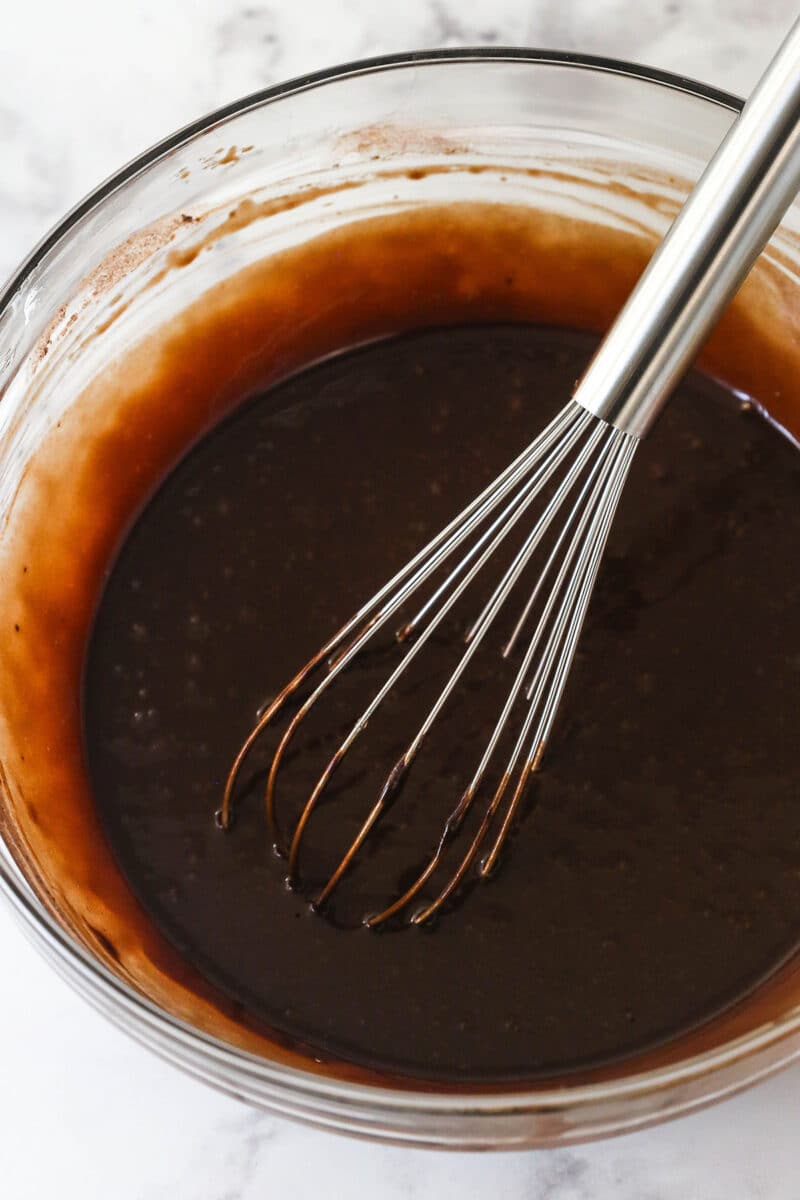
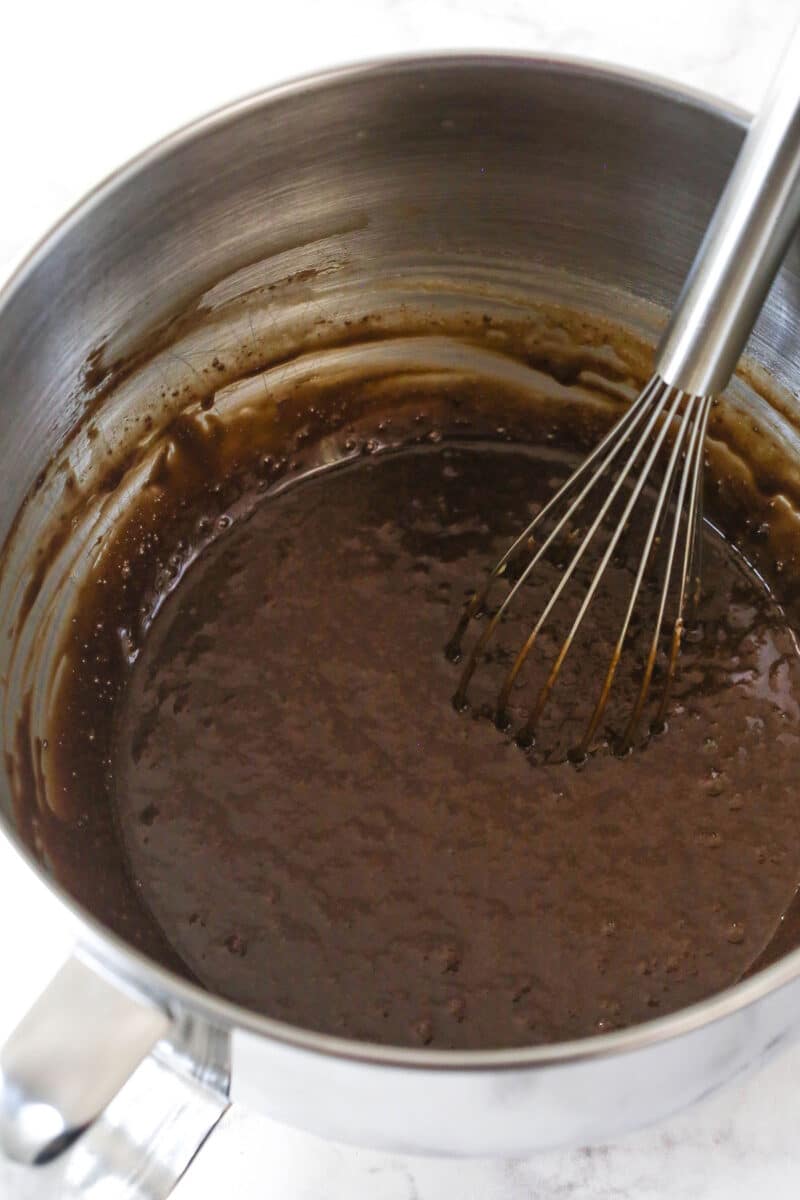
Stir in the hot water. Batter will be thin.
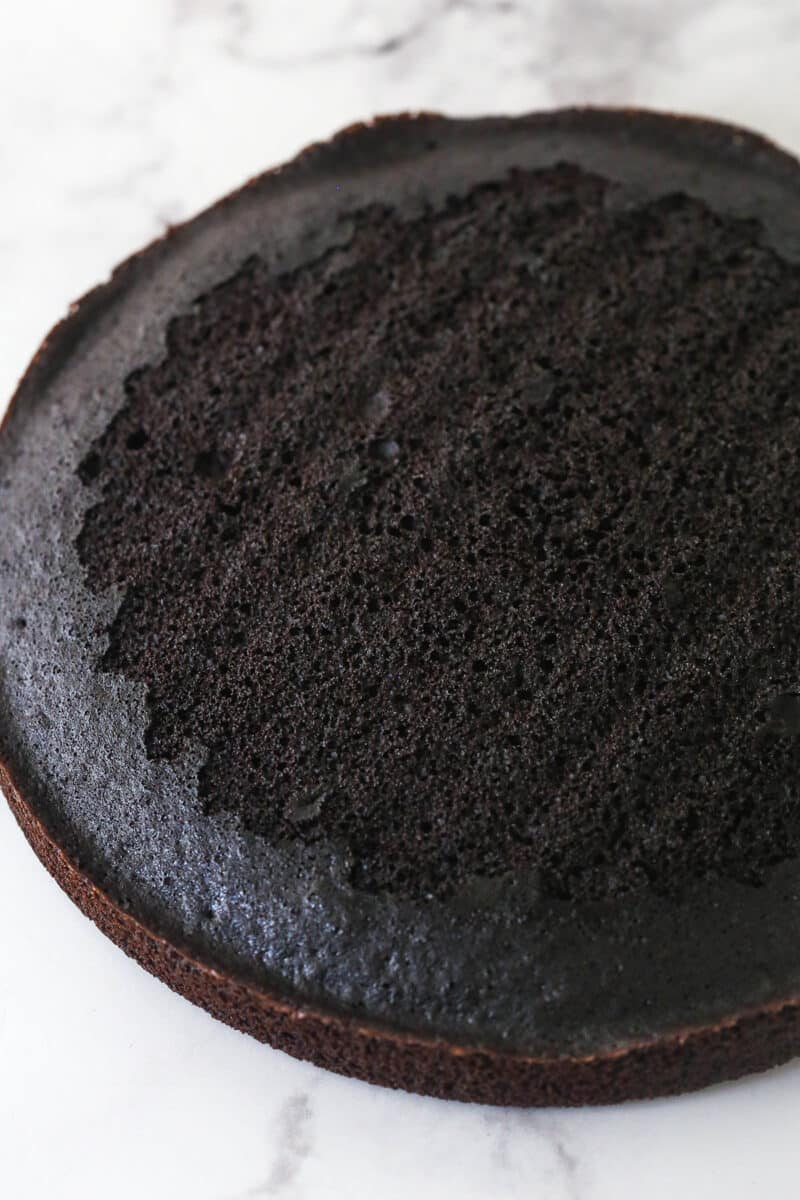
Pour the cake batter into the prepared pan and bake for 18-22 minutes. Allow to cool.
Make the fudge layer
Prepare your cake collar or cake pan for layering and building the cake before making the fudge. For more on how to do that, see the section below on what type of pan is best.

Combine chocolate chips, corn syrup, and vanilla extract, then set aside. Heat the heavy cream until just boiling then pour over the chocolate chips. Allow to sit for 3-5 minutes, then whisk until smooth.
Remove the dome from the top of the cake layer, then add it to your pan or cake collar. Pour the fudge on top of the cake, then place in the fridge for about an hour to firm up.
Make the chocolate mousse layer
Combine the egg yolks, sugar, and 1/2 cup of heavy whipping cream in the top of a double boiler (or a mixing bowl over simmering water). Whisk constantly until it has thickened, lightened in color, and has more volume.
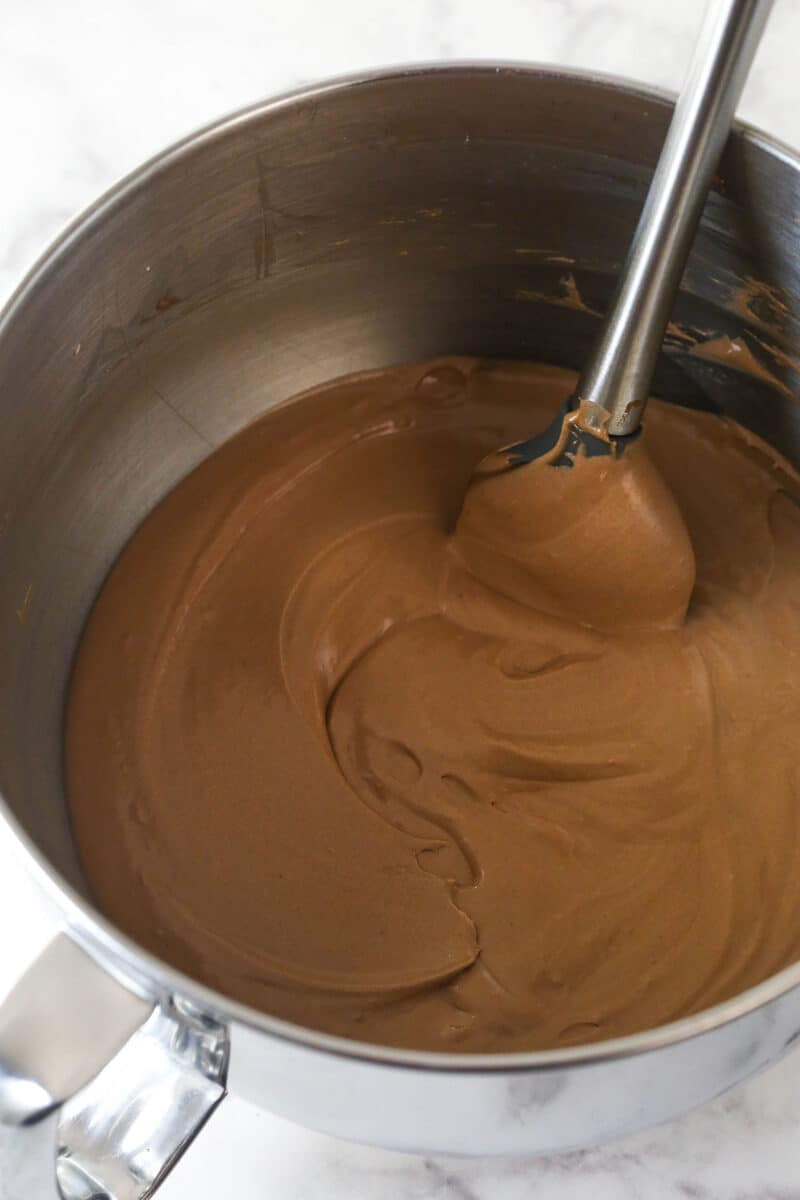
Microwave the chocolate chips in 10-15 second intervals, mixing between each interval, until smooth. Vigorously whisk the egg mixture into the melted chocolate. Set aside to cool to room temperature.
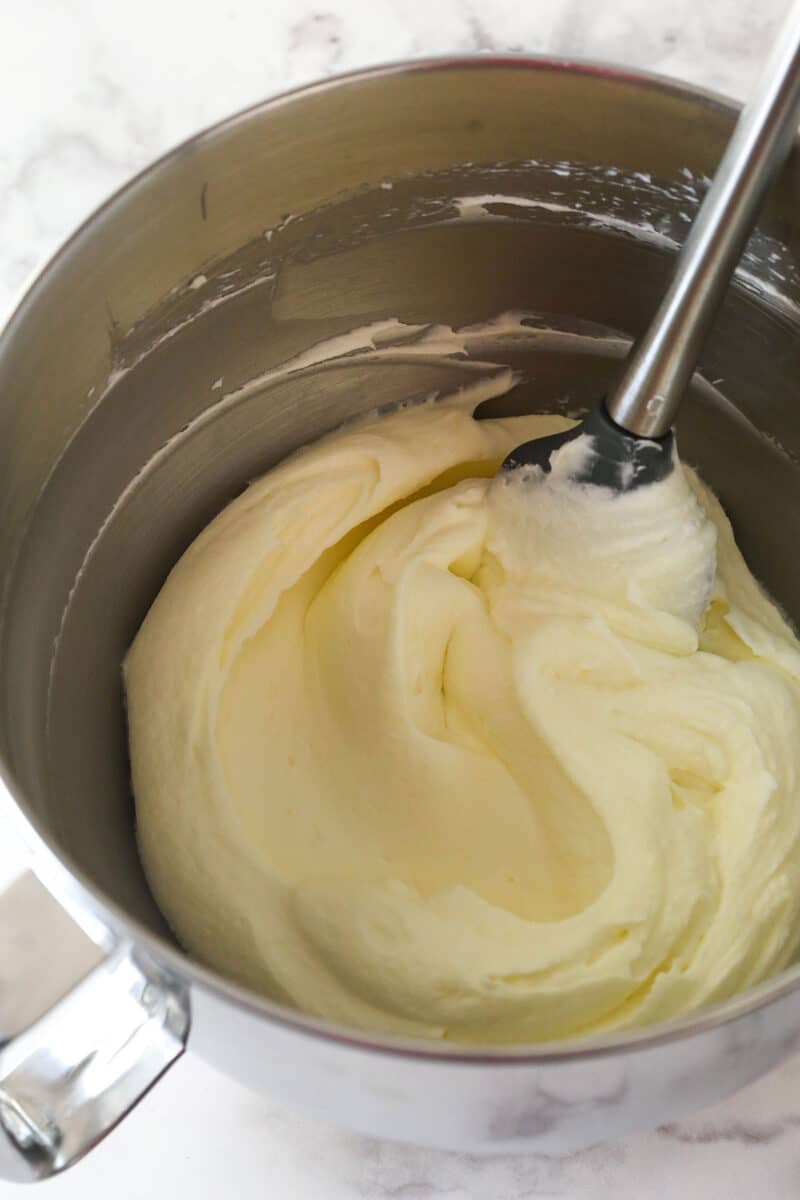
Whip the remaining heavy whipping cream and powdered sugar until stiff peaks form. Fold 1/4 cup of the whipped cream into the chocolate mixture, then fold 1/4 of the chocolate into the whipped cream. Fold the remaining chocolate into the whipped cream.
Spread the chocolate mousse onto the chocolate fudge in an even layer. Refrigerate for an hour.
Make the white chocolate mousse layer
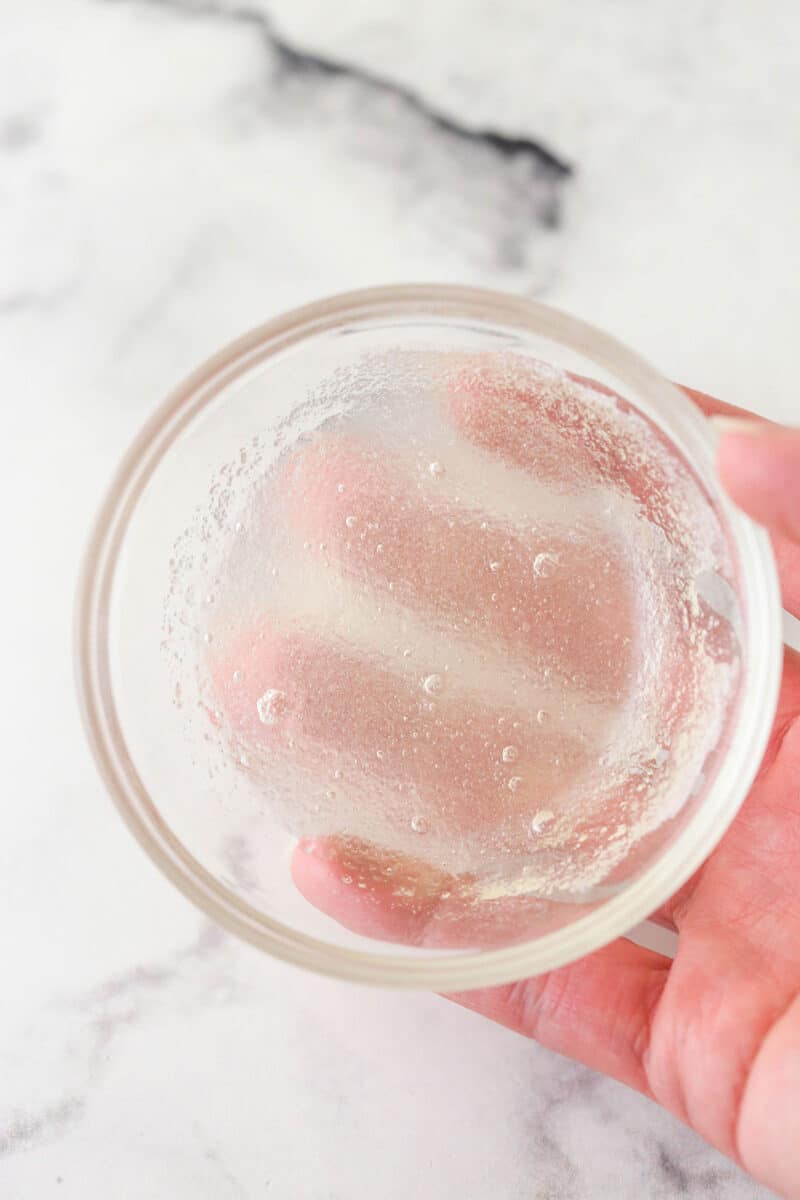
Sprinkle the powdered gelatin over the cold water, ensuring all of it is touching the water. Let stand for 5 minutes.
Heat 1/2 cup of the heavy cream until it comes to a boil. Whisk the gelatin into the hot cream until dissolved, then pour the mixture over the white chocolate chips. Whisk until the chocolate is melted and the mixture is smooth.
Whip the remaining heavy cream and powdered sugar on high until stiff peaks form. Gently fold 1/3 of the cooled white chocolate at a time into the whipped cream until completely combined.
Spread the white chocolate mousse on top of the chocolate mousse. Refrigerate for 3-4 hours, until completely firm.
Finish the cake
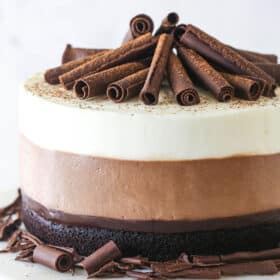
Once all layers are completely firm, remove the cake from the pan. Smooth the edges with an offset spatula, if needed, and place on a serving plate. I decorated mine with chocolate curls and a sprinkle of cocoa powder, but feel free to decorate it as you’d like. Refrigerate until ready to serve.

What’s The Best Pan For This Cake?
Using the right pan is key to making this triple chocolate mousse cake because you need to be able to easily remove it from the pan once it’s assembled.
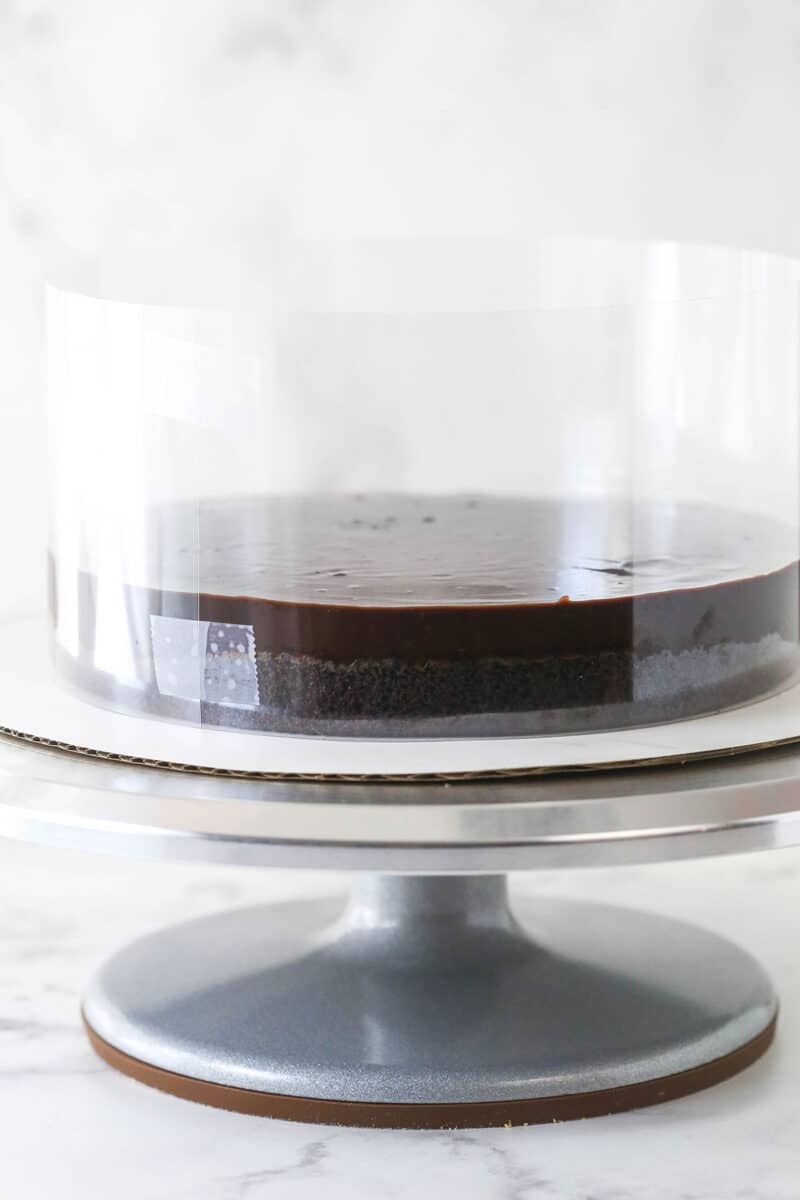
There are a few ways you can set up for layering the cake. The easiest options is to use a clear cake collars, as shown in the photos.
If you don’t have those or don’t want to use them, line the inside of a springform pan with parchment paper that sticks about 2 inches above the top of the pan, to act as a cake collar (see photo).
If you don’t have a springform pan, line a regular cake pan with plastic wrap in the bottom and up the sides (which you can use to lift the cake out later), a cardboard cake circle on top of the plastic wrap to stabilize the cake as you remove it from the pan, and parchment paper around the insides, to act as a collar.
Tips For The Best Cake
- Make the cake layer in advance. The cake layer needs to cool completely before you can proceed with the rest of the recipe, so I often make it ahead of time. Either first thing in the morning to assemble the cake in the afternoon or the night before.
- Leave time for each layer to set. As you add the ganache and mousse layers, the cake will need to be refrigerated for at least an hour each time. The exception is after adding the final white chocolate mousse layer, when it needs 3-4 hours to firm up completely. Don’t skip this chill time, as the layers will mix together too much otherwise.
- Be gentle with the mousse. For both the chocolate mousse and white chocolate mousse layers, take care when adding the whipped cream to the chocolate. The key to mousse is to gently fold the chocolate in a bit at a time. Adding it all at once or mixing it instead of folding it can cause the mousse to collapse.

Proper Storage
Triple chocolate mousse cake needs to be refrigerated until ready to serve. I like to place it in a cake carrier or cover it with plastic wrap (using toothpicks to keep it off the top layer). It’s best if enjoyed within 4-5 days.
More Decadent Recipe To Try
Triple Chocolate Mousse Cake
save this recipe
Enter your email & we’ll send it to your inbox. Plus get new recipes from us every week!
Ingredients
Chocolate Cake
- ¾ cup (92g) all-purpose flour
- ¼ cup (29g) Dutch-processed cocoa powder (sifted)
- ¾ teaspoon baking soda
- ¼ teaspoon salt
- 3 tablespoons (42g) unsalted butter (melted)
- 3 tablespoons (45ml) vegetable oil
- ½ cup (112g) packed light brown sugar
- ½ teaspoon vanilla extract
- 1 large egg white
- 2 tablespoons (29g) sour cream
- 3 tablespoons (45ml) milk
- ⅓ cup (80ml) hot water or coffee
Chocolate Fudge
- 6 ounces (170g) semi sweet chocolate chips
- 2 tablespoons (30ml) light corn syrup
- ½ teaspoon vanilla extract
- ½ cup (120ml) heavy whipping cream
Chocolate Mousse
- 4 large egg yolks
- ¼ cup (52g) sugar
- 1 ¾ cups (420ml) heavy whipping cream (cold, divided)
- 8 ounces (227g) semi sweet chocolate chips
- ¾ cup (86g) powdered sugar
White Chocolate Mousse
- 1 ¼ teaspoons unflavored powdered gelatin
- 1 ½ tablespoons (23ml) water
- 9 ounces (255g) white chocolate chips
- 1 ¾ cups (420ml) heavy whipping cream (cold, divided)
- ⅓ cup (38g) powdered sugar
Toppings
- Chocolate curls (optional)
- Cocoa powder (for dusting, optional)
Instructions
Make the cake layer
- Prepare an 8-inch cake pan with a parchment paper circle in the bottom, and grease the sides. Preheat oven to 350°F (180°C).
- Combine the flour, cocoa powder, baking soda and salt in a medium sized bowl and set aside.
- Add the melted butter, vegetable oil, sugar and vanilla extract to a large bowl and mix until well combined.
- Add the egg white and sour cream and mix until well combined, then add the milk and mix until well combined.
- Add the dry ingredients to the wet ingredients and mix just until well combined. Don’t over mix.
- Add the hot water and mix until well combined.
- Pour the batter into the prepared cakes pan and bake for 18-22 minutes, or until a toothpick comes out clean.
- Remove cakes from oven and allow to cool for 3-4 minutes, then turn onto cooling racks to cool completely.
Prep for layering and make fudge layer
- There are a few ways you can set up for layering the cake. The easiest options is to use a clear cake collars, as shown in the photos above. If you don’t have those or don’t want to use them, line the inside of a springform pan with parchment paper that sticks about 2 inches above the top of the pan, to act as a cake collar (see photo). If you don’t have a springform pan, line a regular cake pan with plastic wrap in the bottom and up the sides (which you can use to lift the cake out later), a cardboard cake circle on top of the plastic wrap to stabilize the cake as you remove it from the pan, and parchment paper around the insides, to act as a collar.
- Cut the dome off of the cake, then place it in your prepared pan or cake collar.
- To make the fudge layer, add the chocolate chips, corn syrup and vanilla extract to a medium heat-proof bowl.
- Heat the heavy whipping cream until it just starts to boil, then pour it over the chocolate chips. Cover the bowl with clear wrap and allow to sit for 3-5 minutes, then whisk until smooth.
- Pour the chocolate on top of the cake and spread into an even layer. Place the cake in the fridge while the chocolate firms up, about 1 hour.
Make the chocolate mousse
- Combine egg yolks, sugar and 1/2 cup (120ml) of heavy whipping cream in the top of a double boiler. If you don’t have a double boiler, you can use a mixing bowl set over a pot with simmering water in it. I use my mixer bowl. Do not let the water boil, or it will be too hot. To ensure that the steam cooking the eggs doesn’t get too hot, occasionally lift the bowl to release the steam.
- Cook mixture, whisking constantly. The mixture will thin out at first, then begin to thicken. The egg mixture will be ready when is has thickened, lightened in color and has more volume. It should take about 7-10 minutes and reach 160°F (71°C). Do not boil. When done, remove egg mixture from heat and set aside.
- Place the chocolate chips for mousse in a medium sized bowl and melt in the microwave in intervals of about 10-15 seconds, stirring well between each interval, until smooth. You could also melt them in a double boiler, if you prefer.
- Vigorously whisk the egg mixture into the melted chocolate until smooth. Set aside to cool to about room temperature.
- In another bowl, whip remaining 1 1/4 cups (300ml) of heavy whipping cream and powdered sugar until stiff peaks form.
- Fold about a ¼ cup of the whipped cream into the chocolate mixture until , then fold about a 1/4 of the chocolate mixture into the whipped cream. Slowly fold the remaining chocolate mixture into the whipped cream.
- Spread the chocolate mousse into an even layer on top of the chocolate fudge. Refrigerate for about an hour.
Make the white chocolate mousse
- In a small bowl, sprinkle the powdered gelatin over the water, making sure the powder is all touching water. Let stand for about 5 minutes.
- Place the white chocolate chips in a medium glass bowl. Microwave 1/2 cup (120ml) of heavy cream in a medium measuring cup until it comes to a boil.
- Add the gelatin mixture to the hot heavy cream mixture and whisk until the gelatin is dissolved.
- Pour the hot cream over the white chocolate chips and let stand, covered, for 3-5 minutes. Whisk the white chocolate mixture until the chocolate is melted and the mixture is smooth. If it doesn’t completely melt, microwave in 10-15 second intervals, whisking well between each, until smooth. Set aside to cool to about room temperature.
- Whip remaining 1 1/4 cups (300ml) heavy cream and powdered sugar at high speed with a mixer until stiff peaks form.
- Gently fold about a third of the cooled white chocolate mixture into the whipped cream until combined. Add the second third of the cooled white chocolate and gently fold into the whipped cream. Add the remaining white chocolate and fold together until completely combined.
- Spread the white chocolate mousse into an even layer on top of the chocolate mousse. Refrigerate until completely firm, at least 3-4 hours.
Finish off the cake
- Once firm, remove the cake from the pan or remove the cake collar from the sides. If needed, smooth the sides of the cake using an offset spatula, and place cake on a serving plate.
- Finish off the cake with chocolate curls and a sprinkle of cocoa powder. Keep cake refrigerated and well covered until ready to serve. Best if eaten within 4-5 days.
The nutrition facts provided are calculated using a third-party tool and are estimates only. Actual nutritional content may vary based on the ingredients and brands you use, as well as portion sizes. For accurate results, please consult a registered dietitian or nutritionist.
Enjoy!


I am going to make this delicious looking cake. Can milk chocolate be used instead of semi sweet? My family likes milk chocolate better. Thanks .
I’m not entirely sure. It might be ok, but it might end up a little softer because of the different content of the two chocolates.
I had been waiting for an occasion to make this cake as it looks so amazing, so today I attempted it for my grandsons Birthday, everything went well or so I thought, my chocolate mousse layer didn’t set, I released the springform tin and holy moly chocolate ran everywhere (glad I didn’t attempt it to take somewhere) I guess I mucked that one up 🙁 the cake taste’s amazing even with running chocolate which I scrapped into a bowl, will definitely try again
I made this today for a friends birthday luncheon, it was amazing! Absolutely delicious!!
My only frustration was that my white chocolate mousse wasn’t silky smooth (it was a bit grainy). Can you give me ideas of what could’ve gone wrong? What brand of white chocolate do you use? I just used nestle white chocolate chips whereas the rest of the cake i used trader Joe’s pound plus chocolate and Ghirardelli. Could it have been that? Or possibly a mistake with the gelatin?? Any thoughts would be great. Thanks for the great recipe!
I’m glad you enjoyed it! Hard to say for sure what would have made it grainy. My guess would be either the white chocolate or the gelatin. Hard to say without being there which it was. You do want to be sure the gelatin fully dissolves.
Hi, in one of the steps you mentioned it being frozen but didn’t see a step for this. I was looking for something I could make ahead and this looks like a keeper so i wanted to check on freezing it / thawing slightly.
Thanks!
Which step mentions freezing? I’m not seeing it. This cake is only refrigerated.
Step 9, under the Cake and Fudge instructions, it mentions “(which can later be used to lift your cake out of the pan once it’s assembled and frozen)”. I’m more just curious if you think this could be frozen ahead of time. Thank you!!
Oh I see. I’ve removed the “and frozen” part, which was a carry over from an ice cream cake instructions that use a similar pan building method. I haven’t ever frozen this cake to know for sure. Once assembled, I think it’d be ok to freeze it.
Hi your cake looks amazing. What is the final height of the cake? Cause I am looking for a quite tall cake
I don’t know exactly. Probably 3-4 inches.
This cake can be frozen. Its very common, especially if doing a miroir glaze. Just thaw before serving. I would leave in fridge to thaw.
Would you make any changes for high altitude? Just moved to CO and am still unsure of what changes need to be made in baking.
Made this for my husband’s birthday. He LOVED it and so did everyone else! Even me, and I’m not that big on chocolate. It’s super rich and chocolatey, but the white chocolate layer really helps balance it out. I will definitely be making this again!
Oh, keep in mind this recipe takes a very long time to make because of all the chilling in between the layers and at the end. Not complicated or anything, just make it a day ahead (or really early the day of)!
I’m so glad you enjoyed it!
I made the triple chocolate mousse cake, exactly as the recipe states. It came out perfect.It is super good, but-also super rich.
I’m glad you enjoyed it!
This turned out great for me except my white chocolate mousse was a bit curdy. :/ Maybe my gelatin wasn’t dissolved enough in the hot cream but it definitely looked like it and I made sure to whisk it plenty to ensure it was all dissolved. Still tastes great, I was just hoping for that super smooth white chocolate mousse!
Hmm, it’s possible that it was the gelatin. The other possibility is that sometimes white chocolate needs a little extra time to melt. If it doesn’t completely melt, it could leave a few lumps. I’m glad it still tasted great!
Hey Lindsay!! First off, happy 4th year of blogging!! I am so glad i found your blog, i have made so many of your recipes and each one has been amazing!!
I just wanted to make a quick note that under the directions for Chocolate Mousse, Step #1, it says 1/4 cup of heavy whipping cream, but I think that is supposed to be 1/2 cup since that’s how it is in your recipe for “Chocolate Mousse with Cookie Crumbles” and plus that would equal the ingredient amount of 1 3/4 cups.
I just recently made the “Chocolate Mousse with Cookie Crumbles” along with the “Strawberry White Chocolate Mousse Cups” for a family party and everybody LOVED them!! I definitely cannot wait to make this cake!!
Congratulations on your blogiversary!! This cake is unbelievably gorgeous, like usual 🙂
Thanks Laura! I hope things are well! 🙂
Lindsay, please heeelp! I just made a terrible mistake – and replaced semi-sweet choc chips in the chocolate mousse part – with milk chocolate bar! It was in the baking aisle, but… I realized looking at my way too liquid mousse – there’s no way this is going to thicken enough in the fridge! This is not going to work, is it??? I am sooo mad at myself… 😭
It’s hard to say for sure that it won’t thicken, but it’s likely that it won’t just because there are more milk solids in the semi sweet chocolate. I’m sorry!!
This looks amazing Lindsay, I can’t wait to try it. Do you think it half could be frozen to save for later?
Hmm, great question. I don’t know. Part of me thinks mousse would be ok, the other part isn’t sure. I think the chocolate mousse would do fine, just not sure about the white chocolate. It’d be worth a try though.
How did I miss your 4 year blogiversary???? Let’s just say we celebrated in Portland, although it would have been WAY better with this cake!
Portland was full of so much food, it could count as a celebration for all the remaining events of the year, lol. 🙂
Congratulations on your 4 years of blogging! I can’t wait to try this triple chocolate mousse cake! It looks delicious!!! 🙂
Thank you Alison! 🙂 I hope you enjoy it!
Congrats on your blogiversary! And WOW, this cake looks incredible! Triple chocolate? Now, that is speaking my language! I bet that mousse layer is just divine!
Congrats on your 4th year of Blogging 🙂 Wow ! this cake is superb. Chocolate Mousse is my all time favourite, so I definitely will be making this.
Cheers, and here is to many many more years of blogging 🙂
Thanks so much Lynne!
Happy year 4, Lindsay! I can’t believe you’ve been doing it just 4 years. You are such a seasoned pro by now. And this cake…WOW.
I’m glad your early morning excursion turned out well! It’s totally cute how excited your husband was.
Thanks so much Mir! 🙂