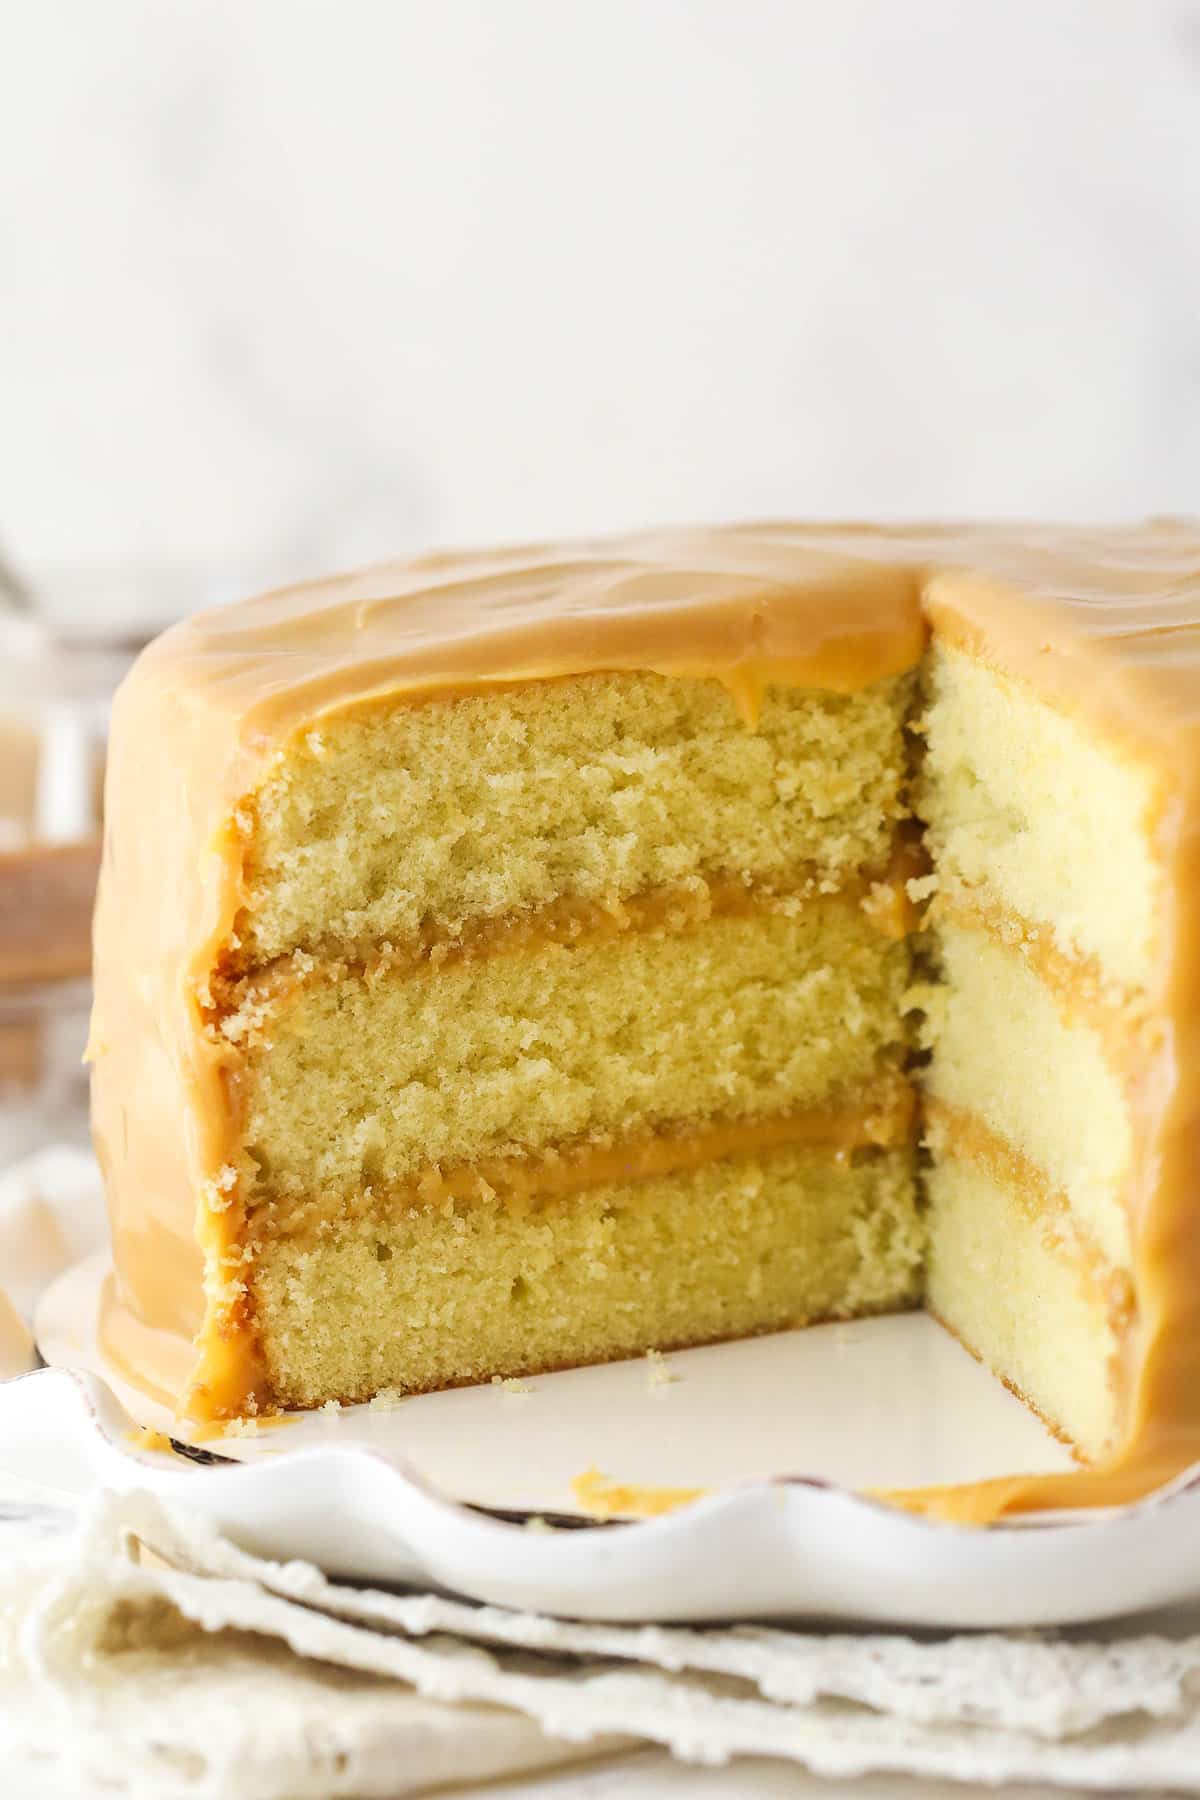
This real deal Caramel Cake is just that – the real deal! Layers of moist vanilla cake are covered in a delicious homemade caramel sauce. It’s a classic southern cake that is sure to be a hit every time!
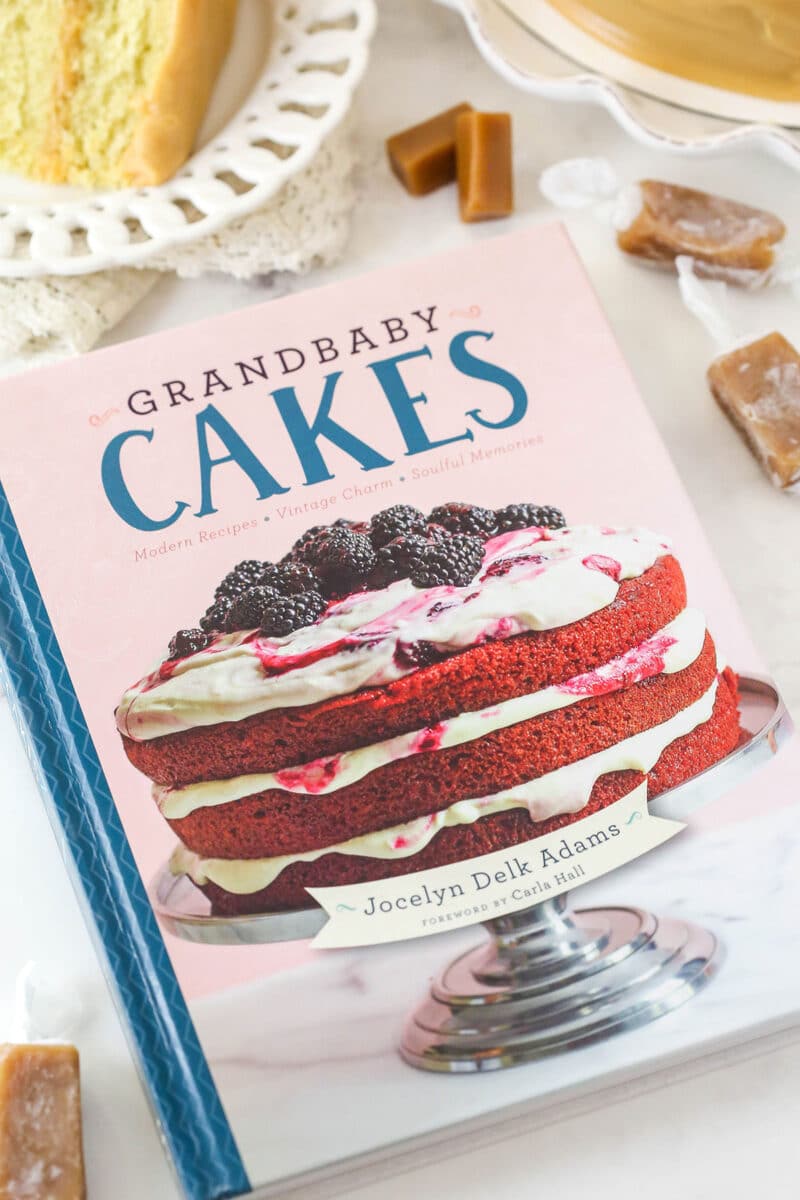
I could not be more excited to share this cake with you today. It comes from a good friend of mine, Jocelyn, from Grandbaby Cakes and it’s included in her first cookbook by the same name. It’s a great cookbook full of droll-worthy recipes and oh my goodness, I want them all. I have actually been eyeing this cake ever since I first saw it. I’m a serious caramel lover and when you douse a cake in the stuff, you have my full attention!
Why You’ll Love This Classic Southern Caramel Cake
- Wonderfully moist. The cake itself is pretty straightforward to make and has the silkiest batter you’ve ever seen. It bakes into a super light, moist cake that is totally crave-worthy.
- So much caramel! It’s not called the ‘real deal’ for nothing! I make my own caramel sauces all the time, but this recipe is unique. It starts with evaporated milk and has a slightly different flavor than other recipes I’ve tried. It’s more milky and so good.
- Easy to make. Now hear me out, the caramel takes about 2 hours to make, but once you mix the ingredients together it pretty much cooks itself with only a few occasional stirs. You can actually bake the cake while the caramel cooks, knocking out two steps at once. Score!
- Gorgeous. The only thing better than delicious cake is delicious pretty cake! And, while this cake takes a little time to make, it’s worth every second for the end result. It’s a total showstopper that will really impress.
What You’ll Need For Real Deal Caramel Cake
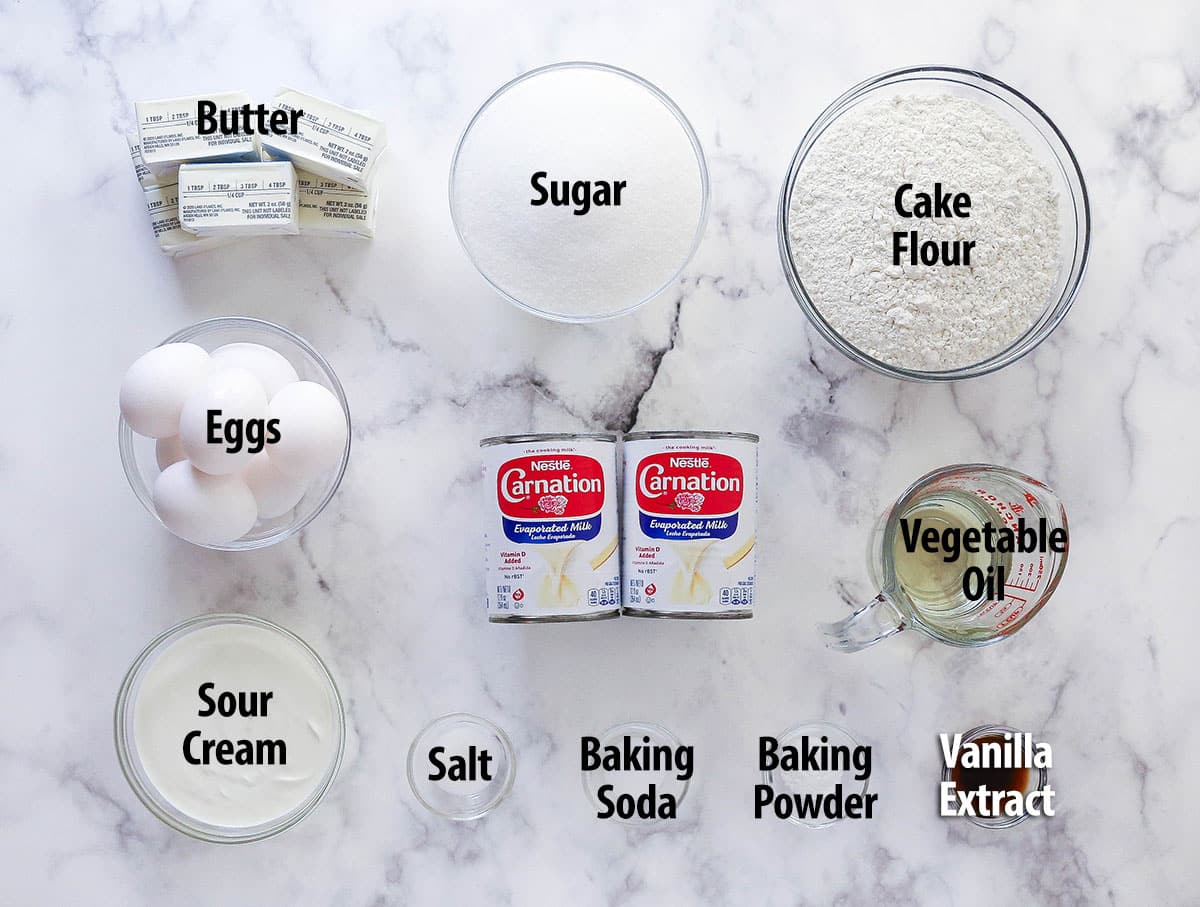
Great desserts start with great ingredients. Here’s what you should know as you gather everything you’ll need. Check out the recipe card toward the bottom of this post for the full amounts.
For the Caramel Sauce
- Unsalted butter – If you prefer using salted butter, omit the additional salt.
- Evaporated milk – The key to this special caramel sauce! Gives the sauce a unique and delicious flavor. Be sure not to mistake it for sweetened condensed milk. They aren’t the same.
- Sugar – Use granulated sugar.
- Salt – For a touch of flavor.
- Vanilla extract
For the Vanilla Cake
- Unsalted butter and salt – Bring the butter to room temperature before beginning the cake batter. I prefer to use unsalted butter when baking. If you only have salted butter, just leave out the additional salt in the recipe.
- Sugar
- Eggs- It’s important to use large eggs (not medium or extra large). Bring them to room temperature before mixing them into the batter to help them incorporate more easily.
- Cake flour – To make this cake extra light and fluffy, you’ll want to use cake flour and carefully sift it into the batter.
- Leaveners – Both baking powder and baking soda are used in this recipe to help the layers rise to their fullest and give the best texture.
- Sour cream – Use room temperature, full-fat sour cream. It adds moisture and flavor to the cake layers.
- Vegetable oil – Also adds moisture to the cake batter, making it silky and smooth.
- Vanilla extract
How to Make Real Deal Caramel Cake
Let’s jump in! Follow these steps to get familiar with the recipe for this Caramel Cake. More comprehensive directions can be found in the recipe card below.
For the Caramel Sauce
This sauce takes about 2 hours to make, plus 30 minutes of cooling, and it’s worth all the time and effort! Take note of the 4 distinct phases of preparation to help you be successful! I recommend baking the cake while the caramel cooks. The timing will work out perfectly so that by the time the caramel is done, the cake will be baked, cooled and ready for layering.
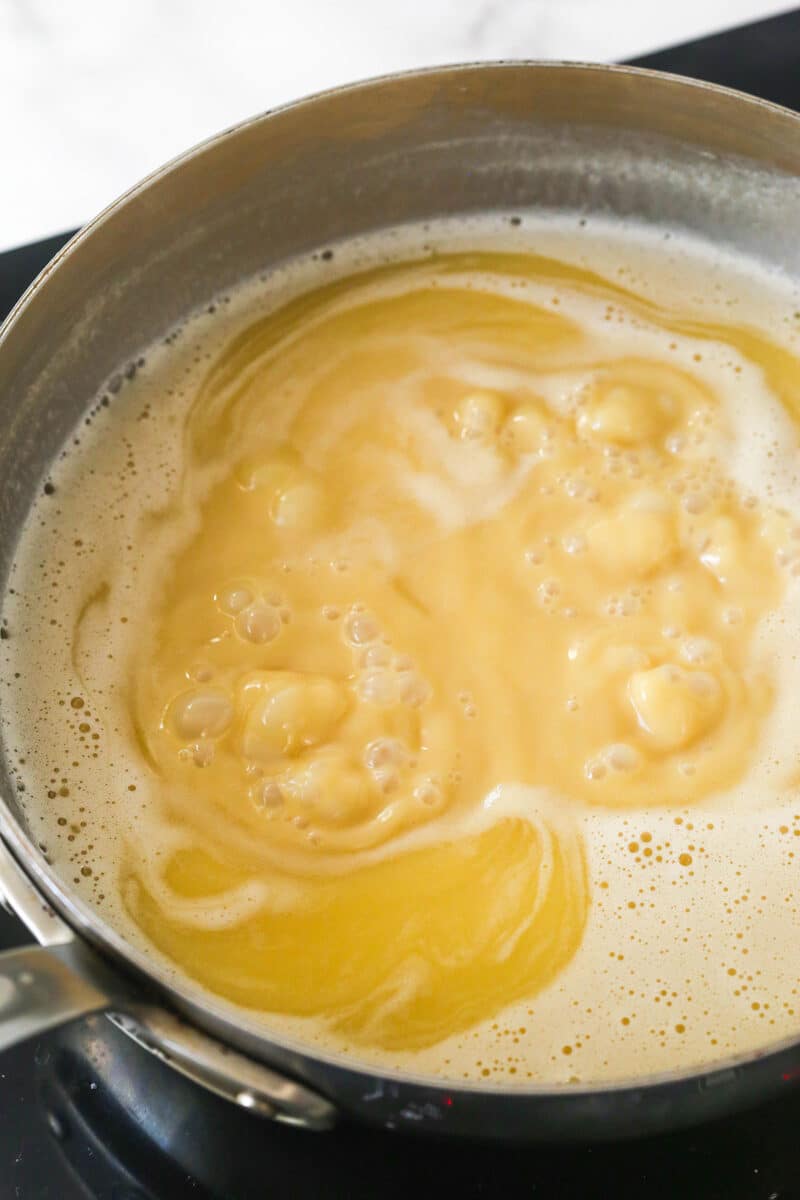
- Phase 1, takes about 20-30 minutes: Combine the evaporated milk, sugar, butter and salt in a medium saucepan over medium-low heat. As the ingredients heat up, the butter will begin to separate and create a yellow, oily film.
- Phase 2, takes about 60 minutes: This is the longest phase. The mixture will come to a slow boil and form bubbles on the surface. The longer it cooks, the bigger the bubbles will get. Stir occasionally.
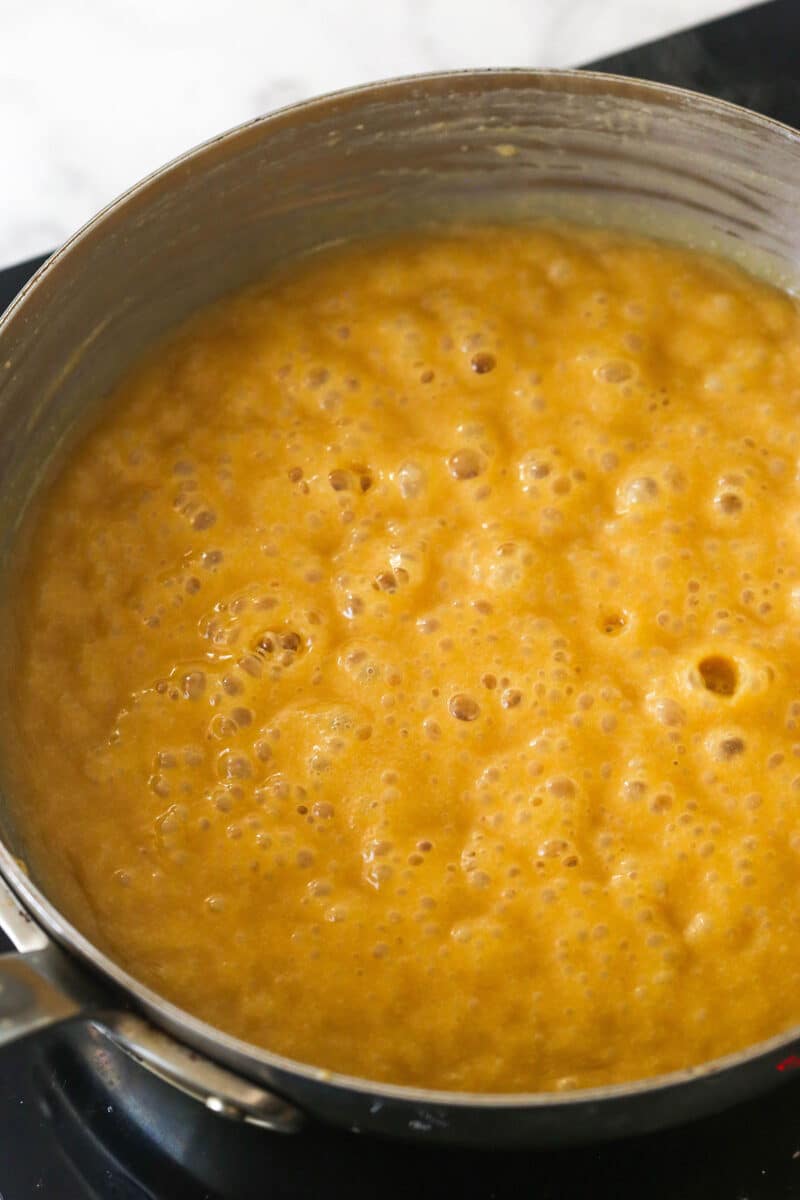
- Phase 3, takes about 15 minutes: This phase begins when you notice white clumps forming on the surface. Continue heating the mixture, stirring occasionally to blend everything together. It will turn a light golden color and slowly deepen into a darker golden color, as the bubbles grow higher.
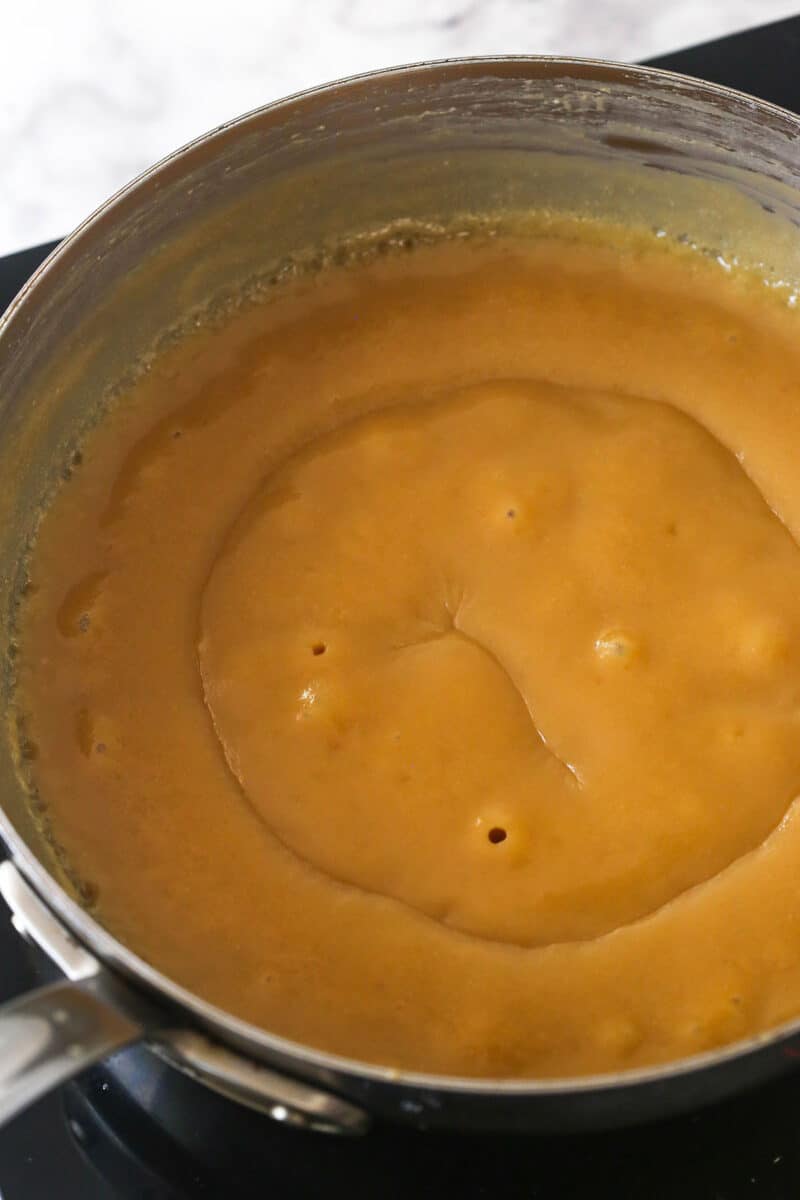
- Phase 4, takes about 10-15 minutes: Reduce the heat to low. The bubbling will reduce down into a simmer as the caramel thickens. You’ll know the caramel is done when it is amber brown and thick enough to coat the back of a spoon after dipping it into the sauce. Once this happens, take the caramel from the heat and stir in the vanilla extract.
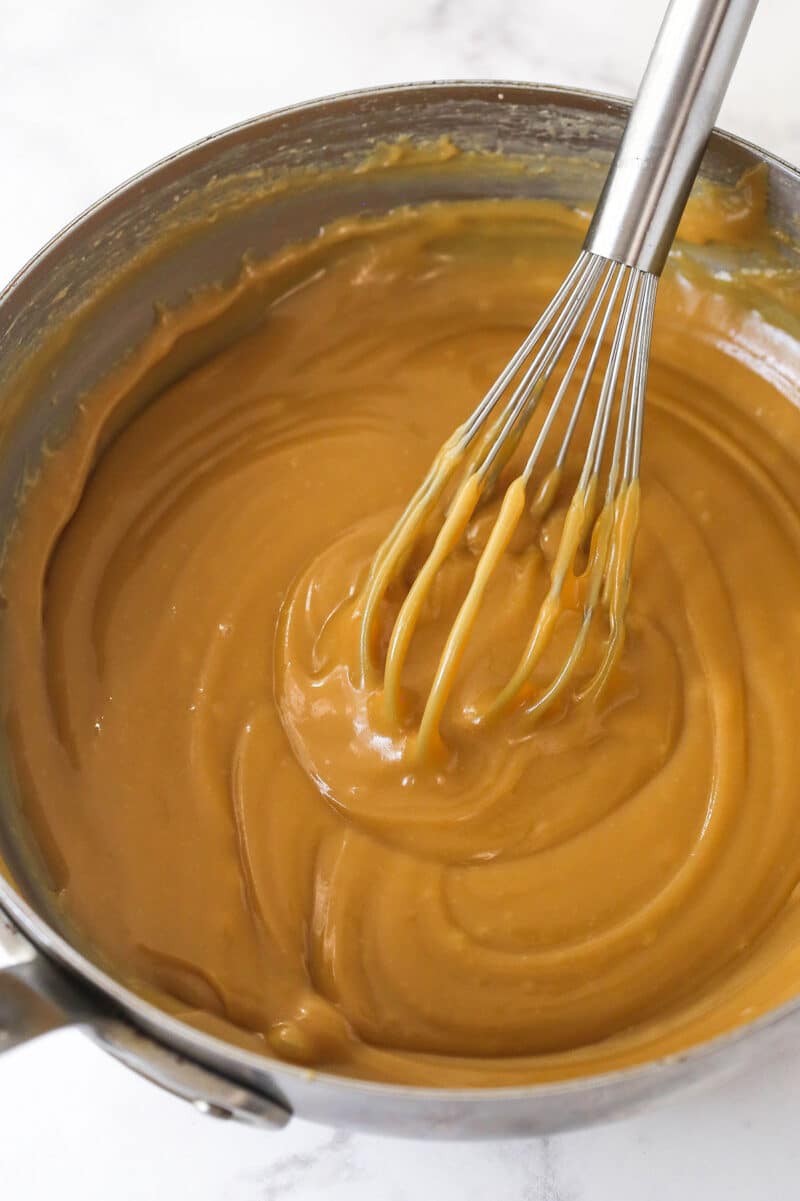
- Cool. Before layering the cake, allow the caramel to cool and thicken (about 30 minutes).
For the White Cake
- Prepare to bake. Preheat oven to 325°F (163°C). Place a parchment round in the bottom of three 9 inch cake pans and grease the sides.
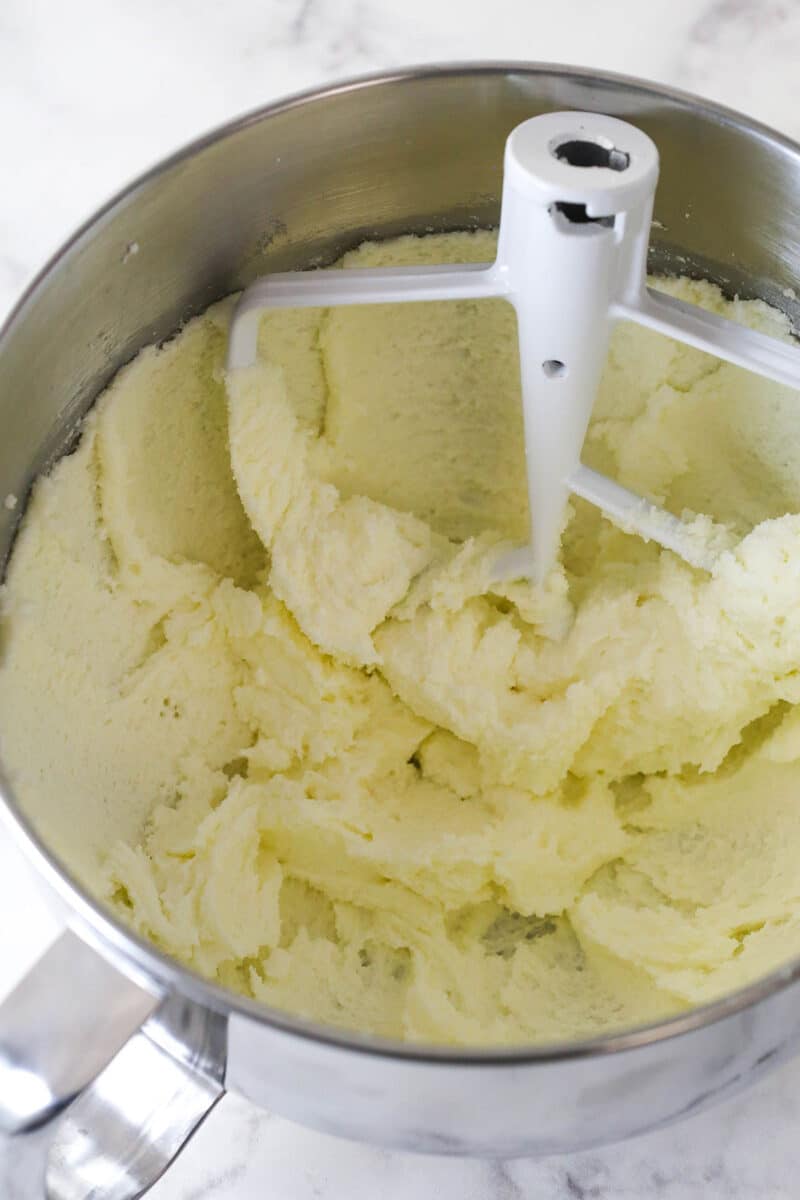
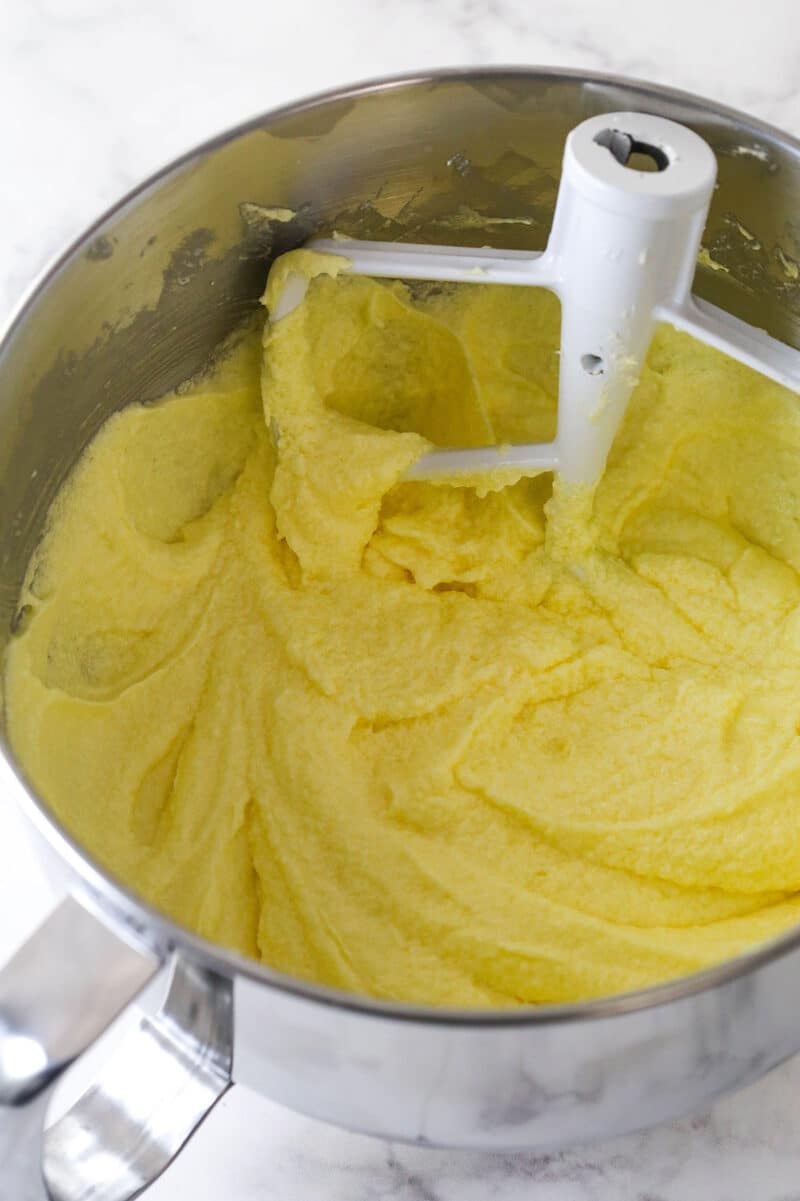
- Beat butter. Place the softened butter in the bowl of a stand mixer fitted with a whisk attachment. Beat on high for 2 minutes.
- Cream butter with sugar. Switch to the beater attachment and add the sugar, creaming until pale yellow and fluffy (about 5 minutes).
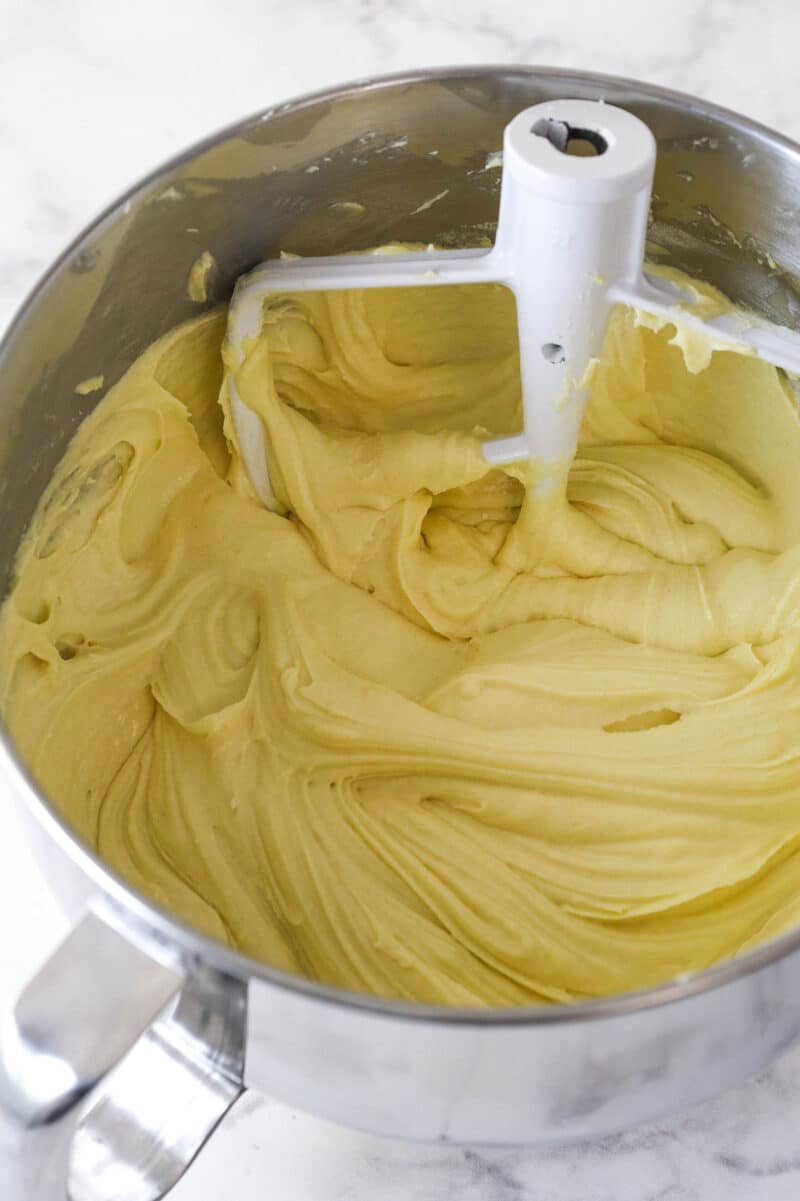
- Add eggs. Add eggs one at a time, mixing well after each. Use a spatula to scrape down the sides of the bowl as needed.
- Add flour and other dry ingredients. Turn the mixer to low speed and add the flour in two batches. Then add the salt, baking powder and baking soda, mixing until well combined. Don’t overmix.
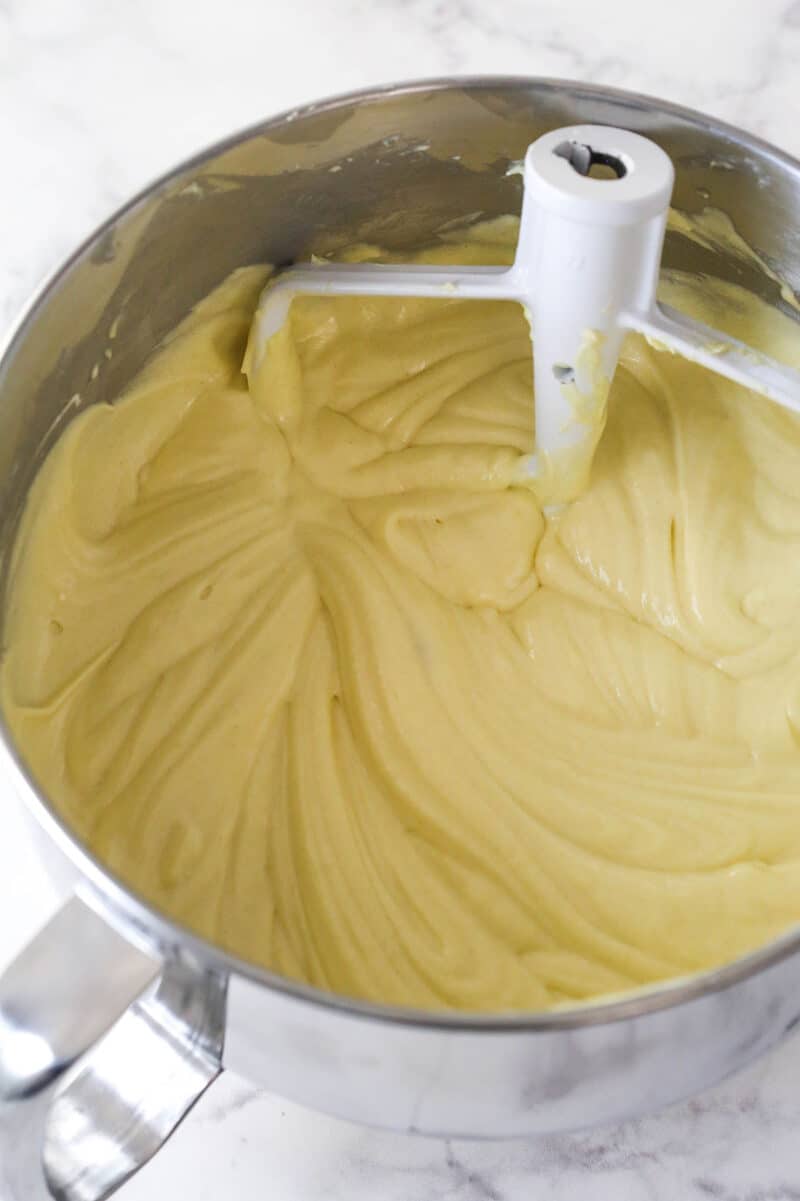
- Finish the batter. Add the sour cream, oil and vanilla. Mix until just combined, scraping down the sides and bottom of the bowl until the batter is silky.
- Bake and cool. Fill the prepared pans evenly with batter and bake until a toothpick inserted into the center comes out with a few crumbs (about 27-32 minutes). Cool in the pans for 10 minutes, then remove cakes to finish cooling on wire racks.
Finish the Cake
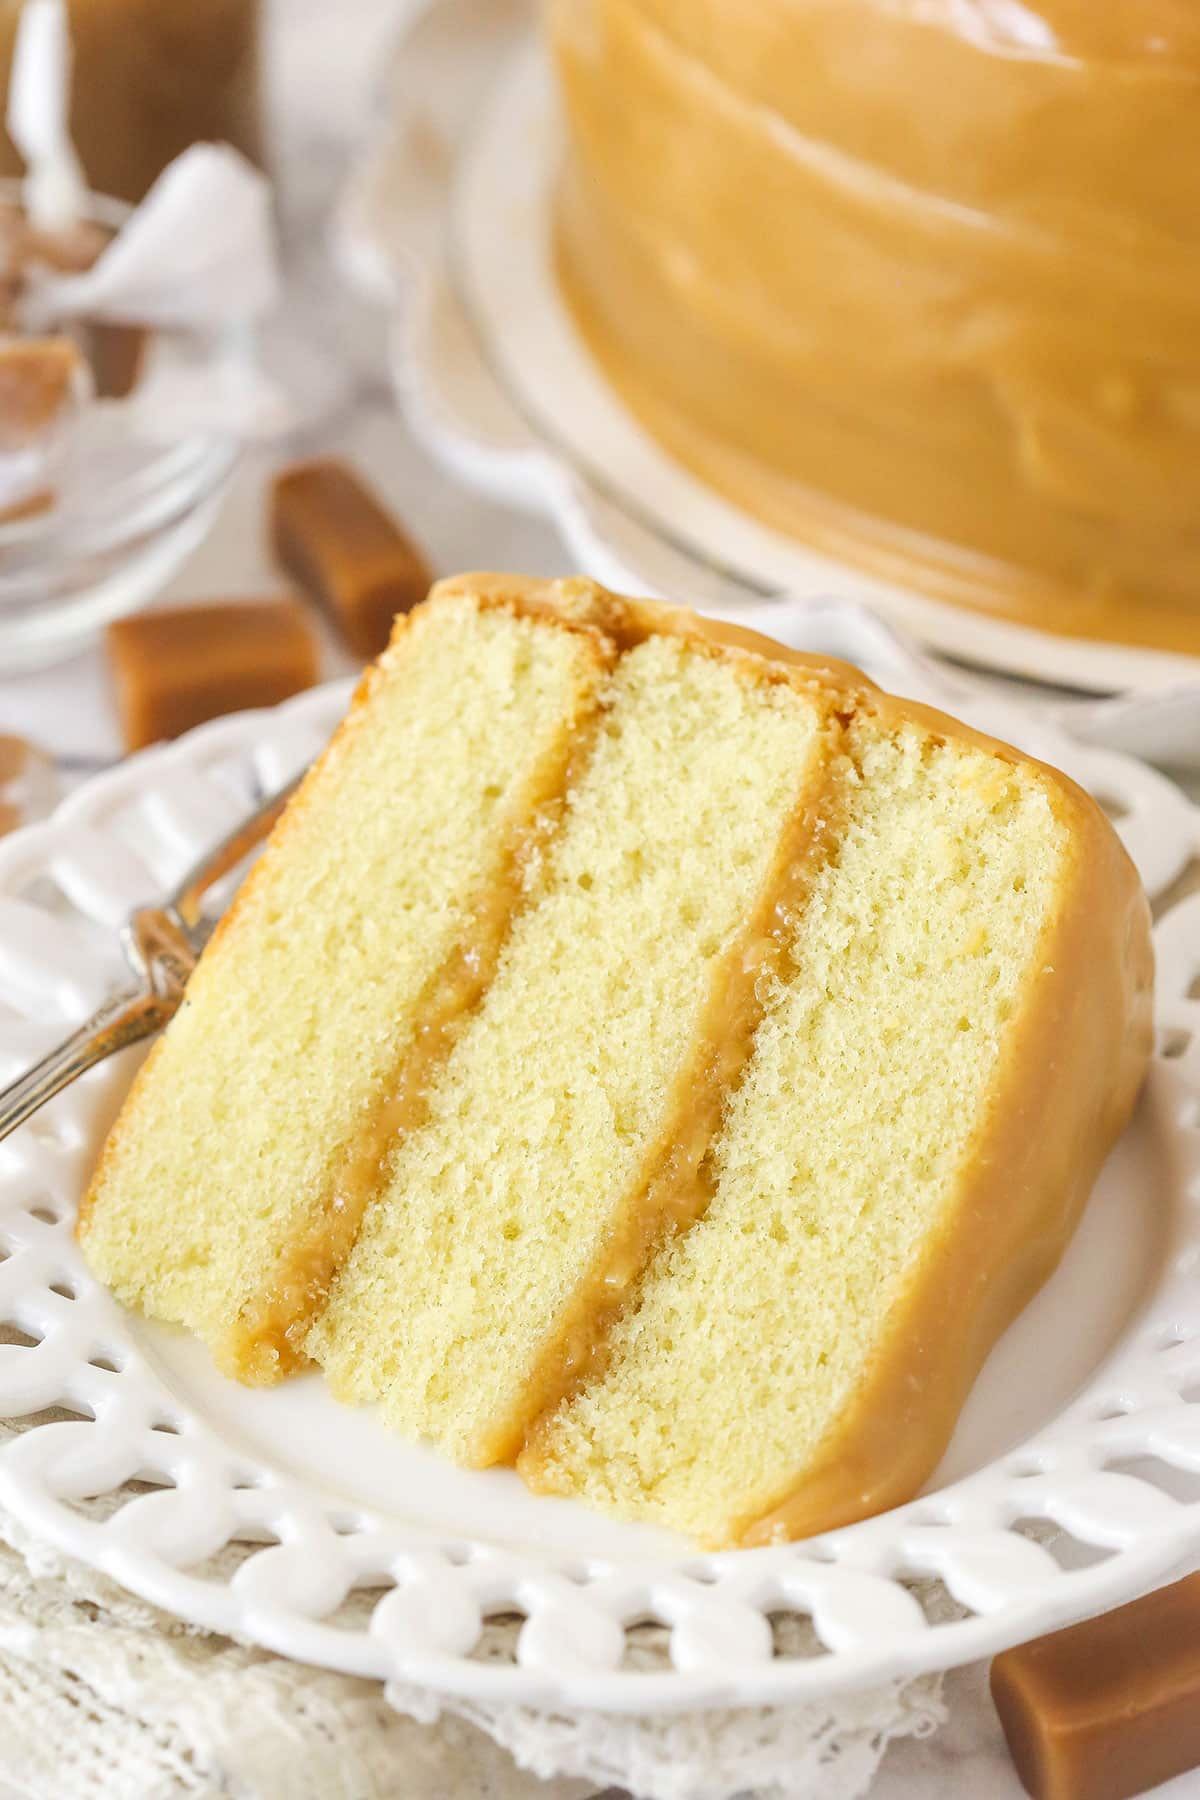
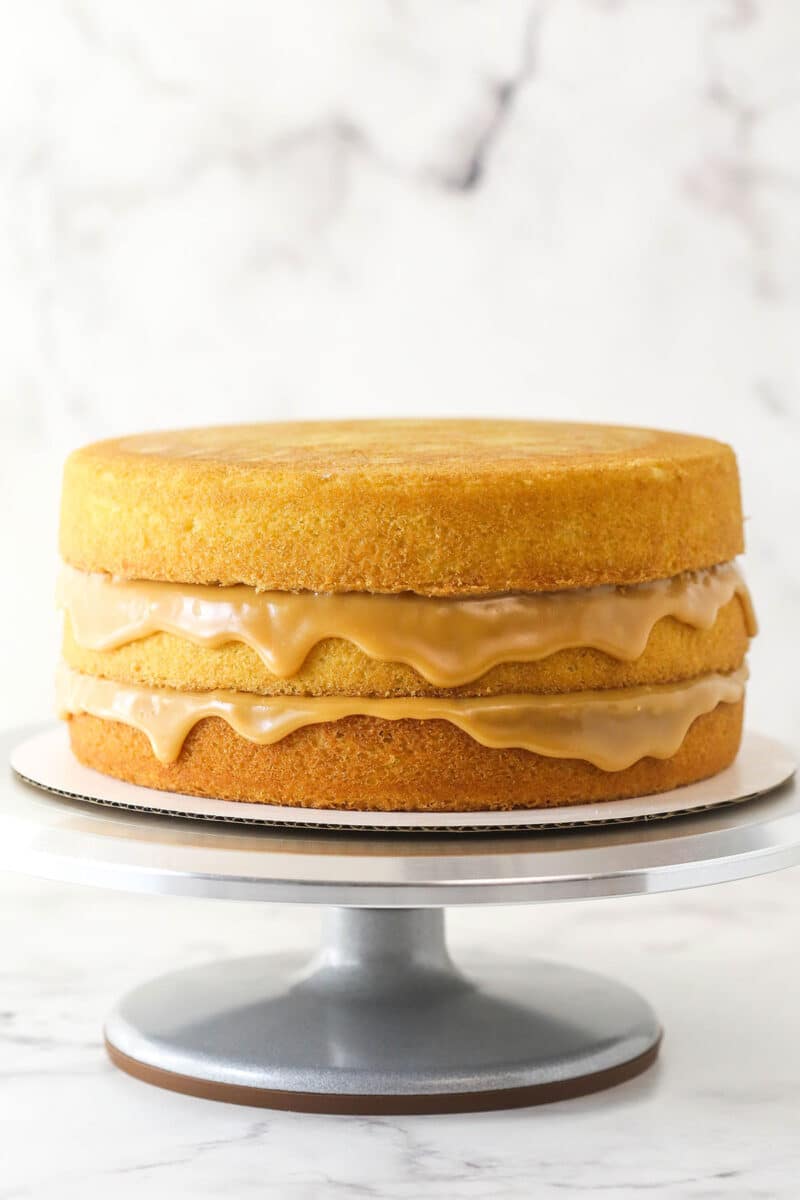
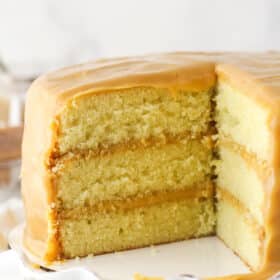
- Place and smother first layer. Place the first cake layer on a serving plate, and cover it with 1/3 of the caramel sauce, allowing it to drip down the sides a bit.
- Follow with second and final layers. Place the second cake layer and cover with another 1/3 of the sauce. Turn the third layer bottom-side up, and place it on top of the cake. Use a spatula to spread a thin layer of caramel over the top and sides of the entire cake.
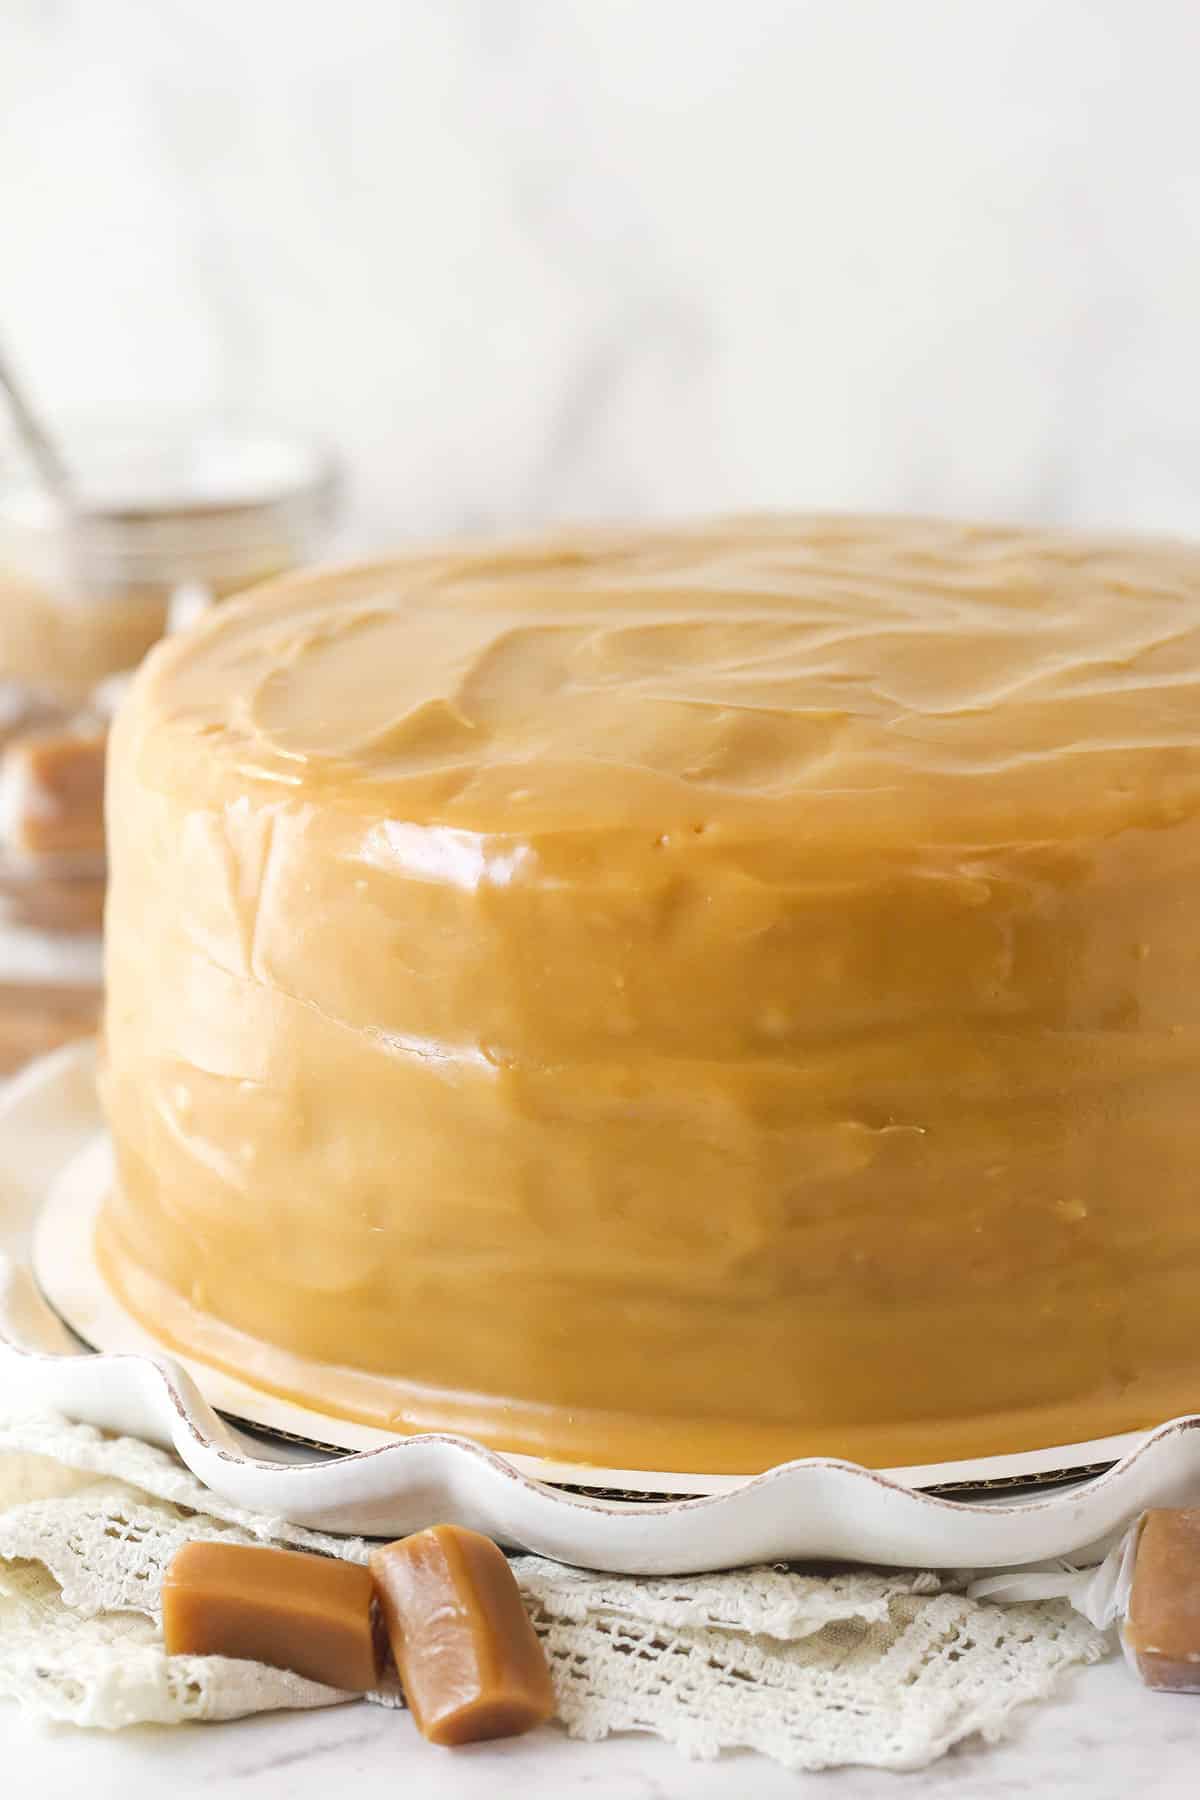
- Finish and serve. Pour remaining caramel over the cake and allow it to drizzle down the sides. Serve at room temperature.
- Enjoy!
Tips for Success
- Follow the time schedule for the caramel – Cooking caramel for 2+ hours may seem daunting, but don’t be deterred by the time! Any adjustments to the timing of each phase could ruin the final sauce. Just take your time and let the caramel do its thing, nice and slow.
- Measure properly – The cake layers will be super fluffy and moist, IF you measure the flour correctly. If possible, use a kitchen scale to weigh the flour so that you don’t accidentally add too much. Adding too much flour is one of the main reasons a cake becomes dry and dense. If you don’t have a scale, use the spoon and level method.
- Don’t skimp on the creaming – To achieve the lightest, fluffiest layers, this cake batter begins with a lengthy creaming process. You may be tempted to shorten the creaming time but don’t. Watch for the color of the butter and sugar to lighten.
- Cooled cakes – Make sure the cake layers are completely cool before frosting, so that everything stays in place and they don’t slide around on the caramel sauce.
- Frost (almost) immediately – Keep an eye on the caramel sauce while it cools and have your cake layers cooled and ready. The caramel sauce is easiest to frost with when it’s still just a touch warm and more spreadable. Once it gets too thick, it won’t spread smoothly. You can try warming it back up, but you may need to add some cream to thin it out at that point.
- Serve at room temperature – This cake is best enjoyed at room temperature. If it has been refrigerated, let it sit on the counter for about an hour before slicing and serving.
Storage Information
- Room temperature – Seal the cake in an airtight cake carrier or wrap it in a double layer of plastic wrap. I like to use toothpicks to prop the plastic away from the top. If you already sliced the cake, arrange the slices in a single layer in an airtight container. Store at room temperature for up to 3 days.
- Fridge – Still seal the cake in an airtight cake carrier or wrap it in a double layer of plastic wrap. Store in the fridge for up to 4 days. Serve at room temperature.
- Freezer – You can freeze the cake, if you’d like. Flash freeze the full cake for a couple hours, then wrap in a double layer of plastic wrap. You could also add a layer of foil, for extra protection. Freeze for up to 3 months. Thaw in the fridge before serving.
More Caramel Cake Recipes
- Caramel Apple Layer Cake
- Best Salted Caramel Cheesecake
- Bourbon Vanilla Cake
- Caramel Cheesecake Brownie Trifle
- Caramel Baileys Pound Cake
- Caramel Banana Layer Cake
Classic Southern Caramel Cake
save this recipe
Enter your email & we’ll send it to your inbox. Plus get new recipes from us every week!
Ingredients
Vanilla Cake
- 1 cup (224g) unsalted butter (room temperature)
- 3 cups (725g) granulated sugar
- 7 large eggs (room temperature)
- 3 cups (390g) cake flour (sifted)
- 1 tsp salt
- 1/2 tsp baking powder
- 1/2 tsp baking soda
- 1 cup (230g) sour cream (room temperature)
- 1/2 cup (120ml) vegetable oil
- 1 tbsp vanilla extract
Aunt Beverly's Caramel Icing
- 3/4 cup (168g) unsalted butter
- 2 cans (12-ounces each) evaporated milk
- 2 cups (414g) granulated sugar
- 1 pinch salt
- 1 tbsp vanilla extract
Instructions
Vanilla Cake
- Preheat oven to 325℉. Prepare three 9-inch cake pans with parchment rounds in the bottom of the pans and grease the sides.
- With the whisk attachment of your mixer, beat the butter for 2 minutes on high speed.
- Add the sugar then beat for another 5 minutes with the beater attachment until pale yellow and fluffy.
- Add the eggs one at a time, combining well after each addition and scraping down the sides of the bowl as needed.
- With your mixer on low speed, add the flour in two batches.
- Add the salt, baking powder and baking soda and mix until well combined, careful not to overbeat.
- Add the sour cream, oil and vanilla extract. Scrape down the sides and bottom of the bowl and mix until just combined. The batter should be nice and silky.
- Divide the batter between the three pans and bake for 27-32 minutes or until a toothpick inserted into the center comes out with a few crumbs.
- Let the layers cool for about 10 minutes, then finish cooling on wire racks.
Caramel Icing
- Phase 1, takes about 20-30 minutes: In a medium saucepan over medium-low heat, melt the evaporated milk, sugar, butter and salt. Continue cooking. The butter will begin to separate and create and yellow, oily film.
- Phase 2, takes about 60 minutes: The bulk of the process is this phase. The ingredients will come to a slow boil and form bubbles on the surface. As you continue cooking, the bubbles will get bigger and become more numerous. Stir occasionally as it all comes together.
- Phase 3, takes about 15 minutes: Some white clumps will develop on the surface. This is normal. Just continue to cook and stir occasionally to blend everything back together. You should start to see the mixture turn a light golden caramel color. The color will slowly deepen and the caramel will bubble higher.
- Phase 4, takes about 10-15 minutes: Reduce the heat to low to ensure you don’t burn the caramel. The bubbling will subside into a simmer as everything thickens. The caramel should be an amber brown when done and coat the back of a spoon. Once that happens, remove from heat and add in vanilla extract. Allow the caramel to cool for about 30 minutes and thicken before layering the cake.
Finish the Cake
- Place first layer on serving plate. Spread about 1/3 of the caramel on top of the cake. The icing may drip down the sides a bit, but that’s ok.
- Add the second layer of cake and another 1/3 of the icing.
- Add the final layer, bottom up, and ice the top and sides of the cake with a thin layer of caramel.
- Pour remaining caramel over the cake and allow to drizzle down the sides.
- Serve at room temperature.
Notes
- Timing – I recommend baking the cake while the caramel cooks. The timing will work out perfectly so that by the time the caramel is done, the cake will be baked, cooled and ready for layering.
- Cooled cakes – Make sure the cake layers are completely cool before frosting, so that everything stays in place and they don’t slide around on the caramel sauce.
- Frost (almost) immediately – Keep an eye on the caramel sauce while it cools and have your cake layers cooled and ready. The caramel sauce is easiest to frost with when it’s still just a touch warm and more spreadable. Once it gets too thick, it won’t spread smoothly. You can try warming it back up, but you may need to add some cream to thin it out at that point.
- Serve at room temperature – This cake is best enjoyed at room temperature. If it has been refrigerated, let it sit on the counter for about an hour before slicing and serving.
Nutrition
The nutrition facts provided are calculated using a third-party tool and are estimates only. Actual nutritional content may vary based on the ingredients and brands you use, as well as portion sizes. For accurate results, please consult a registered dietitian or nutritionist.
Recipe shared from Grandbaby Cakes with permission.
Enjoy!
Categories:
Cakes and Cupcakes, Christmas, Easter, Holidays, Recipes, Sweets and Treats, Thanksgiving,


I am making a 7 layer Carmel cake will this be enough for between layers, top and sides? The layers will be thinner than a normal cake layer. Thanks!
I’m not really sure. It’s been a long time since I made this cake and I didn’t make it that, so it’s hard to say.
Can I make the Carmel sauce ahead of time like the day before needing it? If so, do I need to put it in the fridge or can I leave it on the countertop over night?
Thanks,
Lesa
It should be fine to make ahead. I’d store it in the fridge. You may need to warm it back up a touch before using it.
Can you make this into a two-layer cake instead of three?
Sure, just increase the bake time if you’re using the same size pans.
What adjustments must I make to turn this three layer cake into a two layer cake?
If using the same size pans, just bake them for a little longer.
Does the icing get hard when it cools???
I’m looking for one that does.
I don’t remember it getting hard.
Does it matter what goes into the pot first when making the caramel thanks
I’m not sure what you mean. The first step of the caramel adds several ingredients at one time.
Hey lindsay! For making salted caramel buttercteam which caramel would be better? This one or the traditional one with water as the base? Which one would give a richer yummier taste?
Hmmm, they are different. I would say the more traditional one is probably my favorite and might give a stronger flavor when added to buttercream. I often use this one.
In the picture, it looks like you may have punched holes in the cake with a wooden spoon handle. Do you think I could do this so the caramel goes all through the cake? It looks delicious. I love caramel.
I did not poke holes in the cake, the caramel just naturally dripped down onto the cake. If you wanted to poke some small holes in the cake, you could. But, be careful not to damage the structure of the cake, or it may fall apart when stacked.
Hi Lindsay,
I would really like to make this cake for my mother on her birthday, considering how much she loves caramel. I was just wondering if I can use condensed milk instead of evaporated milk?
Thank you in advance.
Enjoy your day!
Those two milks are different, I would probably stick with evaporated milk.
The cream is not always the main factor for yummy cake. This cake is really amazing and ill try this for my children.
Can I use sweet condensed milk to make caramel for a cake instead of evaporated milk?
I have seen caramel sauces made with SCM, but I haven’t made it myself. You could probably swap out a recipe for that caramel sauce with this cake though.
This cake looks amazing! Definitely decadent. Love it!
Thank you Emily!
I am making this for my husbands Thanksgiving Day Birthday. Is this best made the day of and served right away or can I make the day before? Thanks so much for the recipe.
You can make it a day ahead. Should be fine.
Hi, thank you for that recipe, it looks delicious. Sorry for a dumb question but do you mean 3 cups of flour that has already been sifted? ie. sift a bunch of flour and then measure out 3 cups of that already sifted flour?
Thanks,
Natasha
Not a dumb question! Yes, 3 cups of already sifted flour.
my fave is an intricate nut kifle that my grandmother used to make. but she did not let us have the recipe. she refused to admit that her son had any children
a family recipe called Wacky Cake
I think that caramel cake will become a family favorite. It looks so good, can’t wait to make itt.