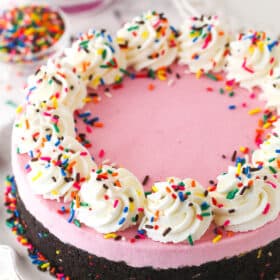
This No Bake Strawberry Milkshake Cheesecake is light, easy to make and full of strawberry milkshake flavor. Made with real Strawberry Nesquik and a chocolate Oreo crust, it’s the perfect dessert for strawberry milkshake lovers!

I originally got the idea for the flavor of this cheesecake from my husband, who loves strawberry milk. He doesn’t have the biggest sweet tooth, but he does love trying my desserts and this one seemed perfect for him. Needless to say, we both loved it! It was difficult to keep from eating it all in one sitting. Such amazing flavor.
Originally, this recipe didn’t use any gelatin and was a much softer no-bake cheesecake. Today, I’m updating it to be a little more firm and like a more traditional no-bake cheesecake. It still has all that amazing flavor, just with a thicker texture.
Easy Strawberry Milkshake Dessert
There are many reasons to try this cheesecake and fall in love. Here are a few of them.
- Nostalgic. While my husband still drinks strawberry Nesquick, it’s something I associate with childhood. The flavor is great too, so it makes a really fun dessert to try and brings back memories.
- Bold strawberry flavor. One of the reasons I love Strawberry Nesquik milk powder is because it has such bold strawberry flavor. Using the Nesquik powder helps create the perfect strawberry milkshake flavor, and I absolutely love it!
- Quick, easy, and no oven necessary. Traditional baked cheesecakes can be intimidating because of the long cooking process. No bake cheesecakes, like this one, are much easier to make and way less time consuming.
What You’ll Need
Here’s a look at the ingredients you’ll need and a kew things to keep in mind. Be sure to scroll to the recipe card below for exact measurements.
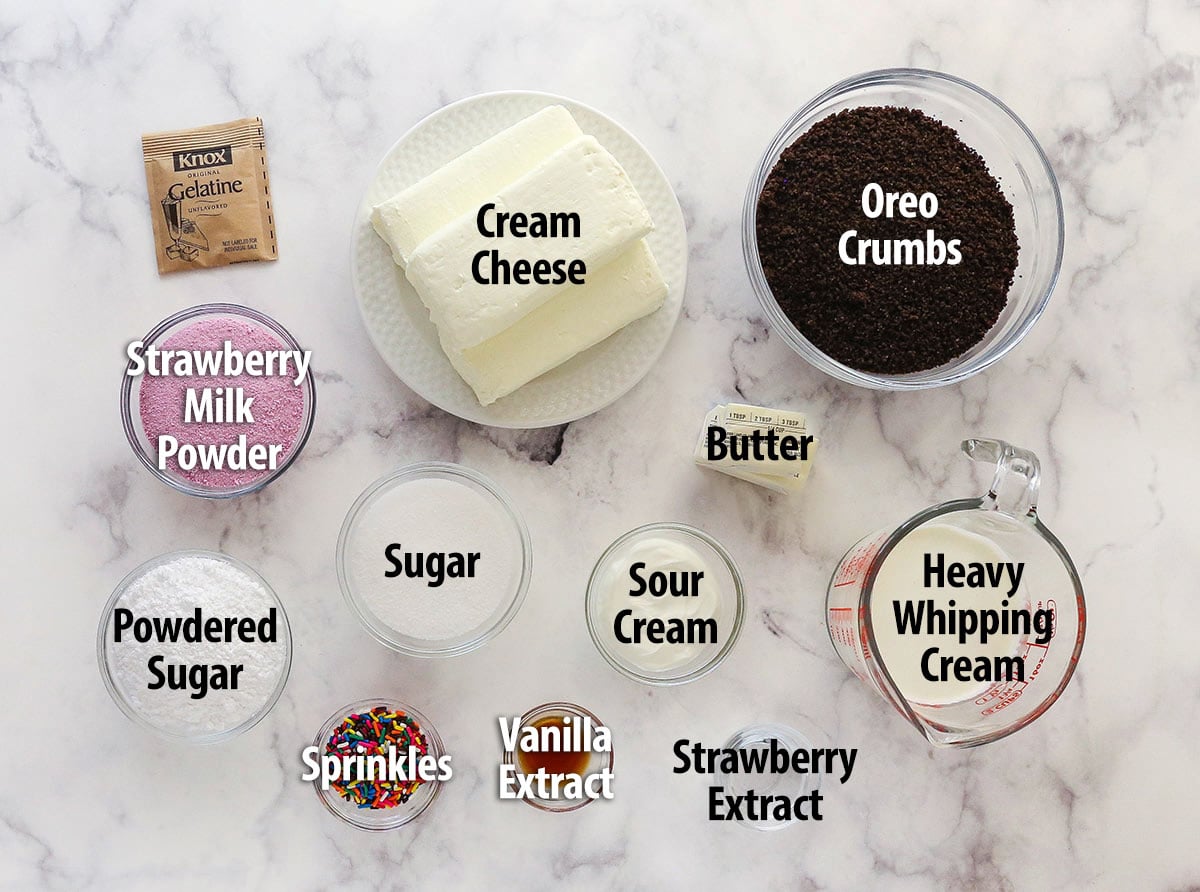
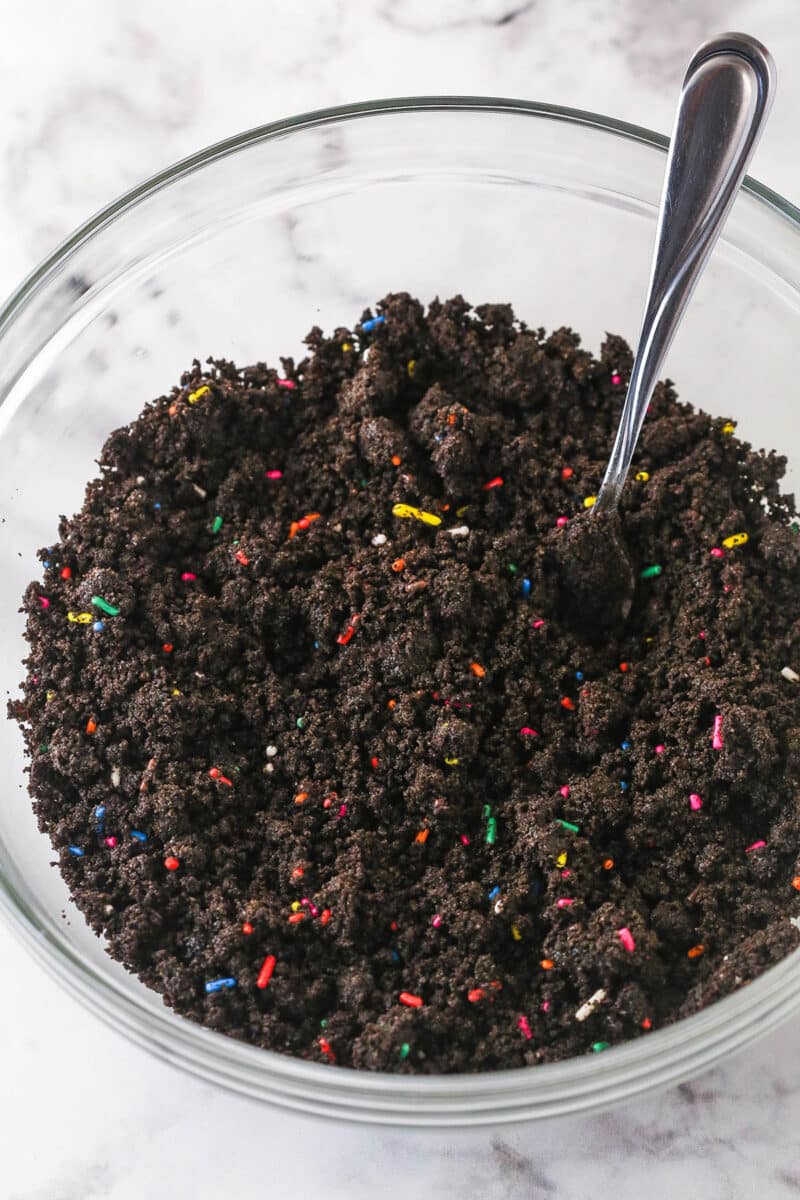
- Oreo Cookie crumbs – You’ll need about 24 standard Oreo Cookies to make enough cookie crumbs for the crust. You do not need to remove the Oreo filling.
- Colorful sprinkles – I highly recommend using jimmies. They’ll show up well and not be too crunchy.
- Cold water – Hydrates the gelatin so it can be used in the filling.
- Unflavored gelatin – Gives the cheesecake a bit more stability, making it easier to slice. I use powdered gelatin.
- Cream cheese – Use brick-style, full-fat cream cheese. Using reduced-fat cream cheese will make the filling too soft, and it won’t set properly.
- Strawberry milk powder – For that unmistakable strawberry milkshake flavor! I used Nesquik, but it’s ok use other brands of strawberry milk powder if you don’t have Nesquik.
- Sour cream – Makes the cheesecake creamy and adds tangy flavor. Make sure to use full-fat sour cream so that the filling sets properly.
- Strawberry extract – You’ll need strawberry extract to give the filling additional strawberry flavor.
- Powdered sugar – This will stabilize the heavy whipping cream when whipped. Don’t leave it out, so that your whipped cream doesn’t wilt.

How to Make No Bake Strawberry Milkshake Cheesecake
Ready to make this cheesecake? Check out these step-by-step directions to get familiar with the recipe. For more detailed instructions scroll to the recipe card below.
For the Crust
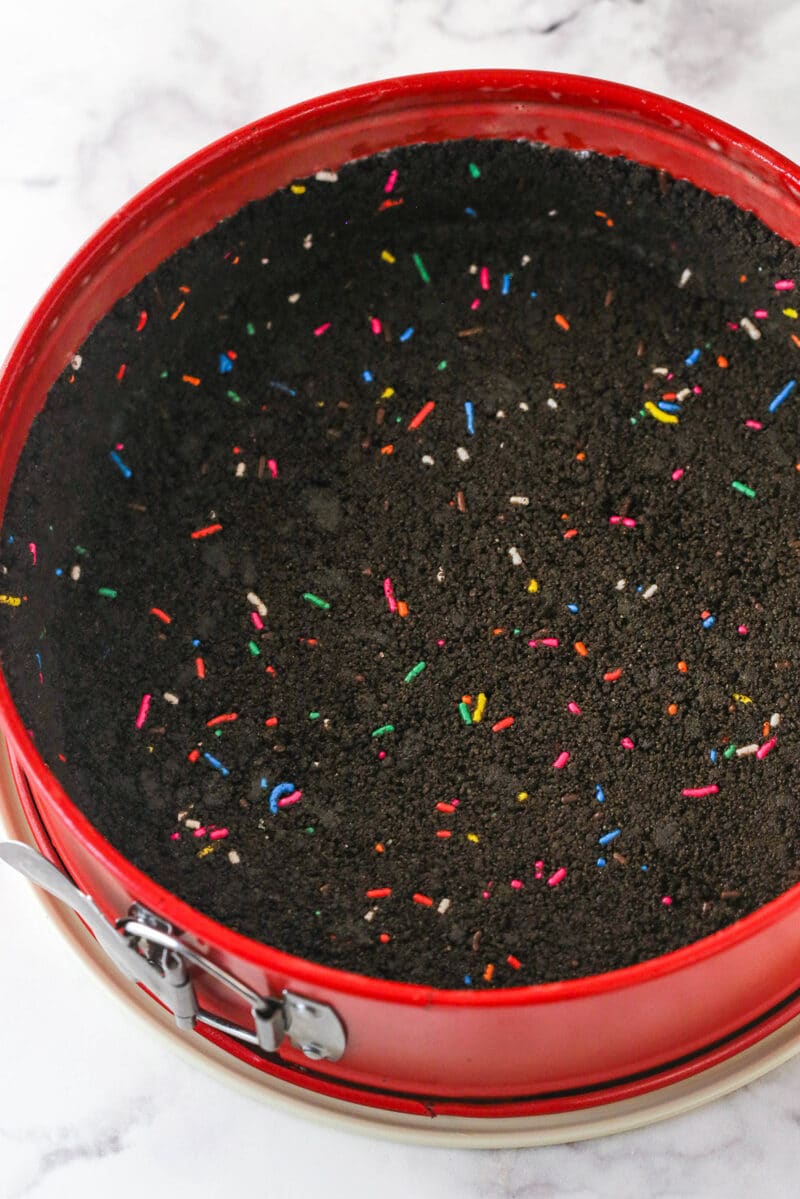
- Prep pan. Line the bottom of a 9-inch springform pan with parchment paper and grease the sides.
- Mix crust, fill pan. Combine the crust ingredients and press the mixture into the springform pan.
- Chill. Place the crust in the fridge to chill.
For the Filling
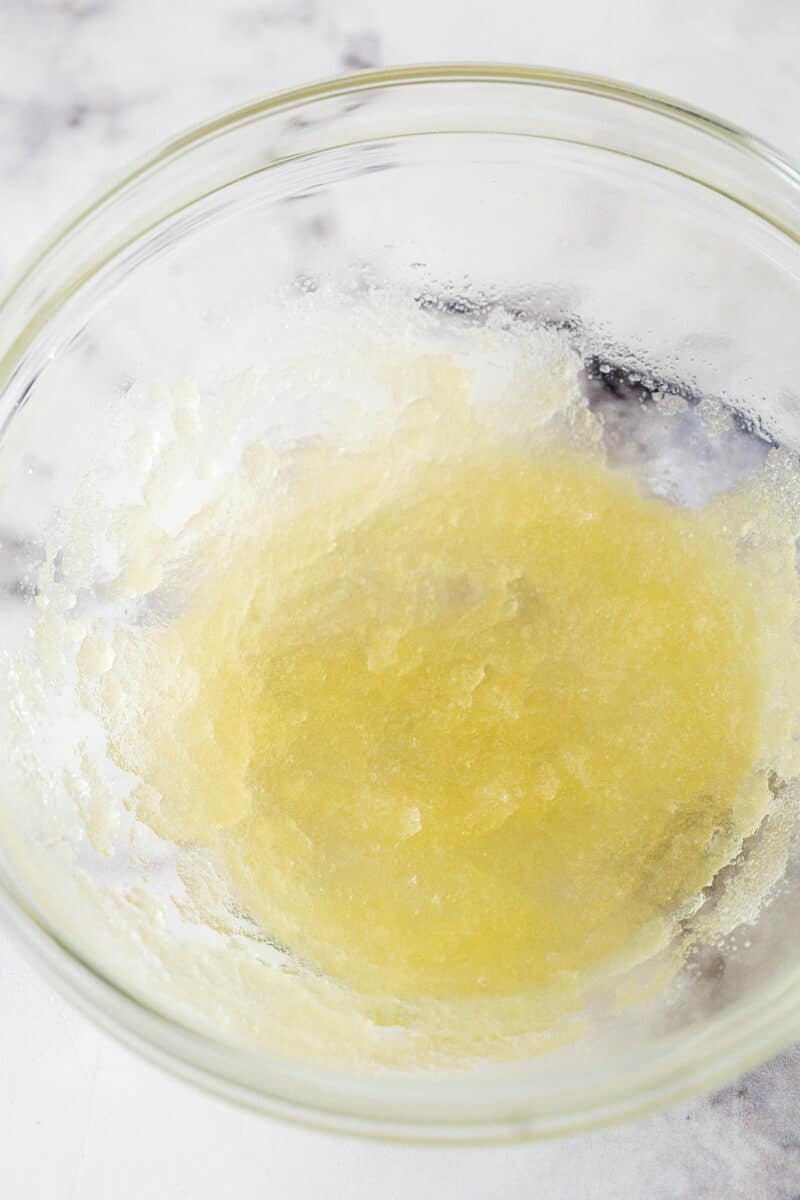
- Prepare gelatin. Sprinkle gelatin evenly over cold water. Stir to make sure all the gelatin is moistened. Let it bloom (hydrate) for 5 minutes.
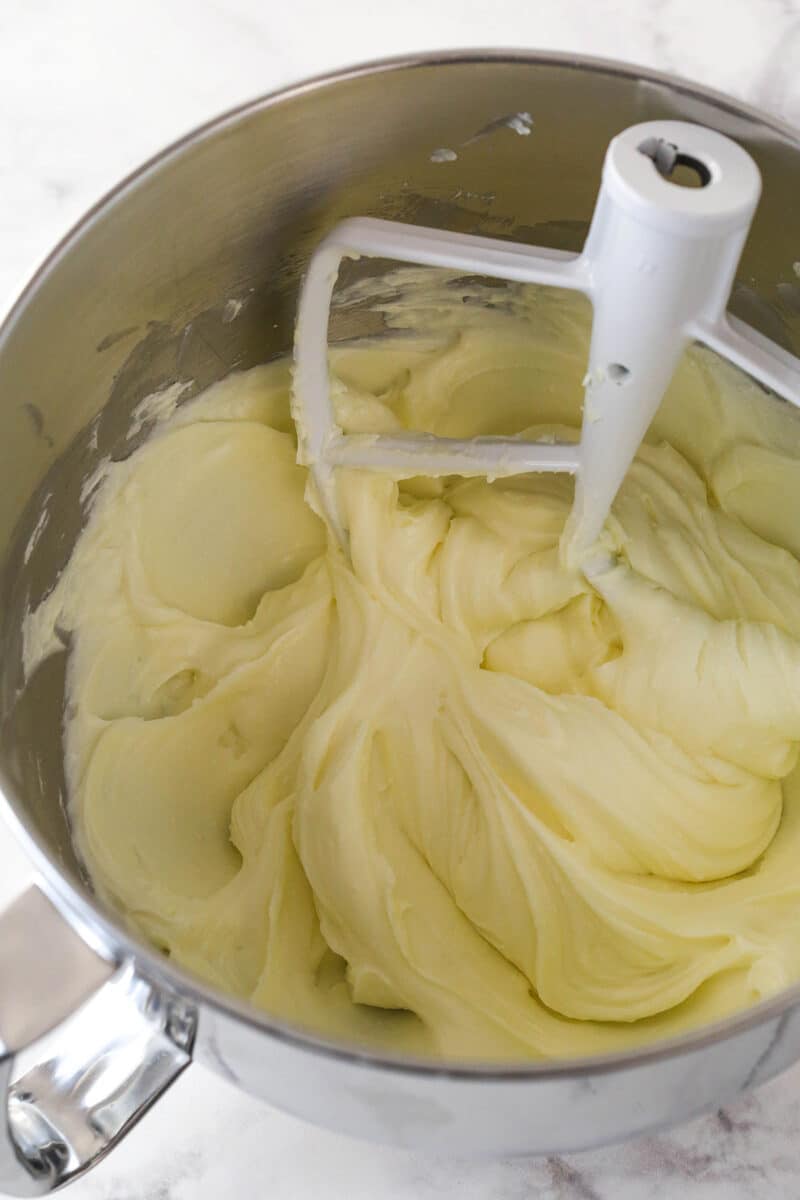
- Begin making the filling. In a large mixer bowl, beat the cream cheese and sugar until smooth. Add the strawberry milk powder and mix until smooth. Next add the sour cream and strawberry extract and mix until well combined.
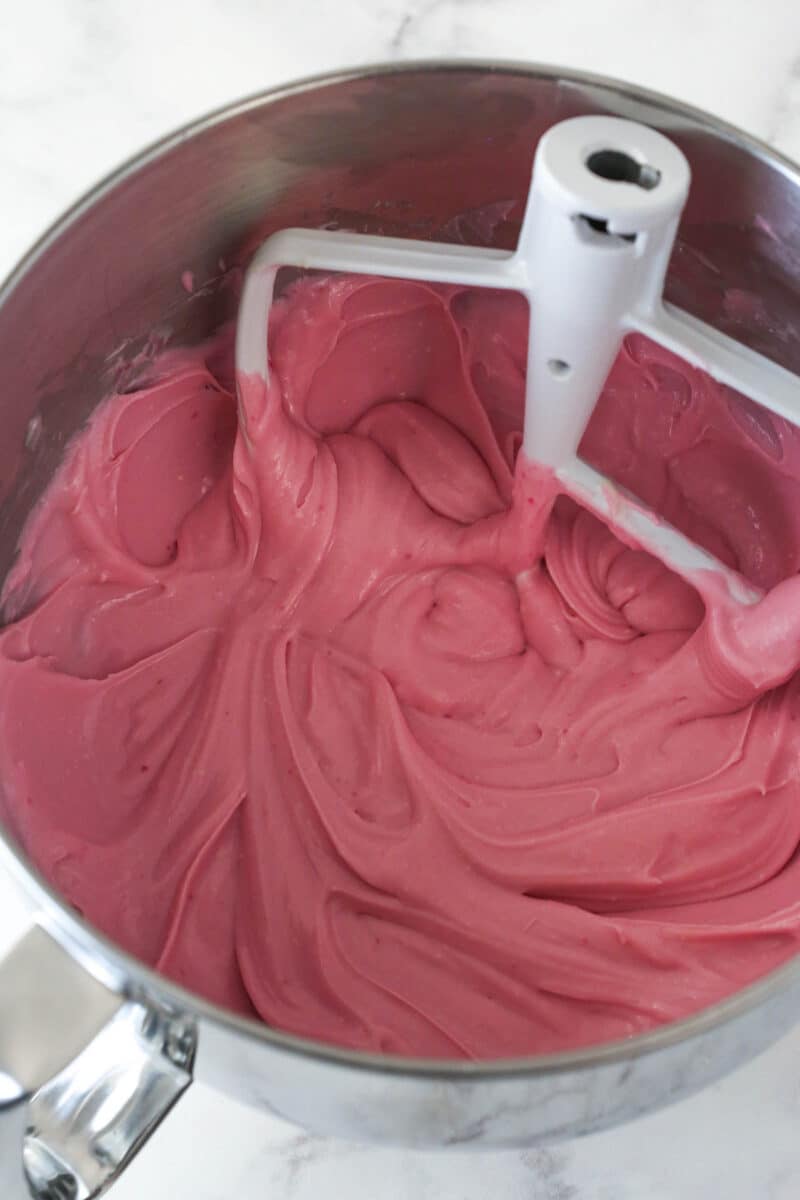
- Add gelatin. Heat the bloomed gelatin until melted (about 10 seconds). Add it to the cheesecake filling, mixing until well combined. Set filling aside.
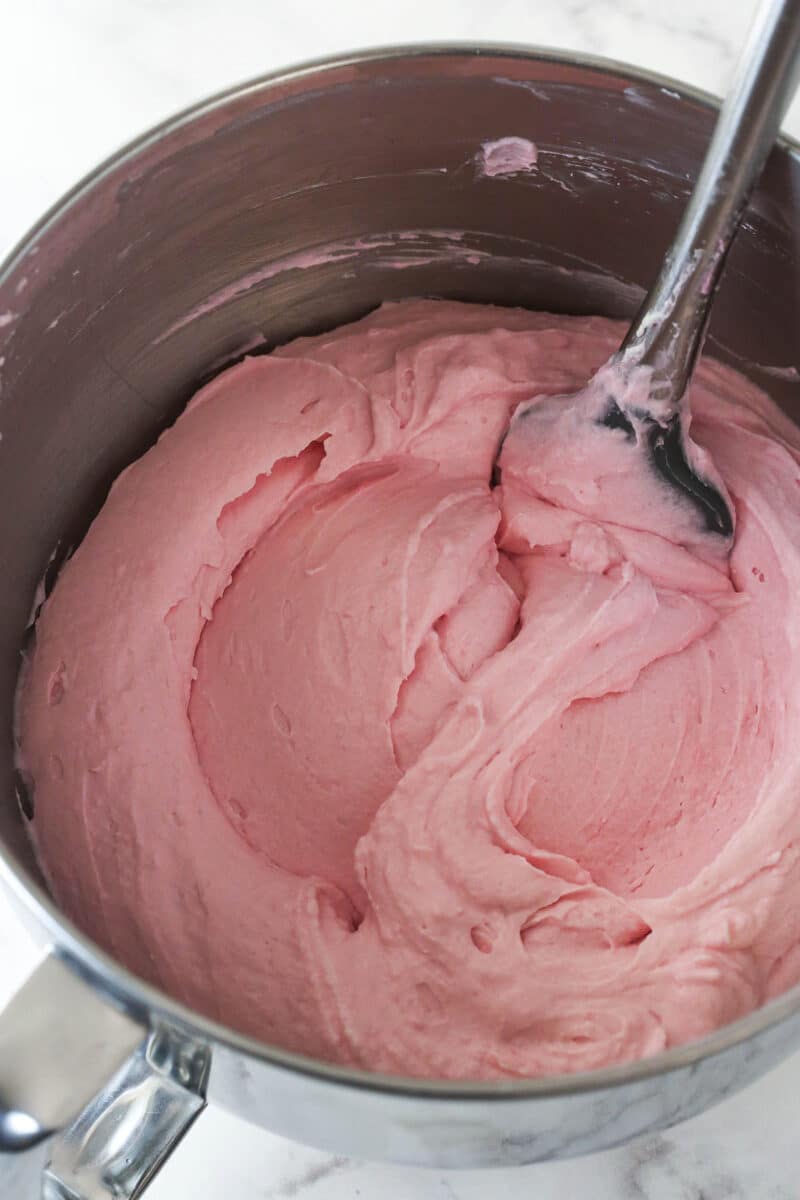
- Make and add whipped cream. In another bowl, whip the cream, powdered sugar and vanilla on high speed until stiff peaks form. Fold it into the cream cheese mixture in two parts.
- Add filling to pan and chill. Pour the filling evenly into the crust. Refrigerate for 4-5 hours, until cold and firm.

Finish Off the Cheesecake
- Place on serving plate. Remove the cheesecake from the pan, and set it on a serving platter.
- Make whipped cream. Whip heavy whipping cream, powdered sugar and vanilla extract on high speed until stiff peaks form.
- Decorate. Pipe swirls of whipped cream around the edge of the cheesecake and top with some colorful sprinkles, if desired.
- Serve and enjoy!

Tips for Success
- Temperature matters. To make a smooth, lump-free filling, make sure to use room temperature cream cheese. You can test for softness by pressing your thumb gently on the outside of the foil packaging. It’s ready when your thumb leaves a slight indent.
- Wet the gelatin. To be sure you don’t end up with lumps of gelatin, you want all of the powder to be wet from the water. Give it a stir, if needed, to moisten all the powder.
- Don’t overheat. With gelatin, you also want to be sure not to heat it too much when you melt it. It won’t firm back up properly.
- Don’t over-mix. When folding the whipped topping into the cheesecake filling, don’t over-mix it! Over mixing takes the volume out of the whipped topping and can cause your dessert to fall flat.

Storage Information
- Fridge. Store cheesecake in an airtight cake carrier or container in the fridge. Or you can wrap the cake in a layer of plastic wrap and use toothpicks to prop the plastic away from the whipped cream. Store the cheesecake in the fridge for up to 5 days.
- Freezer. You can freeze this cheesecake, but I recommend freezing it before decorating it with toppings. Place the undecorated cheesecake in the freezer for a few hours to firm up, then wrap it in a double layer of plastic wrap. If you’ve sliced it already, arrange the slices in a single layer in an airtight container. You can store the cheesecake in the freezer for up to 3 months. When you’re ready, thaw it in the refrigerator (overnight is best) and then decorate.
More No Bake Cheesecake Recipes
- No-Bake Oreo Cheesecake
- Perfect No-Bake Cheesecake
- No Bake Blueberry Cheesecake
- No Bake Cherry Almond Cheesecake
- No Bake Strawberry Cheesecake
This recipe was updated 6/9/2025. For the original recipe, download the recipe PDF.
No Bake Strawberry Milkshake Cheesecake
save this recipe
Enter your email & we’ll send it to your inbox. Plus get new recipes from us every week!
Ingredients
Crust
- 2 ¾ cups (369g) Oreo cookie crumbs (about 31 oreos)
- 7 tablespoons (98g) butter (salted or unsalted, melted)
- 3 tablespoons sprinkles
Filling
- 2 tablespoons cold water
- 2 ¼ teaspoons unflavored gelatin (0.25 oz package)
- 24 ounces (678g) cream cheese (room temperature)
- ½ cup (104g) sugar
- 1 ½ cups strawberry Nesquik powder mix (or similar strawberry milk powder)
- ¼ cup (58g) sour cream
- 2 teaspoons strawberry extract
- 1 ¼ cups (300ml) heavy whipping cream (cold)
- ¾ cup (86g) powdered sugar
- 1 teaspoon vanilla extract
Whipped cream
- 1 cup (240ml) heavy whipping cream (cold)
- ½ cup (58g) powdered sugar
- ¾ teaspoon vanilla extract
- Sprinkles
Instructions
Make the crust
- Line a 9-inch (23cm) springform pan with parchment paper in the bottom and grease the sides.
- Combine the crust ingredients in a small bowl. Press the mixture into the bottom and up the sides of the springform pan.
- Place the crust in the fridge while you make the filling.
Make the cheesecake filling
- Add the cold water to a small bowl and sprinkle the gelatin evenly over it. You want all of the powdered gelatin to be touching water. If it isn’t, give it a stir until it’s all moistened. Let the gelatin sit and bloom/hydrate for 5 minutes.
- In a large mixer bowl, beat the cream cheese and sugar together until well combined and smooth.
- Add the strawberry milk powder and mix until well combined and smooth. Add the sour cream and strawberry extract and mix until well combined.
- Heat the gelatin until. Melted, about 10 seconds, then add to the cream cheese mixture and mix until well combined. Set aside.
- In another large mixer bowl, add the heavy whipping cream, powdered sugar and vanilla extract. Whip on high speed until stiff peaks form.
- Carefully fold the whipped cream into the cream cheese mixture, in two parts, until well combined.
- Adding the cheesecake filling to the prepared crust and spread into an even layer. Refrigerate until cold and firm, 4-5 hours.
Finish cheesecake
- Remove your cheesecake from the springform pan and set it on a plate or serving platter. You can use an offset spatula to smooth out the sides, if needed. Set aside.
- To make the whipped cream, add the heavy whipping cream, powdered sugar and vanilla extract to a large mixing bowl and whip on high speed until stiff peaks form.
- Pipe the whipped cream around the top outer edge of the cheesecake, then add the sprinkles. I used Ateco tip 844.
- Store cheesecake in the fridge well-covered or in an air-tight cake carrier. Best if eaten within 4-5 days.
The nutrition facts provided are calculated using a third-party tool and are estimates only. Actual nutritional content may vary based on the ingredients and brands you use, as well as portion sizes. For accurate results, please consult a registered dietitian or nutritionist.
Enjoy!


Hi, I had to thank you for such an easy & fun cheesecake recipe. I made this for an Elk’s Super Bowl Party on Feb. 3rd & it sure was a hit !!
Wish I could show you a picture.
Awesome! So glad you enjoyed it!
Hi, can’t wait to make this for my daughter! We’re in the UK & don’t really measure in cups so I was wondering if you could convert the cup ingredients to grams or ounces for me please? Thank you in advance!
I actually have a conversion chart here. I hope that helps!
Hi can this be made in cupcake moulds rather then a whole cake?
I would think that’d be fine.
Hello, just love your website. today I tried to sign up for your newsletter and it wouldn’t let me is there a problem with signing up.
Thanks so much Melissa! It should be working, but try this link if it isn’t. Otherwise just let me know which list you want to be on and I can add you. 🙂 Thanks!
I tried this recipe and my batter is runny than usual. I am worried that it wouldnt come out as desired. Its for a friend’s birthday ????
Hi Lindsay, I just stumbled upon your blog, as I was searhing for a Nesquik Cheesecake.. so it is perfect! My on thing is have you ever made it without the cream inside the cake? Do you think it would ruin it?
Cheers
Claire
I’m not sure what you are referring to by cream?
This recipe is glorious! I made it for my family and they loved it! Thank you very much for sharing! <3
Hi,
Approximately how many people would this be able to serve? I am a teacher and my students are interested in making a dessert dish. I wanted to make this dish. I have four groups of 5-6 students and each group would be responsible for making their own cake. Thanks!
It should make at least 10-12 pieces, depending on size.
what would happen if I used one 8 oz. of strawberry cream cheese and left the other two as regular?
Would you be leaving out the powdered strawberry mix? I’m sure the strawberry cream cheese would be fine, but if you leave out the powder you would probably not have much strawberry flavor.