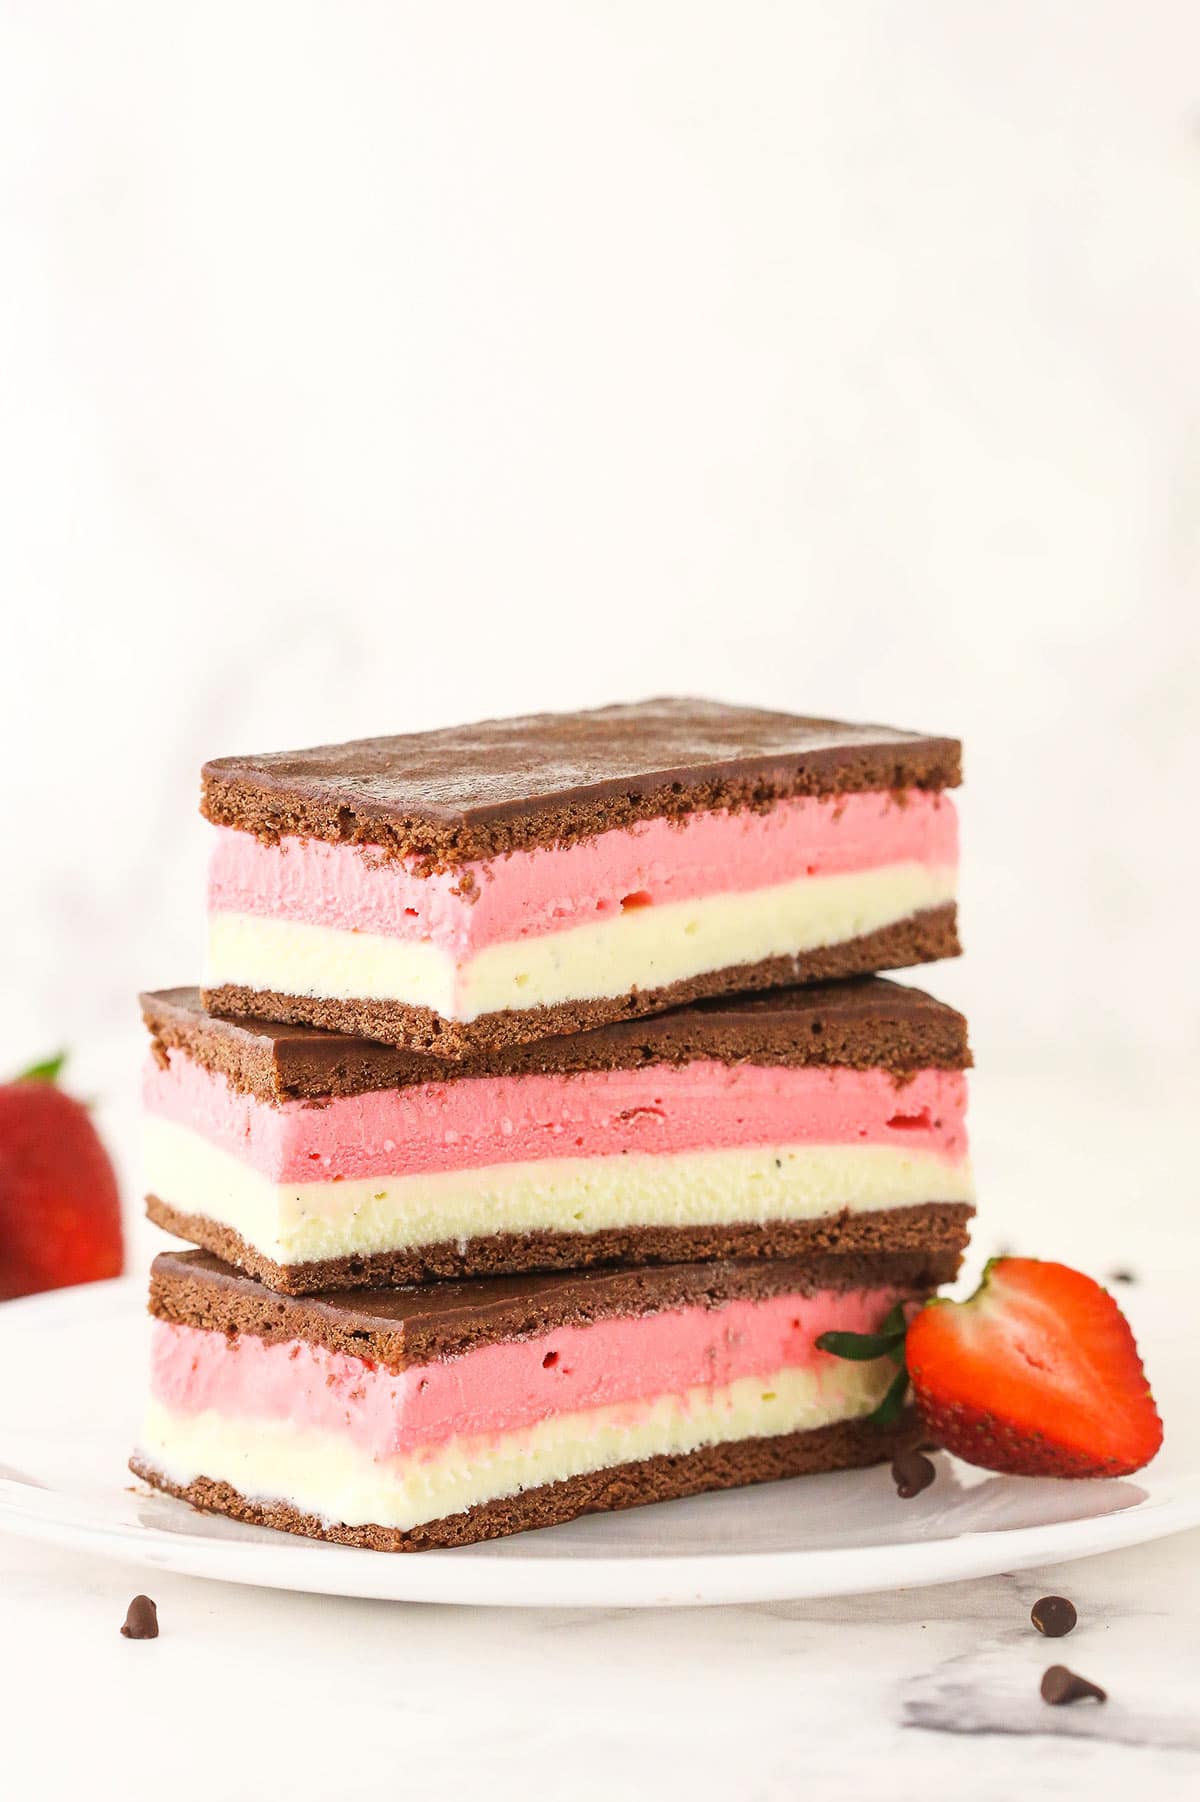
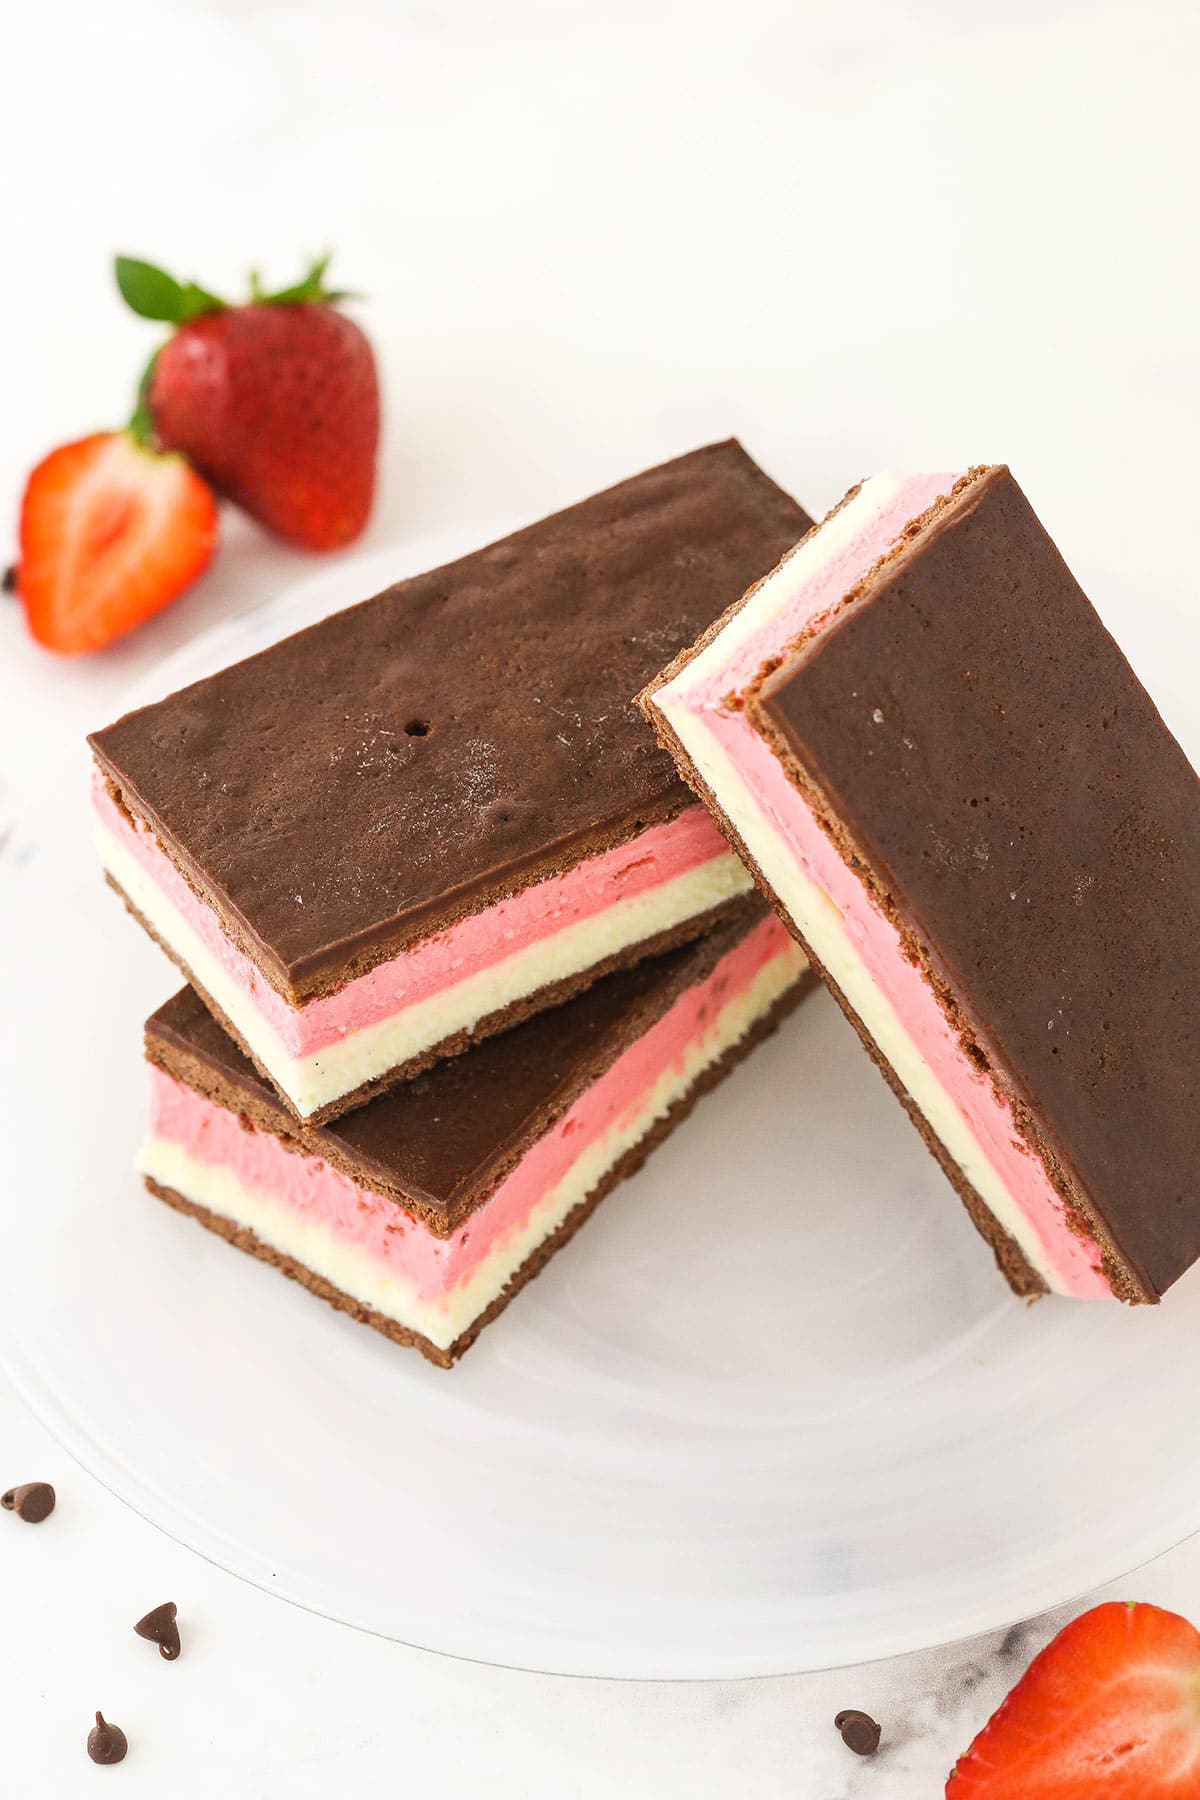
Creamy vanilla and strawberry ice creams are sandwiched between two soft chocolate cookies in these easy Neapolitan Ice Cream Sandwiches! They’re even better than the classic store-bought kind!
These Ice Cream Sandwiches Could Never Get Old!
Frozen desserts are hugely responsible for getting me through the summer. With these classic ice cream sandwiches, I can cool down after a day in the sun and treat my sweet tooth at the same time. It’s hard to believe how easy they are to make!
The “cookies” are adapted from these cakey cookies, which are so wonderfully tender, I figured they would stay soft in the freezer like the original. Well, I was right on the money! The rich cookie bases pair perfectly with the smooth, refreshing ice cream in between them. Every bite is a burst of chocolate, vanilla and strawberry bliss.
These ice cream sandwiches were a huge hit in our house! The kids and the hubs all loved them. They were the treat of choice everyday until they were gone. They really are even better than the store-bought version because each flavor is present in every bite. So good!
What Are Neapolitan Ice Cream Sandwiches?
These crowd-favorite ice cream sandwiches pay homage to Neapolitan ice cream, which features three different flavors in the same tub – chocolate, vanilla and strawberry. Many ice cream brands produce their own variation of this treat, but none of them could upstage this tempting homemade version. You’ll want to recreate it with fun new combinations of your other favorite ice cream flavors!
Recipe Ingredients
You can make these completely from scratch if you’d like, but I decided to keep them simple with store-bought ice cream. If you make the ice cream yourself, it may best to use a machine. No-churn ice cream is a bit too soft to work well in sandwiches, unless it’s one that uses cream cheese as the base, instead of sweetened condensed milk.
- All-Purpose Flour: Measure with a food scale or fluff and spoon it into the measuring cup slowly to prevent overpacking.
- Cocoa Powder: Natural and unsweetened – not Dutch-processed.
- Baking Powder: Don’t worry, this won’t make your cookies tall and puffy. It’s there to ensure that they stay soft and light.
- Salt
- Unsalted Butter: At room temperature.
- Sugar
- Egg
- Milk: I use 2%.
- Vanilla Ice Cream
- Strawberry Ice Cream
How to Make Neapolitan Ice Cream Sandwiches
This recipe keeps the hands-on prep work to a minimum. Since each component must be frozen before the next one is added, it does require a little patience – but I promise the results will be worth the wait!
Make The Cookie Bases
Heat Oven & Prep Pan: Preheat the oven to 375°F. Prepare two 9×13-inch baking pans with parchment paper in the bottom and spray the sides.
Combine Dry Ingredients: Combine the flour, cocoa powder, baking powder and salt in a medium-sized bowl. Set the mixture aside.
Beat Butter & Sugar: Beat the butter and sugar just until they’re combined and smooth.
Add Egg & Milk: Add the egg and milk and mix until well combined.
Add Dry Ingredients: Add the flour mixture to the combined wet ingredients and mix just until well incorporated.
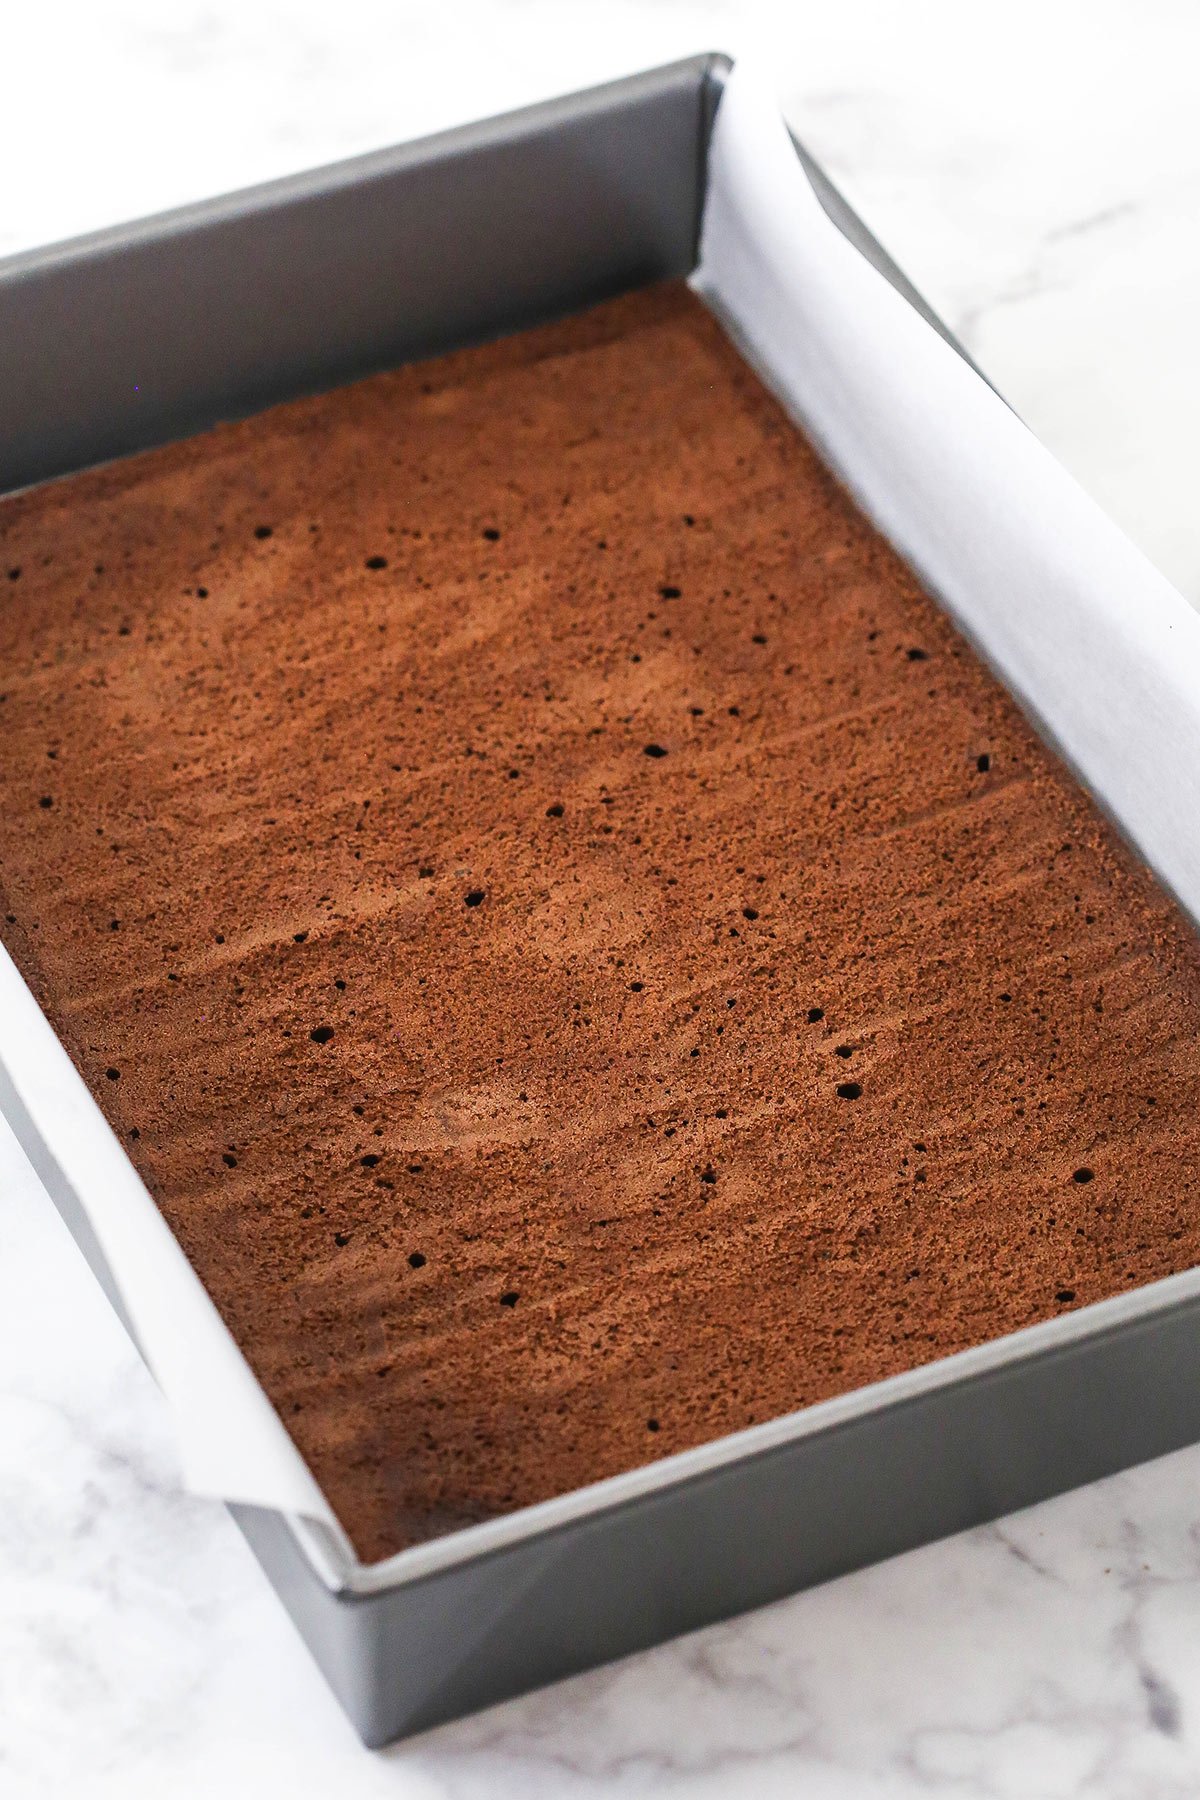
Pour Batter Into Pans: Divide the batter evenly between the two cake pans. It’ll be very thin. I used a food scale to halve it accurately, but you could measure it out with cups if preferred. Spread the batter evenly.
Bake: Bake the cookie/cake bases for 5-8 minutes, or until a toothpick inserted into the center comes out clean.
Let Cool: Allow the cakes to cool mostly in the pan, then turn them out onto a large cooling rack (or two). You don’t want any part of either cake hanging off the rack. Before you transfer them over, line the cooling rack with parchment paper and lightly spray it with nonstick baking spray.
Build the Ice Cream Sandwiches
Freeze Cookie Bases: Put the cakes into the freezer for about 20-30 minutes before you start assembling the sandwiches (you can freeze them for longer if you want to make them ahead of time).
Remove First Ice Cream Flavor From Freezer: Set the first flavor of ice cream (I started with vanilla) out at room temperature for about 15-20 minutes before you use it.
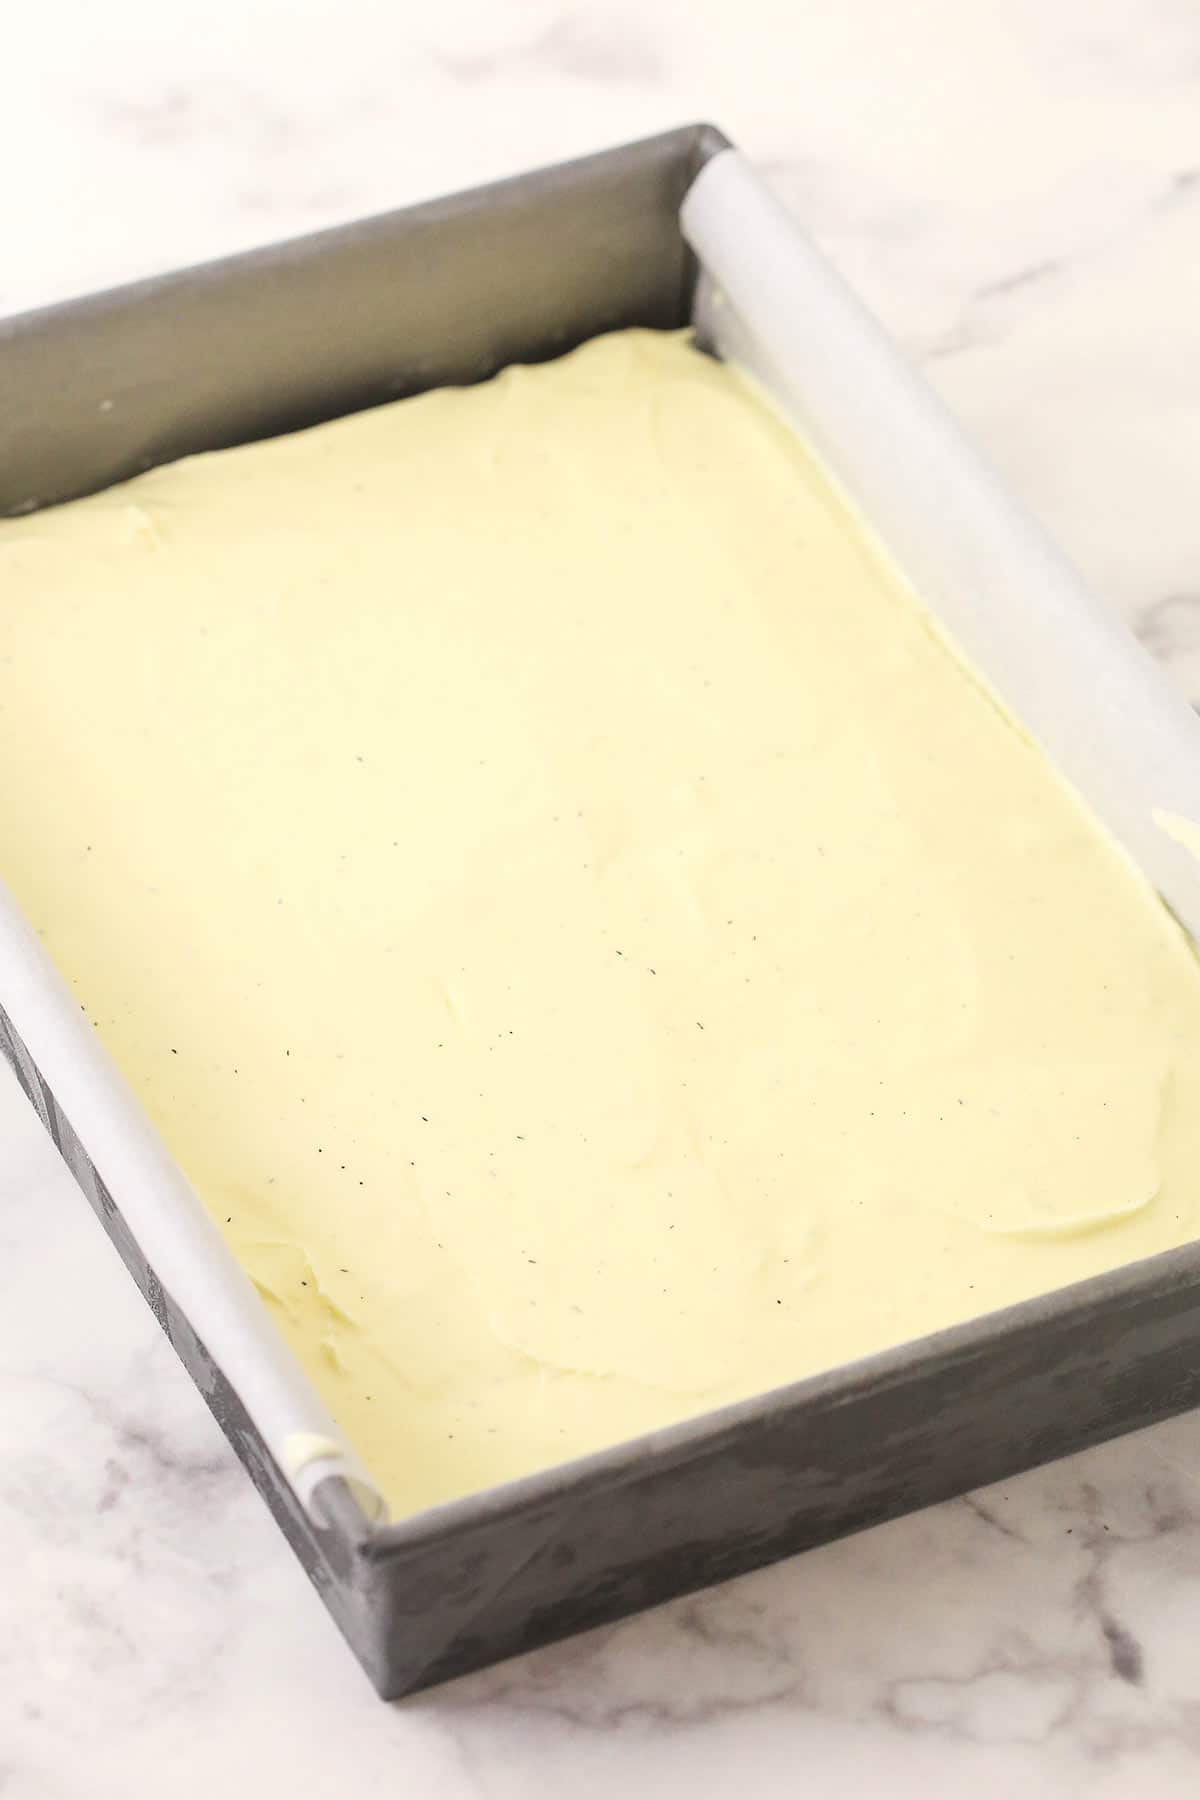
Add First Base to Lined Pan: Prepare one of the 9×13-inch baking pans for assembly. Make sure it’s clean and line it with parchment paper that sticks up above the two long sides of the pan. You’ll use the overhanging bits to lift the bars out of the pan later. Add one of the frozen cakes to the bottom of the pan with the “pretty side” (or the top of the cake) on the bottom/facing down.
Spread On First Ice Cream Layer: Place your first ice cream flavor into a large bowl and stir well until it’s smooth and spreadable. Spread it into an even layer on top of the chocolate cookie/cake. Set the pan back into the freezer for 30 minutes to an hour, depending on your freezer. You want to let the ice cream get firm enough to stay in place when you add the next layer.
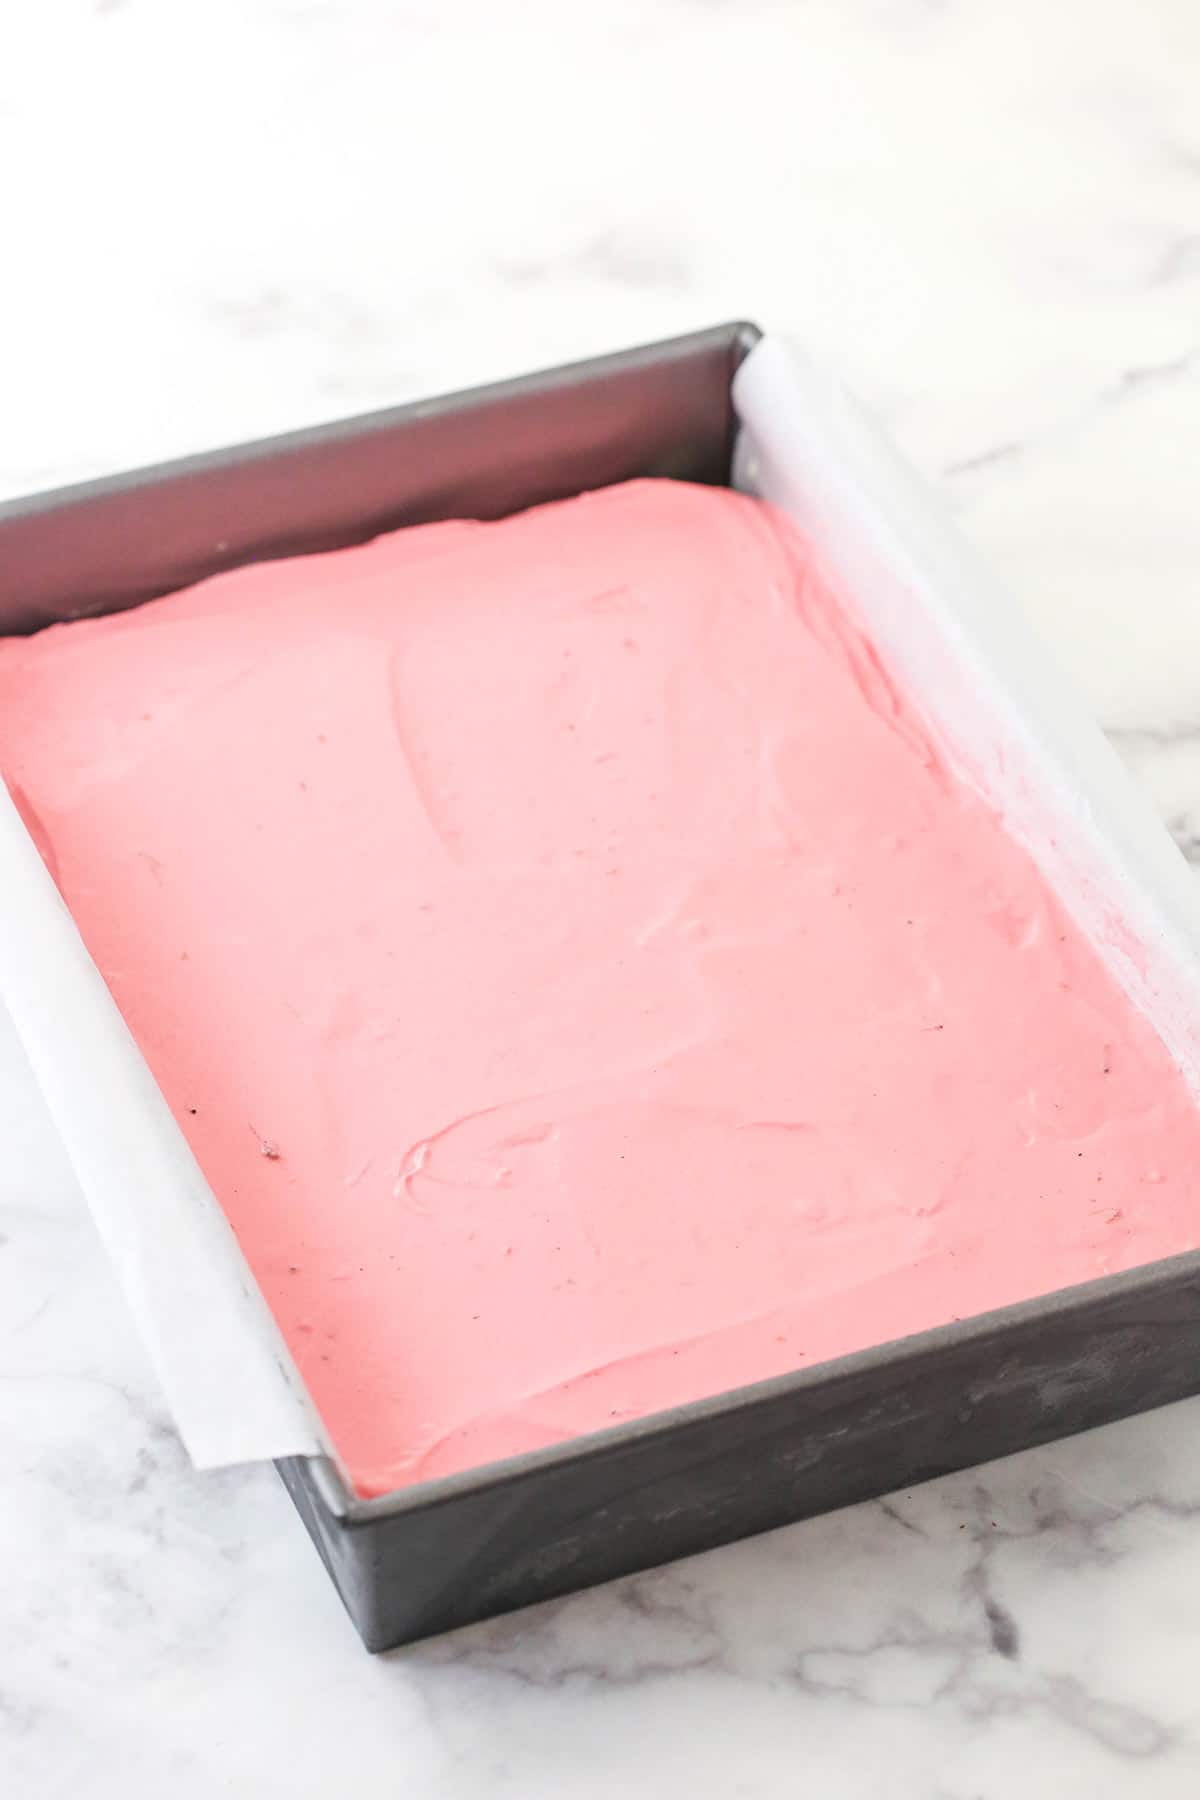
Spread On Second Ice Cream Layer: About 15-20 minutes before you remove your pan from the freezer to add the second layer of ice cream, set the ice cream out to thaw a bit. Then place it into a large bowl and stir well until it’s smooth and spreadable. Spread it out evenly on top of the previous ice cream layer.
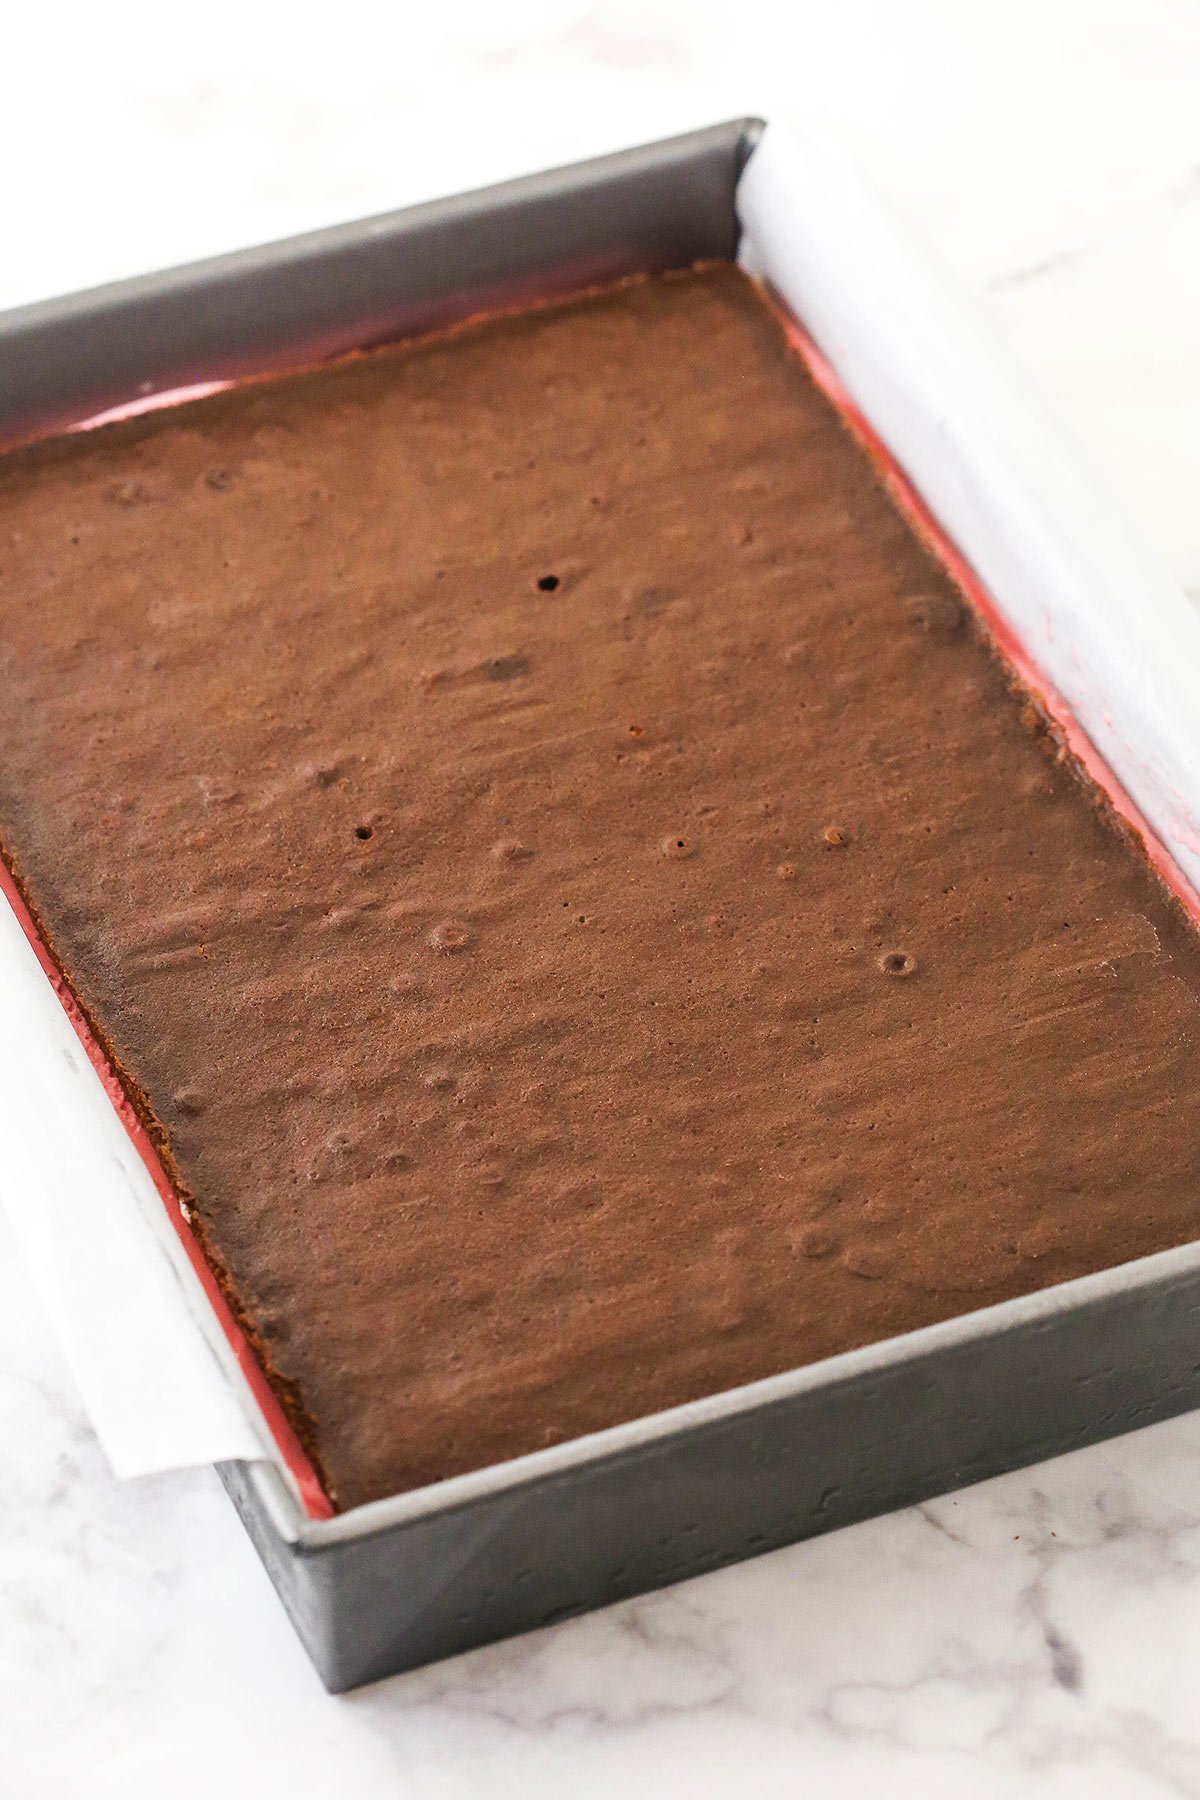
Add Top Cookie Base: Add the second frozen chocolate cake on top of the ice cream, with the “pretty side” up. Press it lightly onto the ice cream so it sticks well and fills in any gaps. Freeze the completed sandwiches until they’re firm and frozen. This will take at least 2 hours.
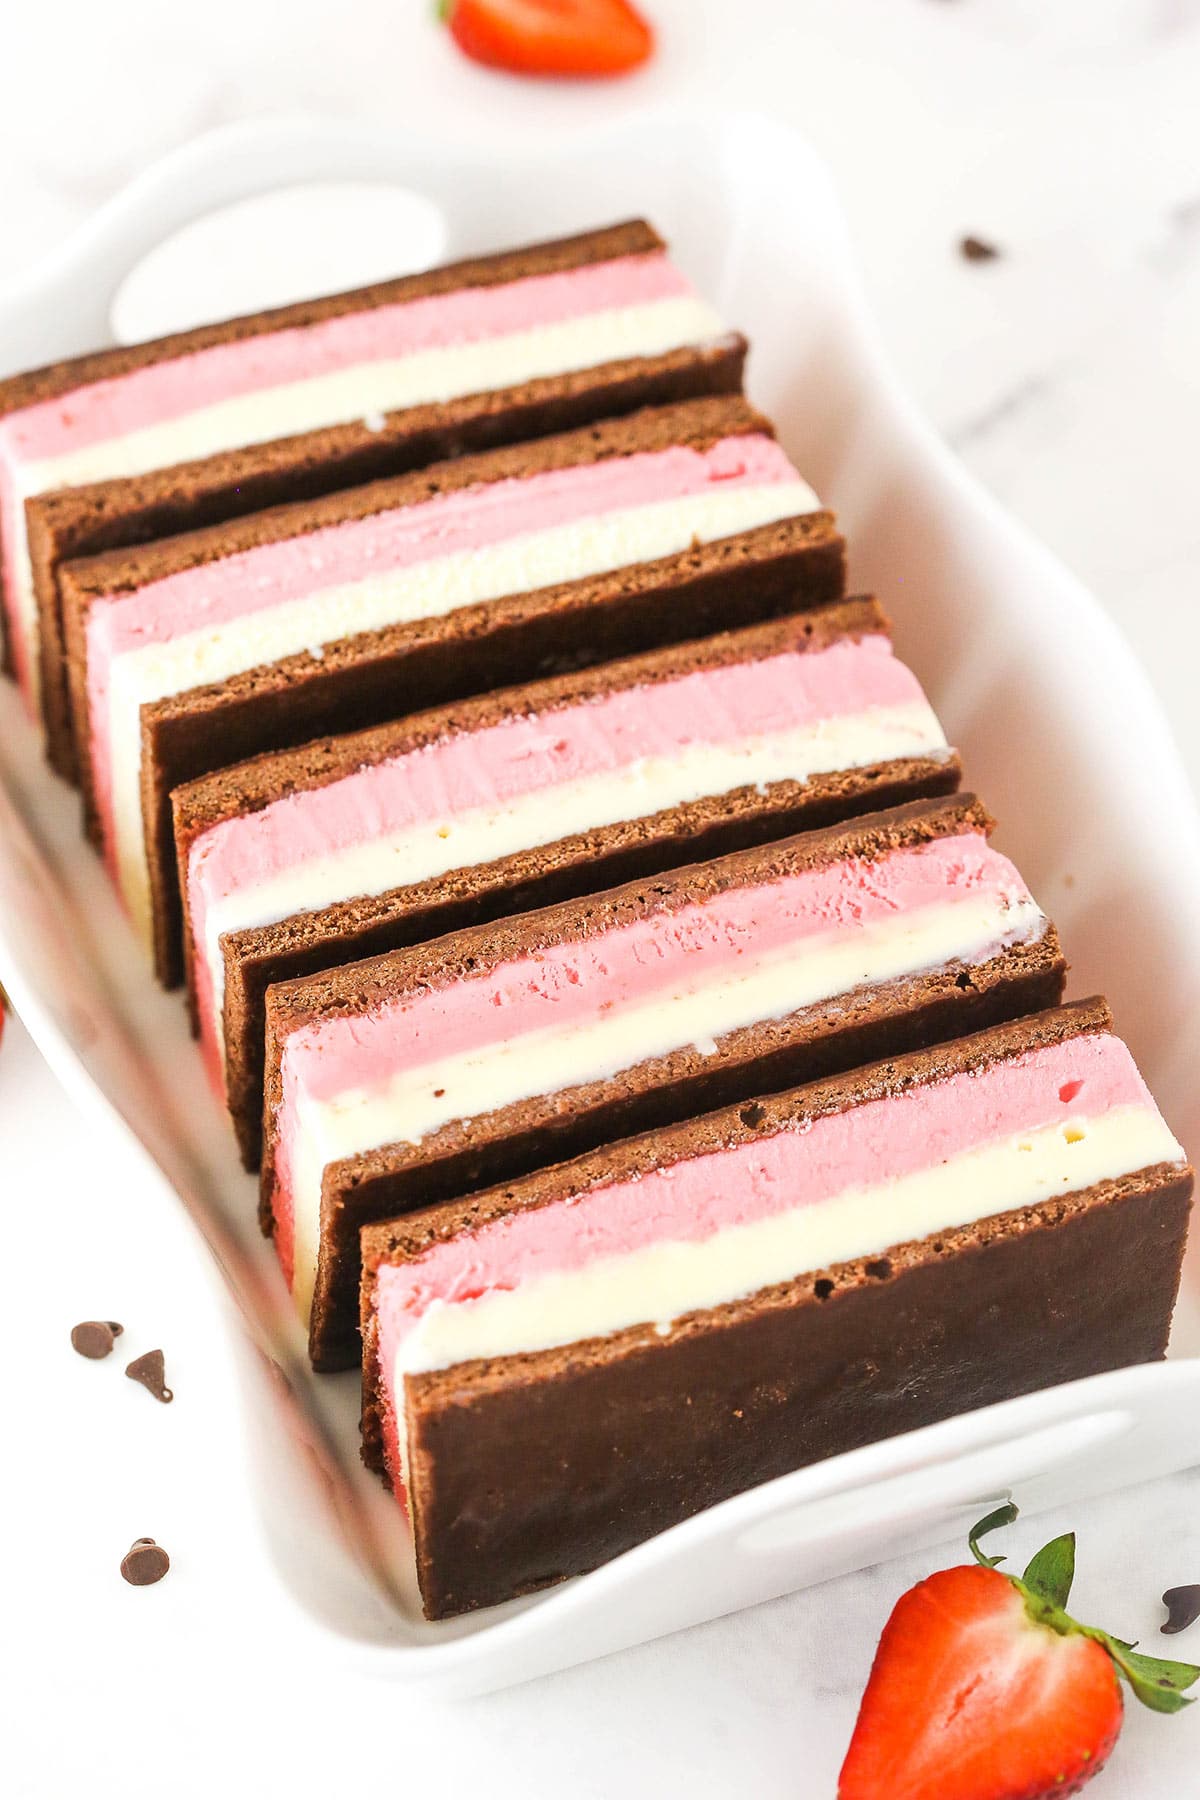
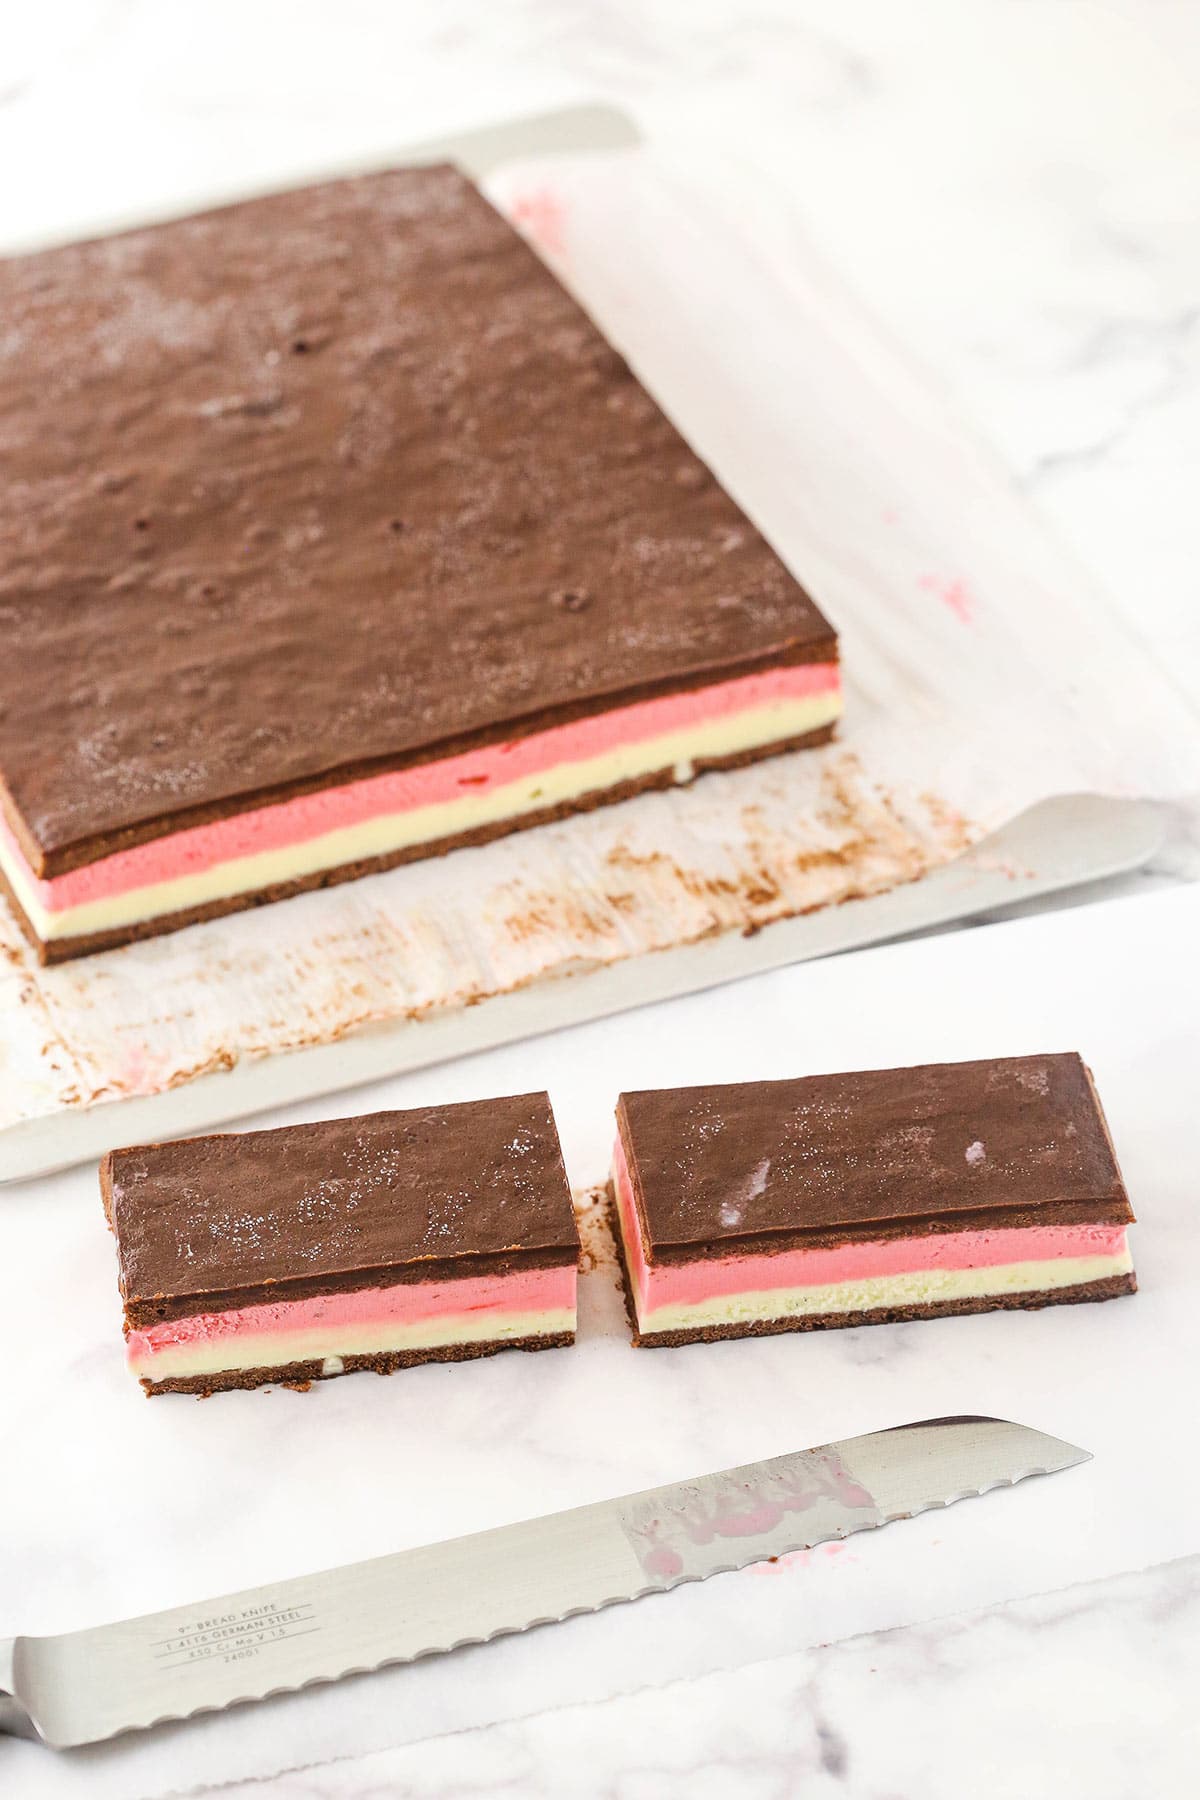
Cut Into Bars: Once the ice cream sandwiches have fully set, use the overhanging parchment paper to lift them out of the pan. Cut off the rough edges with a long knife, then cut them into rectangles.
Enjoy! Return your ice cream sandwiches to the freezer until you’re ready to serve them.

Tips for Success
Don’t start on this recipe until you review the following tips. Soon enough, you’ll be munching on a flawless Neapolitan dessert.
- Don’t Forget to Line the Pans! It’s super important to line the bottoms of the pans with parchment paper before you bake the cookie bases. You don’t want them to stick to the pan when you try to remove them. Because they’re thin, they could easily break.
- Can I Make My Cookie Bases In Advance? If you’d like to make your cookies/cakes the day before you assemble the sandwiches, go right ahead. Just pop them in the freezer for when you’re ready to make the sandwiches. Just be sure to cover them in plastic wrap if you’re making them more than a couple days in advance. This prevents freezer burn.
- Line the Cooling Rack With Greased Parchment Paper: Before you transfer your cookie bases to the parchment-lined cooking rack, remember to spray the parchment paper with nonstick baking spray. The “tops” of the cakes will end up on the outsides of the sandwiches, and ideally they’ll look nice, so you don’t want them sticking to the parchment paper when they cool.

Variation Ideas
Every recipe has room for some customization, especially when it comes to desserts. These ice cream sandwiches are no exception!
- Add Chocolate Ice Cream: I like to make these sandwiches with just vanilla and strawberry ice cream to let the chocolate in the cookie bases speak for itself. But if you’d like, you could certainly add a layer of chocolate ice cream as well.
- Make Them Square: Ice cream sandwiches are known for their rectangular shape, but square ones are just as delicious! Smaller portions make for more servings and fewer calories a pop.
- Swap Out the Flavors: You can use any ice cream flavor you’re craving for these sandwiches. Try substituting the strawberry ice cream for cherry or the vanilla for vanilla bean!
How to Store
Keep these ice cream sandwiches in the freezer at all times so they don’t melt. Wrap each one in a tight layer of plastic wrap to preserve them. Enjoy your Neapolitan ice cream sandwiches within about 2 weeks.
Print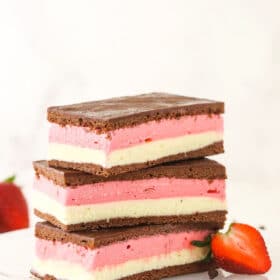
Neapolitan Ice Cream Sandwiches
- Prep Time: 2 hours 30 minutes
- Cook Time: 5 minutes
- Total Time: 2 hours 35 minutes
- Yield: 12 1x
- Category: Dessert
- Method: Oven
- Cuisine: American
Description
Creamy vanilla and strawberry ice creams are sandwiched between two soft chocolate cookies in these easy Neapolitan Ice Cream Sandwiches! They’re even better than the classic store-bought kind.
Ingredients
- 1 1/2 cups (195g) all-purpose flour
- 3 tbsp (22g) natural unsweetened cocoa powder
- 1 1/4 tsp baking powder
- 1/4 tsp salt
- 1/2 cup (112g) unsalted butter, room temperature
- 1 cup (207g) sugar
- 1 large egg
- 1/2 cup (120ml) milk
- Half gallon vanilla ice cream (you only need half of it)
- Half gallon strawberry ice cream (you only need half of it)
Instructions
Make the Cookie Bases
- Preheat the oven to 375°F (190°C). Prepare two 9×13 inch baking pans with parchment paper in the bottom and spray the sides.
- In a medium sized bowl, combine the flour, cocoa, baking powder and salt. Set aside.
- Beat the butter and sugar just until combined and smooth.
- Add the egg and milk and mix until well combined.
- Add the flour mixture and mix just until well combined.
- Divide the batter evenly between the two cake pans. I used a food scale to do that accurately, but you could measure with cups as well. Spread the batter evenly. It’ll be very thin. Bake for 5-8 minutes or until a toothpick comes out clean.
- Allow to cool mostly in the pan, then turn out onto a cooling rack that’s large enough for the full cake. You’ll want to line the cooling rack with parchment paper and lightly spray the parchment with non-stick baking spray, so that it doesn’t stick. The “tops” of the cakes will end up being the outside of the ice cream sandwiches and ideally they’ll look nice, so you don’t want them to stick to the parchment paper.
Build the Ice Cream Sandwiches
- Prior to building the ice cream sandwiches, put the cakes into the freezer for about 20-30 minutes (you can freeze them for longer if you want to do that ahead of time). Set the first flavor of ice cream (I used vanilla first) out for about 15-20 minutes prior to using, as well.
- Prepare one of the 9×13-inch baking pans for building the sandwiches. Be sure it’s clean and line it with parchment paper that sticks above the two long sides of the pan. You’ll use those for lifting the bars out of the pan for later. Add one of the frozen cakes to the bottom of the pan with the “pretty side” (or the top of the cake) on the bottom/facing down.
- Add about half of the ice cream flavor you’re using first to a large bowl and stir well until smooth and spreadable. Spread into an even layer on top of the chocolate cake layer. Set the pan back into the freezer for 30 minutes to an hour, depending on your freezer. You want the ice cream firm enough that it won’t move around when you add the next layer.
- About 15-20 minutes before adding the second ice cream flavor, set it out to thaw a bit. Then add about half of the ice cream flavor you’re using second to a large bowl and stir well until smooth and spreadable. Spread into an even layer on top of the previous ice cream layer.
- Add the second frozen chocolate cake on top of the ice cream, with the “pretty side” up. Press it lightly onto the ice cream so it sticks well and fills in any gaps. Freeze again until firm and frozen, at least 2 hours.
- Use the parchment paper to lift the sandwiches out of the pan. Cut off the rough edges with a long knife, then cut into bars.
- Store in the freezer until ready to serve.
Notes
- Makes 12 rectangular ice cream sandwiches or 18 square ones.
- To Store: Sandwiches should be individually wrapped in plastic and stored in the freezer for up to 2 weeks.
Nutrition
- Serving Size:
- Calories: 465
- Sugar: 32 g
- Sodium: 131.3 mg
- Fat: 23.7 g
- Carbohydrates: 58.4 g
- Protein: 6.7 g
- Cholesterol: 114.4 mg
More Refreshing Treats to Try
Want more frozen desserts to enjoy with your loved ones this summer? You’ve just hit the jackpot.


