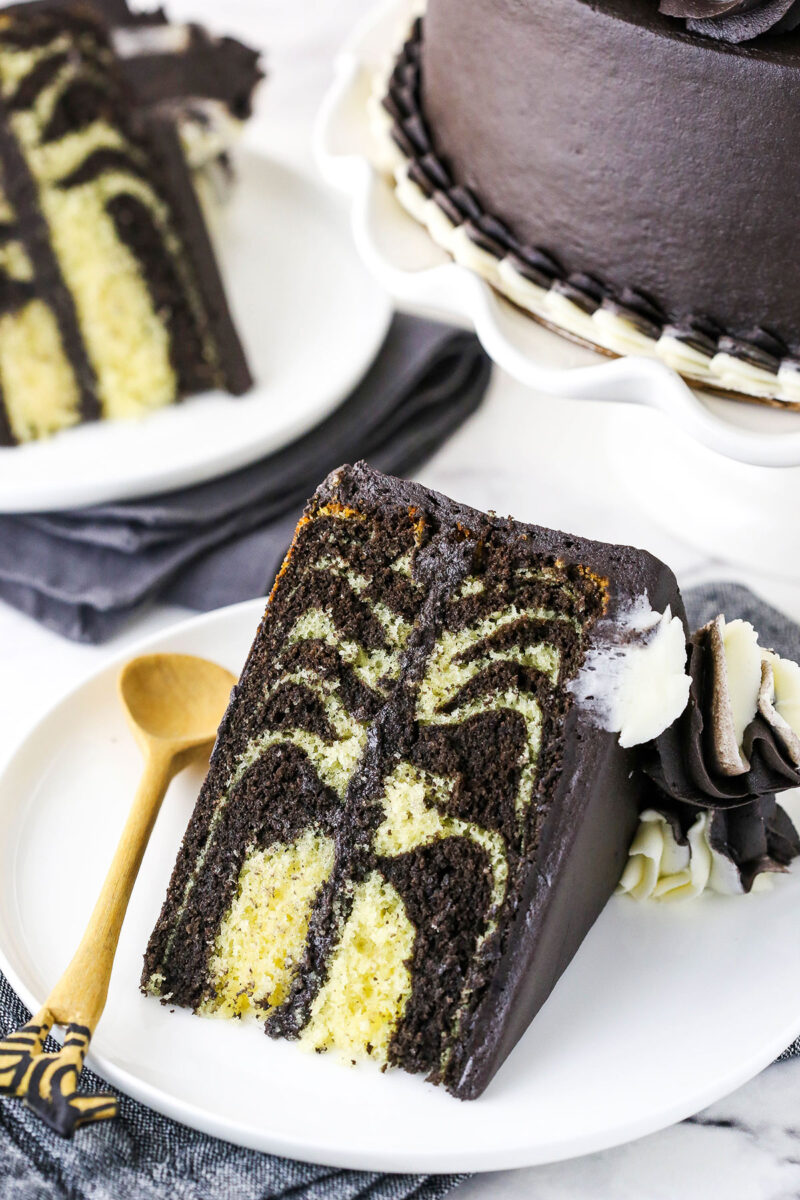
This chocolate and vanilla swirled Zebra Cake is incredibly moist and delicious. Covered in a sweet homemade buttercream, this cake is a million times better than the pre-packaged zebra cakes! Plus, it’s made from one cake batter!

Easy Homemade Zebra Cake
This indulgent dessert is modified from my popular Marble Cake Recipe. The difference? This version features a beautiful zebra pattern inside the cake, and it’s frosted with chocolate and vanilla buttercream instead of just chocolate. Now you can choose a homemade marble cake to match your mood!
Just like the original recipe, this zebra cake is easy to make. It looks beautiful on a cake stand and even more so when you slice into it to reveal the zebra pattern inside. This cake is so fun and interesting, it makes a great celebratory treat.

What is Zebra Cake?
Zebra cake contains the best of both worlds – chocolate and vanilla! The classic Little Debbie dessert is frosted in a black and white zebra pattern, but this homemade version takes it a step farther by having a zebra pattern baked into the cake as well. If you can’t decide between vanilla and chocolate, decide on this cake! You’ll never settle for the packaged zebra cakes again.

Cake Ingredients
Minimal ingredients are required for this decadent cake. Just some simple pantry staples for both the cake and the frosting!
For the Zebra Cake
- All-Purpose Flour: As is the case with most cake recipes, flour is a key ingredient.
- Baking Powder: Not baking soda.
- Salt: For flavor!
- Butter: Use unsalted, room temperature butter.
- Vegetable Oil: For extra moisture.
- Sugar: Regular granulated sugar.
- Eggs: Use large eggs.
- Vanilla Extract: Use good quality vanilla extract for the very best flavor.
- Buttermilk: I use powdered buttermilk. Regular milk would work fine as a substitute, but the buttermilk does give a more tender result.
- Chocolate: Chop up your chocolate. I highly suggest using bittersweet; I like 60% cacao.
- Black Gel Icing Color: Optional, but this will help darken your chocolate cake so it looks just like zebra stripes.
For the Vanilla Buttercream
- Butter: Butter is the base for this smooth and creamy frosting.
- Powdered Sugar: This will give your buttercream the right consistency.
- Vanilla Extract
- Water: Or milk.
- Cocoa Powder: You’ll need some natural, unsweetened cocoa powder for the chocolate half of the frosting.
- Black Gel Icing Color

How to Make Zebra Cake
This cake is easy to make, but it does take a little time to put together with the chocolate and vanilla cake and frosting. The end result is well worth the wait!
Make the Marble Cake
- Prepare for Baking: Prepare two 9 inch cake pans with parchment paper circles in the bottom and grease the sides. Preheat the oven to 350°F.
- Combine Dry Ingredients: Combine the flour, baking powder and salt in a medium sized bowl and set aside.
- Combine Butter, Oil & Sugar: Add the butter, vegetable oil and sugar to a large mixer bowl and beat together until light in color and fluffy, about 3-4 minutes. Do not skimp on the creaming time.
- Add Eggs: Add the eggs two at a time, mixing until well combined after each. Scrape down the sides of the bowl as needed to be sure all ingredients are well incorporated.
- Start Adding Dry Ingredients: Add half of the dry ingredients to the batter and mix until combined.
- Add Buttermilk & Vanilla: Add the buttermilk and vanilla extract and mix until well combined.
- Finish Adding Dry Ingredients: Add the remaining dry ingredients and mix until well combined and smooth. Scrape down the sides of the bowl as needed to be sure all ingredients are well incorporated. Do not over mix the batter.
- Divide Batter: You should have roughly 5 1/2 cups of cake batter total. Divide it in half in two separate bowls (about 625g each, if using a food scale) and set aside.
- Make Chocolate Batter: Melt the chopped chocolate, then add it to one of the bowls of cake batter that was set aside, along with the black gel icing color, and gently fold together to combine. Work somewhat quickly so that the chocolate in the cake batter doesn’t firm up too much and make the cake batter more difficult to work with. If it thickens too much, it makes it harder to layer the colors of cake batter together easily.
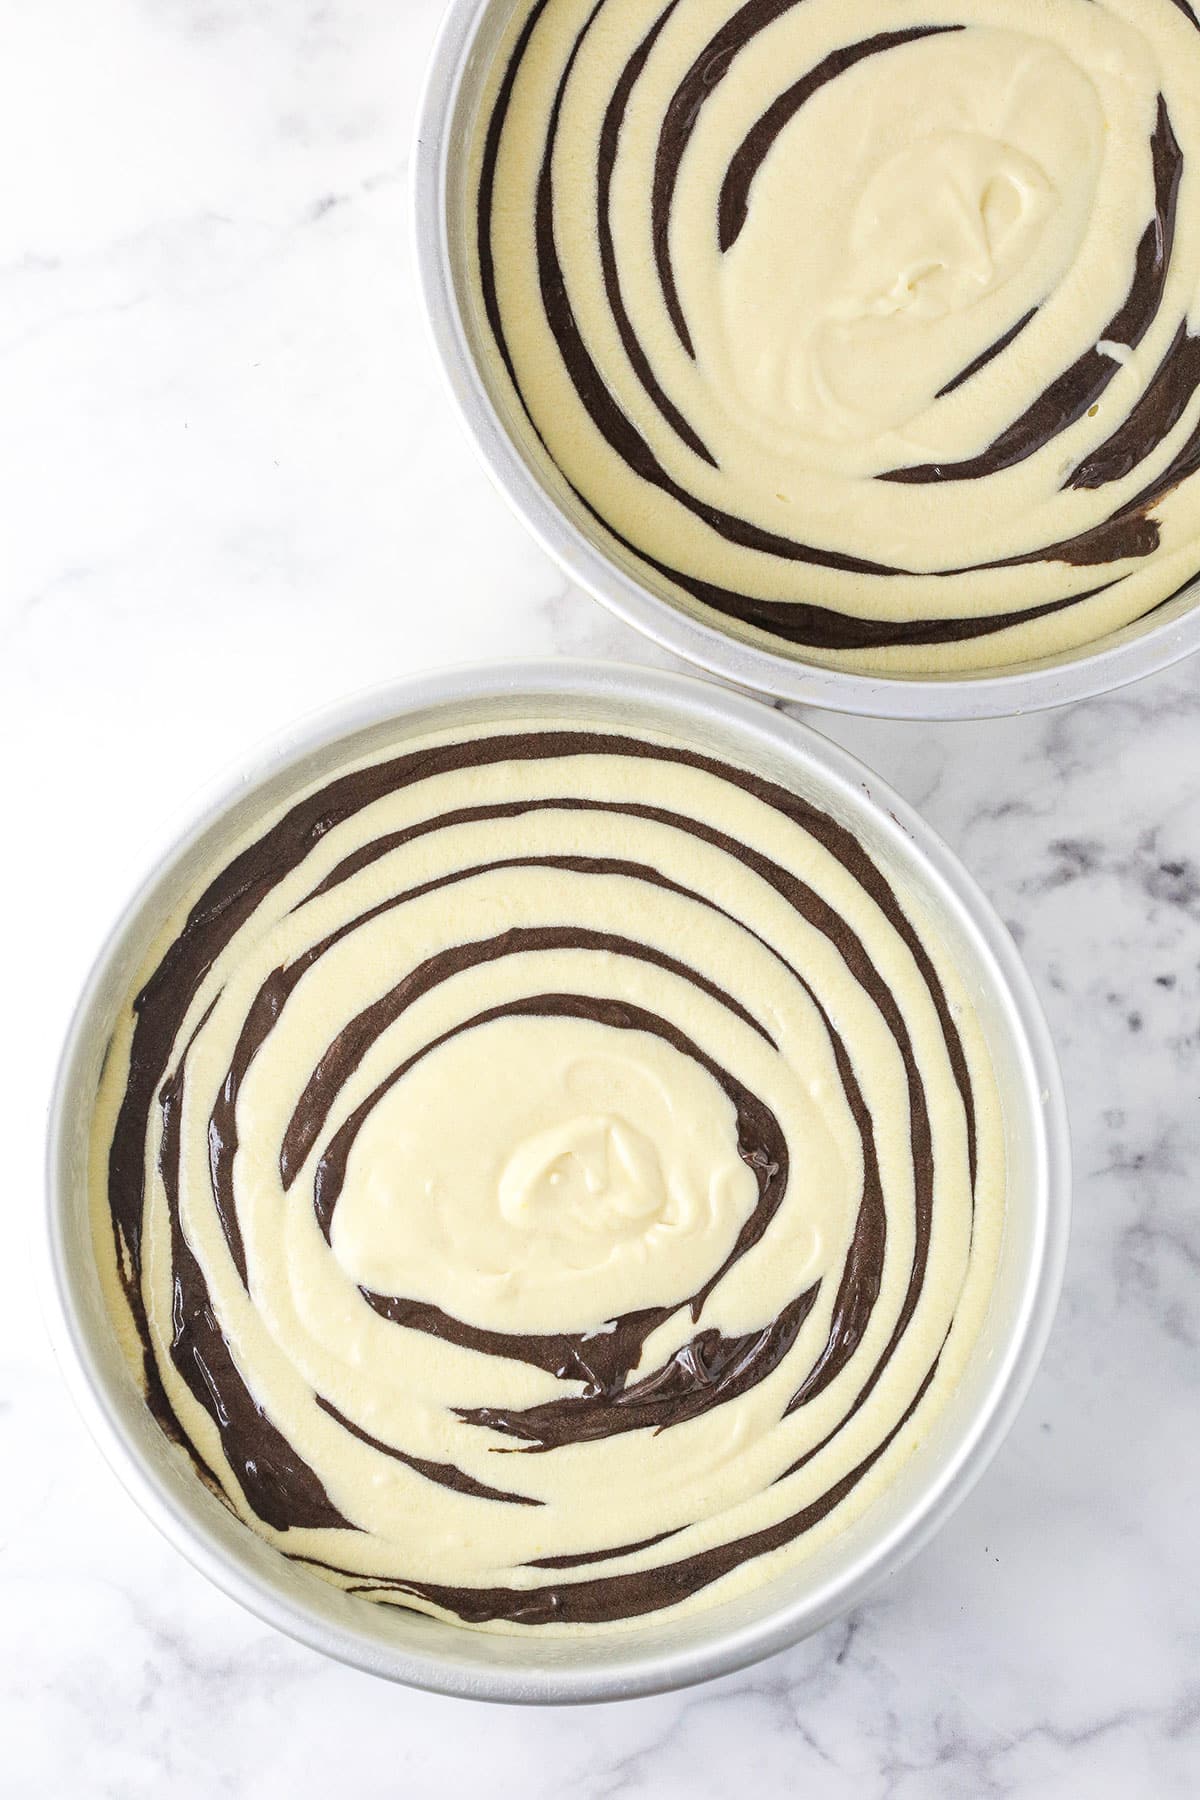
- Assemble in Pans: Drop alternating heaping spoonfuls of each batter to the cake pans and gently shake the pan side to side to spread it evenly after every 2-3 spoonfuls. So, add a large spoonful of the vanilla batter to each cake pan, then add a large spoonful of chocolate batter to the center of the vanilla batter. Shake side to side to spread. Repeat until you’ve used all the cake batter between the two pans.
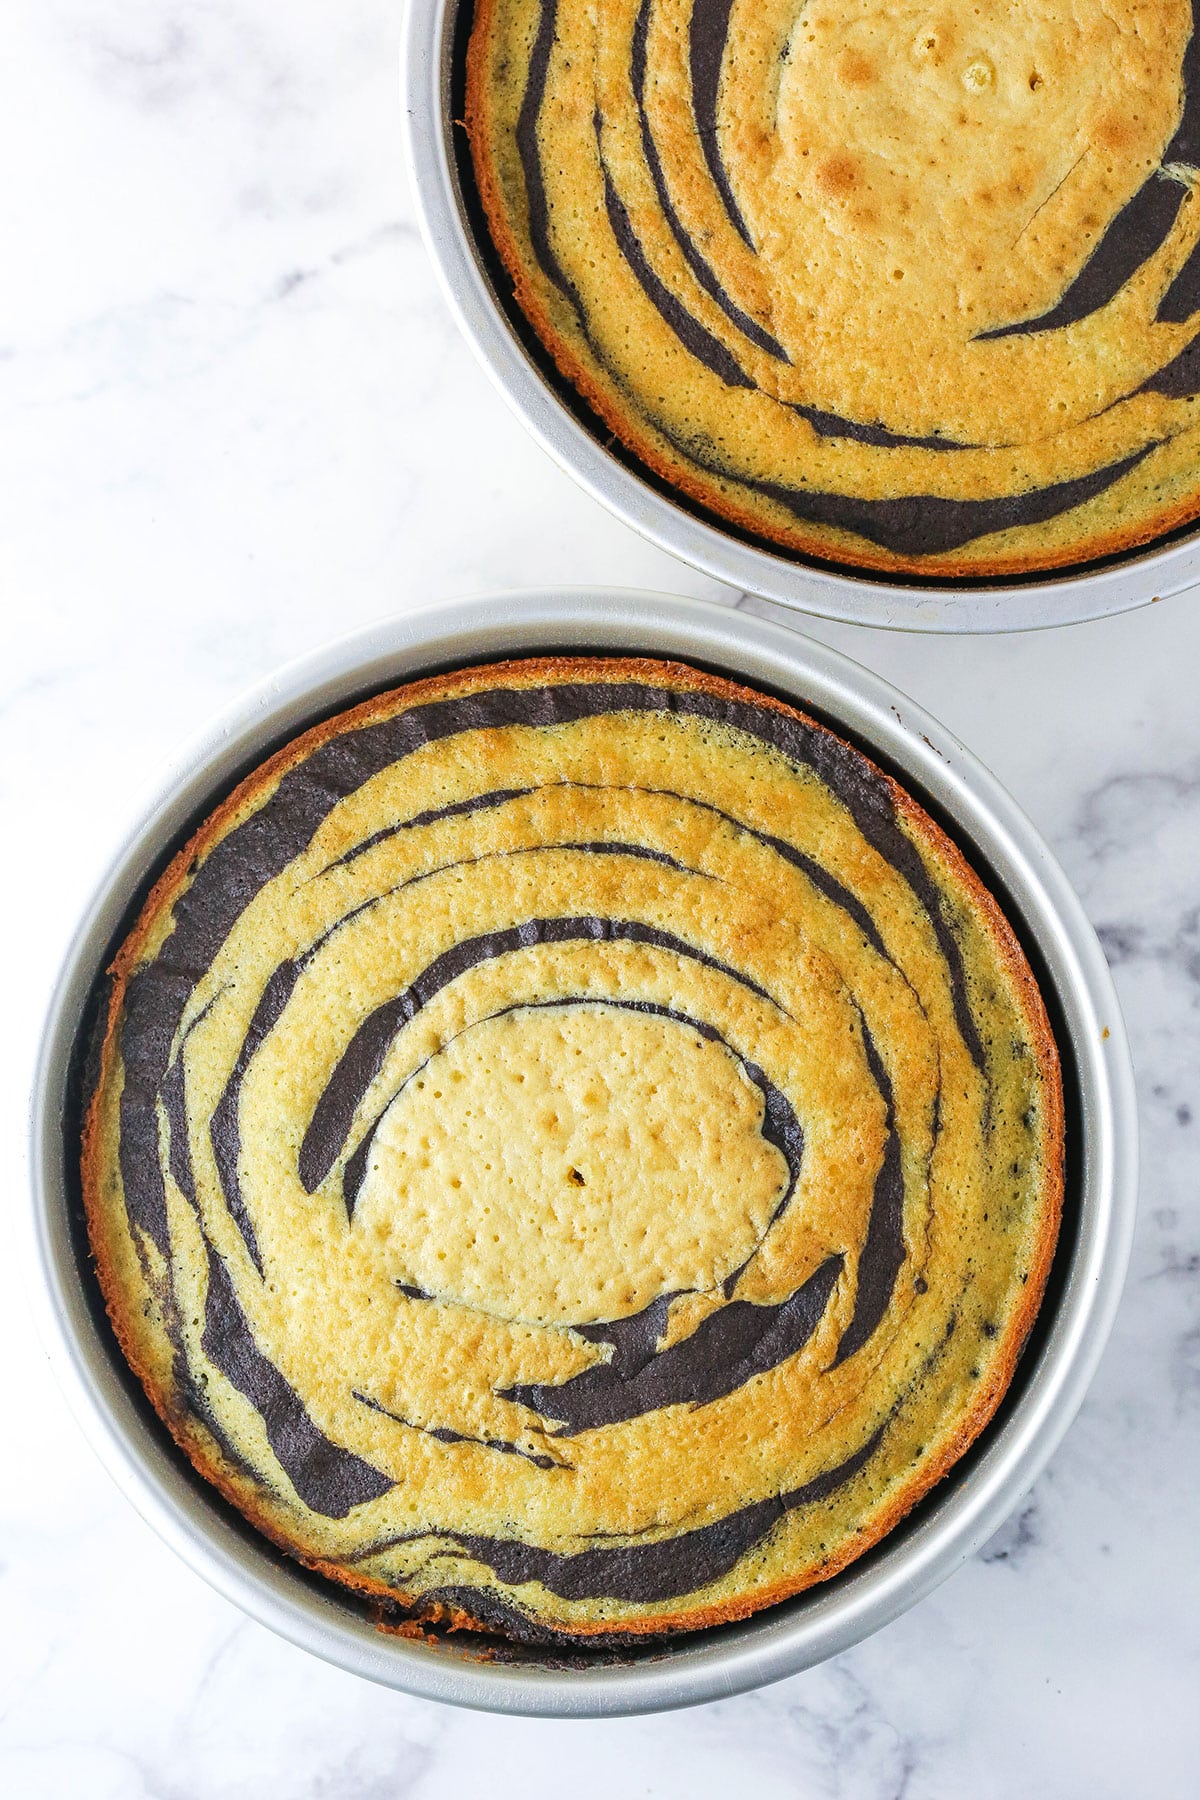
- Bake: Bake for 25-30 minutes, or until a toothpick inserted comes out clean.
- Let Cool: Remove the cakes from the oven and allow to cool for about 2-3 minutes, then transfer to cooling racks to cool completely.
Make the Buttercream Frosting
- Make Buttercream: To make the frosting, beat the butter in a large mixer bowl until smooth.
- Add Some Powdered Sugar: Add half of the powdered sugar and mix until smooth.
- Add Vanilla & Water: Add the vanilla extract and 3 tablespoons of water or milk and mix until well combined and smooth.
- Add Remaining Sugar: Add the remaining powdered sugar and mix until well combined and smooth.
- Divide Buttercream: Remove about 1 1/4 cups of the vanilla buttercream and set in another bowl. Add additional water or milk, if needed to get the right consistency of frosting.
- Make Chocolate Buttercream: Add the cocoa powder to the remaining buttercream and mix until well combined and smooth. Add additional water or milk, if needed to get the right consistency of frosting, then add the black gel icing color to get the right shade of black.
Assemble and Decorate Your Zebra Cake
- Assemble Cake: To put the cake together, use a large serrated knife to remove the domes from the top of the cakes so that they’re flat. These cakes don’t have a large dome, but I like to make sure they’re completely flat. Place the first cake on a serving plate or a cardboard cake round and spread about 1 cup of chocolate buttercream evenly on top of it. Then, add the second layer of cake on top, then frost the outside of the cake with the chocolate buttercream.
- Decorate: Use the remaining chocolate buttercream and the vanilla buttercream to create swirls on top of the cake and shells along the bottom. To create the two toned swirls, I find it easiest to add each color to their own piping bag, then put both piping bags into a larger piping bag fitted with the piping tip. Squeeze the larger piping bag to do your piping.
- Serve or Store: Slice and serve your cake, or store it in an airtight container.
Tips for the Best Zebra Cake
Your cake will come out perfect if you follow the recipe and take note of these simple tips and tricks.
- Use Bittersweet Chocolate: I strongly recommend sticking with bittersweet chocolate for this cake. I find it gives the best flavor and texture to the chocolate cake portion.
- Cream Butter and Sugar Well: You’ll need to cream your butter, sugar and vegetable oil for at about 2 to 3 minutes. Don’t stop until the mixture fluffs up and turns a lighter shade. But you also don’t want to over-cream. If it starts to look a little curdled, rather than fluffy, you may have over-creamed.
- Don’t Over Mix Batter: Don’t keep mixing your cake batter once everything is well incorporated, or you’ll over mix it and the cake will end up more dense.
- Work Quickly: Once you’ve made your chocolate cake batter, don’t waste any time before adding your batters to the pans. If the chocolate batter sits, it will thicken and become hard to work with.
How to Store Leftovers
This cake should be kept in an airtight container and should last well for 2-3 days. You can leave it at room temperature for up tp two days, but then it should be refrigerated. I do recommend serving it at room temperature, as it’s less firm that way.
Can You Freeze Zebra Cake?
You can freeze this cake, frosting and all. Frozen zebra cake will last for about 2-3 months. Store it in an airtight container or wrap it well in both plastic wrap and foil, then thaw it overnight in the fridge before eating.
Print
Zebra Cake
- Prep Time: 40 minutes
- Cook Time: 25 minutes
- Total Time: 1 hour 5 minutes
- Yield: 24 1x
- Category: Dessert
- Method: Oven
- Cuisine: American
Description
This chocolate and vanilla swirled Zebra Cake is incredibly moist and delicious. Covered in a sweet homemade buttercream, this cake is a million times better than the pre-packaged zebra cakes!
Ingredients
For the Zebra Cake
- 2 1/4 cups (293g) all purpose flour
- 2 1/2 tsp baking powder
- 1/2 tsp salt
- 1/2 cup (112g) unsalted butter, room temperature
- 1/2 cup vegetable oil
- 1 1/2 cups (310g) sugar
- 4 large eggs
- 1 tbsp vanilla extract
- 1 cup (240ml) buttermilk*
- 5 oz bittersweet chocolate (60% cacao), chopped**
- 1/2 tsp black gel icing color
For the Vanilla Buttercream
- 2 1/2 cups (560g) butter
- 9 cups (1035g) powdered sugar
- 2 tsp vanilla extract
- 6–8 tbsp (90-120ml) water/milk
- 1 cup (114g) natural unsweetened cocoa powder
- Black gel icing color
Instructions
Make the Marble Cake
- Prepare two 9 inch cake pans with parchment paper circles in the bottom and grease the sides. Preheat oven to 350°F (176°C).
- Combine the flour, baking powder and salt in a medium sized bowl and set aside.
- Add the butter, vegetable oil and sugar to a large mixer bowl and beat together until light in color and fluffy, about 3-4 minutes. Do not skimp on the creaming time.
- Add the eggs two at a time, mixing until well combined after each. Scrape down the sides of the bowl as needed to be sure all ingredients are well incorporated.
- Add half of the dry ingredients to the batter and mix until combined.
- Add the buttermilk and vanilla extract and mix until well combined.
- Add the remaining dry ingredients and mix until well combined and smooth. Scrape down the sides of the bowl as needed to be sure all ingredients are well incorporated. Do not overmix the batter.
- You should have roughly 5 1/2 cups of cake batter total. Divide it in half in two separate bowls (about 625g each, if using a food scale) and set aside.
- Melt the chopped chocolate, then add it to one of the bowls of cake batter that was set aside along with the black gel icing color and gently fold together to combine. Work somewhat quickly so that the chocolate in the cake batter doesn’t firm up too much and make the cake batter more difficult to work with. If it thickens too much, it makes it harder to layer the colors of cake batter together easily.
- Drop alternating heaping spoonfuls of each batter to the cake pans and gently shake the pan side to side to spread it evenly after every 2-3 spoonfuls. So add a large spoonful of the vanilla batter to each cake pan, then add a large spoonful of chocolate batter to the center of the vanilla batter. Shake side to side to spread. Repeat until you’ve used all the cake batter between the two pans.
- Bake for 25-30 minutes, or until a toothpick inserted comes out clean.
- Remove the cakes from the oven and allow to cool for about 2-3 minutes, then transfer to cooling racks to cool completely.
Make the Frosting
- To make the frosting, beat the butter in a large mixer bowl until smooth.
- Add half of the powdered sugar and mix until smooth.
- Add the vanilla extract and 3 tablespoons of water or milk and mix until well combined and smooth.
- Add the remaining powdered sugar and mix until well combined and smooth.
- Remove about 1 1/4 cups of the vanilla buttercream and set in another bowl. Add additional water or milk, if needed to get the right consistency of frosting.
- Add the cocoa powder to the remaining buttercream and mix until well combined and smooth.
- Add additional water or milk, if needed to get the right consistency of frosting, then add the black gel icing color to get the right shade of black.
Assemble and Decorate
- To put the cake together, use a large serrated knife to remove the domes from the top of the cakes so that they’re flat. These cakes don’t have a large dome, but I like to make sure they’re completely flat.
- Place the first cake on a serving plate or a cardboard cake round.
- Spread about 1 cup of chocolate buttercream evenly on top of the cake.
- Add the second layer of cake on top, then frost the outside of the cake with the chocolate buttercream.
- Use the remaining chocolate buttercream and the vanilla buttercream to create the swirls on top of the cake and the shells along the bottom. To create the two toned swirls, I find it easiest to add each color to their own piping bag, then put both piping bags into a larger piping bag fitted with the piping tip. Squeeze the larger piping bag to do your piping.
- Store in an airtight container.
Notes
Cake is best when eaten within 2-3 days.
*I use powdered buttermilk. Regular milk would work fine as a substitute.
**I strongly recommend sticking with bittersweet chocolate for this cake. I find it gives the best flavor and texture to the chocolate cake portion.
Nutrition
- Serving Size:
- Calories: 568
- Sugar: 60.6 g
- Sodium: 77.4 mg
- Fat: 31 g
- Carbohydrates: 73.4 g
- Protein: 4 g
- Cholesterol: 93.1 mg
More Cake Recipes to Try
There’s always a reason to bake a cake, at least in a sweet tooth’s opinion. These recipes are so good, you have to add them to your list of must-make desserts!
- This Easy Tres Leches Cake is my take on the traditional Mexican treat. It’s melt-in-your-mouth delicious!
- If you want a cake that screams decadence, my Chocolate Covered Strawberry Layer Cake is definitely the way to go.
- Have you ever had to make a birthday dessert for someone who doesn’t like cake? This Chocolate Chip Cookie Cake is an irresistible alternative.


If you use the powdered buttermilk and it is 1 cup, if I had regular liquid buttermilk is it still one cup?
Yes, still 1 cup.
PS. I only use your recipes now😋😋😋😋
That’s great to hear! So glad you enjoy the recipes! ❤️
This recipe is amazing! Thank you Lindsay❤️ it’s now my go to recipe
I’m so glad you enjoyed it!
Hi Lindsay! I made this cake yesterday for my granddaughters. The cake was very moist and delicious. I couldn’t get the frosting the right color. I used Wilton black gel and no matter how much I added to the frosting, the color remained a dark gray. It’s not a big issue but I was wondering what you used to get the color just right.
Besides, it was fun creating a zebra cake or Halloween spooky cake!
I’m glad you enjoyed the cake! it sounds like you may have needed more gel icing color. I actually made this frosting yesterday and it takes a LOT of color. I think I used a full Wilton black color and maybe a little more.
Hi Lindsay,
I made this yesterday with my Granddaughter.
It was quite dense in texture. Would that be from the Buttermilk?
I did see your note at the end that plain milk could be used instead of Buttermilk.
The cake was delicous I must say.
Cheers
Glenda
It’s not the buttermilk. This cake tends to be a little more dense overall so that the layers stay separate but it also could be from over mixing.
this is the second of your recipes that i’ve tried and from now on i will exclusively use your recipes for my cakes, they are by far the best cakes my family and friends and i have ever tried!
Making this today for my daughter’s 18th birthday!!! Is there a way to substitute the black food coloring paste for the liquid type food coloring??
You are going to have a hard time getting as dark of a black color with with liquid food coloring and it will thin out the batter more, which could affect how it bakes.
Hi Lindsay could you please make a copycat recipe of the cheesecake factory’s ‘mango key lime cheesecake’ ?
Hmmm, I’ve never had that one before. I’ll have to check it out!
I hate to ask because it’s part of the fun!…but, will my teeth/lips turn black after enjoying this? If so, do you have any advice? I’m new to baking and black buttercreams look so good right now.
They might get colored. I’m not sure I have any advice though. The coloring is just part of colored frostings. If it does color your teeth, it shouldn’t last long.
This cake looks beautiful!!!!
Thank you!
One word, Lindsay-WOW!
Thank you!
Could I make it yellow and brown for a giraffe or black and orange tiger cake?
Definitely!