This smooth and glossy Sugar Cookie Icing is super easy to make in just 15 minutes! It hardens on top of your cookies beautifully, and it tastes as good as it looks. I recommend using my simple cut-out sugar cookie recipe with this icing!

Easy Homemade Icing for Sugar Cookies
You really can’t buy the kind of icing that hardens at a store. This type of icing must be homemade, and most versions of it are royal icing recipes. While I love my fool-proof royal icing, sometimes I want something a little less finicky, especially if I’m not trying to decorate my sugar cookies with a super intricate design.
While royal icing requires whipping, this simple alternative takes 1 minute to mix together. After that, you just have to color it! If you need a quick-fix icing for cute little cookie designs like snowmen, candy canes or Christmas trees, this recipe is the way to go.
And it’s not just a decorative topping – it also tastes delicious! You can make a classic vanilla version or switch it up with another flavor of choice. Either way, your cookies are about to get an upgrade.
Ingredients You’ll Need
You only need a handful of kitchen staples to make this icing happen. Just gather up the items below!
- Powdered Sugar: As with any icing or frosting, powdered sugar provides the base.
- Light Corn Syrup: To give your icing that shiny finish.
- Vanilla Extract: Feel free to switch it up with almond extract or another favorite.
- Milk or Water: This will thin out the icing.
- Gel Icing Color: I recommend Wilton or Americolor gels. The nice thing about Americolor is that they come in little squeeze bottles, which makes it easier.
What Can I Use Instead of Corn Syrup?
You only need a little bit of corn syrup to make your icing nice and glossy. But if you really don’t want to use it, you can substitute it for honey instead. Honey will impart a different flavor on the icing though.

How to Make Sugar Cookie Icing
Let’s go over the process of making this icing step by step. It’s simple from start to finish!
Combine Ingredients: Add the powdered sugar, corn syrup, vanilla extract and 3 tablespoons of milk or water to a medium-sized bowl. Whisk together until everything is well combined. It may seem dry at first, but it’ll come together.
Adjust Consistency: Add additional milk or cream to get the right consistency (see section below).
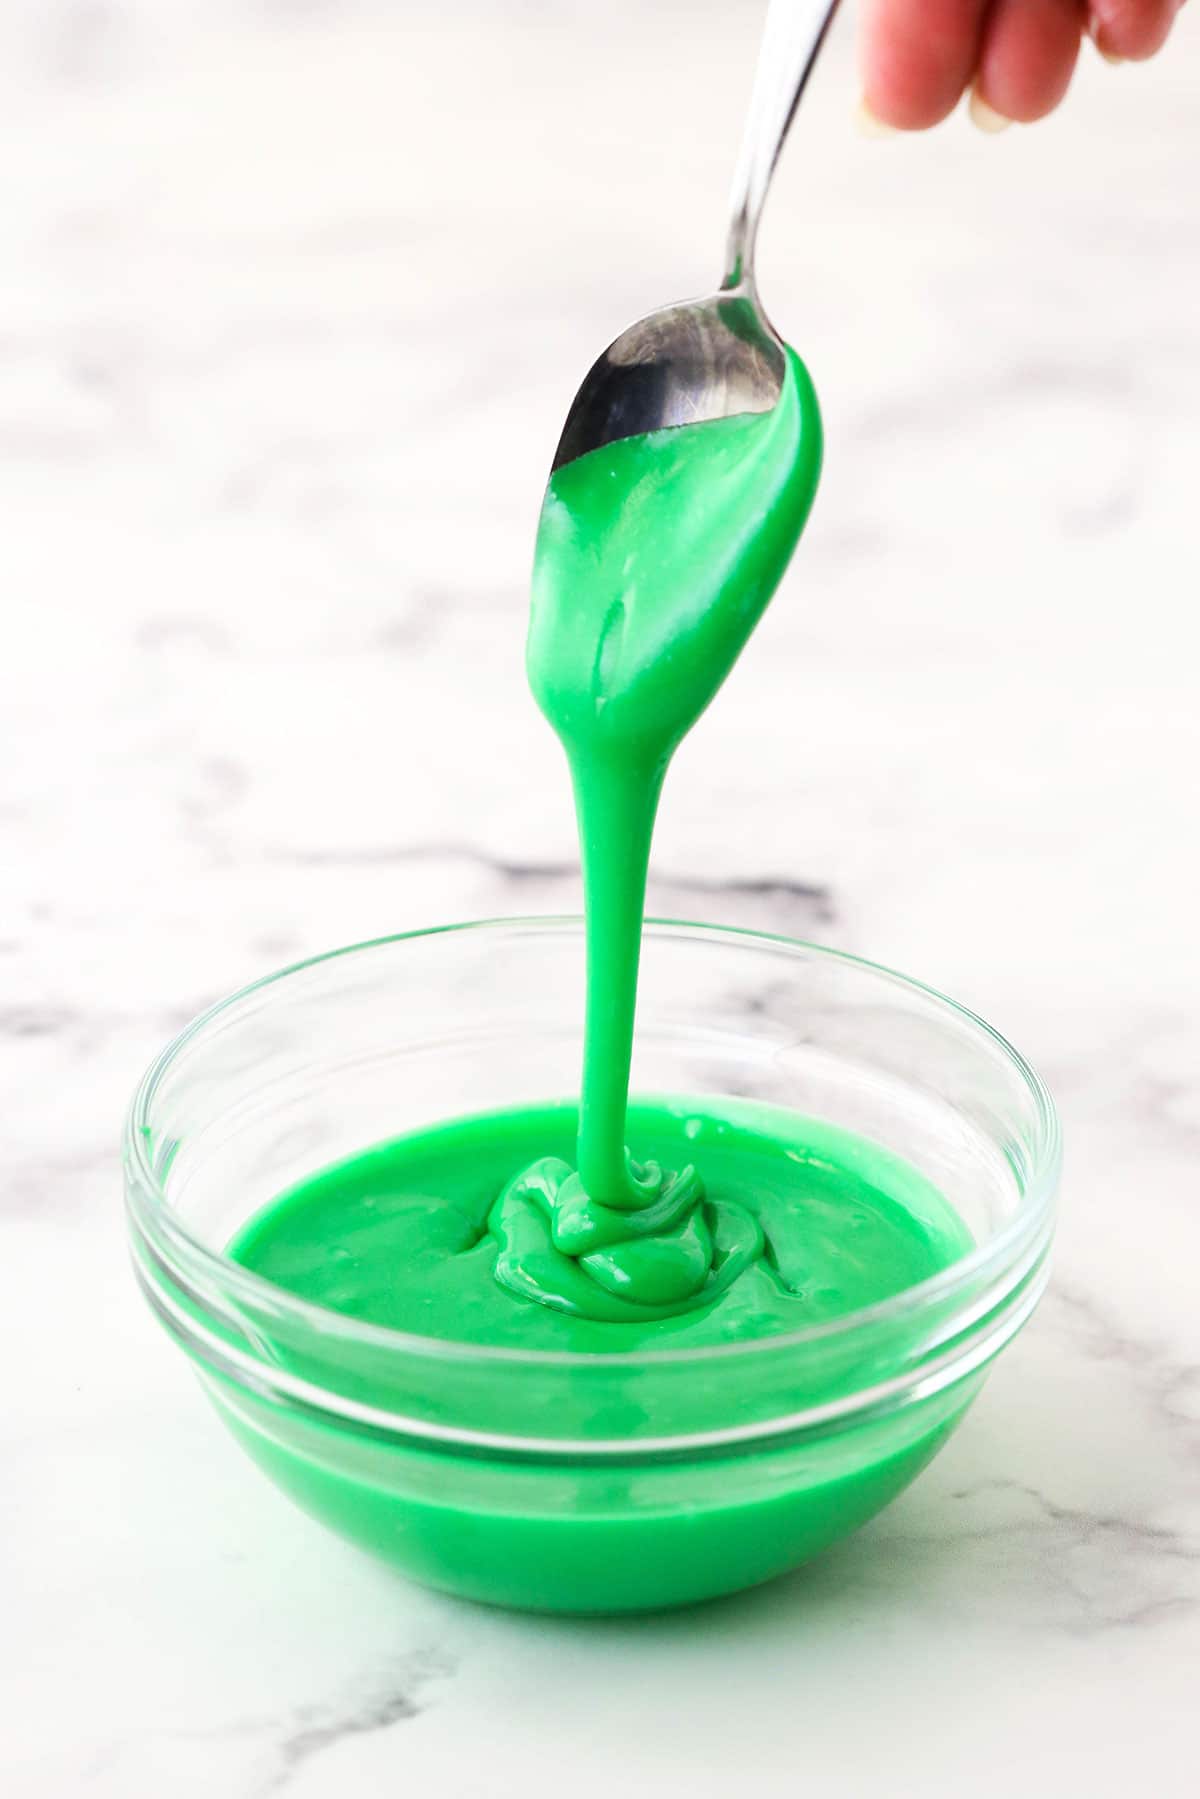
Add Color: Divide the icing into as many bowls as you need for the colors you want. Stir in the gel icing color a little bit at a time until you have your desired shade.
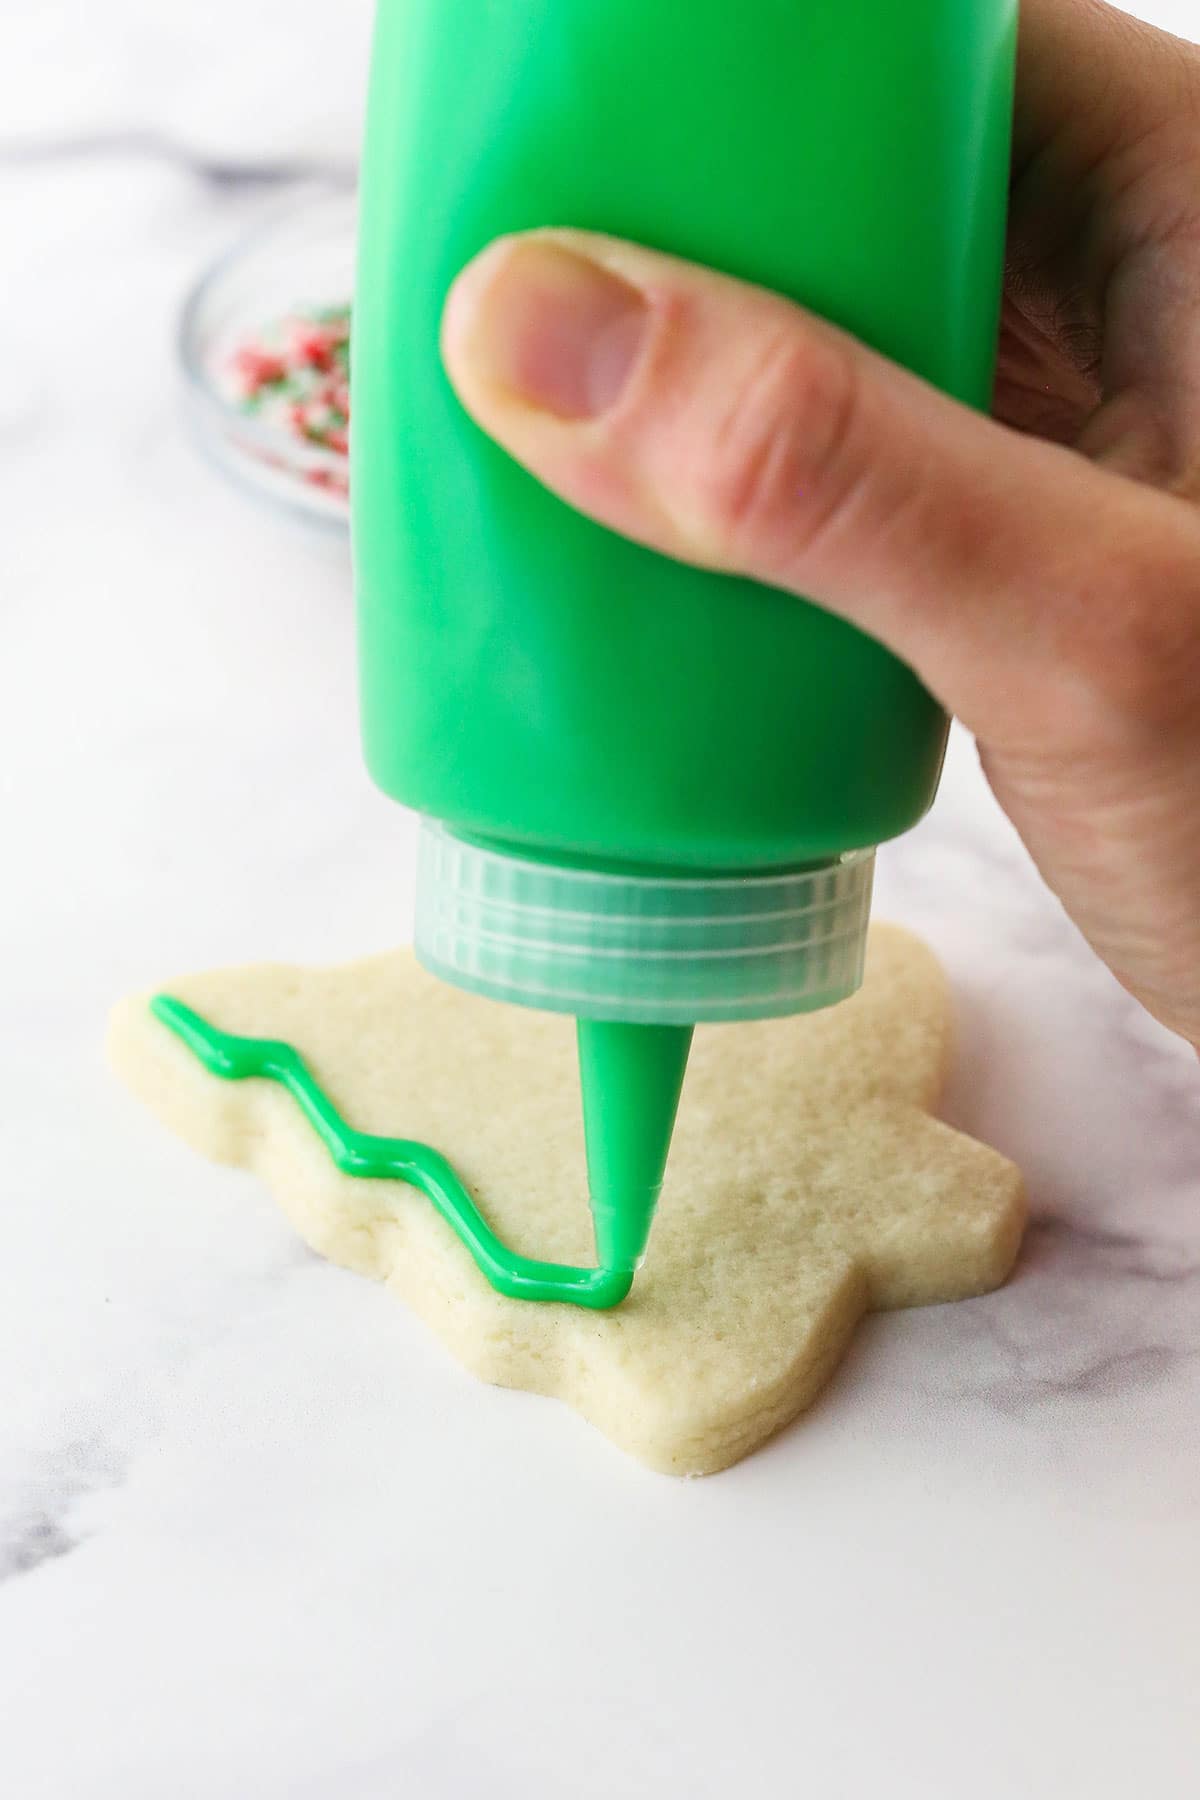
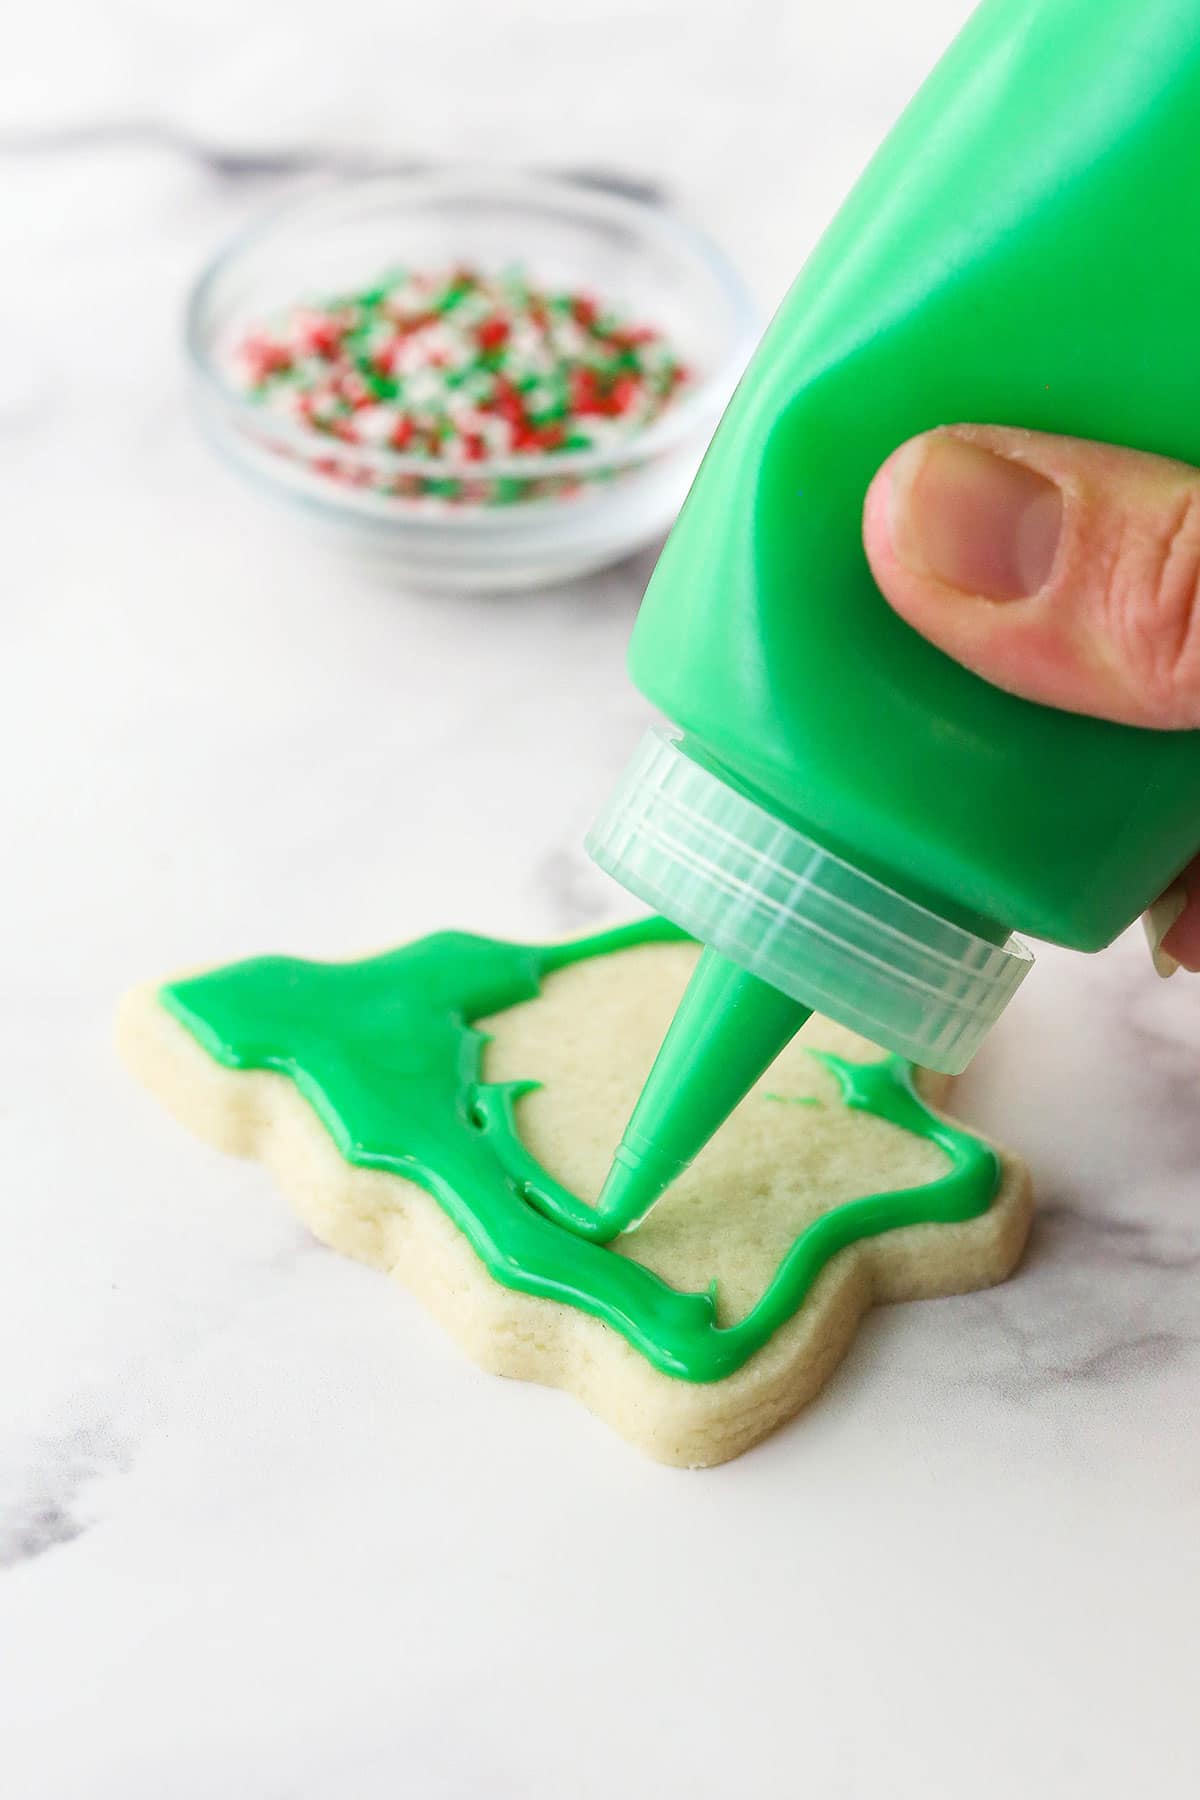
Decorate Cookies: Add the icing to squeeze bottles or piping bags with small round tips for piping.
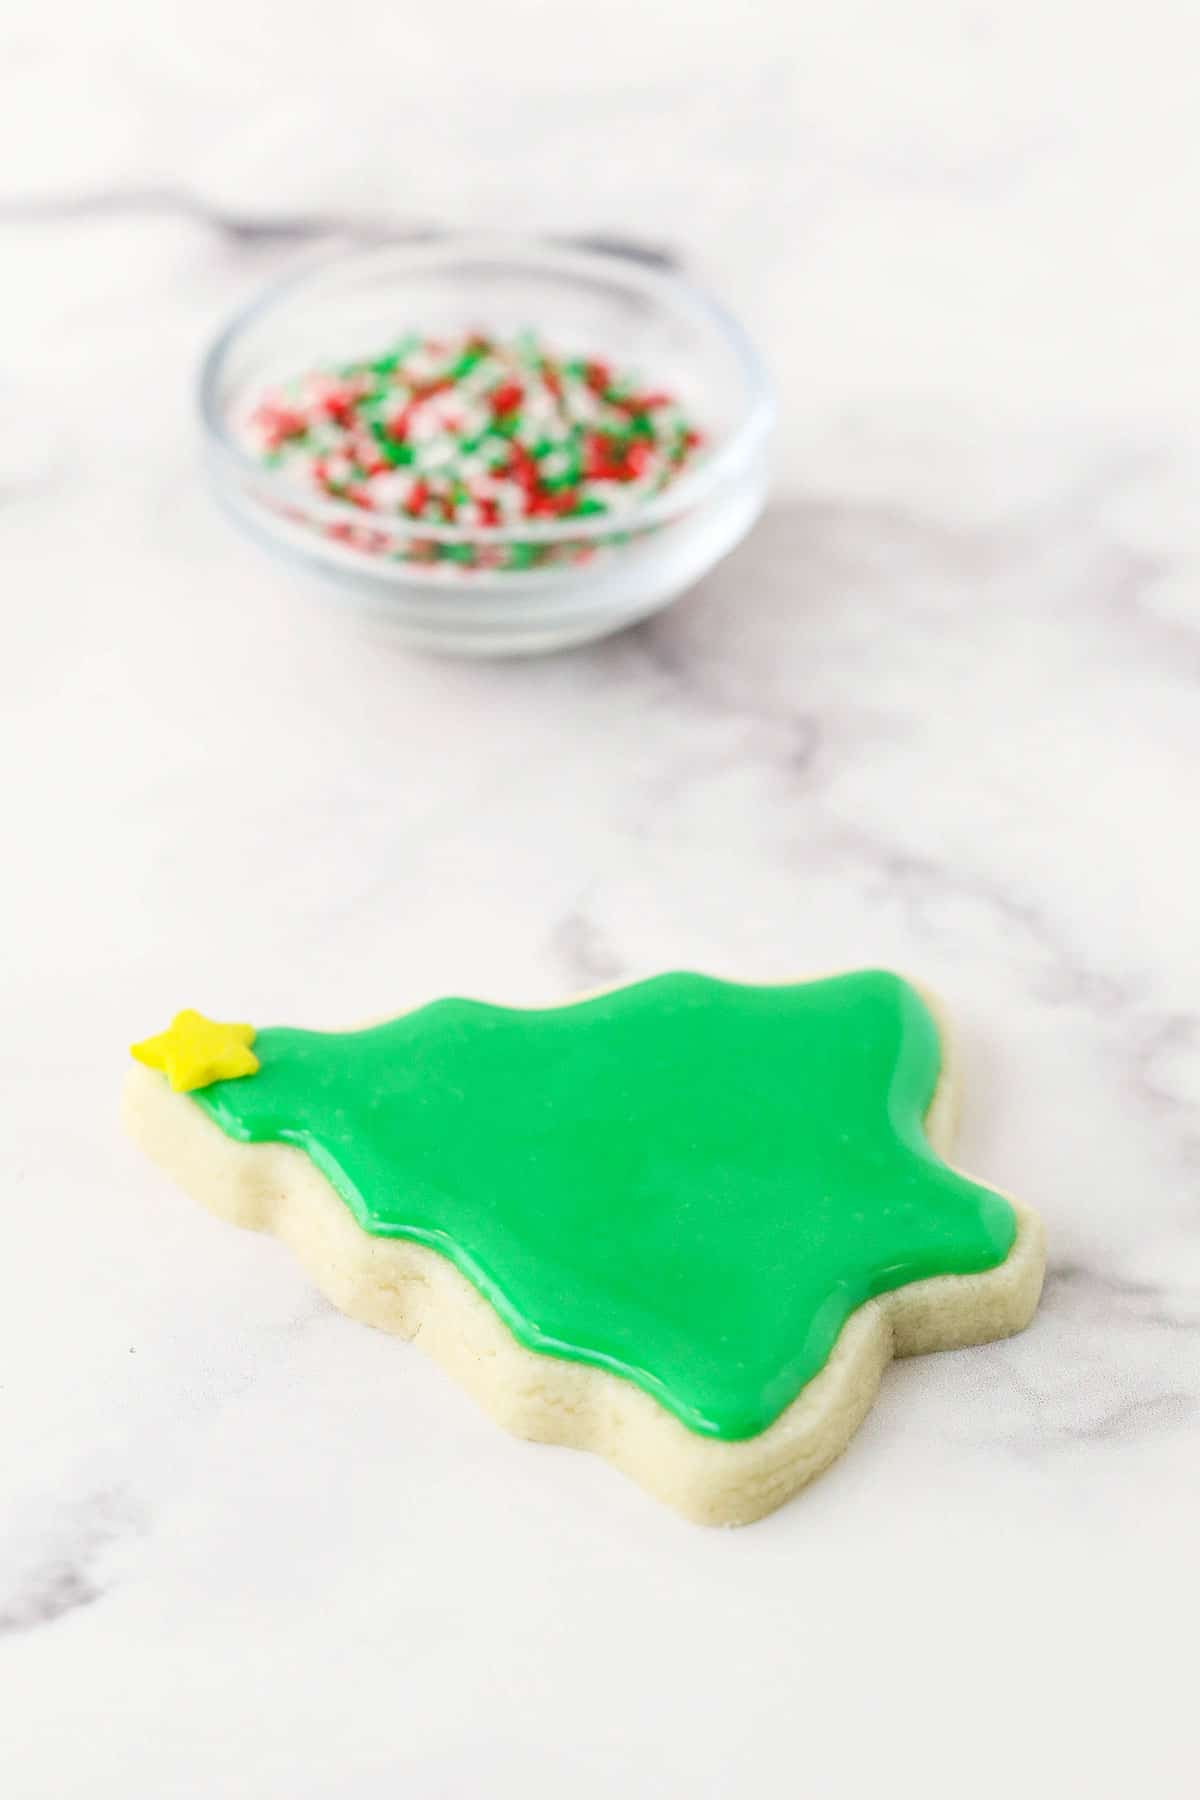
Let Set: Allow the icing to dry. Give it at least 4-5 hours to fully harden before stacking.
How to Decorate Sugar Cookies
There are two typical icing consistencies when it comes to decorating cookies – one for outlining things and one for “flooding” and filling in the outline. I like to bring my icing to a sweet spot that works for both! With just one consistency, you have fewer bowls of icing and fewer piping tools to deal with.
To get your icing to the sweet spot, you need it a little thinner than you’d use for outlining, but not so thin that it won’t hold in place. If you’re unsure what that looks like, there’s an easy way to test it out – once you mix everything together, pick up some icing with a spoon and drizzle it back down into the bowl. It should take 3-4 seconds to fully integrate back into the icing.
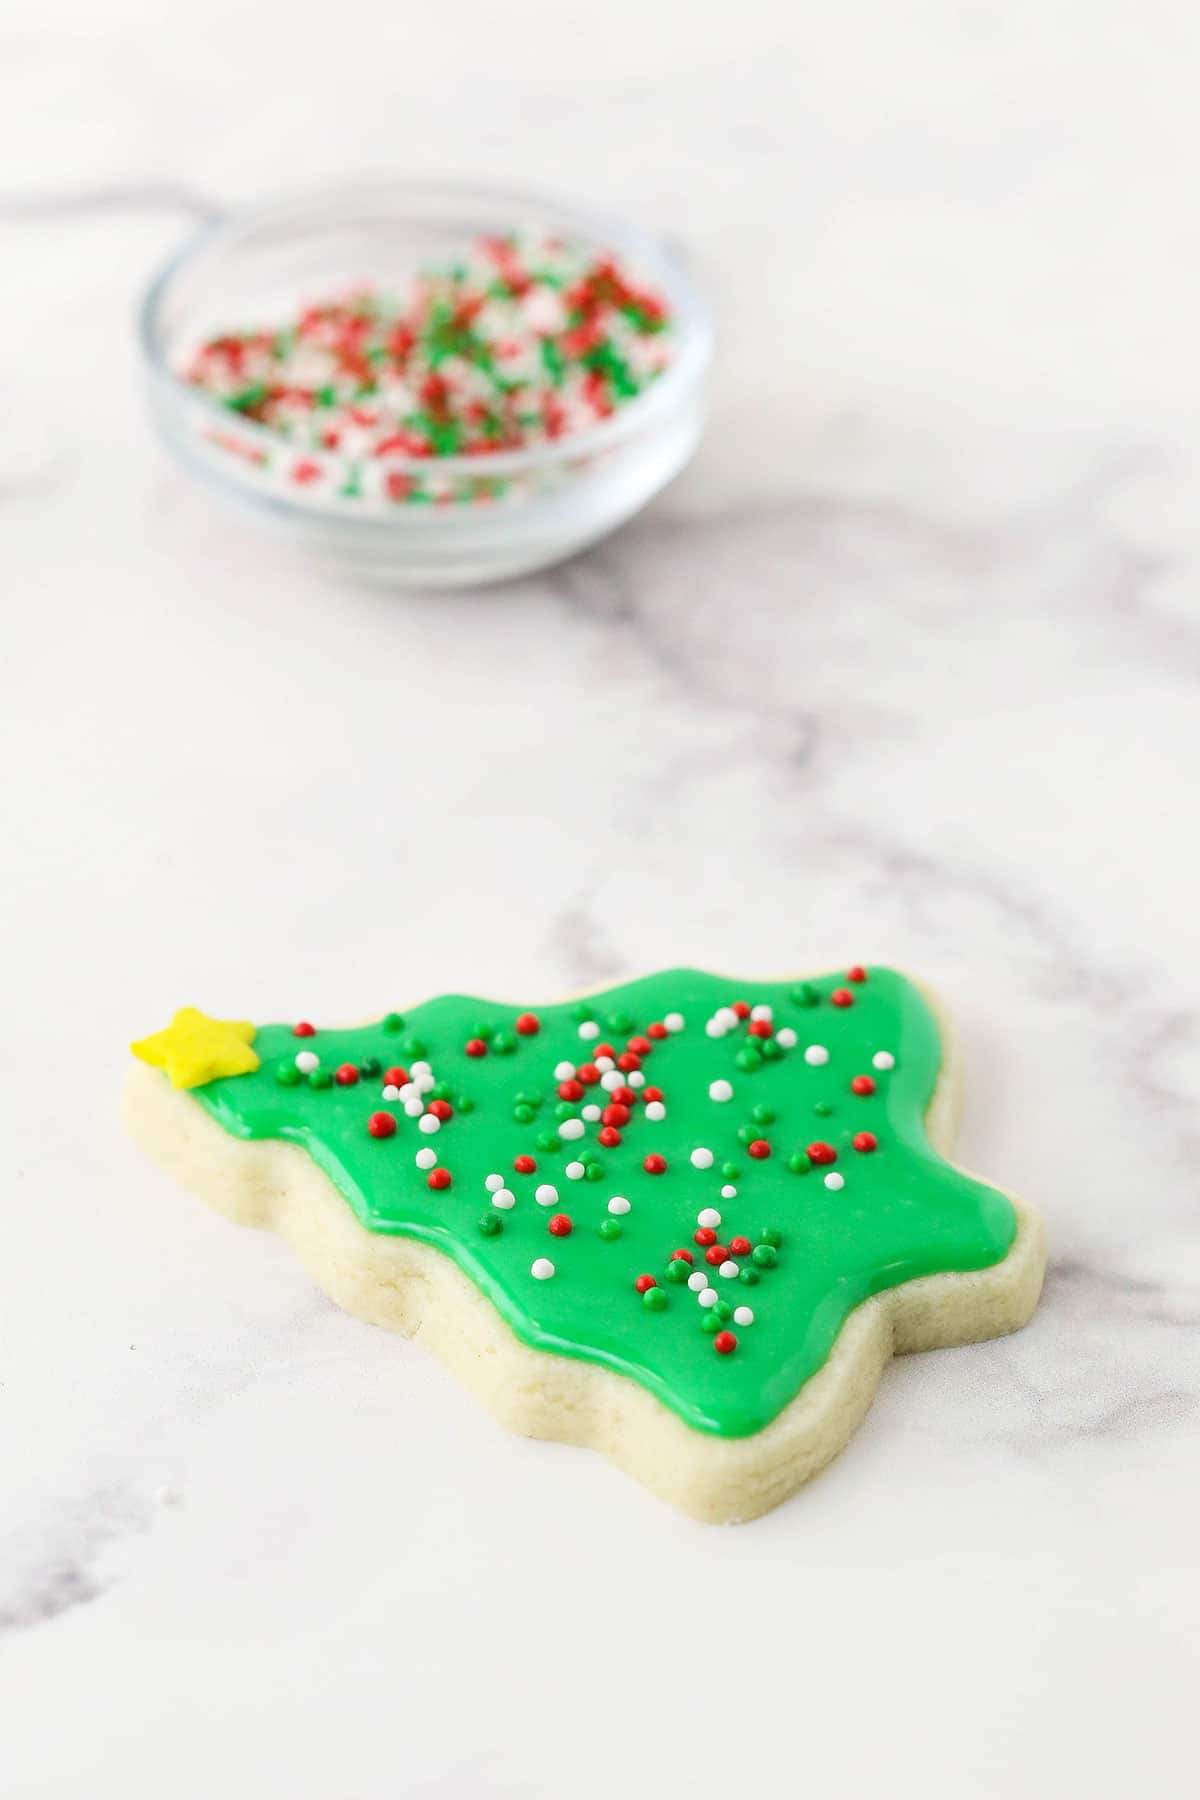
Once you have the tops of your cookies covered in icing, you’ll have to let it harden before doing any detail work with additional icing. Either let the cookies sit for 4-5 hours or leave them in an airtight container overnight. If you’d like to add sprinkles on top of the icing, do so before it sets.

Tips for Success
If you’re new to homemade sugar cookie icing, this recipe is the perfect place to start. These extra tips and tricks will help you become a pro in no time!
- Avoid Liquid Food Coloring: I recommend sticking with a gel-based food coloring for this particular icing. Liquid-based food colorings tend to mess with the consistency because you have to use a good bit to get deeper colors.
- Add Small Amounts of Milk at a Time: You need the right balance between powdered sugar and milk (or water) to get the proper frosting consistency. Start with just 3 tablespoons and add more little by little as needed. You can always add more, but you can’t remove it once you add it.
- Don’t Have Piping Tools? While piping tools or squeeze bottles make the decorating process more simple, you really don’t need them at all. You can simply transfer your icing to a Ziploc bag and cut a small hole in the corner of the bag to squeeze the icing through. Alternatively, you can spread it on with a knife or an offset spatula.
- Toothpick Trick: If you’re piping the icing onto your cookies, you can use a toothpick immediately after doing the piping to fill in little gaps, help get rid of air bubbles, or scrape off little bits of icing that aren’t doing what you want.
Storage Instructions
If you have leftover icing that you’d like to use for future cookies, you can store it in an airtight container in the fridge. Bring it back to room temperature before using it, stirring in a little more milk or water if needed. Use leftover icing within 1 week.
Can I Freeze Powdered Sugar Icing?
I don’t suggest freezing this icing by itself – you’ll have trouble getting it back to the right consistency after thawing it. However, if it’s hardened onto cookies, you can certainly freeze them if you’d like. Just don’t keep them stored for longer than 3 months.
Watch How To Make It

Easy Sugar Cookie Icing
- Prep Time: 15 minutes
- Cook Time: 0 minutes
- Total Time: 15 minutes
- Yield: 24 1x
- Category: Dessert
- Method: No Bake
- Cuisine: American
Description
This smooth and glossy Sugar Cookie Icing is super easy to make in just 15 minutes! It hardens on top of your cookies beautifully, and it tastes as good as it looks.
Ingredients
- 3 cups (345g) powdered sugar
- 2 tbsp light corn syrup
- 1/2 tsp vanilla extract
- 3–4 tbsp of milk or water
- Gel icing color
Instructions
- Add the powdered sugar, corn syrup, vanilla extract and 3 tablespoons cream to a medium-sized bowl. Whisk together until well combined. It may seem dry at first, but it’ll come together.
- Add additional milk or water to get the right consistency.
- Divide the icing into as many bowls as you need for the colors you want. Stir in gel icing color, a little bit at a time, until it reaches your desired shade.
- Add the icing to squeeze bottles or piping bags with small round tips for piping, or use a knife or offset spatula to spread the icing onto your cookies.
- Allow the icing to dry. For it to be fully hard and able to be stacked on, give it 4-5 hours or overnight.
Notes
Makes enough icing to frost around 24 cookies that are about 3 1/2 inches in size.
If you have leftover icing that you’d like to use for future cookies, store it in an airtight container in the fridge. Bring it to room temperature before using, stirring in a little more cream if needed. Use leftover icing within 1 week.
Nutrition
- Serving Size:
- Calories: 84
- Sugar: 21 g
- Sodium: 2.3 mg
- Fat: 0 g
- Carbohydrates: 21.4 g
- Protein: 0.1 g
- Cholesterol: 0 mg
More Easy Frosting Recipes
Want more simple homemade frostings to add to your favorite sweets and treats? I’ve got you covered.
- Pumpkin Spice Buttercream Frosting
- Fudgy Chocolate Frosting
- Classic Vanilla Buttercream
- Sweet Strawberry Frosting
Categories:
Christmas, Cookies, Easter, Frosting Recipes, Halloween, Holidays, Recipes, Recipes with video, Sweets and Treats, Valentine's Day,


Can I dip pretzel rods into this. Looking for a frosting that hardens.
I haven’t tried it, but I would think that should be fine.
Does icing layer need to dry before adding another color on top? Or can you mix colors as you go?
It depends on the look you’re going for. You can add it on top before it dries, but it will sink into the other color. It should maintain it’s shape, so to speak. You can also let the first color dry and then add another layer on top.
Think I can skip corn syrup and not replace it with anything? Just leave that out altogether? It says it’s for the shiny finish so I’m just wondering if that is the only purpose it serves. I don’t have that or honey on hand!
Hi! Can you provide links to the the piping tips and/or kit that you use? Thank you 🙂 my mom and I are going to bake so many Christmas cookies this year and looking forward to trying your recipes!!
Does this icing get very hard like a Royal icing? I prefer an icing that’s stackable
Yes, it does. Definitely stackable.
I just can’t make royal icing! I can’t get the consistencies right for piping and flooding .my kitchen was a horrible mess. Piping bags everywhere leaking all over the counters and floor and I had a bad time trying to get coupler out of the bags what a ness! I don’t don’t what consistency is supposed to be with this recipe can you email me some tips! jillgabel@hotmail.com
The ability to see me make it and show the consistency and give my best tips are all in the post and video above the recipe card. I hope that helps.
Can I use regular food coloring???
I wouldn’t recommend it. You’ll have to add too much to get a rich color and it will thin out the icing.
Can the iced cookies be frozen??? Or should you ice them as needed.
I would frost them as needed. The icing could run when it’s thawed and is exposed to condensation.
Awesome recipe. Made it to decorate cookies to give to a friend and they came out amazing. Tasted great too.
Wonderful! Glad you enjoyed it!
Can I use this recipe when thick to stencil initials on sugar cookie frosting?
Gosh, I’ve never done any stenciling, so it’s hard for me to say. But I feel like it should be ok.
Great recipe– the taste and consistency were fantastic! It was my first time using this kind of detailed icing and it was easy to decorate with. I just smooshed it around with a toothpick a bit and it smoothly settled into exactly where I wanted it to be. My only minor complaint is that the recipe says to whisk the ingredients together– I literally used a whisk and that was a mistake v.v But I was happy with how the icing turned out and will be using this recipe again.
Glad you were happy with it! I literally used a whisk, so I’m not sure what problem you had. Why was that a mistake?
The ingredients immediately formed a solid clump inside the whisk and didn’t come out, so it was a lot easier to mix with a spoon.
HOW LONG DOES IT TAKE FOR ICING TO GET HARD? THX
I would let them sit for about 4-5 hours.
Do the cookies need to be refrigerated after frosting due to the milk in the frosting?
They don’t, but you could use water if you prefer.
Could I use regular food coloring instead of the gel?
I wouldn’t recommend it. It will thin out the icing a good bit and be harder to get a rich color.
HI is the sugar cookie itself posted on the website too?
This new cookie recipe is coming next week. 🙂
This sound like a wonderful icing recipe but being that it is made with milk does it need to be refrigerated?
No, it’s fine. But you could also use water, if you prefer.