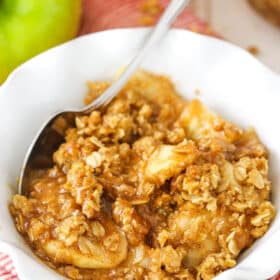
This easy apple crisp recipe is a classic dessert that makes you feel all warm and cozy! Made with cinnamon apples and a crunchy oat topping, all you need is a scoop of vanilla ice cream for the perfect fall dessert.

Why You’ll Love This Apple Crisp Recipe
- Incredible flavor. Fresh sliced apples cooked in cinnamon and brown sugar are drool-worthy enough, but this apple crisp is next-level delicious. This apple crisp is spiced with nutmeg in addition to the cinnamon and brown sugar for an extra boost of holiday flavor.
- Perfect combination of textures. This recipe features a buttery oat topping that’s as crispy as the apples are soft. The difference in textures is such an irresistible combination.
- Easy to make. There are no complicated ingredients or techniques in this recipe. Just make the apple filling, assemble a basic oat topping, then bake.
- Ideal anytime. Make it on a lazy Sunday or whip it up for Thanksgiving dessert. Everyone loves this recipe, especially if you add a generous scoop of vanilla ice cream.

What You’ll Need
Here’s a quick look at what you’ll need to make an old-fashioned apple crisp. Scroll down to the recipe card for a printable list.
For the Crisp Topping
- All-Purpose Flour: This thickener is key for any oat topping.
- Old-Fashioned Rolled Oats: For that amazing crispiness that gives this dessert its name.
- Brown Sugar: Be sure to pack it into the measuring cup.
- Cinnamon & Nutmeg: These classic spices create that warm and cozy fall flavor.
- Salt: To balance out the sweetness of the sugar and enhance the flavors.
- Cold Butter: Cut into cubes. This holds everything together and ensures that your oats get extra crispy.
For the Apple Filling
- Granny Smith Apples: Peeled, cored and thinly sliced.
- Brown Sugar: Packed.
- Butter: Melted.
- All-Purpose Flour: To thicken the filling so it coats the apples and doesn’t get soupy.
- Lemon Juice: For oxidation (browning) prevention.
- Cinnamon & Nutmeg
- Salt: This enhances the other flavors in the filling.
What Kind of Apples to Use
Granny Smith apples are definitely my go-to variety for apple crisp. Their firmness keeps them from getting slimy in your filling, and their tartness prevents the filling from tasting overly sweet. Other great apple options would be Honey Crisp, Gala or Red Delicious. You could also use multiple different kinds for even more flavor!

How to Make Apple Crisp
Perhaps the best part about this iconic dessert is how easy it is to make. Here’s how to do it:
- Heat Oven: Preheat the oven to 350°F.


- Combine dry ingredients for the topping: Add all of the dry topping ingredients (everything but the butter) to a medium-sized bowl and stir to combine.
- Add butter and set aside. Use a pastry cutter or a fork to cut the butter into the dry ingredients until the mixture is crumbly and comes together. Set it aside while you make the filling.


- Make the apple filling: Combine all of the ingredients for the filling and stir until the apples are well coated, then pour the mixture into an 8 or 9 inch square dish.
- Add the oat topping: Sprinkle the topping evenly over the apples.
- Bake: Bake the crisp for about 40 minutes, until the topping is golden around the edges and the apples are tender.
- Cool: Allow your apple crisp to cool for about 15 minutes prior to serving it.
Tips for Success
- Peel the apples: I don’t recommend leaving the skin on your apples. It changes the texture of the filling, and the skin tends to separate from the apples during the baking process.
- Thin & even apple slices are key: Slicing your apples thinly ensures that they will soften through. If some pieces are larger than others, they won’t all cook nice and evenly.
- Keep the butter cold: Don’t leave the butter out at room temperature before you start on your topping. If it’s too warm, the topping will get clumpy.

Serving Suggestions
In addition to vanilla ice cream, here are some more ways to enjoy your homemade apple crisp:
- Top with Caramel Sauce: My Salted Caramel Sauce is a fabulous addition to this apple crisp. If you’d like an unsalted caramel sauce, refer to this recipe instead.
- Add Whipped Cream: If you want to add a creamy element to your crisp without using ice cream, I highly recommend this Stabilized Mascarpone Whipped Cream. It won’t melt from the heat of the crisp as quickly as your typical whipped cream would, and it has amazing added flavor from the mascarpone cheese!
- Add Nuts: Want to add even more crunch to your crisp? Go ahead and sprinkle it with chopped pecans or walnuts after you bake it. You can toast the nuts to bring out their flavor, if desired.
How to Store and Reheat Extras
- Store in the fridge: You can store leftover apple crisp in an airtight container in the fridge for up to 4 days. Just wait until it has fully cooled first.
- Reheat in the microwave: Simply scoop the amount you want into a bowl and warm it in the microwave for 1-2 minutes, depending on how big your serving is. Keep in mind that the topping won’t be crunchy after the crisp has been chilled and microwaved.
- To reheat in the oven: If you’ve made this crisp in advance and stored the whole thing covered in the fridge, you can reheat it in the oven. The topping should crisp back up. Warm up your crisp in a 350°F oven for 15 minutes, or until it reaches your desired temperature. Add your favorite toppings and dig in!
- Can I freeze it? Yes – once cooled, leftover crisp can be frozen in a freezer-safe container. If you want to freeze the whole thing, cover it tightly in two layers of plastic wrap. Frozen apple crisp lasts for up to 3 months. Thaw it out in the fridge overnight before reheating it.

Watch The Video
Easy Apple Crisp Recipe
- Prep Time: 20 minutes
- Cook Time: 40 minutes
- Total Time: 1 hour
- Yield: 6 1x
- Category: Dessert
- Method: Oven
- Cuisine: American
Description
This Easy Apple Crisp is a classic old-fashioned dessert that makes you feel all warm and cozy! Made with fresh cinnamon apples and a crunchy oat topping, all you need is a scoop of vanilla ice cream to complete this crowd-favorite treat.
Ingredients
For the Crisp Topping
- 1/2 cup (65g) all purpose flour
- 1 cup (90g) old fashioned rolled oats
- 3/4 cup (168g) packed brown sugar
- 1 tsp ground cinnamon
- 1/4 tsp nutmeg
- 1/4 tsp salt
- 1/2 cup cold unsalted butter, cut into cubes
For the Apple Filling
- 5 cups (595g) thinly sliced granny smith apples (from about 4 large peeled and cored apples)
- 1/4 cup (56g) packed brown sugar
- 2 tbsp unsalted butter, melted
- 2 tbsp (16g) all purpose flour
- 2 tsp lemon juice
- 3/4 tsp ground cinnamon
- 1/4 tsp nutmeg
- Pinch of salt
Instructions
- Preheat oven to 350°F.
- Add all of the ingredients for the topping, except for the butter, to a medium-sized bowl and stir to combine.
- Add the cold butter and use a pastry cutter or fork to cut the butter into the dry ingredients until the mixture is crumbly and comes together. Set aside.
- Combine all the ingredients for the apples and stir together so that the apples are well coated, then pour the mixture into an 8 or 9 inch square dish.
- Sprinkle the topping evenly over the apples.
- Bake for about 40 minutes, until the topping is golden around the edges and the apples are tender. Allow to cool for about 15 minutes prior to serving.
Notes
- Video Transcript
- Storage: Once cooled, refrigerate leftovers in an airtight container for up to 4 days.
- Reheating: Microwave individual helpings for 1-2 minutes, depending on size.
- Make Ahead: Cover well and store in the fridge. Reheat in a 350°F oven for 15 minutes, or until desired temperature is reached.
- Freezing: Store in freezer-safe container or wrap tightly in two layers of plastic wrap. Enjoy within 3 months and thaw in the fridge before reheating.
Nutrition
- Serving Size: 1 serving
- Calories: 454
- Sugar: 41.7 g
- Sodium: 109.4 mg
- Fat: 19.6 g
- Carbohydrates: 66.3 g
- Protein: 3.8 g
- Cholesterol: 50.8 mg


Easy and the best part all ingredients found in kitchen! I had a few apples that needed to be used. Absolutely Delicious Lindsay! Thank you 🙂
I’m so glad you enjoyed it!
What size baking dish do you use.? That would be helpful.
It’s actually in step number 4 – “pour the mixture into an 8 or 9 inch square dish.” I hope that helps!