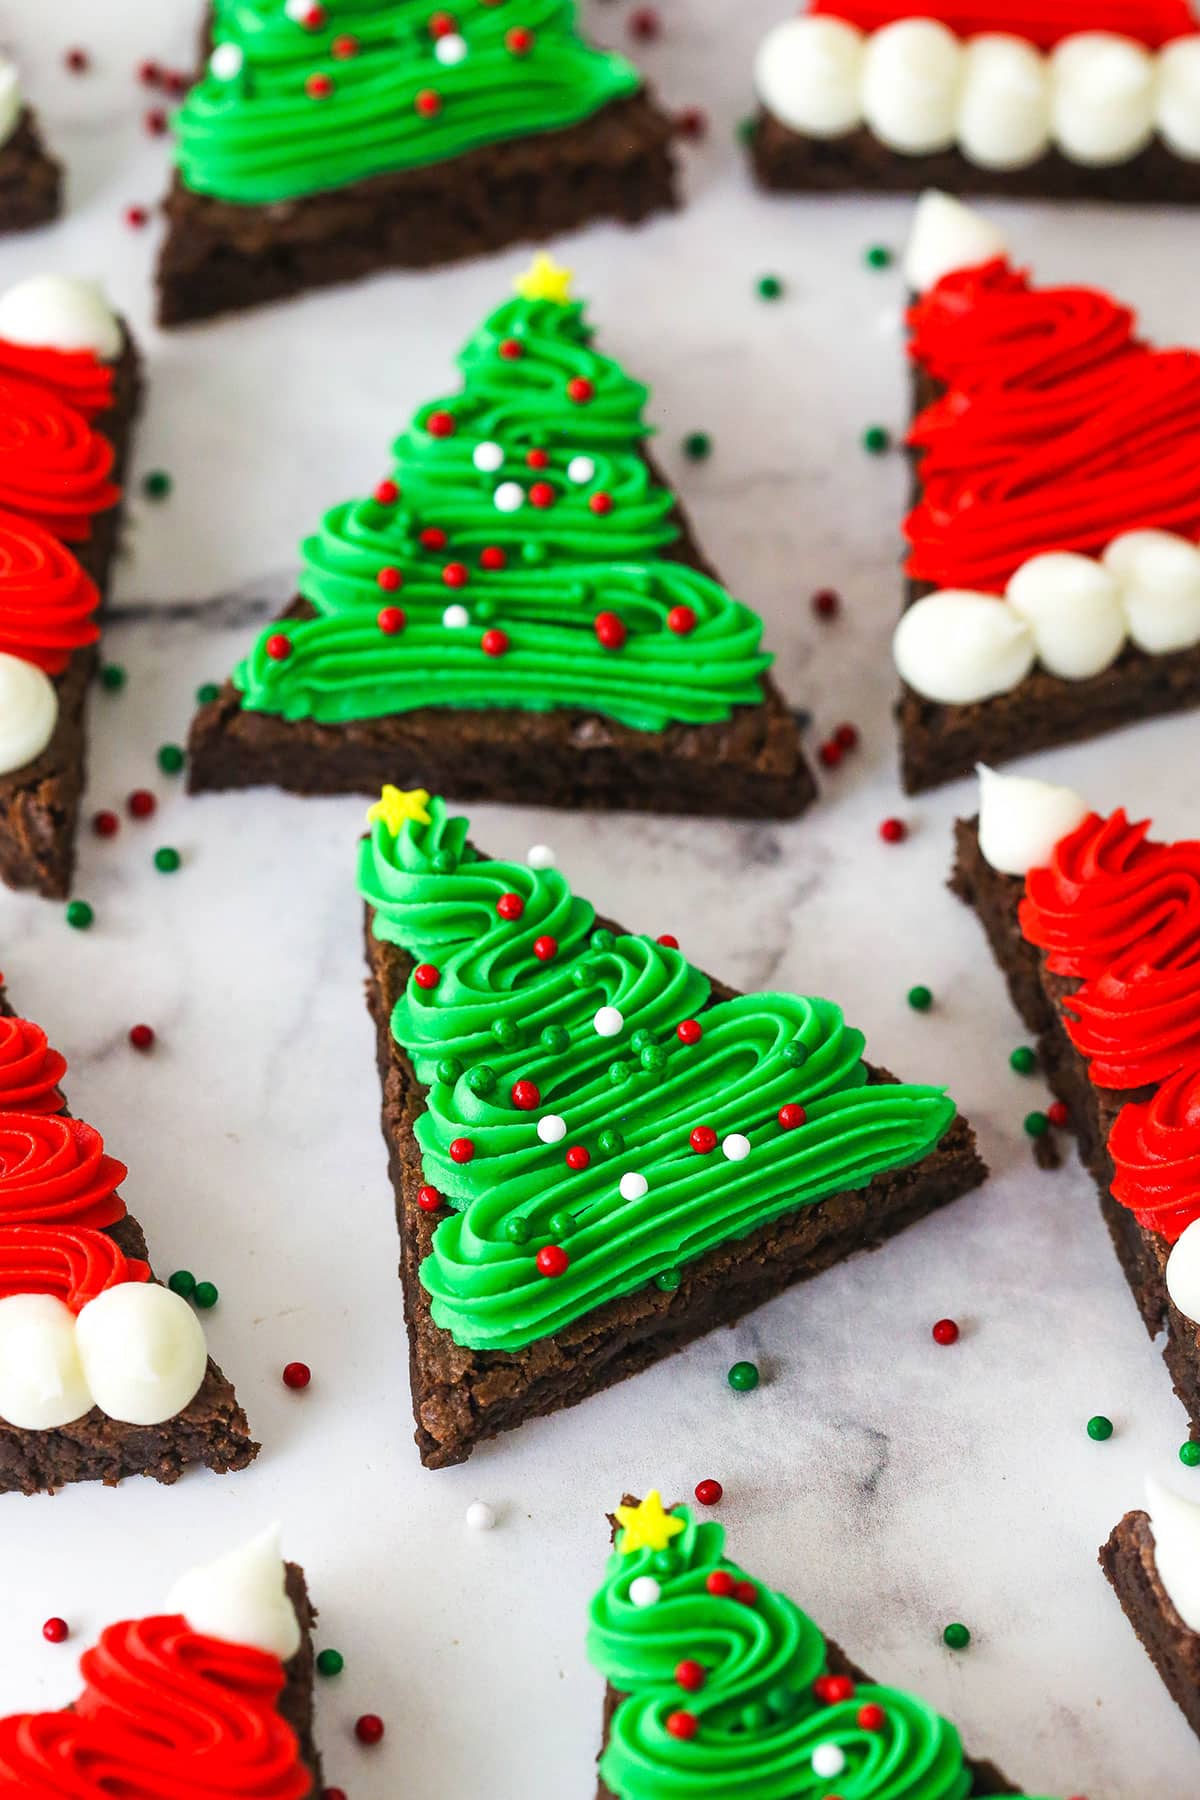
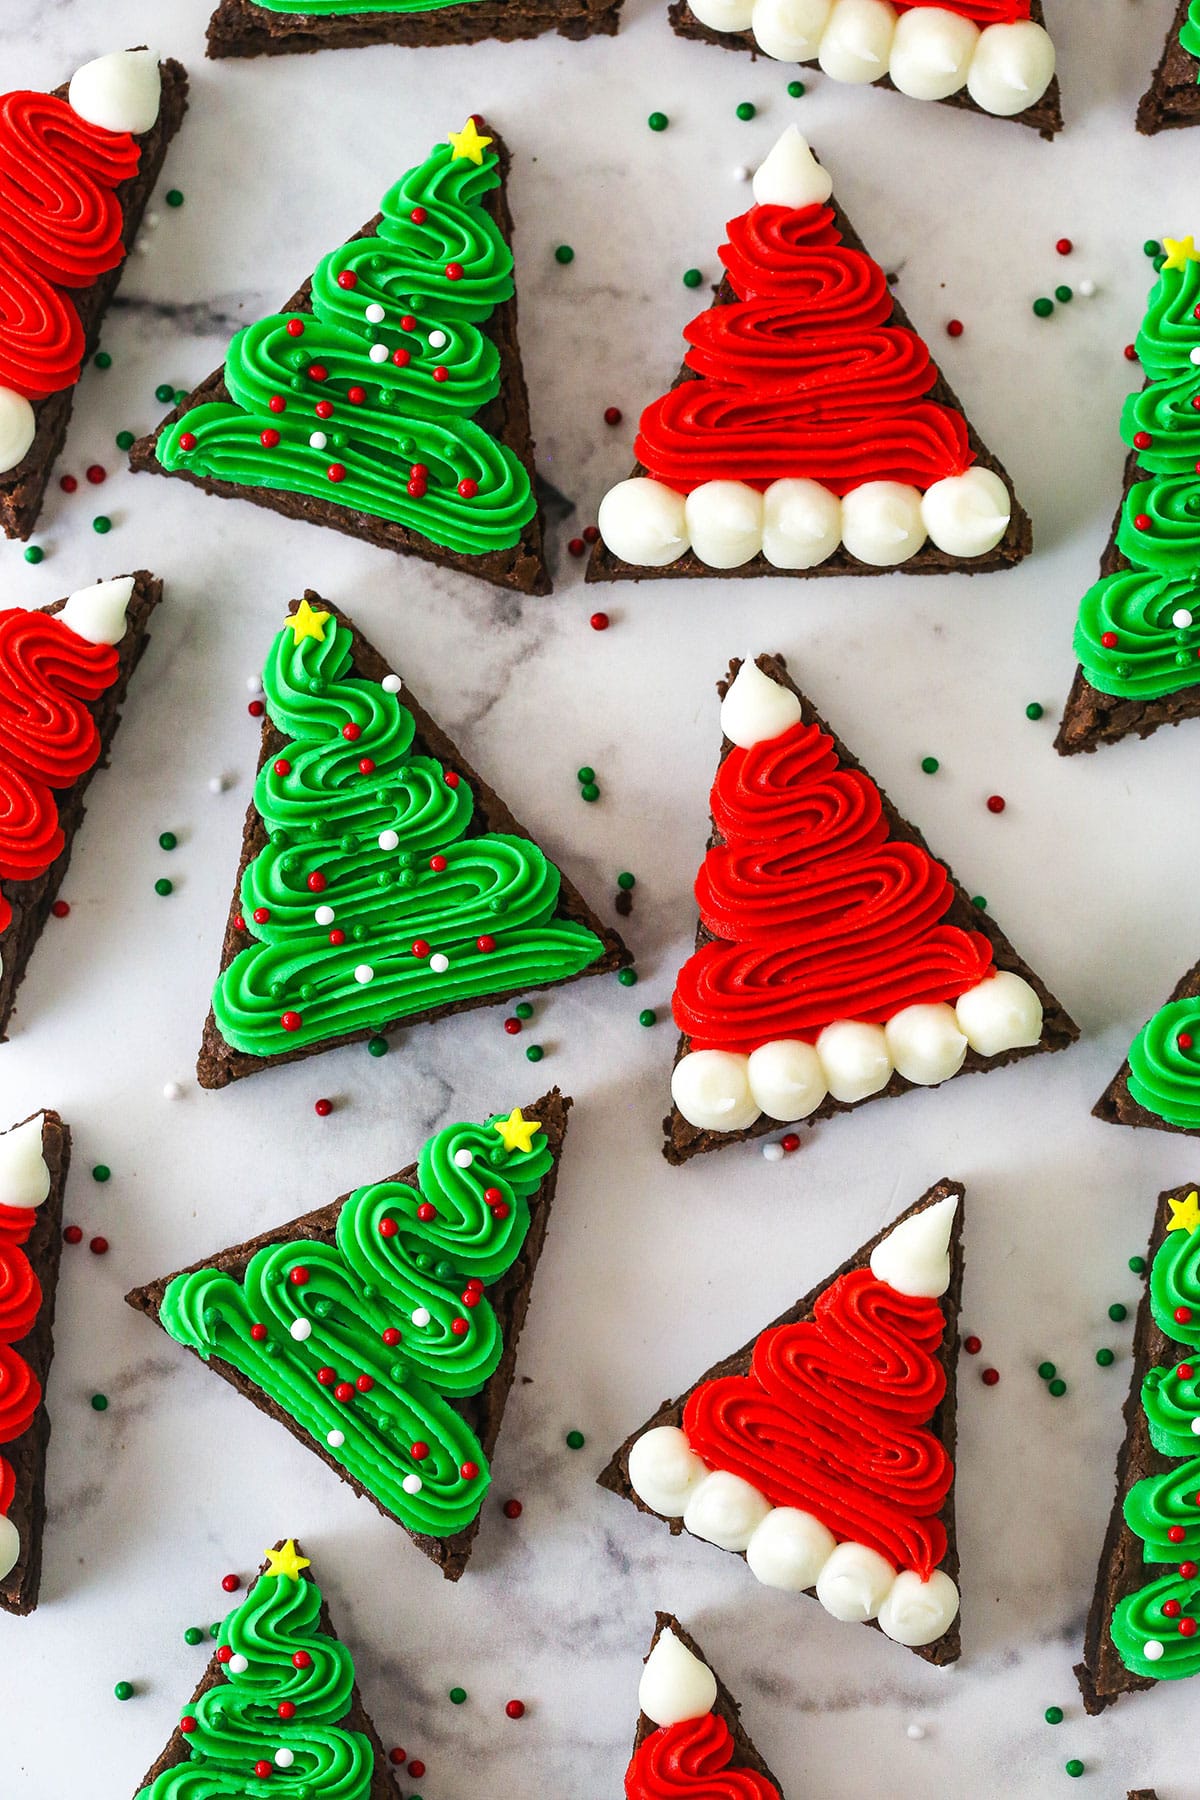
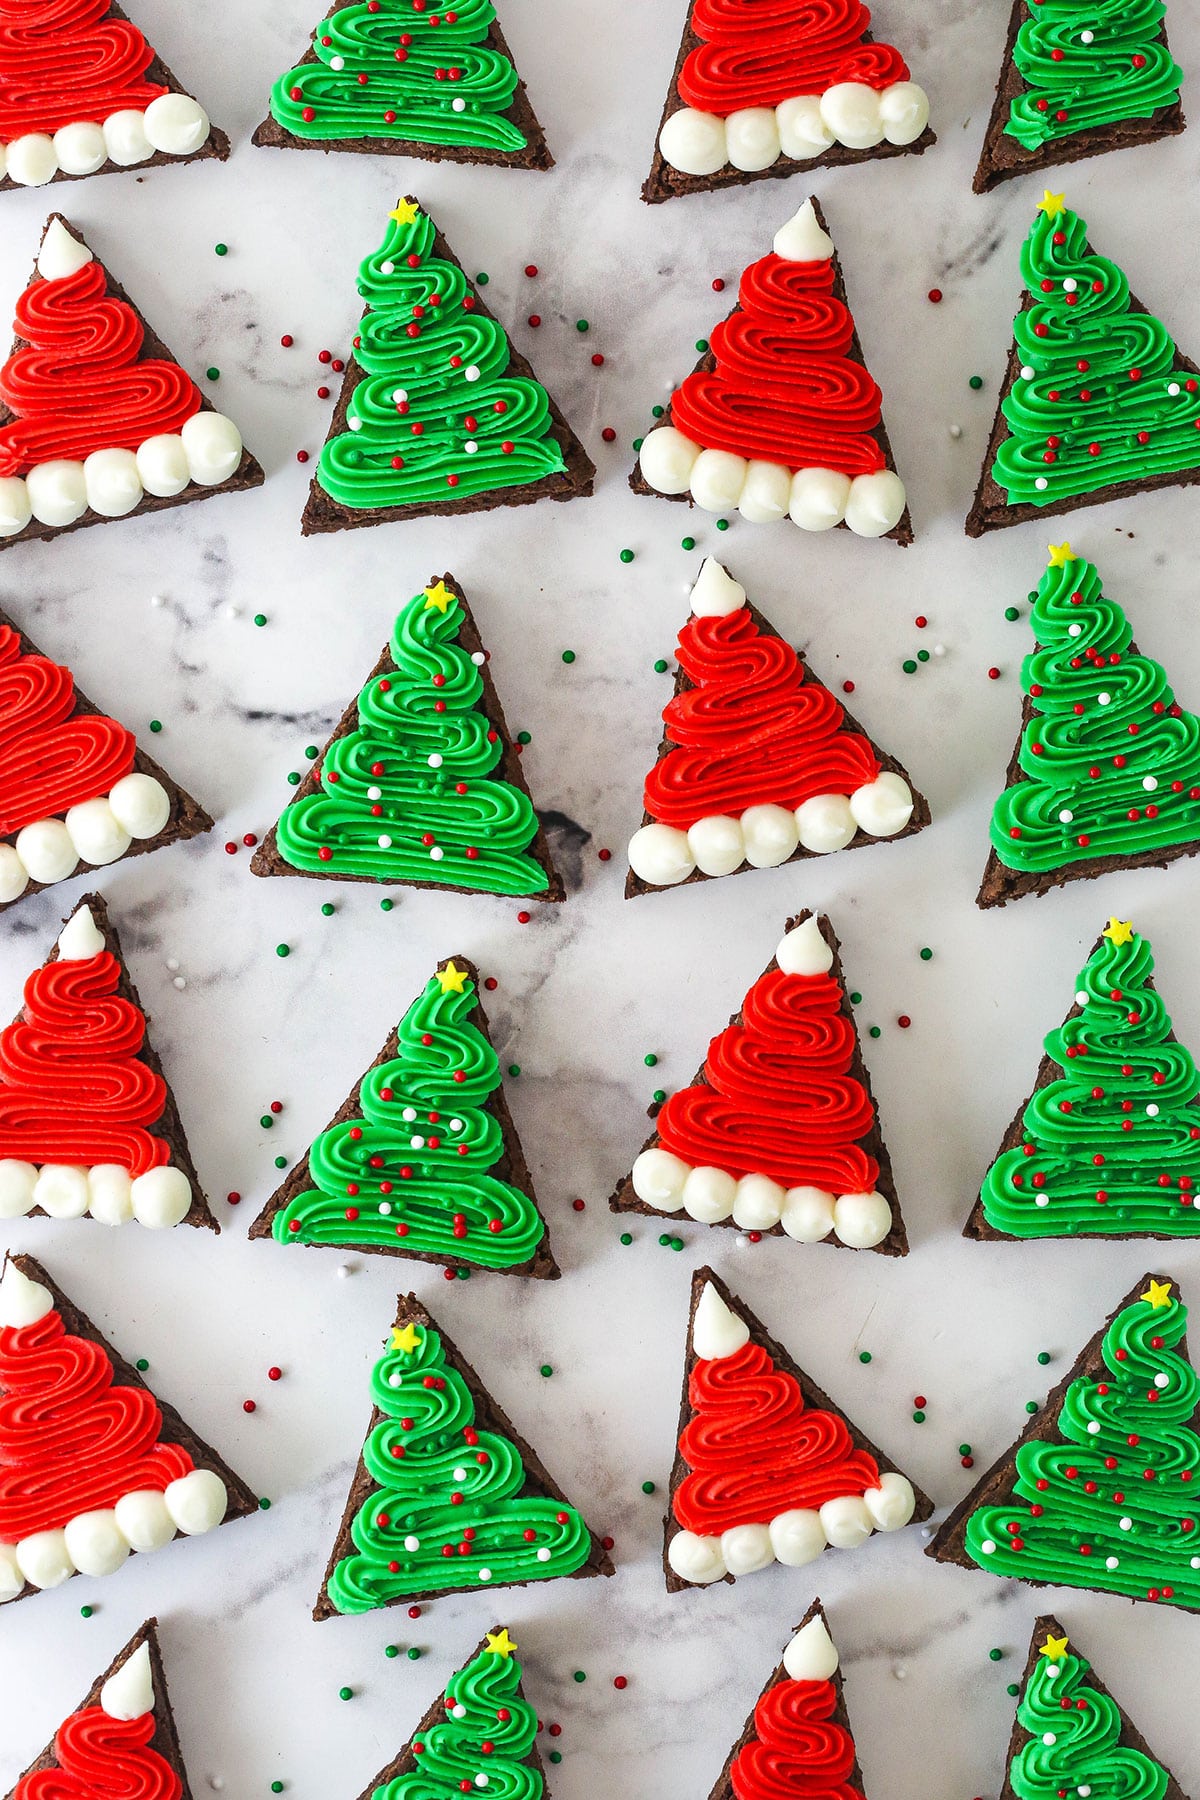
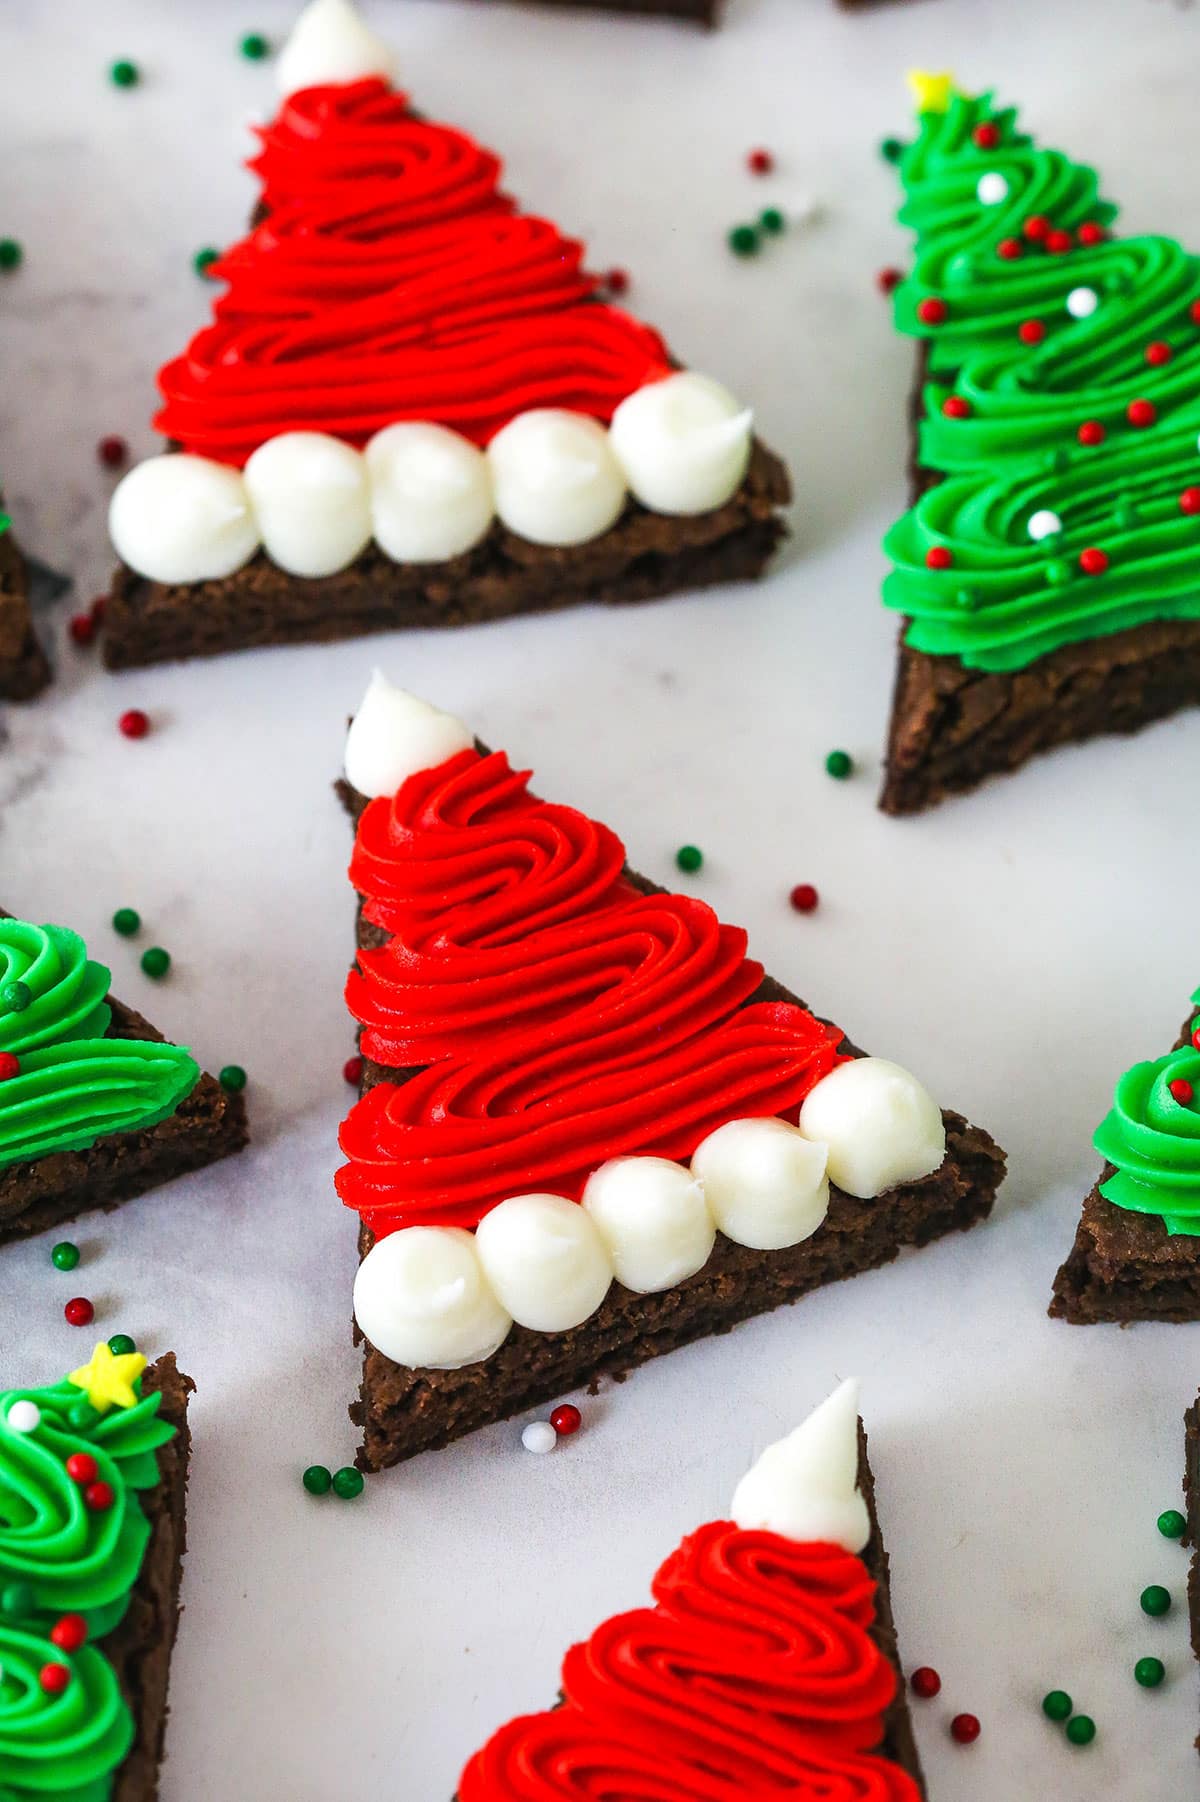
These Christmas tree brownies are so fun and festive for the holidays! A moist and chewy brownie is decorated with colorful vanilla buttercream to make Christmas trees – and Santa hats! One recipe, two possibilities for festive and delicious brownies.
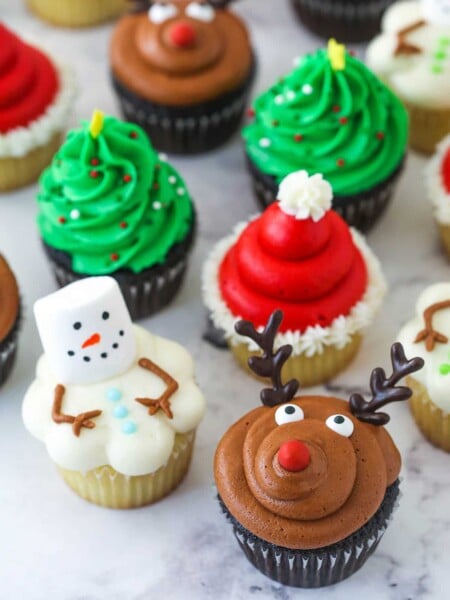
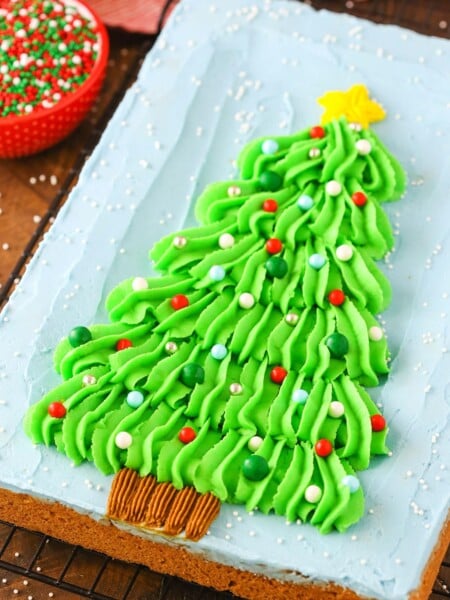
You can never have too many fun Christmas recipes. Between all the parties and events, there are plenty of occasions to try new things or change it up from one event to another. The more festive, the better! From Christmas Cupcakes, to Stacked Sugar Cookie Christmas Trees, Christmas Pinwheel Cookies, Grinch Cookies and a Christmas Cookie Layer Cake, there are lots of options. Today I’m adding to those options with these super fun and easy-to-make Christmas Tree (and Santa hat) Brownies!
Why You’ll Love Christmas Tree Brownies
- Festive and fun – Looking at these just makes everyone smile. The pretty Christmas trees and Santa hats just scream Christmas!
- Easy to make – The brownie comes together easily, without a mixer. The only other thing you need is buttercream to color. These are great to make with kids – from easy mixing and ingredients, to fun with decorating.
- Customizable – Even though I called these Christmas Tree Brownies, their shape lends them to many options. I originally planned on making only trees, but the Santa hats are super cute too. So I made both. You can even turn some into reindeer brownies.
Ingredients and More
Here’s what you’ll need to make these adorable brownies (see the recipe below for precise measurements):
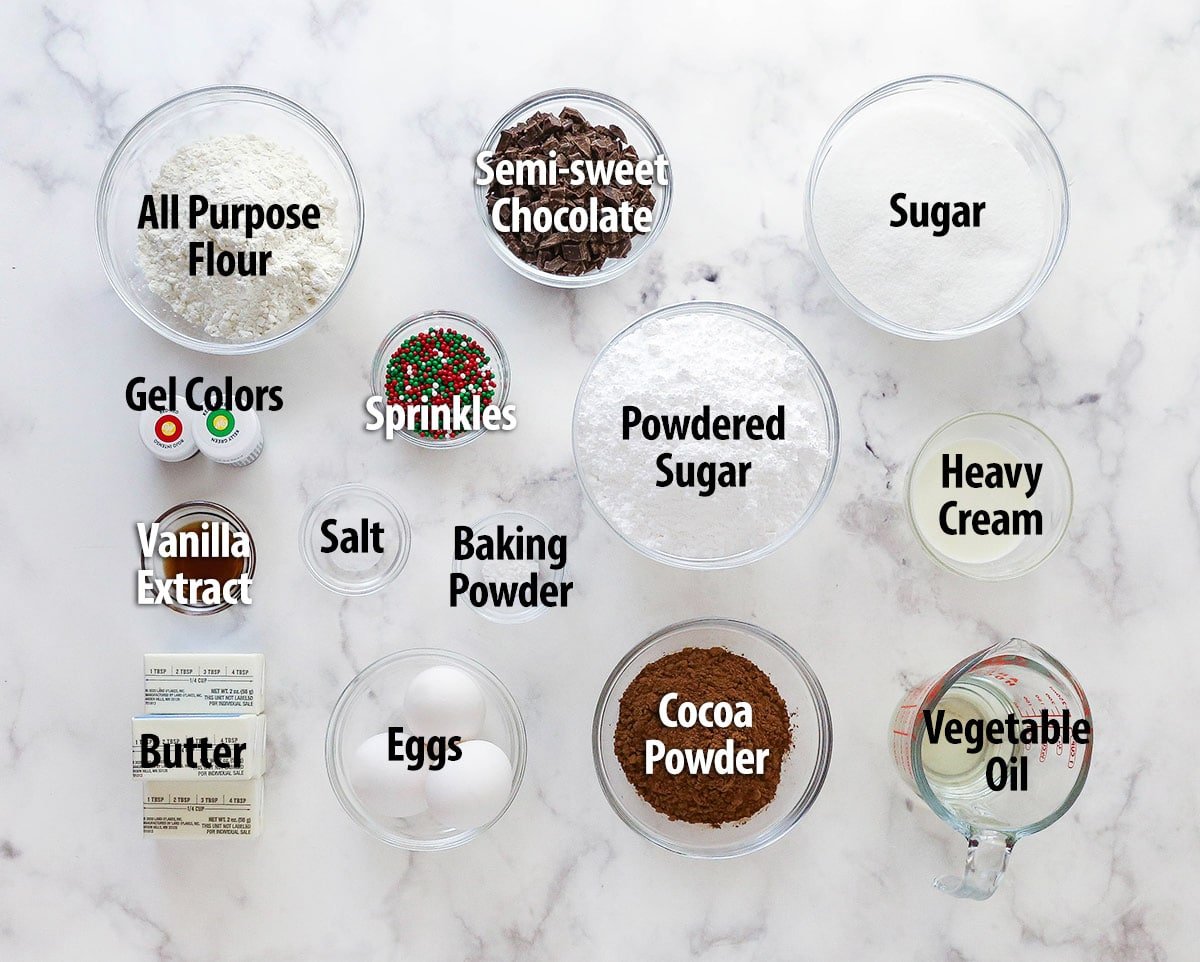
- Flour – Be sure to measure it properly, so you don’t end up with dry cookies. The best thing you can do is use a food scale. Otherwise, the spoon and level method is next best.
- Cocoa powder and semi-sweet chocolate – The combination of the two gives you a more dense and chewy brownie, with plenty of chocolate flavor.
- Salt – Salt enhances the natural flavors in the cookie. Without it, the brownie would be a little bland.
- Butter and vegetable oil – Both butter and oil are used in the brownies for the best texture and flavor.
- Powdered sugar – There’s only 2 cups of powdered sugar in the buttercream. I highly recommend you don’t reduce it. You want the buttercream to be thick enough to hold it’s shape.
- Heavy cream – Added to the buttercream to add some creaminess and thin it out as needed. You can also use water or milk, but you’ll need less of it.
- Gel icing color – To get bright, vibrant colors, you’ll want the gels, not regular food coloring. I use both Wilton and AmeriColor gel colors, but I do like the squeeze bottles that AmeriColors come in.
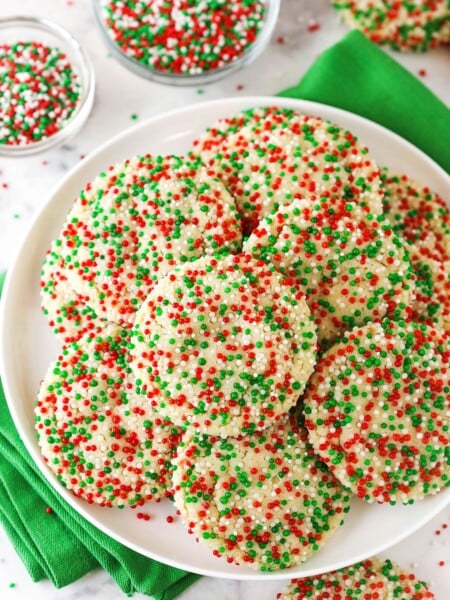
- Sprinkles – Some red, green and white nonpareils for decorating the trees. I used some yellow stars from a sprinkle mix I had, but there are fun yellow star and gold star options online.
- Wilton 21 tip and Wilton 12 tip – Look! They come as a set!
How To Make Christmas Tree Brownies
Here’s a quick step-by-step look at how to put these tasty brownies together. Please see the recipe card below for more thorough instructions.
Preheat oven to 350°F (180°C). Grease a 9×13-inch pan or line it with parchment paper that sticks up above the sides, which can be used to lift the finished brownies out of the pan and make cutting easier. Set pan aside.
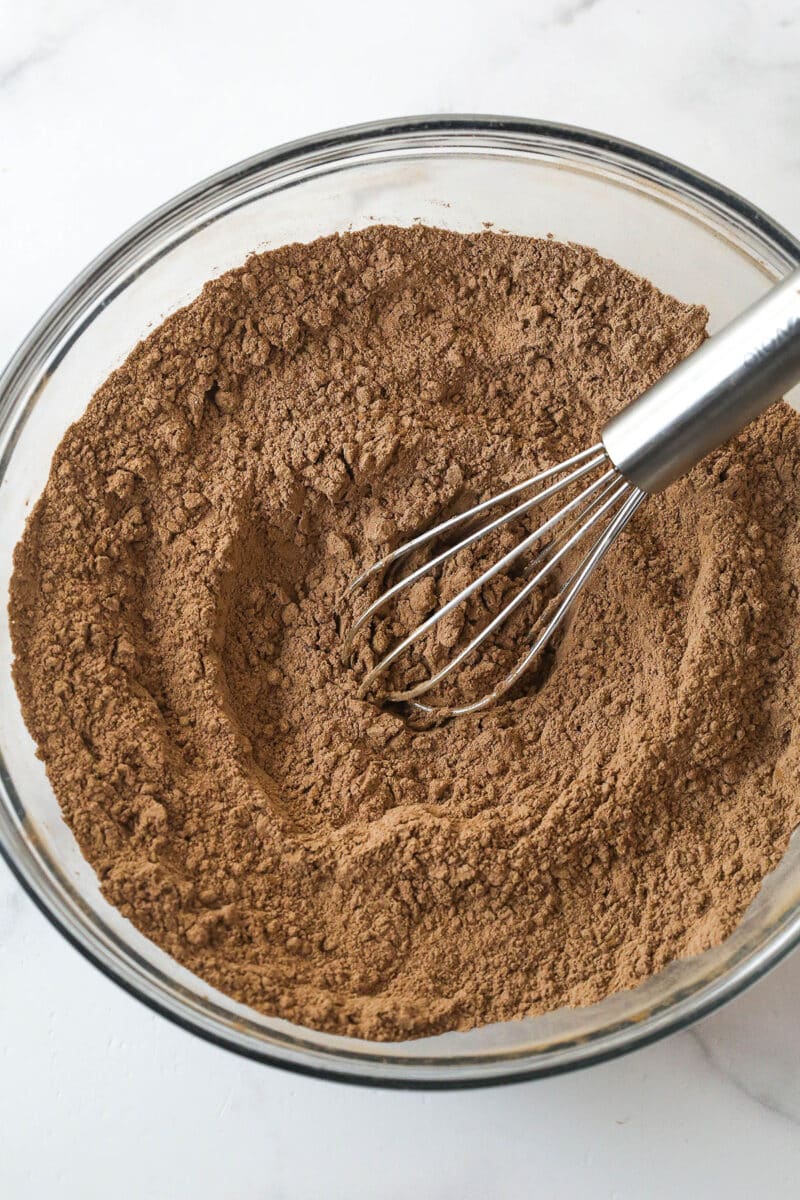
Combine the flour, cocoa powder, baking powder and salt in a medium sized bowl and set aside.
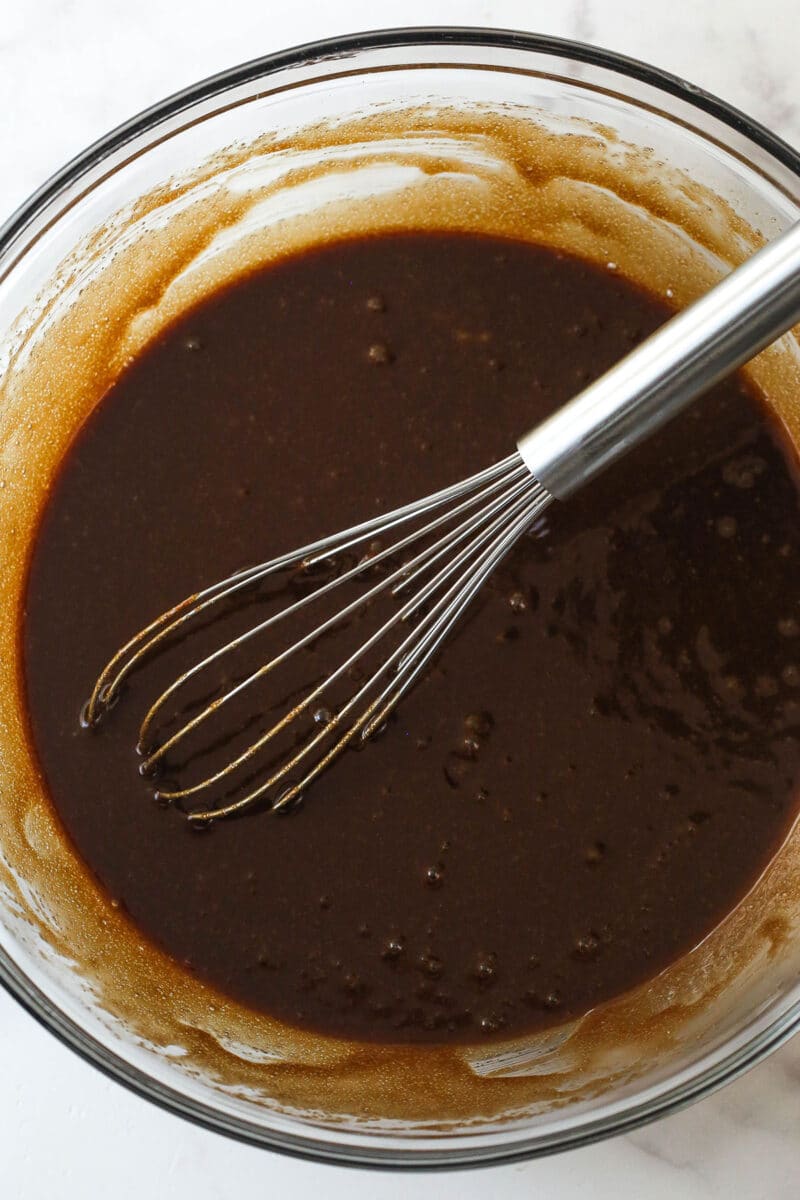
Melt the butter and chocolate in a large bowl until melted and smooth. Add the oil, sugar and vanilla extract and whisk until well combined. Add the eggs and whisk until well combined.

Add the dry ingredients and mix together until well combined.
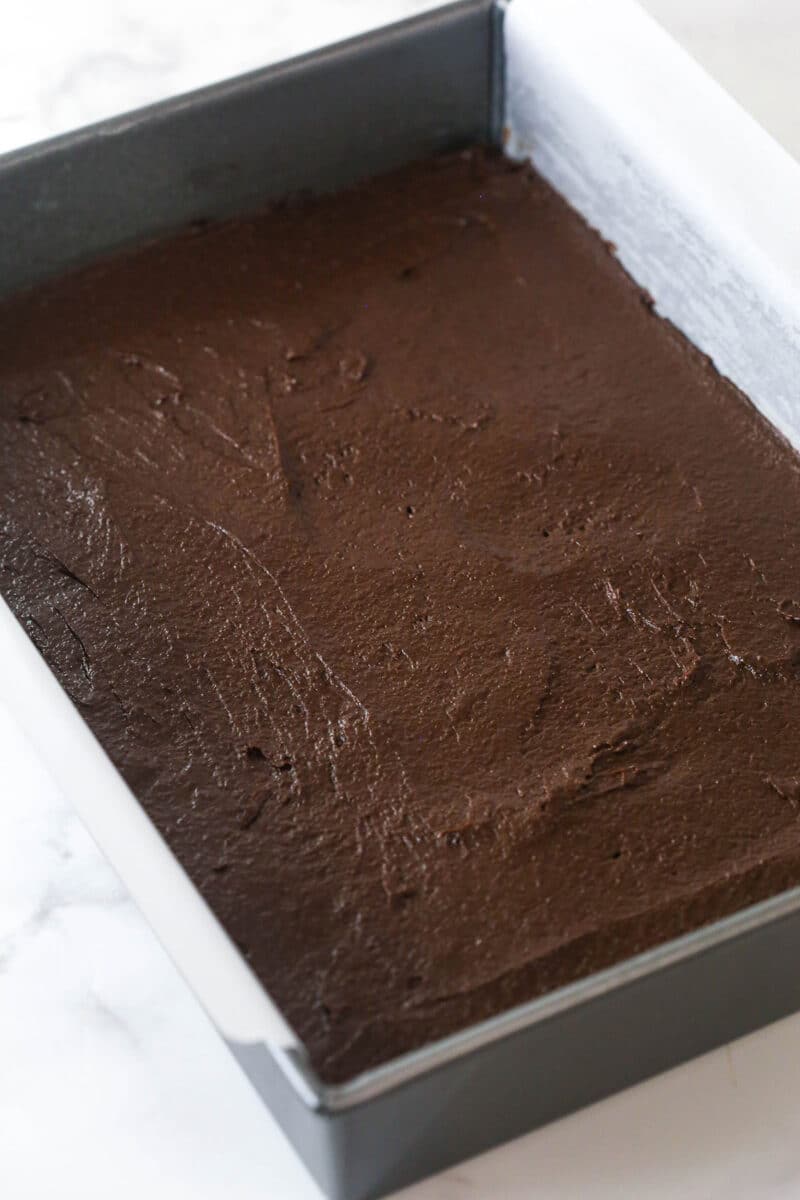
Spread the batter evenly into the prepared pan.
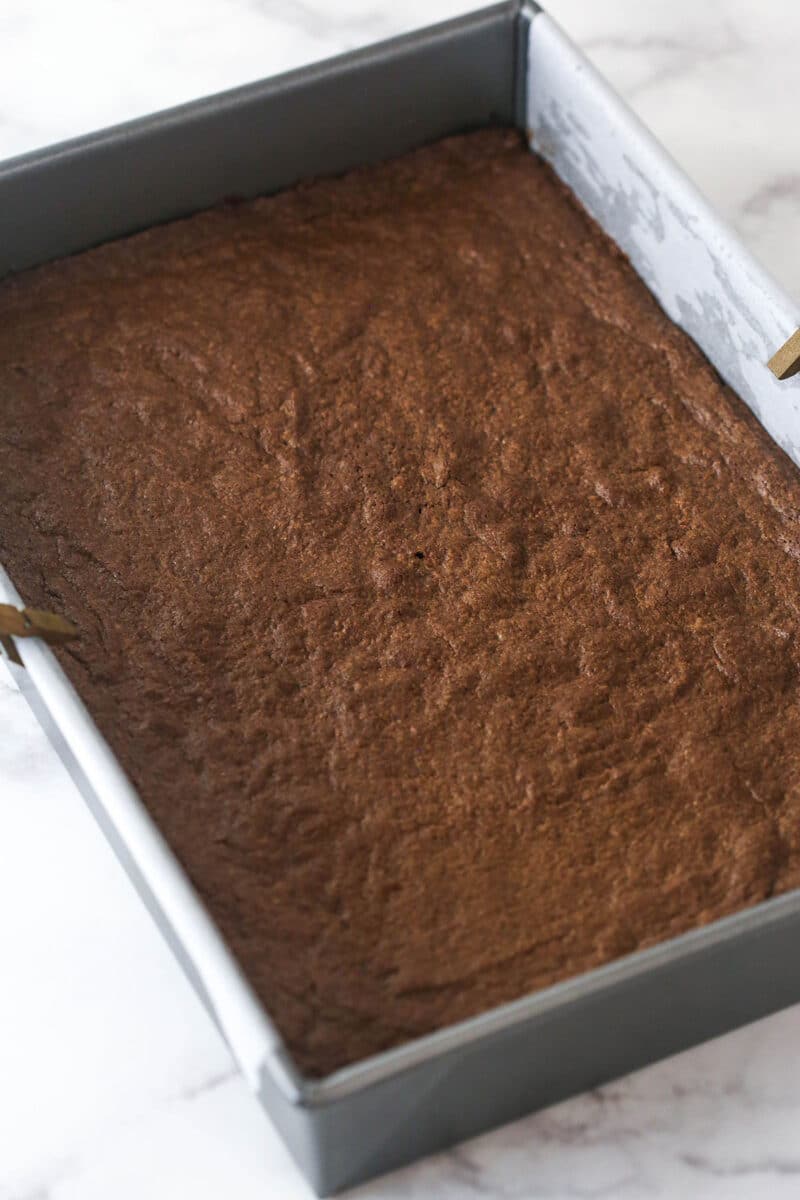
Bake for 17-20 minutes. Set the brownies aside to cool completely.
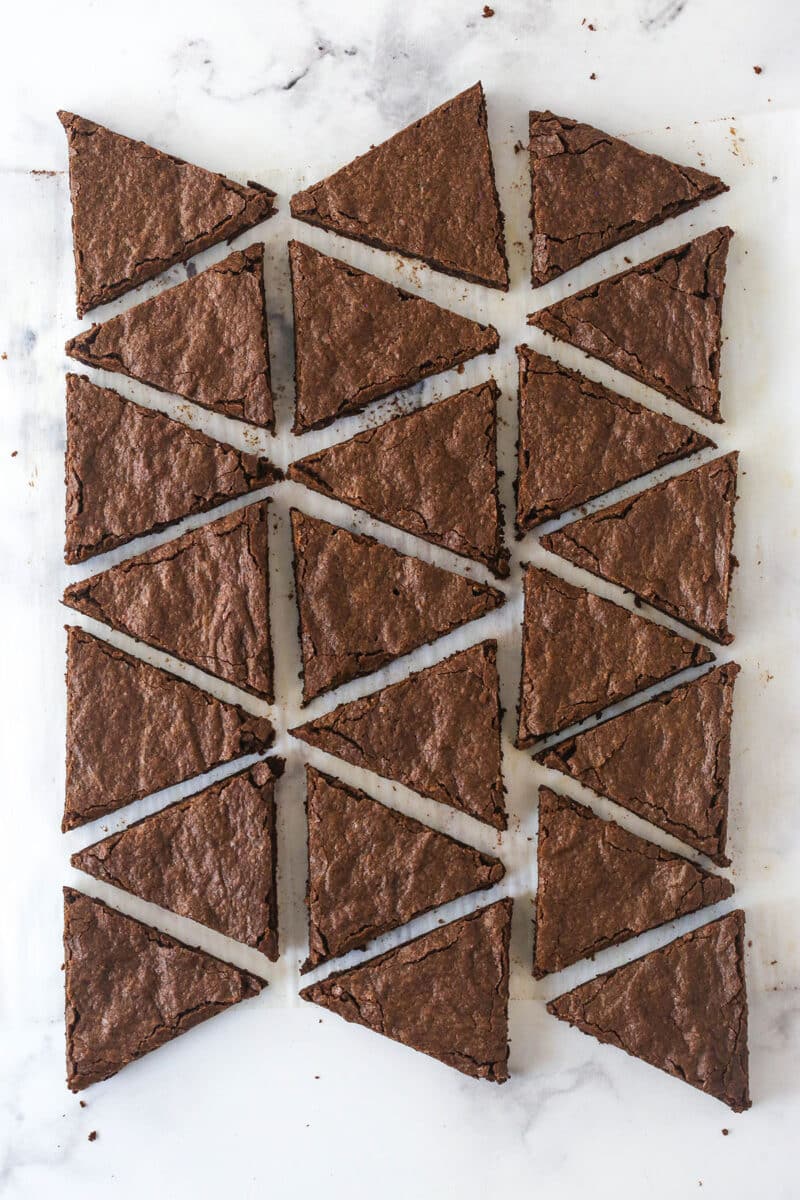
Remove the brownies from the pan and cut them into three triangles, making three equal sections the long way. Take each of the three sections and divide it into triangles, alternating the direction of the triangle.
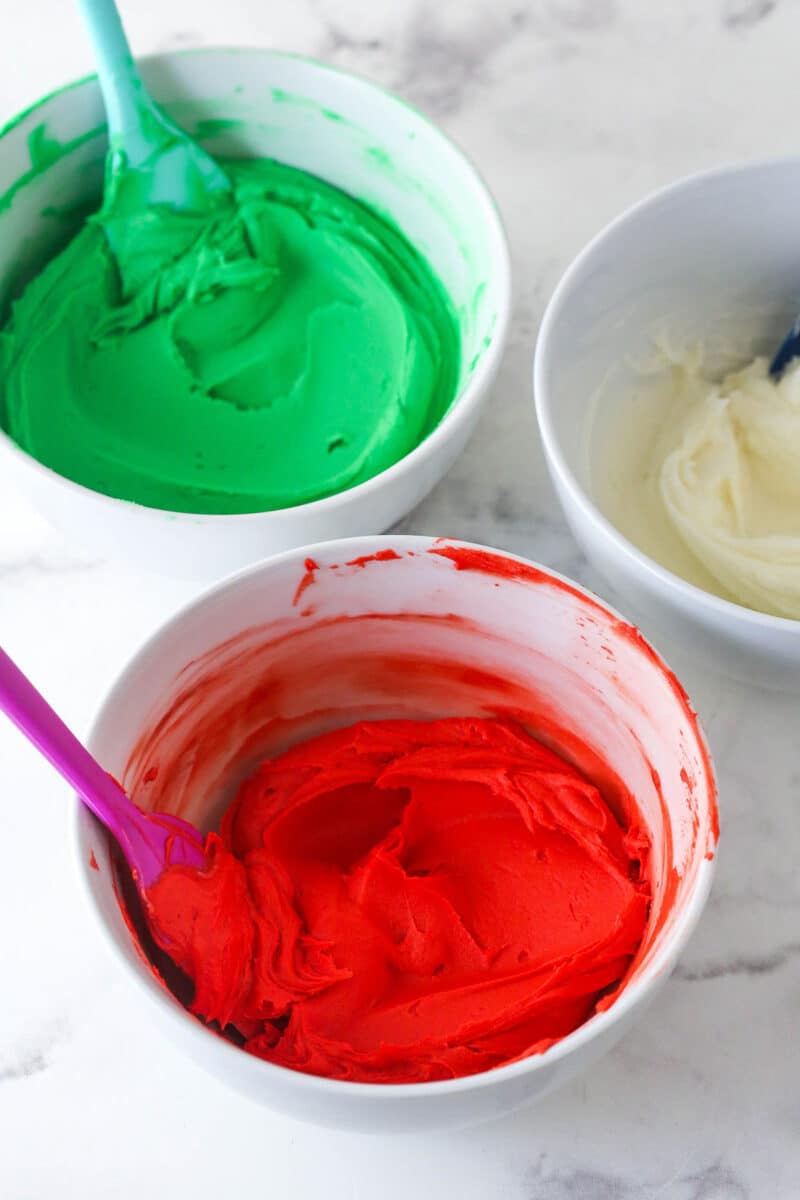
Make the buttercream and divide it between 3 bowls. Color one green, one red and leave one white.
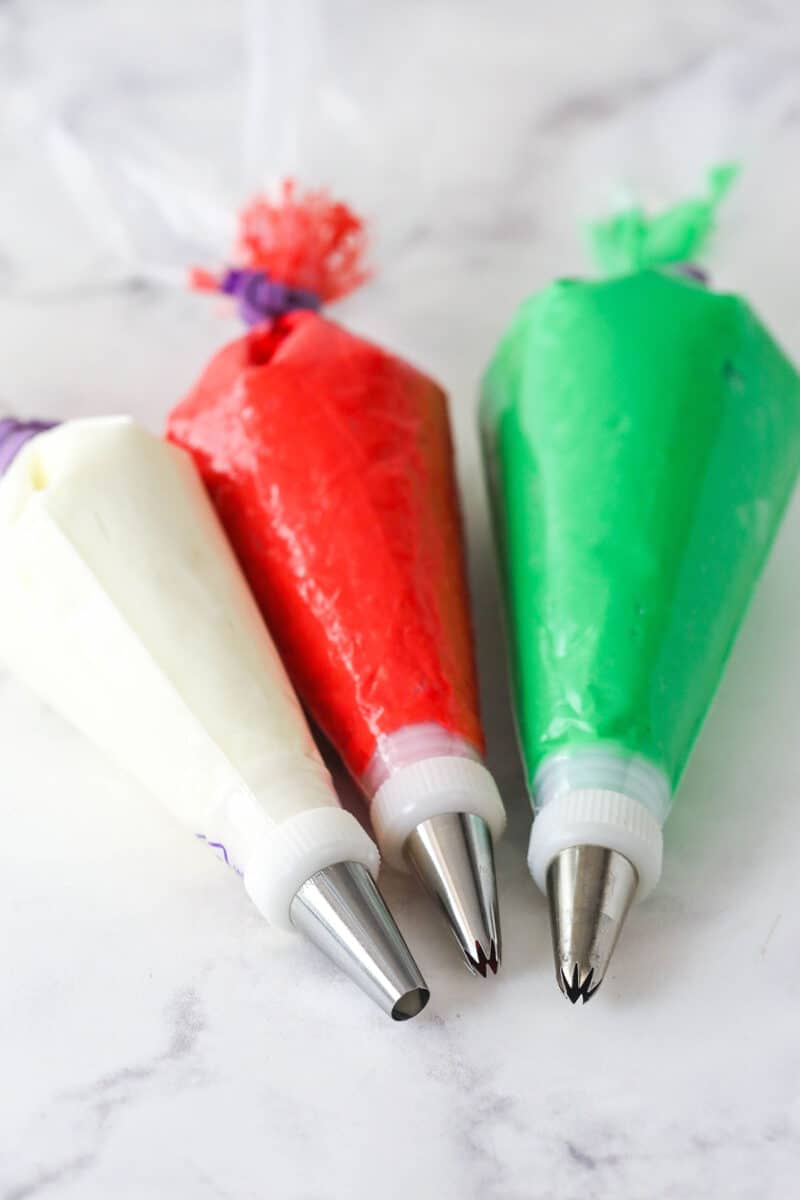
Add the buttercream to individual piping bags fitted wit piping tip. Red and green should be Wilton 21, white should be Wilton 12.
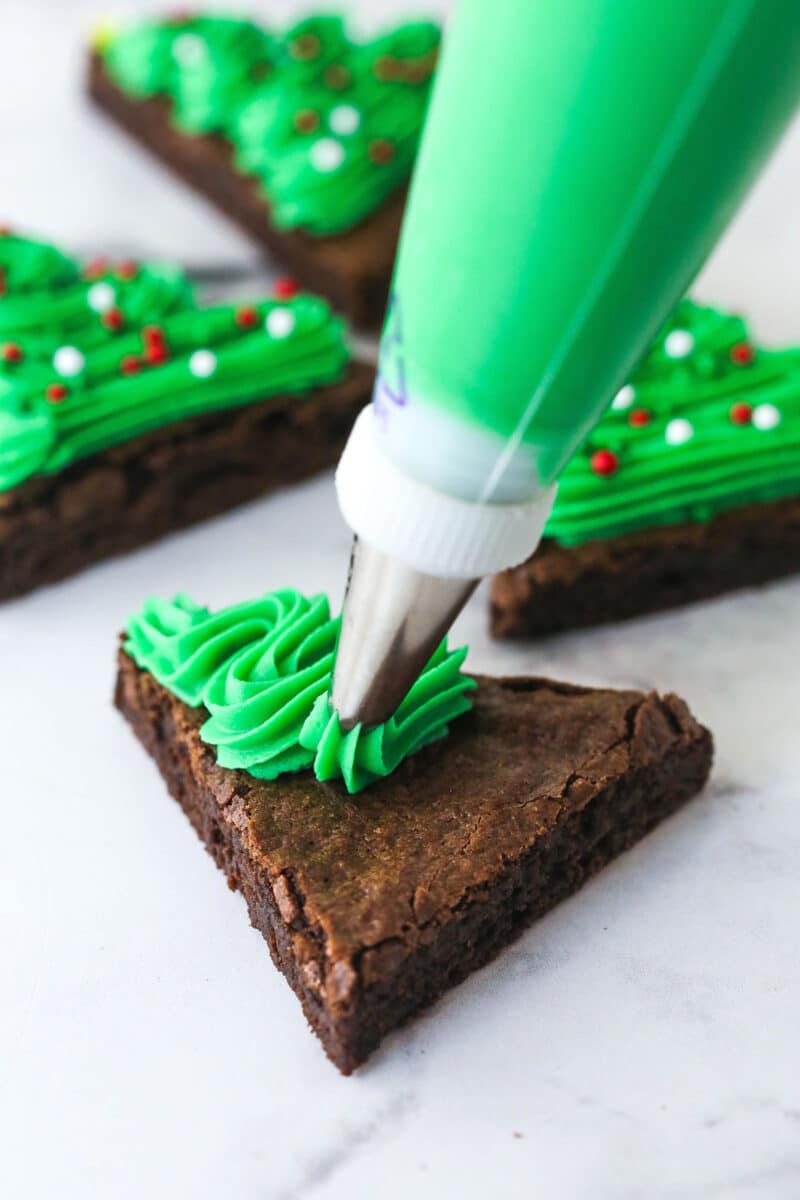
To decorate the trees, pipe a zigzag, starting from the top to the bottom, making it wider as you go towards the bottom of the “tree”. Add a star sprinkle at the top of the “tree” and add some round sprinkles all over.

To decorate the Santa hats, pipe a red zigzag, starting from the top to the bottom, making it wider as you go towards the bottom of the “hat”. Leave a little space at the top and and use the white buttercream to pipe a dot of frosting at the top of the hat and to pipe several dots along the bottom.
Tips for Success
- Parchment paper hack. Use enough parchment paper so that it hangs over the edges of the pan a little. You can use the overhang to easily lift the brownies from the pan once they’ve cooled.
- Measure carefully. Use a food scale or the spoon-and-level method to ensure you get the proper amount of flour. Too much flour will result in dry, cakey brownies, while too little will give you flat, overly gooey brownies.
- Don’t over-mix. Once you add the flour to the batter, mix just until smooth. Over-mixing can cause the glutens in the flour to overdevelop, resulting in tough dessert bars.
- Let ’em cool. Let the brownies cool completely before decorating them, so the buttercream doesn’t melt.
- More or less. The number of brownies you get can vary a bit. You can cut the triangles more narrow or wider to get more or less brownies.
- Colors get darker. Keep in mind when coloring your buttercream that the color will deepen as it sits, so don’t feel like you have to add too much color.
- Sprinkle immediately. Add the sprinkles to the trees just after adding the buttercream. The buttercream will crust over a bit, and then it will be hard for the sprinkles to stick.
- More designs. In addition to the Christmas trees and the Santa hats, you can add a third design – Reindeer!
How To Store Them
Store the brownies in an air-tight container to keep them as fresh as possible. I don’t recommend stacking them. The decorated brownies are fine at room temperature for up to 2 days. After that, they should be refrigerated, because of the buttercream. Do serve them at room temperature though.


Christmas Tree Brownies
save this recipe
Enter your email & we’ll send it to your inbox. Plus get new recipes from us every week!
Ingredients
Brownies
- 1 cup (130g) all-purpose flour (measured properly)
- ½ cup (57g) natural unsweetened cocoa powder
- ⅛ teaspoon baking powder
- ¼ teaspoon salt
- ½ cup (112g) unsalted butter, melted
- 4 ounces semi-sweet chocolate (chopped)
- ¼ cup (60ml) vegetable oil
- 1 ½ cups (310g) sugar
- 1 ½ teaspoons vanilla extract
- 3 large eggs
Vanilla Buttercream
- ½ cup (112g) unsalted butter (room temperature)
- 2 cups (230g) powdered sugar
- ½ teaspoon vanilla extract
- 1-2 tablespoons heavy whipping cream
Additional
- Gel Icing Color
- Sprinkles (nonpareils and stars)
- Wilton 21 tip
- Wilton 12 tip
Instructions
Make the brownies
- Preheat oven to 350°F (180°C). Grease a 9×13-inch pan or line it with parchment paper that sticks up above the sides, which can be used to lift the finished brownies out of the pan and make cutting easier. Set pan aside.
- Combine the flour, cocoa powder, baking powder and salt in a medium sized bowl and set aside.
- Combine the butter and chocolate in a large microwave safe bowl and heat in 20-30 second increments, stirring well after each, until melted and smooth.
- Add the oil, sugar and vanilla extract and whisk until well combined.
- Add the eggs and whisk until well combined.
- Add the dry ingredients and whisk together or stir with a spatula until well combined.
- Spread the batter evenly into the prepared pan, then bake for 17-20 minutes. To test the brownies for being done, insert a toothpick into the center. If it comes out with just a few moist crumbs, they’re done.
- Set the brownies aside to cool completely. When they are cool, cut them into triangles. You can trim the crispy edges, or leave them. Remove the brownies from the pan and cut them into three equal sections the long way.Take each of the three sections and divide it into triangles, alternating the direction of the triangle (refer to the image in the post above). Set aside while you prepare the buttercream.
Make the buttercream
- Add the butter to a large mixer bowl and beat until smooth and creamy. Add about half of the powdered sugar and mix until smooth and well combined.
- Add the vanilla extract and 1 tablespoon of cream and mix until smooth and well combined.
- Add the remaining powdered sugar and mix until smooth and well combined. Add more cream until desired consistency is reached.
Color the buttercream and decorate
- Divide the buttercream between 3 bowls. Put about half of the buttercream into one bowl and color it green. Set about 1/3 of the remainder aside for the white and color the rest red. Add a few drops of the gel icing color to start, and add more as needed. Keep in mind that as the buttercream sits, the colors will darken.
- To decorate the trees, add the green buttercream to a piping bag fitted with the Wilton 21 tip. Pipe a zigzag, starting from the top to the bottom, making it wider as you go towards the bottom of the “tree”. Add a star sprinkle at the top of the “tree” and add some round sprinkles all over.
- To decorate the Santa hats, add the red buttercream to a piping bag fitted with the Wilton 21 tip and the white buttercream to a piping bag fitted with the Wilton 12 tip. Leave a little space on top of the brownie for the white on top, then pipe a red zigzag, starting from the top to the bottom, making it wider as you go towards the bottom of the “hat”. Leave a little space at the bottom for one row of buttercream. Use the white buttercream to pipe a dot of frosting at the top of the hat and to pipe several dots along the bottom.
- Store the frosted brownies in an airtight container at room temperature. If they last longer than a couple days, you can refrigerate them (because of the buttercream). Serve at room temperature. Best if eaten within 4-5 days.
Notes
- Gel icing color – To get bright, vibrant colors, you’ll want the gels, not regular food coloring. I use both Wilton and AmeriColor gel colors, but I do like the squeeze bottles that AmeriColors come in.
- Sprinkles – Some red, green and white nonpareils for decorating the trees. I used some yellow stars from a sprinkle mix I had, but there are fun yellow star and gold star options online.
- Wilton 21 tip and Wilton 12 tip – They come as a set.
The nutrition facts provided are calculated using a third-party tool and are estimates only. Actual nutritional content may vary based on the ingredients and brands you use, as well as portion sizes. For accurate results, please consult a registered dietitian or nutritionist.


Can I make the brownies ahead of time and cut them and then freeze them(without icing)
Thanks
You could. The edges would stay more fresh if you freeze it uncut (if you aren’t going to already frost them), but it would be fine.