Today I am talking all about food photography! After kicking off a blogging series a few weeks ago with a post about how to start a food blog, we are now moving onto one of my favorite parts – the photography.
So as you might be able to guess, photography is a big part of my blog. Like, BIG. People eat with their eyes first, so the food should look great. And while I knew from the beginning that it would be a big part of things, it didn’t start off beautiful. In fact, when I began I wasn’t ready to invest in a nice camera so I actually used a little point and shoot like this Nikon Coolpix Digital Camera. There is not a single thing about that camera that is fancy or handy for food photography, but it’s what I used for the first 1 1/2 years of blogging. Looking back, it’s hard to believe it was that long, but it was. Here’s a couple of my first posts using that camera – My Love Affair with Cheesecake and Triple Lemon Cake. I mean whoa.
So first let’s talk about the equipment I use:
When I finally graduated to a DSLR camera, I started with the Canon Rebel T3i. It made quite a difference to my photos and if you can, I definitely recommend getting a DSLR. The control you have is what will give you great photos. I don’t think the T3i is made anymore, so you might consider starting with the Canon Rebel T5i.
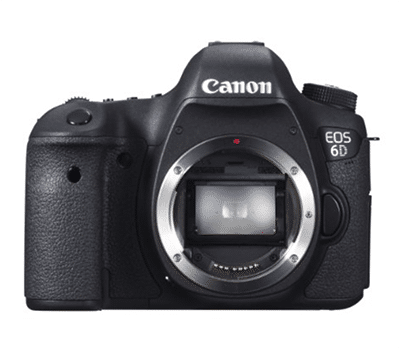
About a year ago, I upgraded to a Canon 6D and I love it! If you know you really want to invest in a camera, this is a great option. The T3i is a great starter, but the 6D gives even more control and works so much better in low light situations. The ISO options have so much more flexibility and now when I go back to using my T3i when I take trips, I seriously miss my 6D. The image quality really is better too. This may or may not be that big of a deal to you. The truth is, when you post photos online, they are going to be at a lower resolution anyway. However I noticed a big difference shooting my cookbook and I also notice a difference when shooting video. It’s up to you whether the price difference is worth it.
One thing that’s a plus about the t3i, and now the t5i, is that it has a flip out screen on the back. If you are in front of the camera, it allows you to see what’s going on in your viewfinder. Pretty hand for certain things. Truth be told, I love having both cameras so I can use the one that’s best for the current situation. Plus, having two cameras is great for shooting video – but that’s a topic for another day. 🙂
As for lenses, I currently use the Canon EF 50mm f/1.8 lens. It’s a little less expensive than the Canon EF 50mm f/1.4 lens, but I do hear the f/1.4 is nice to have if you want to spend a little more. I also shoot with the Canon EF 100mm f/2.8 Macro lens. I bought the one without image stabilization (I didn’t know better at the time), but again, if you can afford it, the Canon EF 100mm f/2.8 IS is the way to go. I used to use the 50mm exclusively, but now that I have the 100mm I use that most often for my regular food photography. I also just got a Canon EF 35mm f/1.4 USM lens about a month ago. I have to say I love this lens. It’s wonderful for traveling and for video. I don’t use so much for food photography, but I mention it mainly for the videos. The 50mm is great, but can be a little close up. The 35mm is perfect.
The other things I use regularly are my Manfrotto tripod and Manfrotto head (they are purchased separately, but go together) and my wireless remote. The tripod has a center column that extends to allow you to shoot overhead, which is handy. The wireless remote is inexpensive and easy to use. It allows you to take actions shots so that you can do something with the food while also taking a photo.
I recently also got this Sunpak tripod. I primarily got it as a less expensive second tripod for shooting video (since I use two cameras), but if you are looking for a less expensive tripod to start with, it would be an option. I can’t say it’s the sturdiest tripod, but it works well and is easy to use.
If you are shooting with an iPhone and would like a tripod, I use an Acuvar phone tripod. I don’t use it for my regular photography, but have started using it to shoot videos I can post to instagram stories. That’s a whole other ballgame, but since I’m talking about equipment it may be something to think about.
As far as editing, I have been using Adobe Photoshop since college, so I love it. But after being introduced to Adobe Lightroom I have to say I’m a fan. It’s incredibly easy to use and makes photo editing a breeze. Lightroom would definitely be my recommendation. Plus, if you are going to shoot tethered at some point – which I HIGHLY recommend! – it’s a great program to use for that. That said, if you go to buy Lightroom, Adobe sells it right now for $10 a month and it’s packaged with Photoshop.
Now for the actual shooting part.
I shoot in manual and always have. I took one photography class in college (who new I’d be using it now?!) and learned how to use manual from the beginning. There are times that manual is a pain, but that’s usually when photographing people and traveling and such. Photographing food in the context I am talking about today is great with manual because of all the control you have.
I also typically shoot in natural light. That isn’t always the case though. When I started writing my cookbook last year, I quickly realized that with the number of photos I needed to be able to take everyday, there wasn’t going to be enough natural light to go around. It was winter during most of my cookbook photographing, so there was a lot of rain and cloudy days. I decided to shoot my whole cookbook with natural light (and didn’t budge), which meant I had to force myself to get comfortable with artificial lighting for the blog when I had no other choice. I’d had some artificial lights for a while but avoided them and had maybe used them a handful of times. I can now tell you that I am much more comfortable with artificial lighting and it’s a big relief sometimes to have that option. I will tell/show you all about it in a future post.
Ok, so now that we’ve talked about the equipment I use, let’s get down to some of the basics. The truth is, a good camera is important but without the basics of photography, it won’t do much. The camera won’t work itself, you’ve got to work it.
These are the main controls on your camera that you have to work with:
1. Aperture – This is the size of the hole that light goes through when it comes through your lens. The lower the aperture, indicated by an f-stop (like, f/1.4), the bigger the hole and the more light you let in. The higher the number, the smaller the hole and the less light.
The aperture also determines your depth of field. In food photography land that is often known as “the blurry background”. The lower your aperture, the blurry-er the background. I typically have mine set to anywhere from f/3.0 to f/7.1, depending on what I’m shooting and how blurry I want things and how much light I need to let in. People often like to go all the way down to the 1.4 range. For me, how low I go also depends on how close I am to the food. When everything is close together, less is in focus. When you pull back, more is in focus even at a lower aperture.
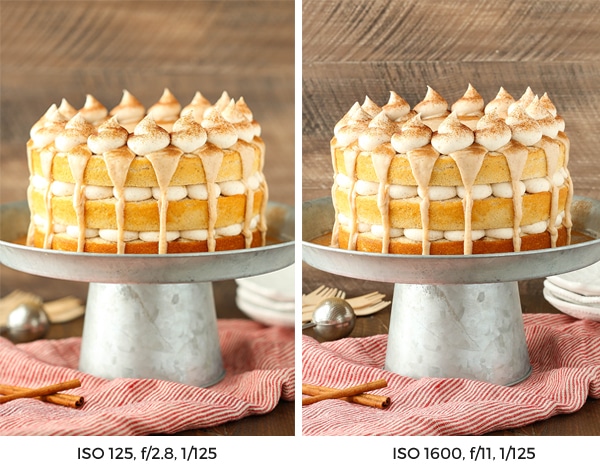
2. Shutter Speed – This is the amount of time the shutter is open to expose the sensor to light. The longer it’s open (slower speed), the lighter the photo. The quicker your shutter speed is (a higher number), the darker the photo. It’s typically represented as a fraction of a second, like 1/125 s, which means your camera is open for one one hundred and twenty fifths of a second. On my camera, you see only the 125, so the higher number means faster shutter, lower number means slower shutter.
The other thing to keep in mind is that shutter speed is important if you are taking action shots where you’ll be moving. If your shutter speed is slower, you will have blurry movement. If you want crisp photos even when something is moving, you’ll need a higher shutter speed, which would mean you’ll need a lower aperture to let in more light.
3. ISO – This number determines how sensitive your camera is to light. The lower the number, the less sensitive and the darker the photo. A higher number means your camera is more sensitive to light, so it’s often used in darker settings to lighten a photo. If you have bright, beautiful light, it’s not an issue. But if you tend to shoot in low light, high ISO is important. Keep in mind though that if you go too high with your ISO, your photos can start to get grainy. One thing that’s nice about the Canon 6D is that you can use a higher ISO before you start to get grainy photos.
So to summarize the three – your camera’s exposure (the total amount of light used to create a photo) is determined by the aperture (which controls the depth of field) and the shutter speed (which controls motion), with the addition of ISO (light sensitivity). Aperture and shutter speed determine how much light goes into the camera, ISO determines how sensitive the camera is to that light. You’ll likely play around with aperture first, then shutter speed, then ISO to get the right settings and take your photo.
As far as where to start if you are really new to using manual, think about it this way. Assuming you are photographing food, start with aperture. If you want it really blurry in the background, go low. If you want more in focus, go high. Next, take a photo. Is it dark? Are your surroundings dark? If the photo is dark, but there’s plenty of light, decrease the shutter speed to allow a longer/brighter exposure. Of course if you’re taking photos with motion, you can’t go too low or you get blur. For food, I usually keep my shutter speed around 1/125. I’ll go down to 1/80 sometimes but not lower, just to account for the fact that I hold my camera and naturally move a bit. If you use a tripod, you can go even lower. Once your shutter speed is where you want it, take another photo. Is it still too dark? Then it’s time to adjust your ISO, take it up and see how high you need it to get the exposure you want. Does that makes? I hope so.
It would be a similar process if your photo is too light after setting your aperture. If it’s really bright, you have no need for a high ISO (which lets in more light). Make sure that’s low and adjust your shutter speed.
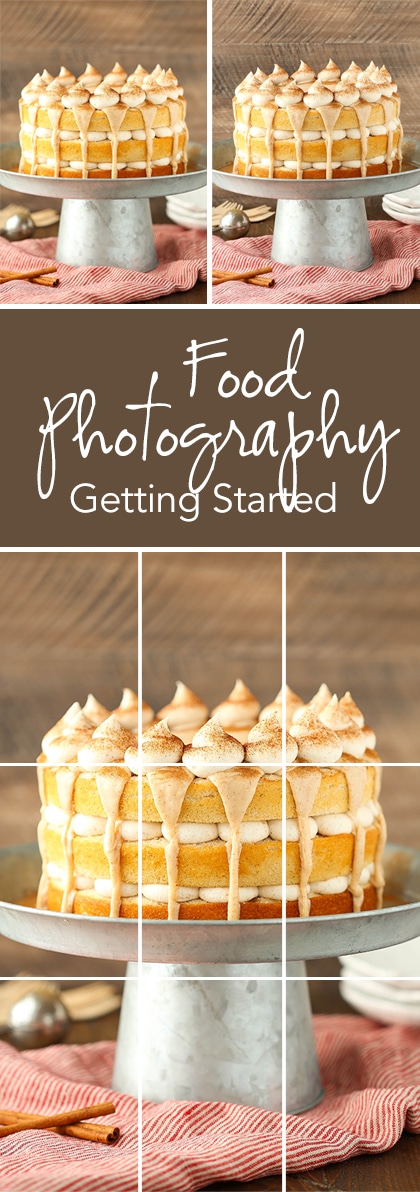
The next thing to keep in mind is composure. There are a lot of things I could say about composure, but the main one to keep in mind when photography food is the rule of thirds. You basically end up with 4 dots that should guide where you have the focal point of your image. It should either be at one of the points or along the lines created. Because of the rule of thirds, you see a lot of great photos where food is off center.
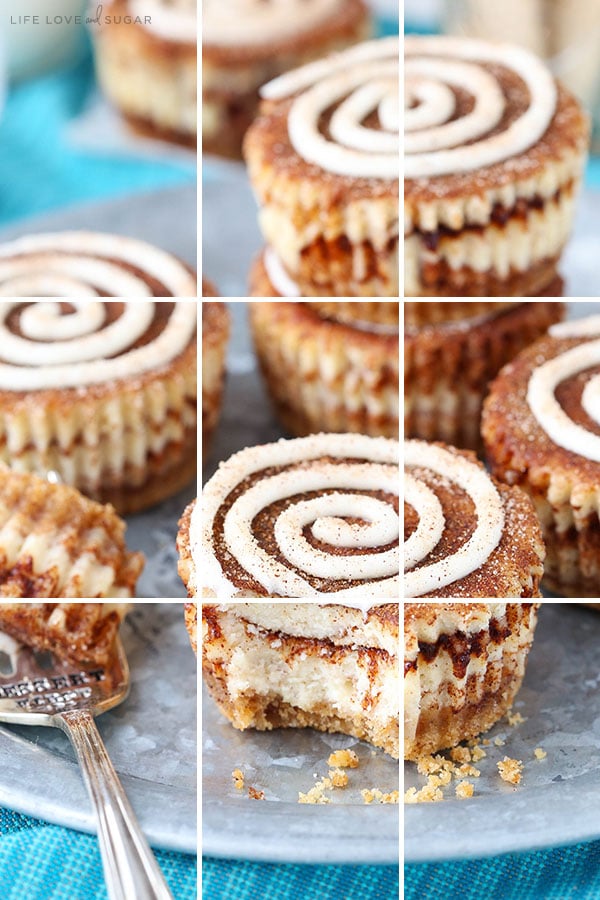
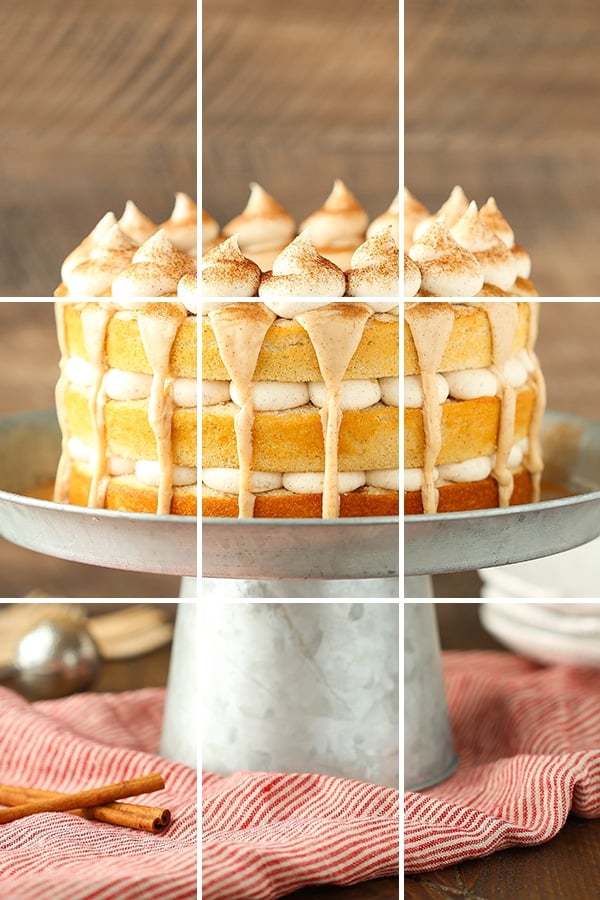
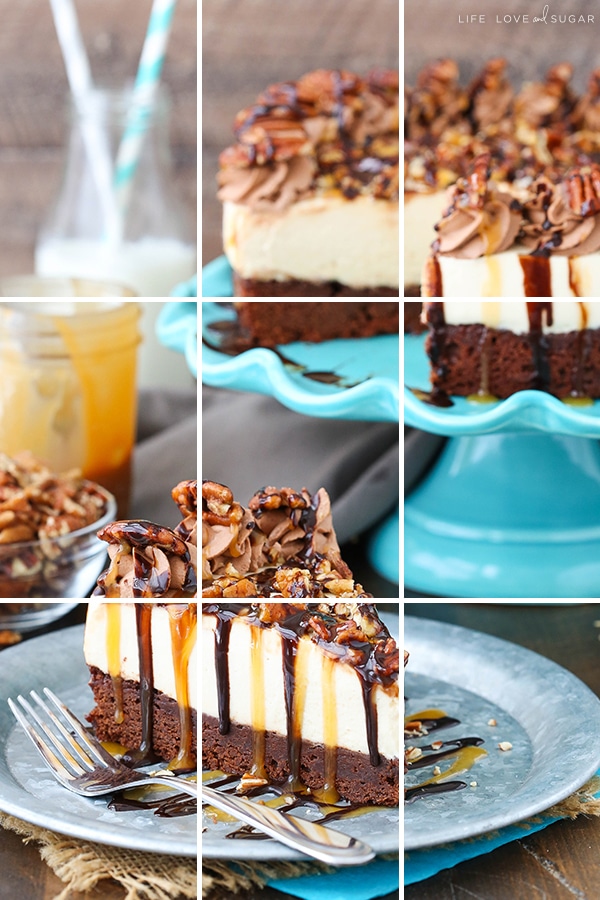
Of course for every rule, there’s a reason to break it. 😉 Sometimes symmetry is all really appealing. Practice, see what you like and vary your photos. the more comfortable you get, the more you’ll learn what you like.
As scary as this all may seem when you get started, it really is fun. It’s become one of my favorite parts. I hope you found all of this helpful and of course feel free to email me or comment below if you have questions. Next, I’ll talk about my artificial lighting set up! Yay!
More great photography resources:
Tasty Food Photography Ebook by Pinch of Yum
Food Photography and Food Styling by White on Rice Couple
This post contains affiliate links.


Thank you for these tips. Just started my blog 😊
Thank you for these posts about food blogging! I’m trying to learn as much as I can. Did you have another post after this one?
I’m glad they’ve been helpful! I actually never quite finished the series. If you have any specific questions though, feel free to email me and I’ll do my best to help.
Can you give more info on the artificial lighting you prefer to use when you have to?
This was a super helpful post!!! I am very technically challenged when it comes to using my rebel for my food photos. So I really appreciate you breaking each part down and using “easy to understand” language.
its so helpful, you don’t know how much i appreciated it… thank you so much!
This is really helpful. I invested in a camera earlier this year but I’m still shooting on auto; don’t get me wrong I’m happy with the results but I’d like to learn how to control the settings myself and this has been the most helpful post I’ve read so far so thank you.
What a great write-up about the process you use for photography, Lindsay. The gorgeous photos have always fascinated me on your blog, and you make it seem nearly possible for the average person to improve with these steps you’ve shared.
Still can’t wrap my mind around shooting manually, though. 😉
Can’t wait for the cookbook to get here in the mail!
Haha, thanks Jennie! Manual is one of those things that you have to play around with a bit to get the hang of it, but I know you could! 🙂
I can’t wait for you to get the book too – just a couple of days!
Great post, thank you for this information!
I’m glad you found it helpful!
This was a great post! I look forward to reading the next one in the series.
I’m glad it was helpful!