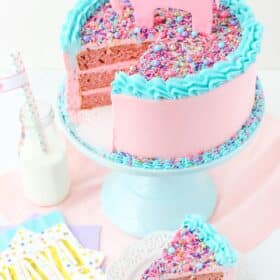
This Strawberry Layer Cake is full of satisfying strawberry flavor! It uses a full cup of strawberry puree for the cake and is covered in strawberry frosting. Strawberry lovers rejoice!
I am SO excited to share today’s post with you! First of all, today is a Surprise Virtual Baby Shower for my friend Ashley, from Spoonful of Flavor. I met Ashley a couple years ago, when I attended my second blog conference. We became quick friends and I’m always excited when I know we are both going to be in the same place and get to hang out. She hosted a retreat last October in Florida that was a blast, too.
There aren’t a ton of bloggers that I know that also work full-time (even though I’ve recently gone part-time) and she is one of them. She is smart, savvy and someone I’ve definitely gone to for advice many times. We’ve had several conversations over the last year about working like crazy, balancing it all and trying to get pregnant. I am SO thrilled for her to have her sweet baby girl arriving in August. I know she’ll make an awesome mom!
She recently shared a post (Design A Baby Girl’s Nursery) on Facebook and her blog that showed how the nursery is coming along and all the colors and details she has planned. It was her color choice and “adventurer” theme that inspired her cake. The only bummer about a virtual shower is that I couldn’t give this cake to her in person. 🙂
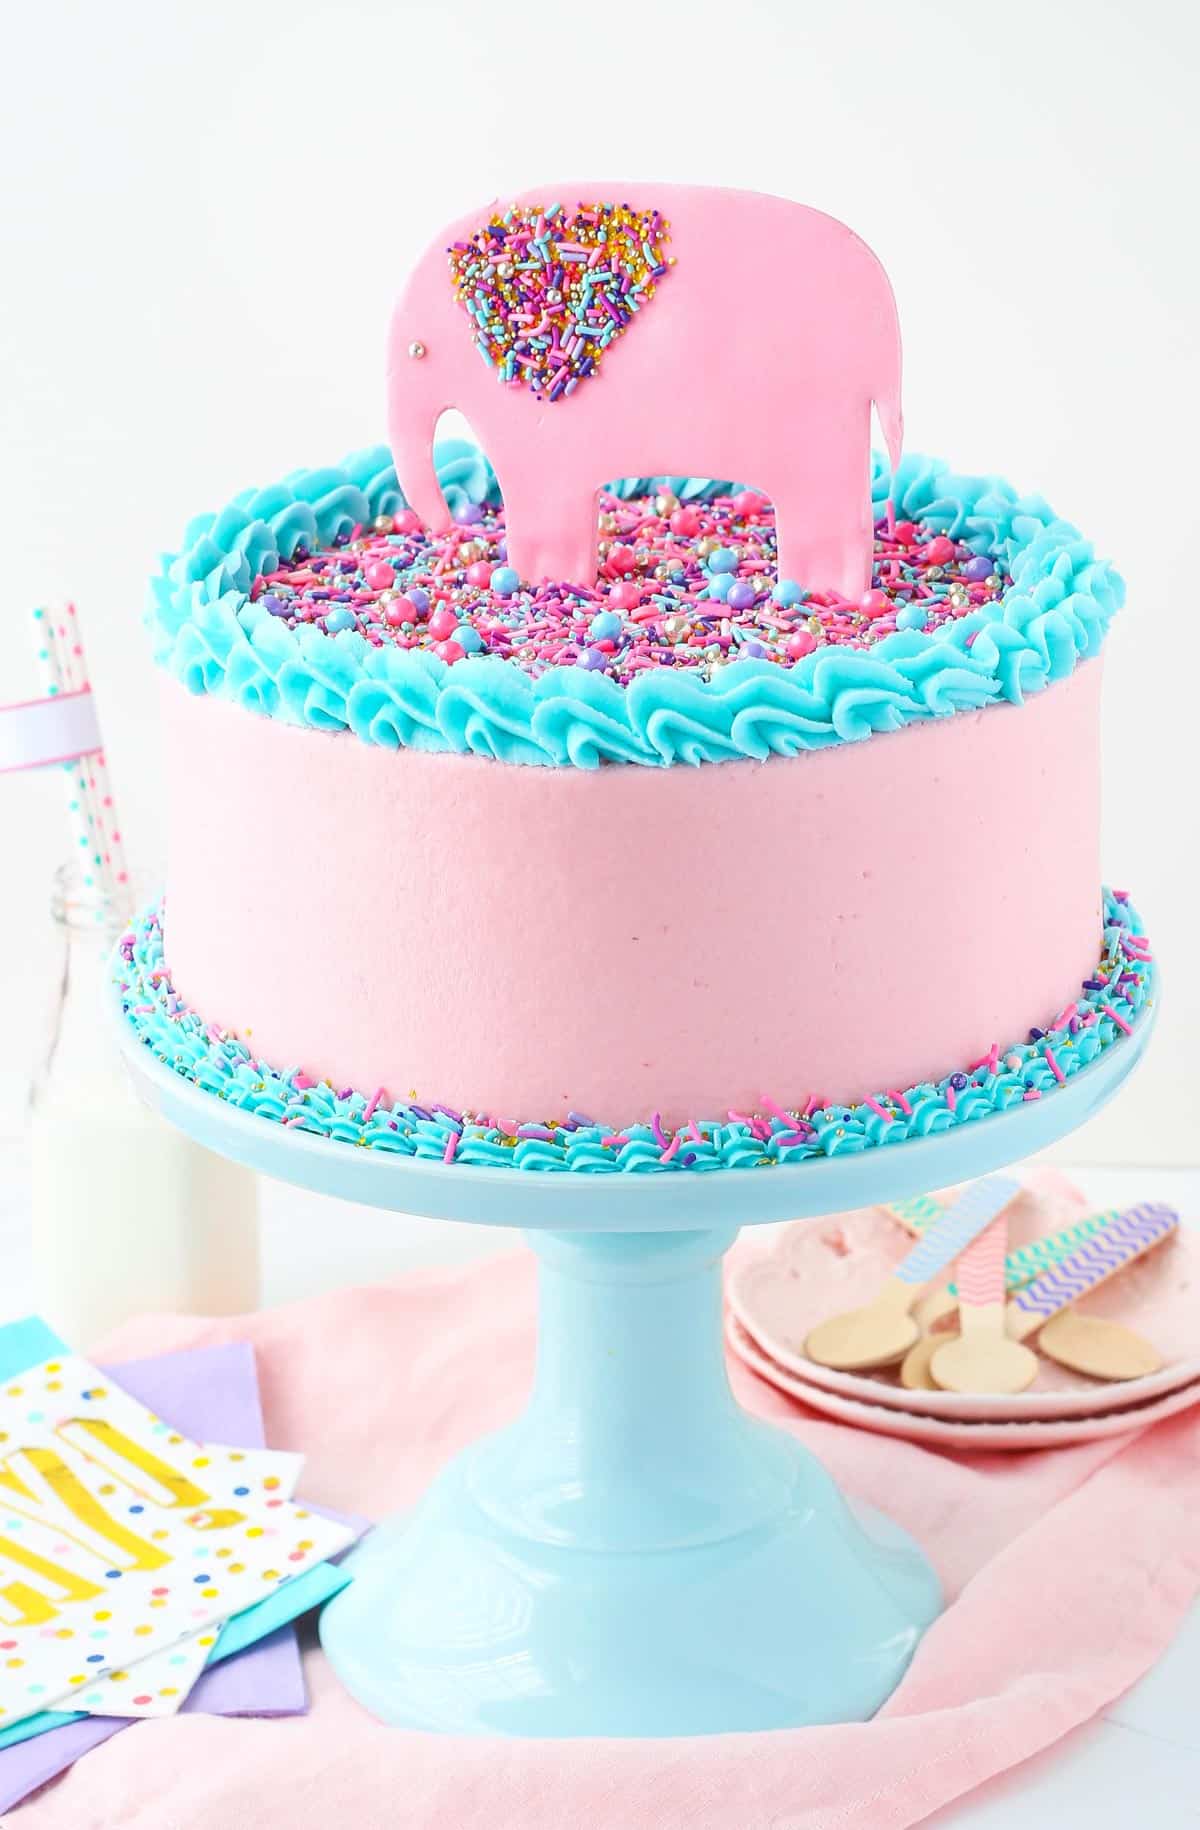
Going off of her nursery theme, I decided to use the colors pink and teal. Just my luck the sprinkles I chose had some dark purple in them that almost looks like navy, which was her third color. Unfortunately the sprinkles that I thought seemed pretty teal ended up being more blue than I thought. I noticed when I was coloring the frosting, so the frosting is a bit bluer than I’d planned. Oh well!

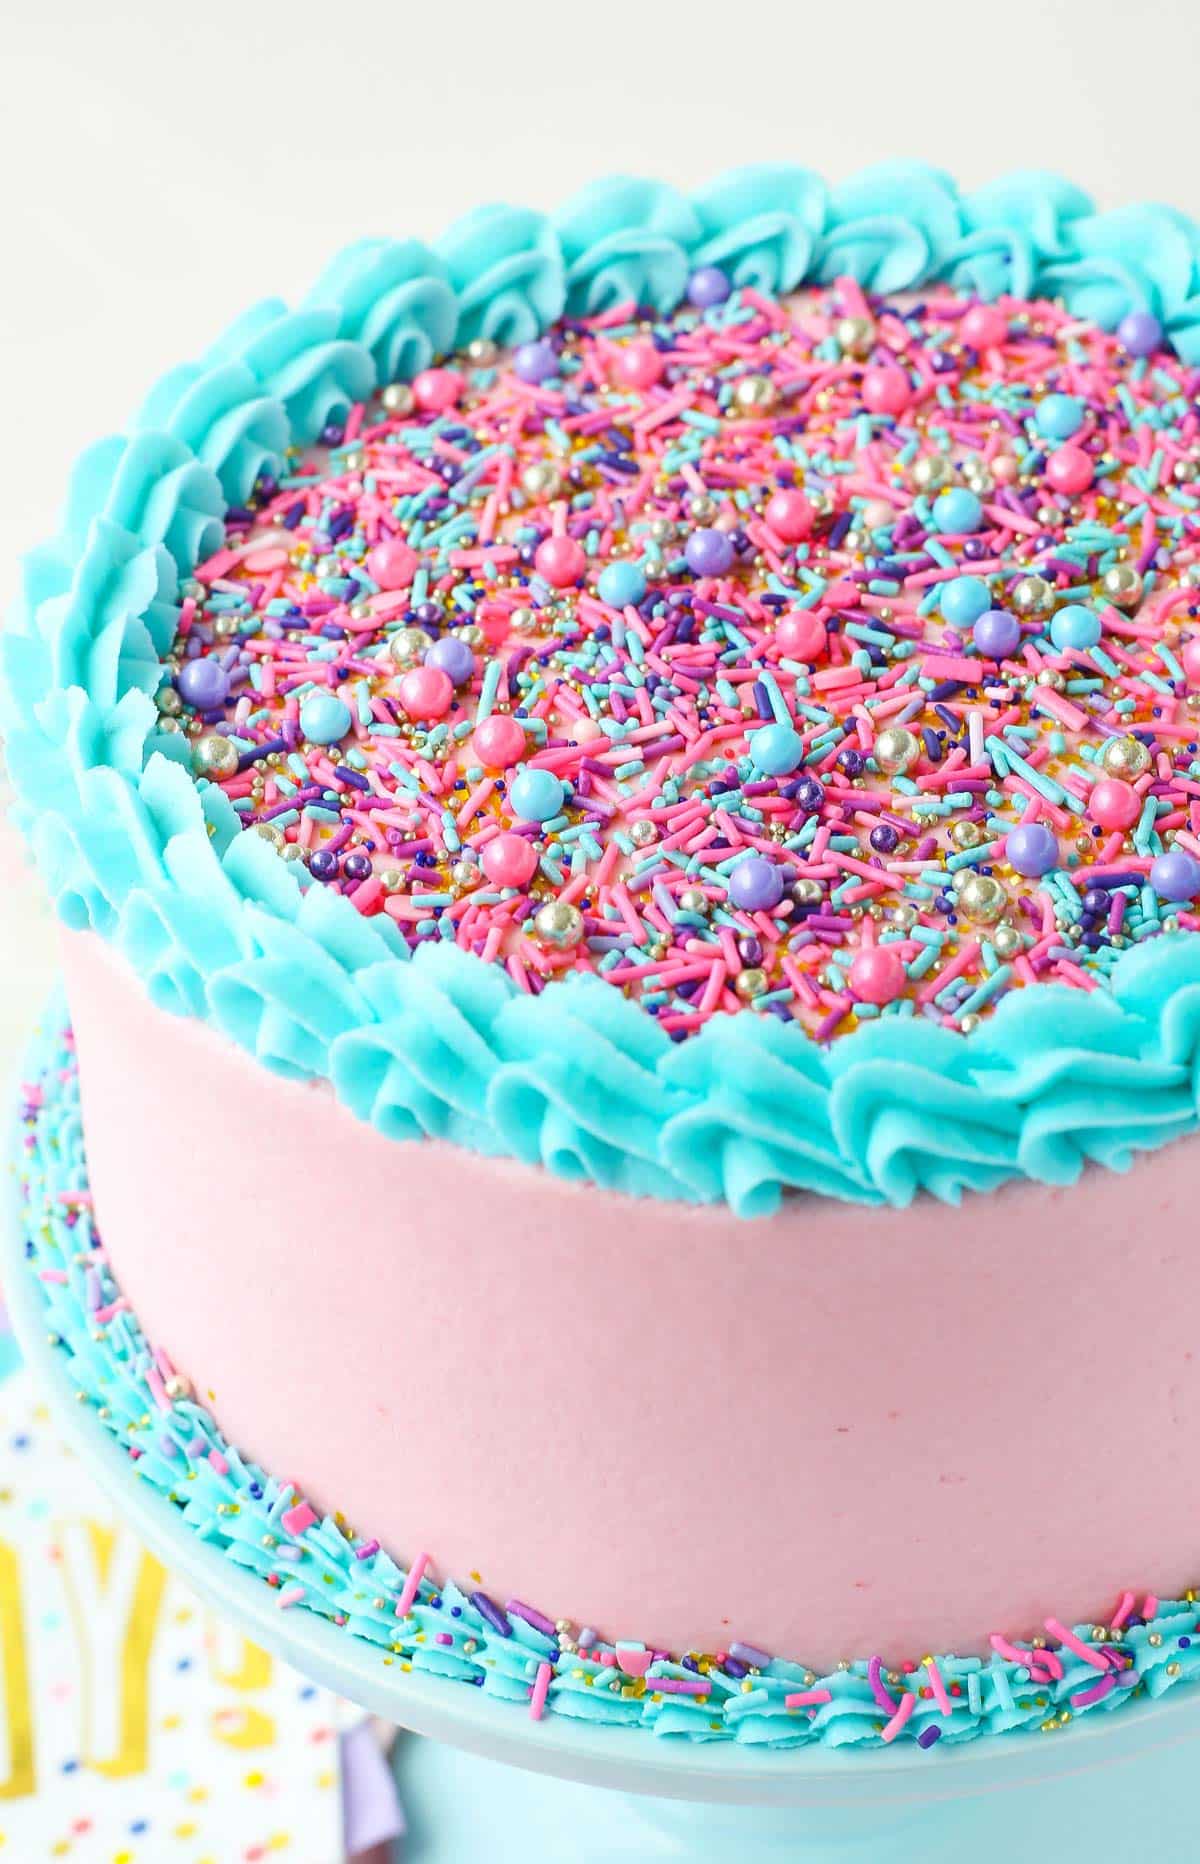
Speaking of the sprinkles, have you seen the new line of sprinkles from Sweetapolita? I’ve always loved her sprinkle mixes and now you can buy them from her!
Then I added the elephant to finish off the adventurer theme. He’s complete with a sprinkle ear – my favorite part! 🙂 You’re going to want to use gum paste, or a mix of fondant and gum paste, to make the elephant. If you just use fondant, it will take FOREVER to fully harden – if ever. Gum paste is made to dry much quicker and firmer, so that’d be my suggestion.
Why This is The Best Strawberry Cake Recipe
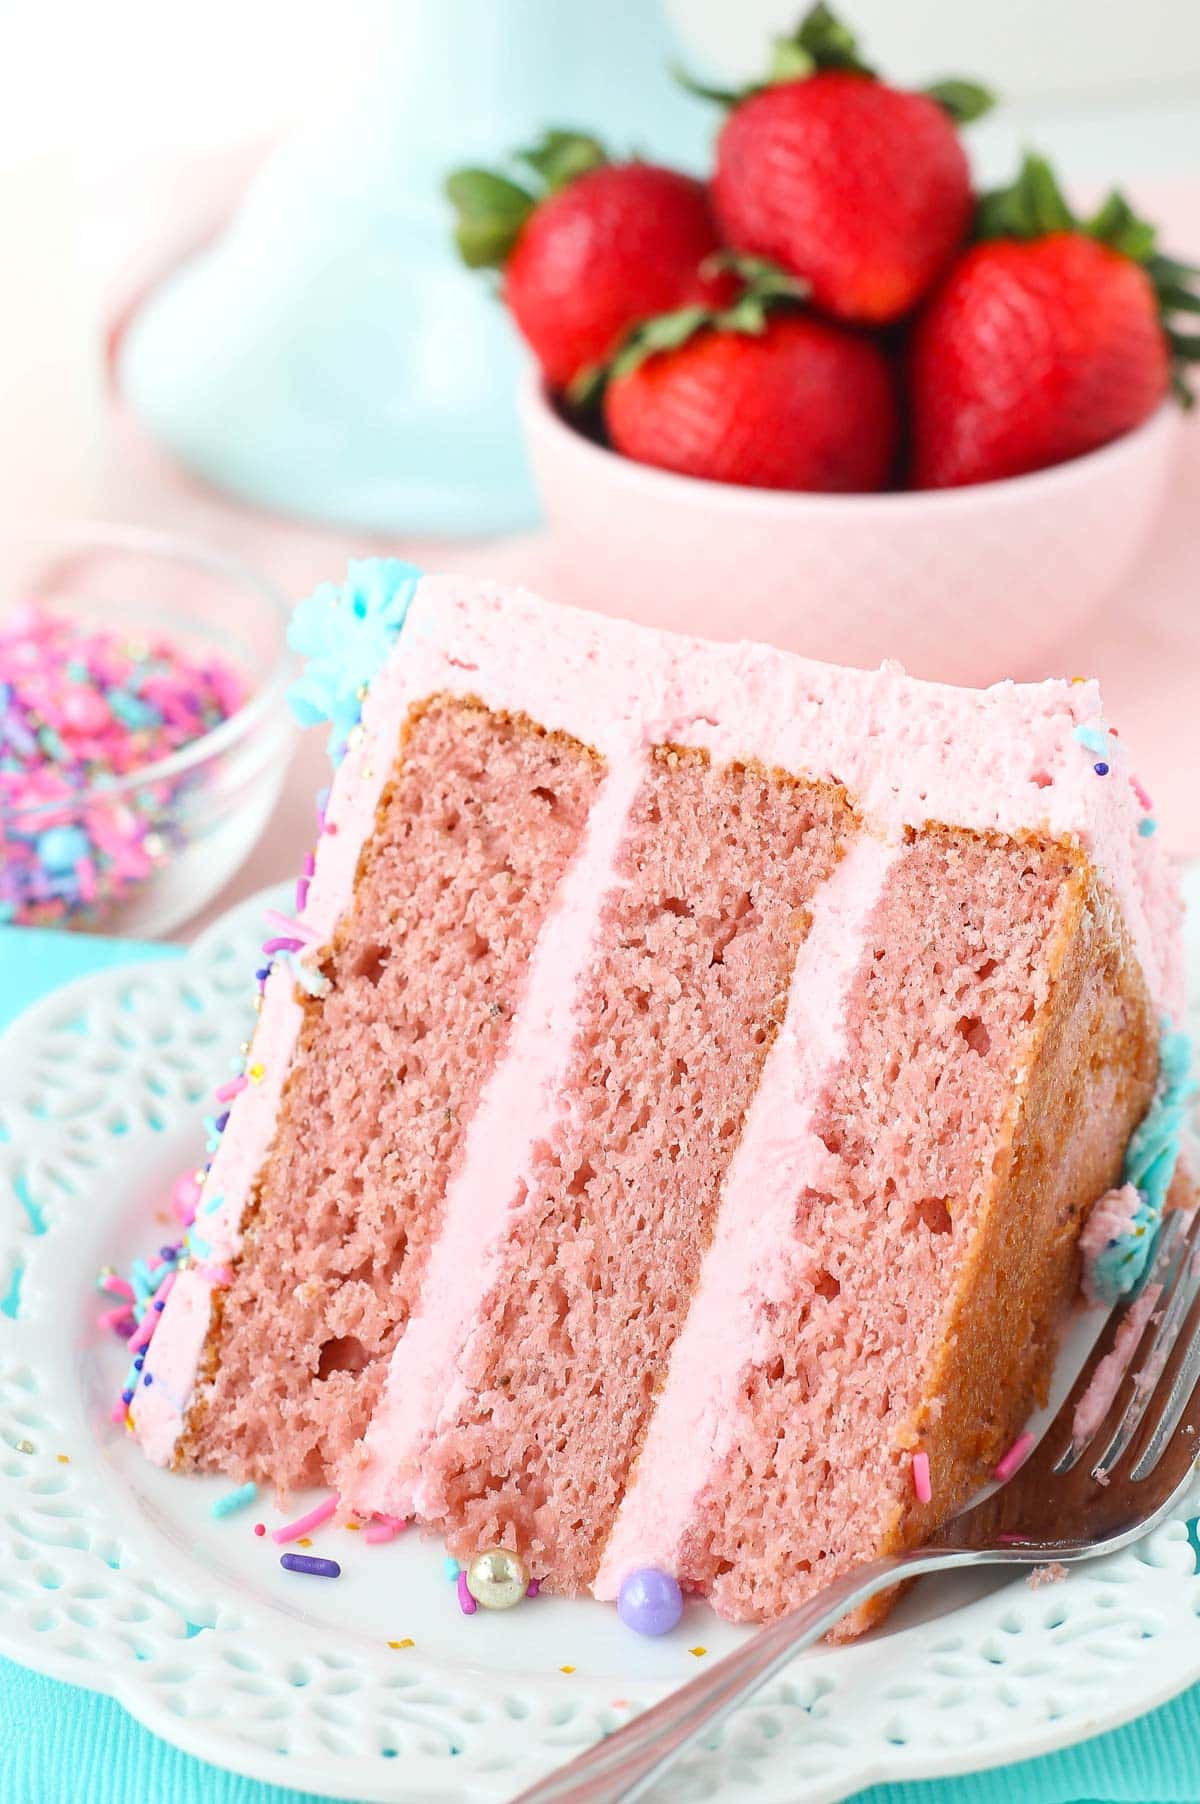
So let’s talk a bit about the recipe. This strawberry cake was a doozie to get right. I played with so many versions of it, it was crazy. I played around with the moisture of the cake – sour cream, milk, buttermilk – and the leavening – baking soda vs baking powder. Ultimately I found the sour cream to give the moistest cake and a mix of baking soda and baking powder to be best. I wanted to stick with all baking powder because the soda altered the flavor and color of the cake, but it also helped it bake better (for lack of going into too much detail). I ended up with a mix of the two to get the best of both worlds. I LOVE the final result! It’s super moist, fluffy and FULL of strawberry flavor with a whole cup of strawberry puree! Just a note about the flavor and the strawberries – because the full flavor of the cake comes from the strawberries you want to be sure to have great tasting strawberries or you won’t get the flavor in the cake.
Finishing the Cake and the Frosting
When making the batter, be sure to fully cream the butter and sugar. It adds air to the batter than is important when it bakes to get that nice, fluffy texture.
For the strawberry frosting, I also used strawberry puree. However for the frosting, I strained the puree through a fine mess sieve first. This removes the pulp and seeds, so that you get the flavor and light pink color but you don’t have the pulp and seeds ruining that perfect smooth finish. I wanted to really go strong with the strawberry flavor, so I added a bit of strawberry extract to the frosting too. That’s totally optional. It’d be delicious without it too – I just LOVE LOVE me some strawberry.
I also added a bit more pink color to the cake and frosting. You certainly don’t have to. I wanted the full pink effect for the baby shower cake and wanted the color of the frosting to match the sprinkles a little more. If you choose not to add coloring, you’ll have a much lighter pink. The cake will also be a duller shade of pink.

Once the cake is baked and the frosting is ready, it’s time to build and frost the cake. To get that nice, smooth finish with buttercream, check out my tutorial on how to frost a smooth cake with buttercream. Once thing I’ll note is that I added a bit more strawberry puree (moisture) to the frosting than I normally would to get the flavor in there. It made the frosting a bit thinner than I normally use. It’s still plenty thick to frost the cake, but when it comes to smoothing the cake with the paper towel in the tutorial I linked to, the frosting will be a bit sticky. I refrigerated the cake for about 5 minutes and then did the paper towel. You won’t want to refrigerate it too long first though, or the frosting will be too firm to smooth.
As for the super cute elephant on top, I’d actually recommend making him in advance so you have time to let him firm up and dry. I colored the gum paste with a mix of pink icing color and burgundy icing color (the same as for the frosting). Feel free to cut out your own shape elephant, or download the elephant template I used. Cut it out and use it to trace the elephant with an exacto knife to cut him out.
Next, stick some toothpicks or thin skewers into his legs so that he can stand up on the cake. I then used my exacto knife to mark the ear area and used a sugar solution to paint the area and get it sticky. To make the sugar solution, I dissolve some gum paste in a very small cup of water. I usually add 1-2 tablespoons of water and then dissolve gum paste in it – about a small grape size worth. I figure the more gum paste, the more stickiness.
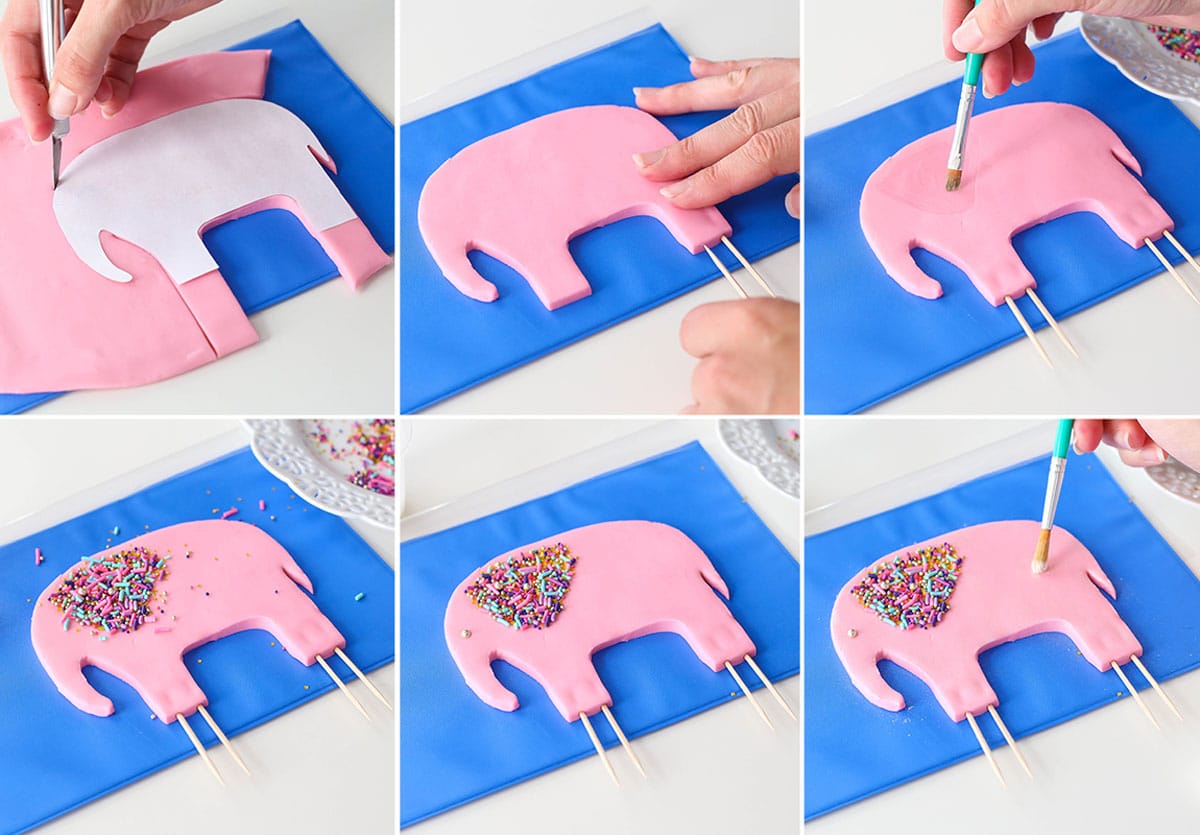
Add the sprinkles to the sticky area, lightly pressing them onto the elephant. Allow it to dry for 5-10 minutes, then brush off the excess sprinkles. I also put a small drop of sugar solution in the eye area and added a sprinkle for the eye. I lightly dusted my elephant with a bit of white pearl dust to give him a bit of sheen, but that’s totally optional.
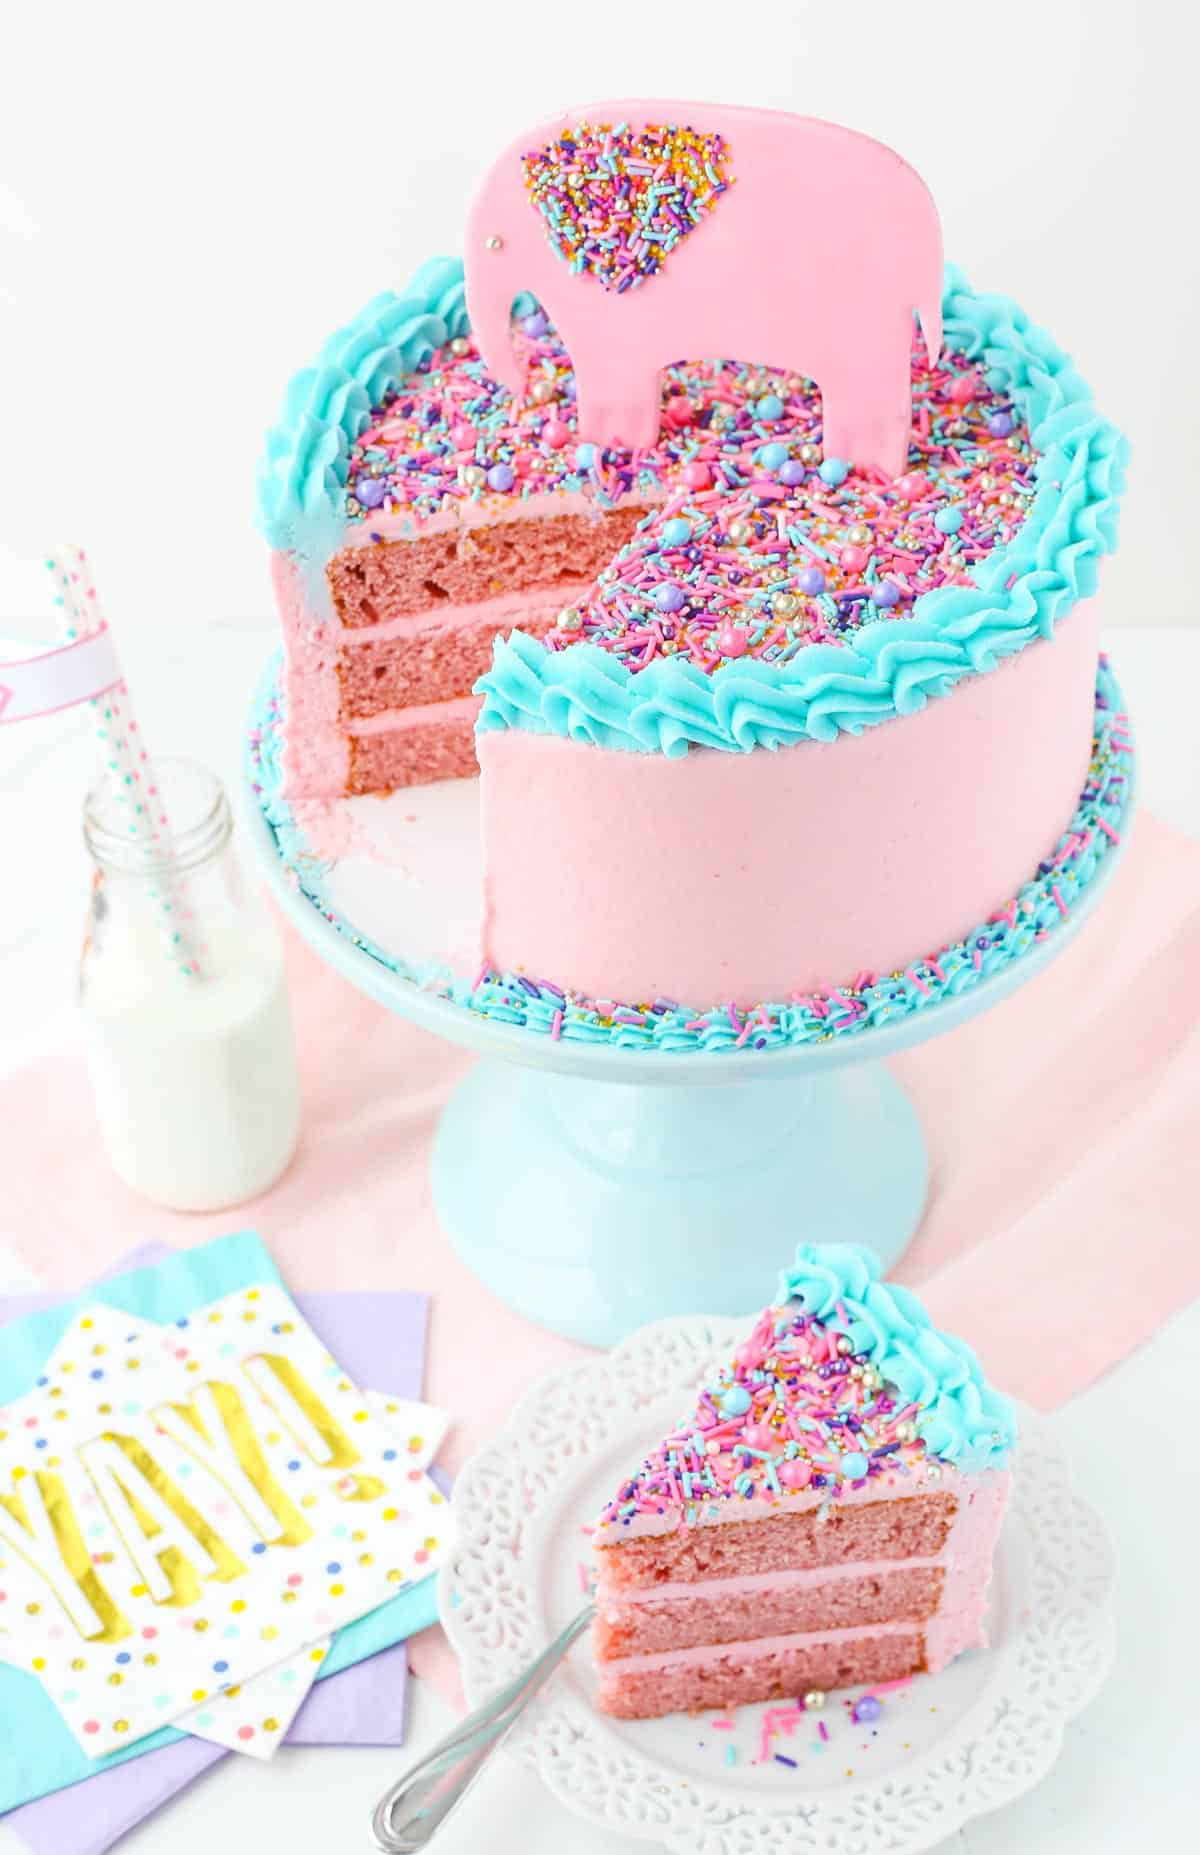
Set the elephant aside to dry and harden. Once he’s ready and the cake is smoothed and beautiful with sprinkles, press him into the top of cake and you’re done!
This cake was so much fun to make and even more fun to eat! It makes a great baby shower cake, but of course you can forgo all the decoration and just make one heck of a delicious strawberry layer cake, if you prefer. The flavor is outstanding and for a strawberry lover like myself – it was to die for!

More Strawberry Dessert Recipes
- Homemade Strawberry Cake
- Strawberry Shortcake Cake
- Strawberry Truffle Cupcakes
- Easy Lemon Strawberry Trifle
- Chocolate Covered Strawberry Cheesecake
- Strawberry Cupcakes with Cream Cheese Frosting
Strawberry Layer Cake
save this recipe
Enter your email & we’ll send it to your inbox. Plus get new recipes from us every week!
Ingredients
Strawberry Cake
- 3/4 cup (168g) unsalted butter (room temperature)
- 1 1/2 cups (310g) granulated sugar
- 3/4 cup (173g) sour cream (room temperature)
- 4 large eggs (room temperature)
- 2 1/2 cups (325g) all-purpose flour
- 4 1/2 tsp baking powder
- 1/2 tsp baking soda
- ½ tsp salt
- 1 cup (240ml) strawberry puree (from 2 cups (280g) chopped strawberries*)
- 7-9 drops pink food color
Strawberry Frosting
- 1 1/2 cups salted butter
- 1 1/2 cups shortening
- 12 cups (1380g) powdered sugar
- 1/2 tsp vanilla extract
- 6-7 tbsp strawberry puree (strained, from 2/3 cup (93g) chopped strawberries)
- 3/4 tsp strawberry extract (optional)
- Pink and burgundy icing color
- 2-3 tsp water
- Teal and sky blue icing color
Additional
- Sprinkles (if desired)
- Gum paste (if desired)
- Toothpicks (or thin skewers)
- White pearl dust (if desired)
Instructions
Cake
- Grease three 8-inch round cake pans and preheat oven to 350°F (176°C).
- Beat the butter and sugar until light and fluffy, about 3-4 minutes. Do not skimp on this step. Cream the butter for the full 3-4 minutes.
- Add sour cream and mix until well combined.
- Add eggs in two batches, mixing until well combined.
- Combine dry ingredients in another bowl. Add half of the dry ingredients to the batter and mix until well combined.
- Add the strawberry puree and mix until well combined.
- Add remaining dry ingredients and mix until well combined.
- Divide batter evenly between the cake pans and bake 24-26 minutes or until a toothpick inserted comes out with a few crumbs.
- Remove cakes from oven and allow to cool for 3-4 minutes, then remove to cooling rack to cool completely.
Frosting
- Beat the butter and shortening together until smooth.
- Slowly add about 1/2 of the powdered sugar, mixing until smooth between each addition of powdered sugar.
- Scoop out about 1 cup (240g) of frosting and set it aside for the teal blue frosting.
- Add the vanilla extract and 6 tablespoons of strawberry puree to the remaining frosting and mix until smooth.
- Slowly add the remaining powdered sugar, mixing until smooth between each addition of powdered sugar.
- Add remaining strawberry puree, if needed, and strawberry extract and mix until smooth.
- Color the frosting with pink and burgundy icing color, if desired.
- For the teal blue frosting, add 2-3 teaspoons of water, if needed to thin it out a bit, then color with teal and sky blue icing color.
Assembly
- Use a large serrated knife to remove the domes from the tops of the cake layers so that they are flat.
- Place the first layer of cake on your serving plate or on a cardboard cake circle.
- Spread 1 cup (240g) of strawberry frosting into an even layer.
- Add the second layer of cake, then another 1 cup (240g) of strawberry frosting.
- Top the cake with the third layer of cake.
- Frost the outside of the cake with the remaining frosting. For help getting a smooth finish, refer to my tutorial – how to frost a smooth cake with buttercream.
- Pipe shells around the bottom and top edges of the cake using the teal blue frosting. I used Wilton tip 21 for the bottom and Ateco 844 for the top. Wilton 2D is similar to the Ateco 844 tip.
To Finish It Off
- If desired, top the center of the cake with sprinkles, then add a few around the bottom.
- To make the elephant, please refer to the instructions and photos in the post above. I suggest making the elephant a day or two in advance, so it has time to dry and harden.
Notes
Nutrition
The nutrition facts provided are calculated using a third-party tool and are estimates only. Actual nutritional content may vary based on the ingredients and brands you use, as well as portion sizes. For accurate results, please consult a registered dietitian or nutritionist.
Enjoy!
This post contains affiliate links.


Do I need to add the shortening?
No, you can replace it with additional butter in the same amount.
I made this cake for my nephew’s birthday and it was very delicious. It had great strawberry flavor. I will definitely be making this again when we have a craving for strawberry cake. For the frosting, I made a strawberry whipped cream because we wanted to make a lighter frosting.
One question I had was I saw another recipe and video of yours for Homemade Strawberry Cake. I’m curious how different it is with the one I made?
https://www.lifeloveandsugar.com/homemade-strawberry-cake-recipe/
I’m glad you enjoyed it!
The other recipe is actually my newer strawberry cake. The recipes are quite different. The ingredients and method are different. You actually use even more strawberry puree and reduce it over the stove to increase the strawberry flavor.
Ah ok. Maybe I’ll give the newer recipe a try next time. I can’t say no to more strawberry flavor. Thanks!
Hello, I am wanting to try this cake recipe and would like to know if I can color the strawberry frosting a brown and also green? The theme is Jurrasic World. Or would the strawberries alter the frosting color. Should I stick to a classic buttercream recipe?
Your help is greatly appreciated!
You’d want to use a white buttercream to get accurate colors.
I loved the buttercream! The cake came out a bit dense, almost like cornbread, so I added a strawberry glaze in between the layers.
hey! I was wondering if this cake could be frozen for a few weeks before defrosting and icing it? 😊
I haven’t tried it, but I assume it would be fine.
I want to make this for this weekend. Do you boiling fresh strawberries then blended it or you just go ahead and blend it in blender to make it purée? Also do you add sugar to it??
In this recipe, I just puréed them. But I would check out my newer strawberry cake as well. I make a strawberry reduction to give a stronger strawberry flavor, so you could try that too. https://www.lifeloveandsugar.com/homemade-strawberry-cake-recipe/
Do you think this could work with a cream cheese frosting instead? Like the one here – https://www.lifeloveandsugar.com/strawberries-cream-cheesecake-cake/. I don’t trust myself making a cheesecake, so I’d just keep these layers.
That would be fine. You could also use this Cream Cheese Frosting.
Hi! could I use frozen strawberries for the puree?
Yes, but you really want to make sure to get rid of the excess water. The strawberry flavor comes from those strawberries and if too much water is added from the frozen berries, it’ll water down the flavor.
Hi!
I love your cakes!
I want to make this for my daughters birthday party this Saturday but would need to make it ahead of time on Thursday. I know you can’t say for this specific recipe but I’m general how ahead of time can you make a cake? And how would I best store a cake like this one?
Thank you!
I generally say a day ahead is best. Two days is fine. I have stretched it to three before and had it be ok though. I generally like to store my cakes at room temperature, but if you are going to make it a few days ahead I might refrigerate it and then bring it back to room temperature before serving it. I have several of these cupcake carriers that I use to store my cakes. You can remove the cupcake inserts and then it leaves a large space for a tall cake.
Hi there, I am making your cake for my daughter’s 4th b-day. She loves elephants. Is there anything else I need to do or add to make the strawberry puree for the cake besides pureeing the berries? Also, do you think I can double the puree to provide more strawberry flavor?
Nope, just puree the berries! I wouldn’t double the puree, but you could add some strawberry extract, if you like.
Dear Lindsay,
I am cray-cray about your recipes! I love how you present it and everything.
I’m looking forward to trying this recipe for my cousin’s 12th birthday party. Just two questions. One: If I can’t find strawberry puree at the shops (since I don’t have a food processor), can I just use strawberry extract? Two: I only have a 10-inch round baking pan. Will I have to double the recipe?
Thank you in advance. Love your baking!
I’m so glad to hear you enjoy the recipes!
If you aren’t able to use strawberry puree, I’d suggest taking a look at this recipe. There’s still a touch of puree in it, but it can be replaced with water and you can up the extract by maybe a 1/2 teaspoon. It’s cupcakes, but can be doubled for an 8 inch cake. If you are going to use 10 inch pans, you’d probably want either 1 1/2 recipes worth or to double it. I’m not entirely sure which, since I don’t make a lot of 10 inch cakes. I hope that helps!
How do you make your strawberry puree? Do you add sugar to it?
Yikes! I’m about to make this cake and just noticed that you did not specify how much baking soda. Teaspoon or tablespoon?
It’s a 1/2 teaspoon.