This post may contain affiliate sales links. Please read my disclosure policy.
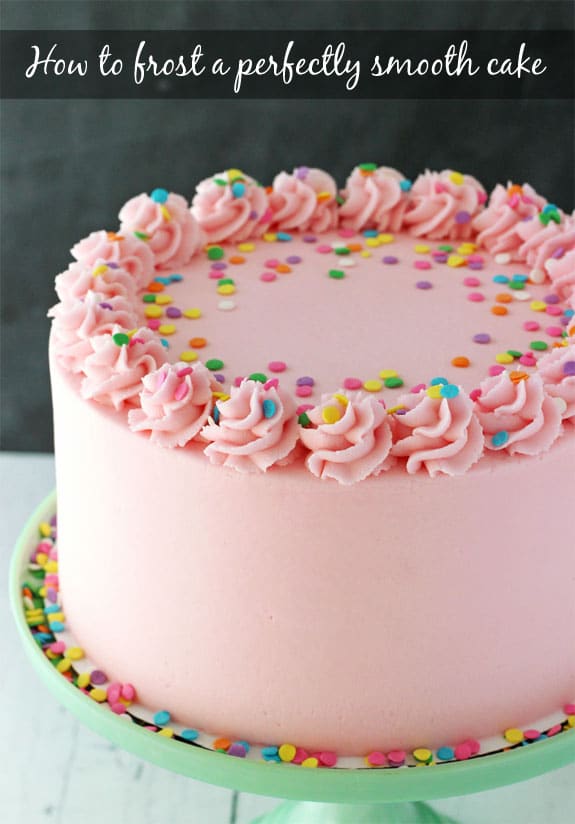
Today’s tutorial is all about how to frost a smooth cake. Getting that nice, smooth finish when icing a cake can take some practice, but I have been asked so many times about how I get my icing so smooth, I’ve finally put together some instructions that I hope will be helpful. Just remember you have to be patient. My first cake did not look like my current cakes. It took practice – and the right tools.
Want to frost cupcakes? See my post on how to beautifully frost your cupcakes!
Watch How To Do It
So to start, let’s talk about the tools you’ll need:
- Icing tips (Wilton #789 for icing the sides and Ateco 844 for piping the border)
- Icing bags
- Turntable (I use Wilton Trim-N-Turn Ultra Cake Decorating Turntable)
- Icing smoother (I 100% recommend Ateco Decorating Comb over any other)
- 9 inch offset spatula (I use Wilton Angled Spatula)
- Fondant smoother (I use Wilton Easy Glide Fondant Smoother)
- Viva paper towels (Viva brand specifically)
Let’s talk about that icing smoother for a second. I linked to it above, but it’s an Ateco smoother that costs less than $5. It is the best money I have ever spent on a tool. I used to use another one, but it was big and clunky and I had no idea how much it hindered my ability to get a nice, smooth cake until I tried this one. It’s lightweight, small and easy to use.
In addition to those tools, you’ll obviously need a cake and some icing. I used regular American Buttercream (American Buttercream recipe here). For my cakes that are about this size, I go through about 2 1/2 recipes worth.
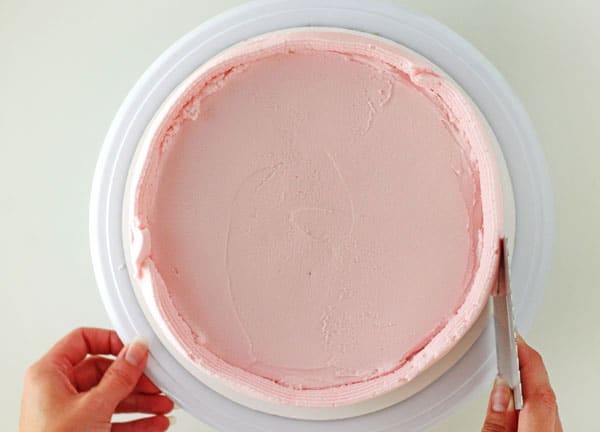
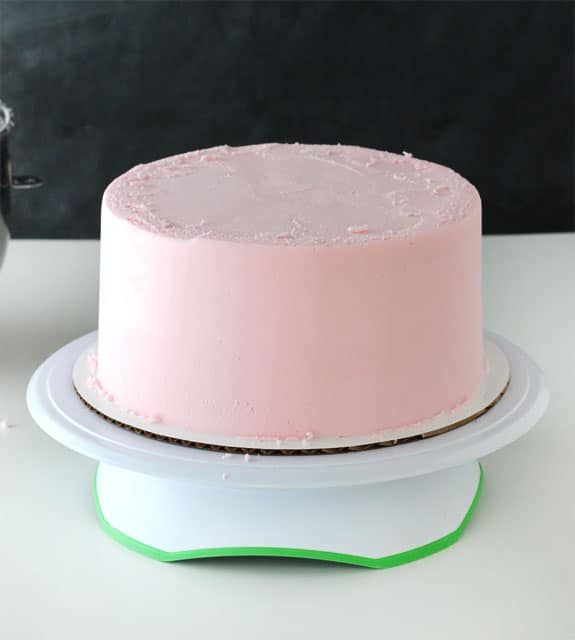
For this tutorial, I started with a cake that was already crumb coated and had a layer of icing on the top of the cake. It’s important to already have the top layer on the cake and get it as smooth as you can with your offset spatula. It’ll get further smoothed later, but it’s best to have it smooth now too.
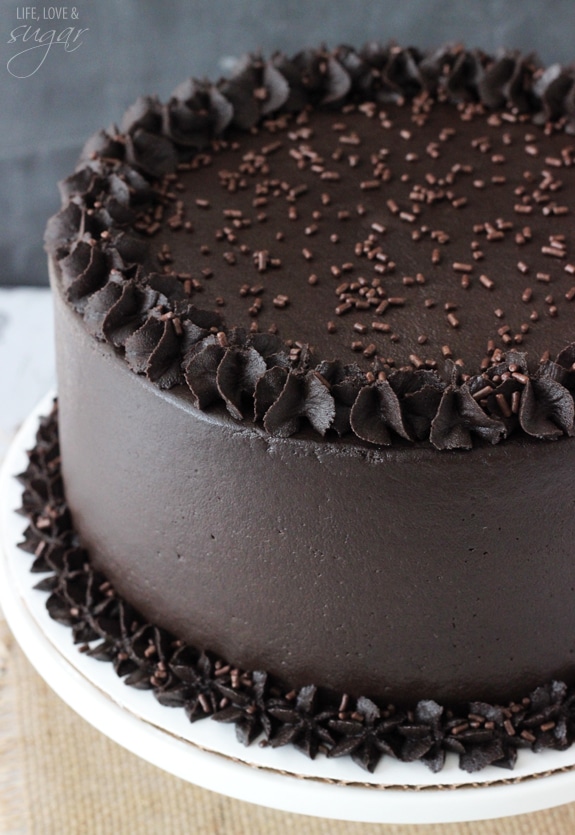
The crumb coat isn’t entirely necessary for every cake. Typically chocolate cakes are more likely to need them, since they tend to have more crumbs. But because of the way I add my icing, it’s not always necessary. I use an icing tip and bag, which reduces crumbs mixing into the icing.

How to Frost a Cake
So to get started from here, you’ll want your icing bag fitted with the Wilton #789 icing tip and filled with icing. Starting from the bottom of the cake, pipe icing around the edge, trying to keep even pressure on the bag so that the layer of icing is even.
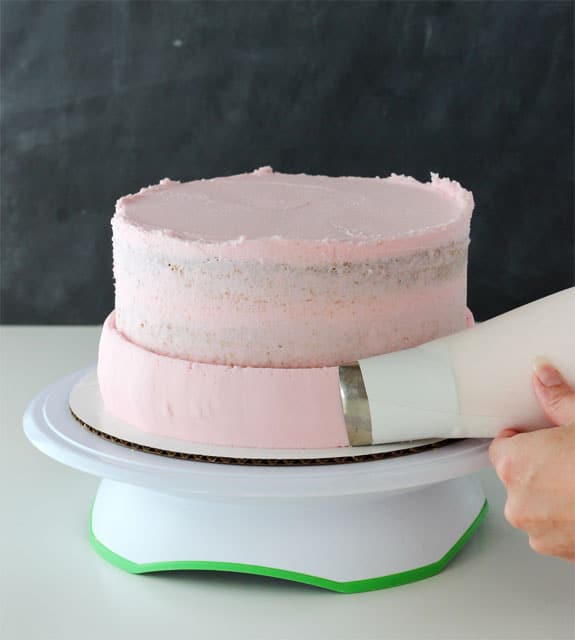
You’ll have multiple layers of piped icing, depending on the height of your cake. The top layer needs to stick above the top edge of the cake. This will be important later for smoothing the top edges/corners of the cake.

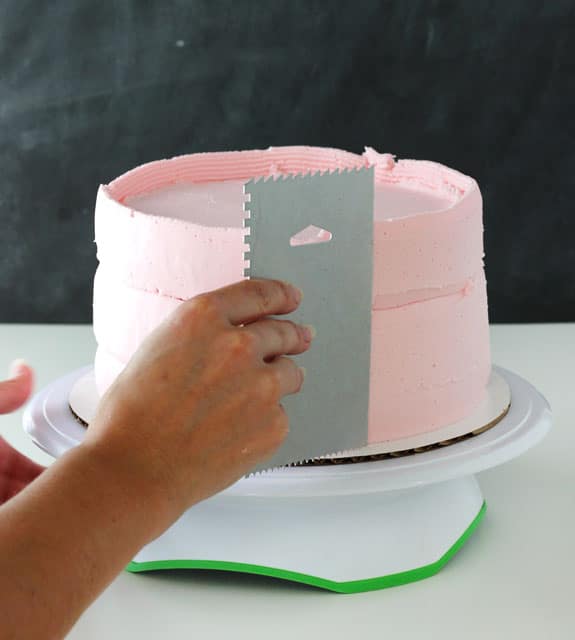
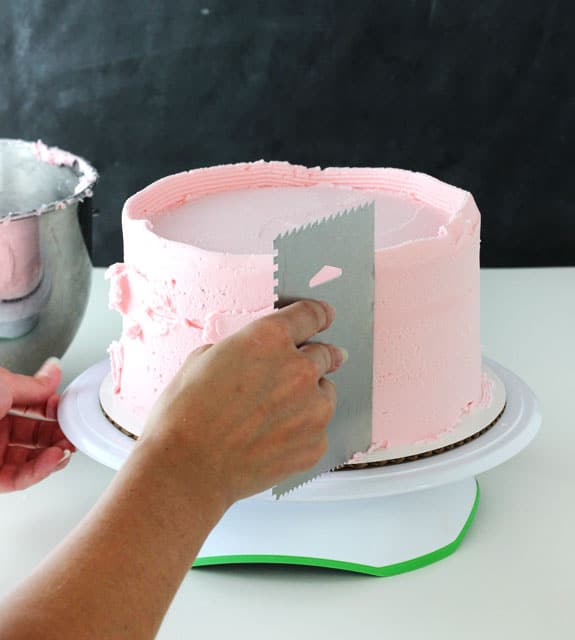
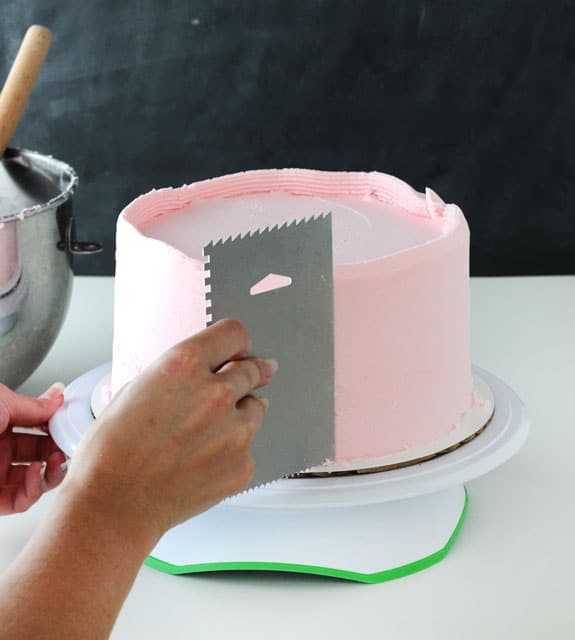
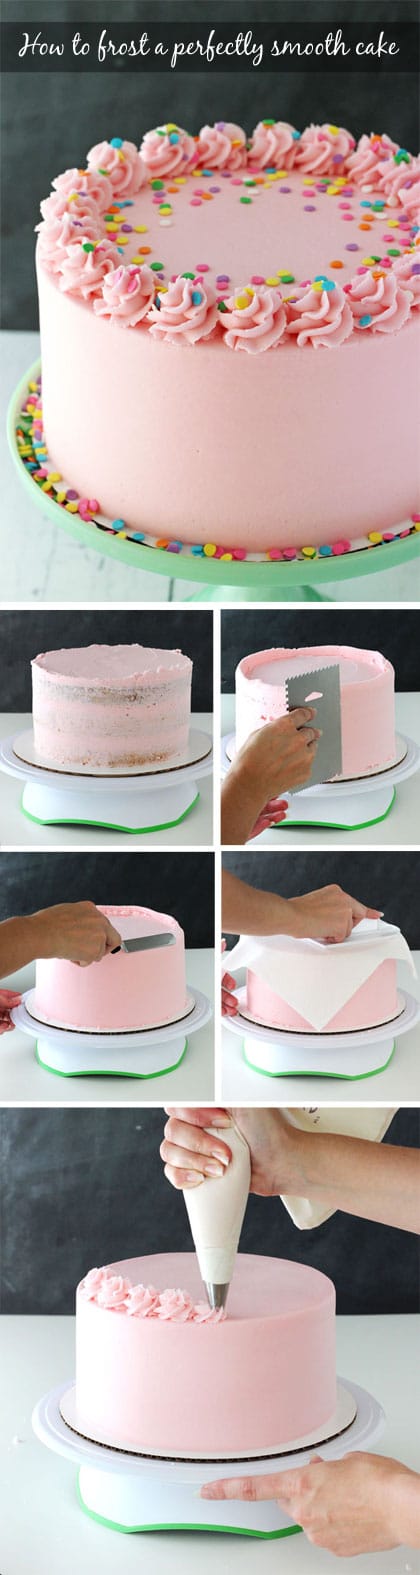
When you are done applying the icing to the sides of the cake, it’s time to smooth it. This is where the icing smoother comes in. Place it against the side of the cake. You want to hold it straight up and down, as straight as possible. Hold your icing smoother in the same place and use your other hand to turn the turntable. Continue to turn the turntable, scraping the icing off of the smoother occasionally so that there isn’t too much buildup. I clean off my smoother regularly and when I scrape the excess icing off of it, I usually also wipe it with a paper towel, so that there isn’t anything left on there that will mess up the icing once I place it back on the side of the cake.
Here is an image showing the angle at which I hold the smoother. I really believe the angle makes a big difference in the way the icing smooths. Do not hold it at 90 degrees. The tighter the angle (like shown), the better the excess icing pulls around the cake and fills in gaps.
After doing a few turns of the turntable, you’ll notice some gaps that are deeper and should probably be filled in. I usually notice it at the “seems” where the three layers of icing were piped on. At this point, use your offset spatula to add some icing to the gaps. You’ll want to have a little excess icing, rather than too little.
Begin smoothing the sides again, pulling the excess icing around the cake to fill in gaps, then wiping off the icing smoother as needed.
Continue working around the outside of the cake, pulling the icing, then scraping it off of the icing smoother. You can fill in more gaps if needed, just keep working the sides until you are happy with it.
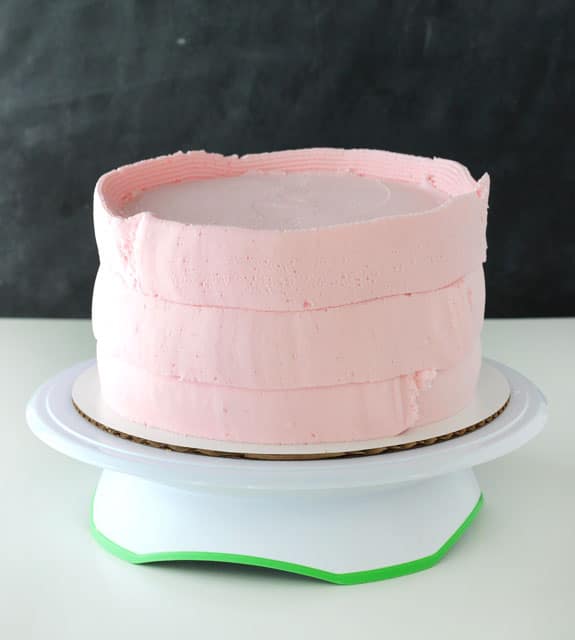
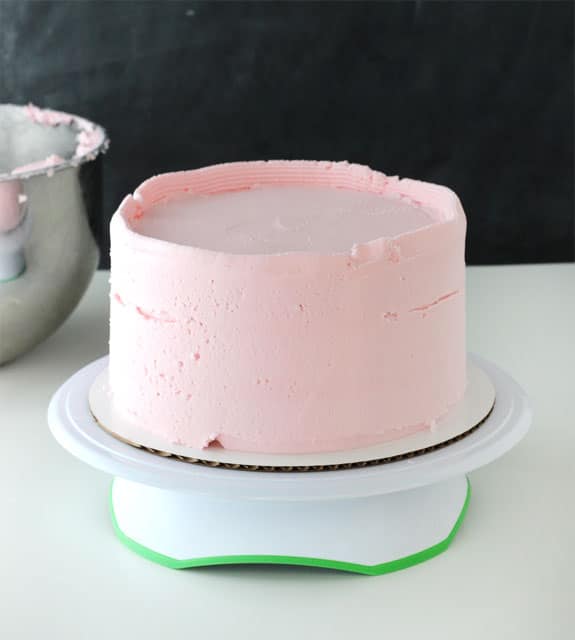
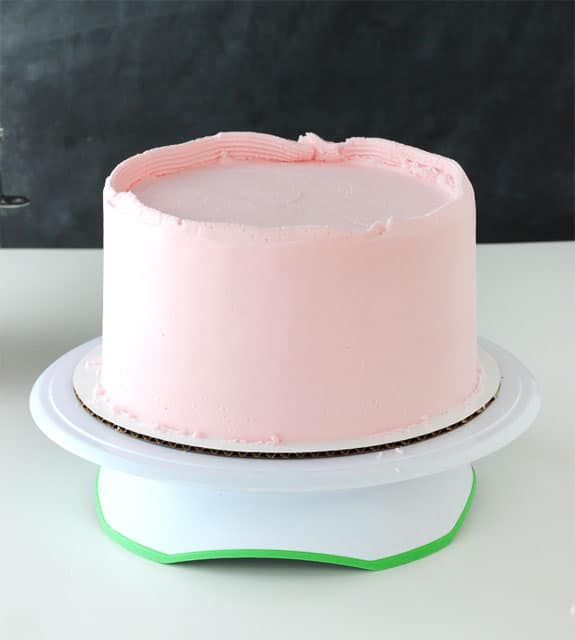
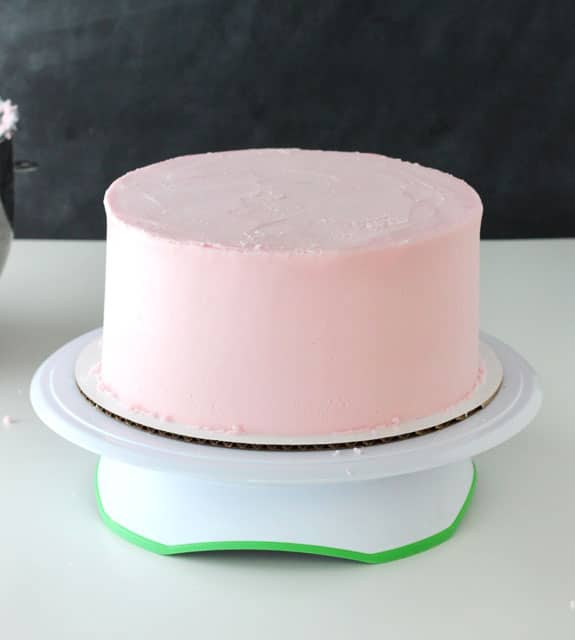
You should end up with a cake that looks like this. The sides are mostly smooth and the excess icing from the top is still sticking up above the cake. In some places you may have tiny little holes from the air in the icing. The angle that you hold the icing smoother can make a difference in how many of those you end up with. Again, tighter angle is better. Also, some of those will fill in as we smooth the sides again later with a paper towel.
Next is always the scariest part! The top edges/corners. It was even harder to do these while taking photos. 🙂 The whole icing process took longer than normal, so my icing started to crust a bit and so it’s a little drier in the photos than yours should be at this point. You want to work as quickly as you can. If the icing starts to crust, it’s harder to work with.
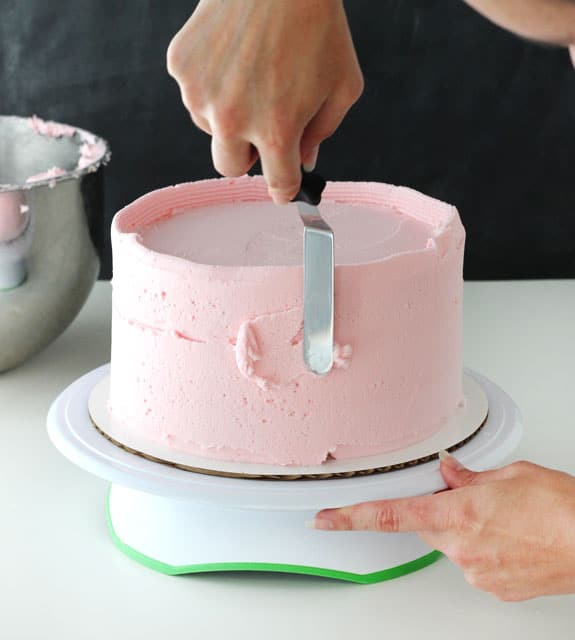
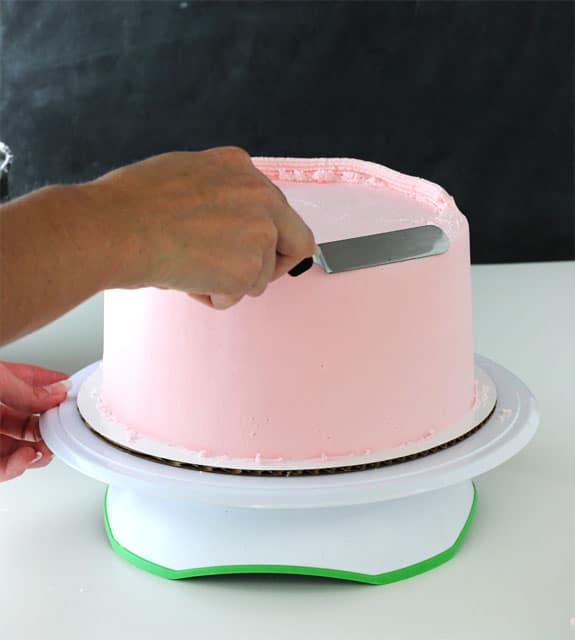
To do the edges, you can use the icing smoother or the offset spatula. I use either, depending on my mood, though often I do feel like the offset spatula gives me more control. Pull the icing in towards the middle of the cake, making the corner level with the top of the cake. The spatula should be at about a 45 degree angle. The excess icing should help fill in any uneven-ness on those top corners as you pull it in.
Go all the way around the cake, until it looks like the one below. Again, my icing is a bit drier than yours should be. Hopefully, your cake top is a bit smoother.
Use your offset spatula to continue to work the icing on the top of the cake and smooth the top edges. Do not mess with the sides or side part of the corners yet. Just try to get the top as smooth as you can, the sides should already be smooth.
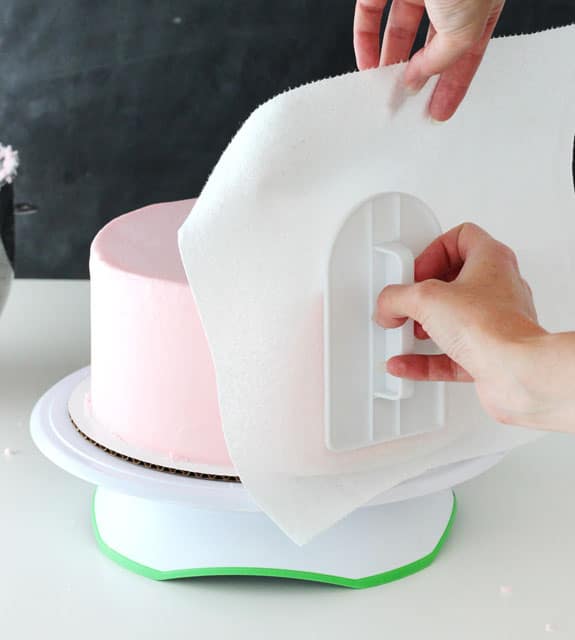
Next, we use the paper towel to finish smoothing any imperfections that are left from the offset spatula. Like I said above, I ONLY use Viva paper towels for this. They are the only paper towel I know of that doesn’t have raised patterns on it. You’ll notice that one side is smoother than the other – that’s the side you want against the cake.
I usually start with the top of the cake, since it tends to be rougher and need more work. Along with your paper towel, you’ll need the fondant smoother. Place the paper towel on the cake, smoothest side down, and rub in small circular motions with the fondant smoother to smooth out the icing. Press firmly and evenly, but not hard.
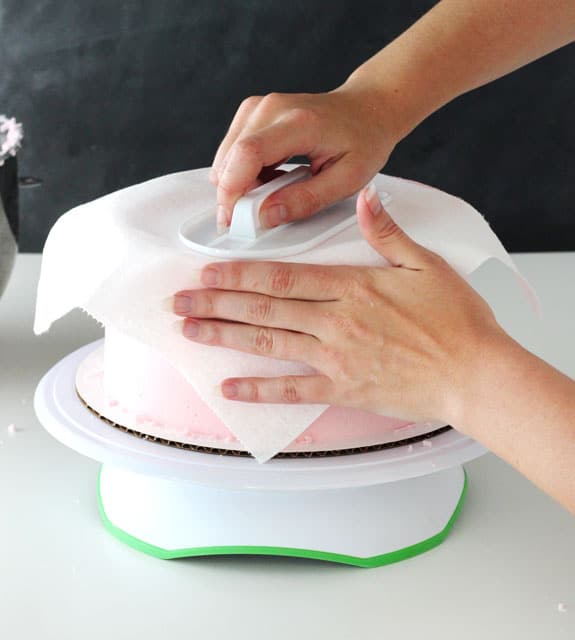
Do the same with the sides of the cake, evening out any bumps or air holes.
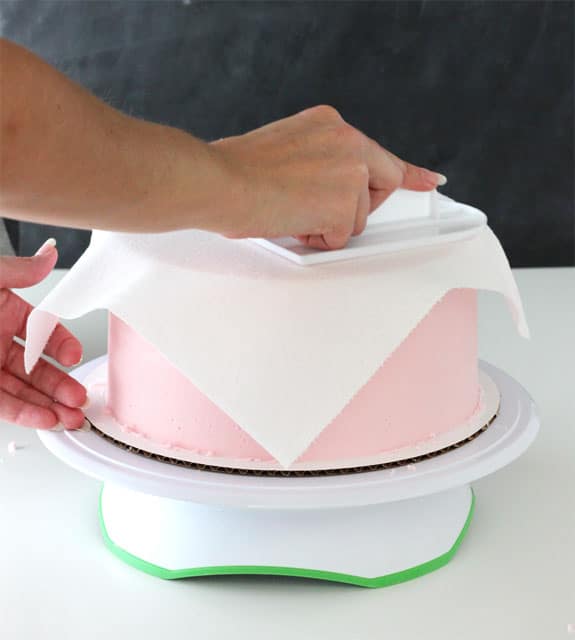
To help make sharper corners, place the paper towel on the top of cake, letting it hang over the edge and down the side. Placing your fingers against the side of the cake to keep the icing in place, use the fondant smoother to gently push the icing out towards to edge to help make that corner sharp. Do that anywhere you think the edges could use it.
Keep working that paper towel and fondant smoother until you are happy with your cake.
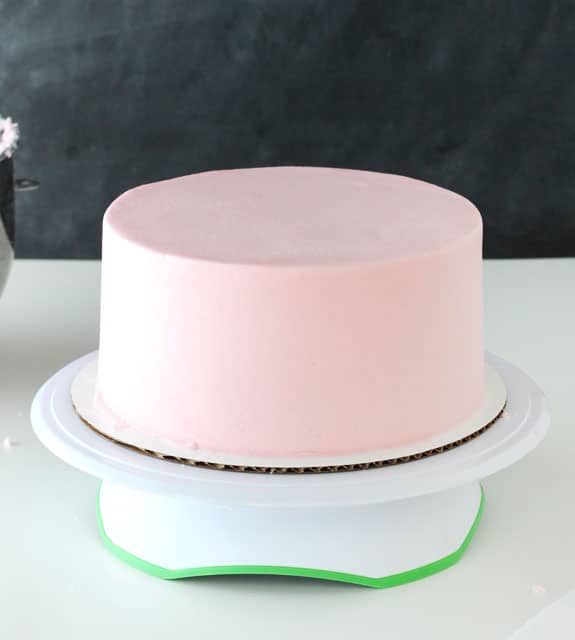
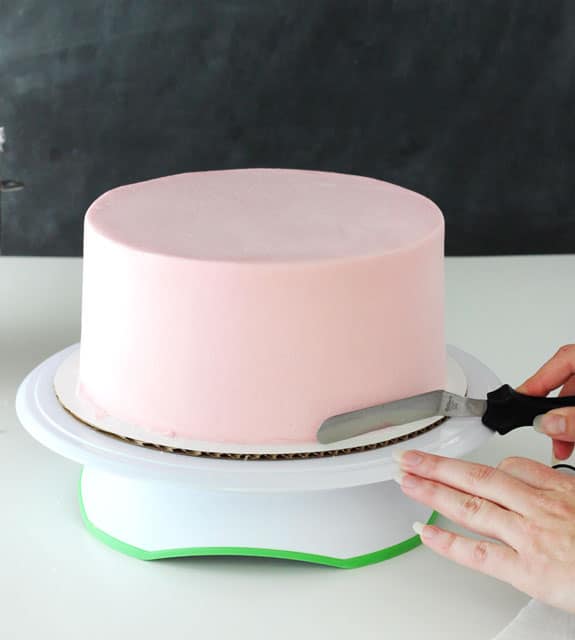
Next, I like to take my offset spatula and remove excess icing at the bottom of the cake and give it a clean edge. The spatula is placed at an angle so that nothing is actually touching the side of the cake, but just the bottom of the spatula side is grabbing the excess icing. Then pull the excess towards you and away from the cake.
Use your other icing tip to pipe on your border. I used Ateco tip 844, but you could also use Wilton 1M, which is similar, or any other tip you prefer.
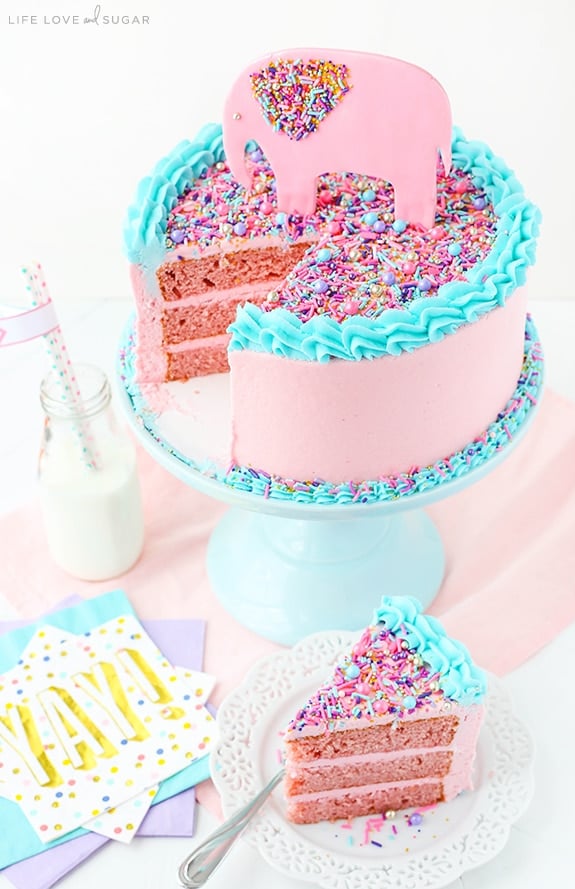
Sprinkle with some spraaaankles (I used Wilton Spring Confetti Sprinkles)!

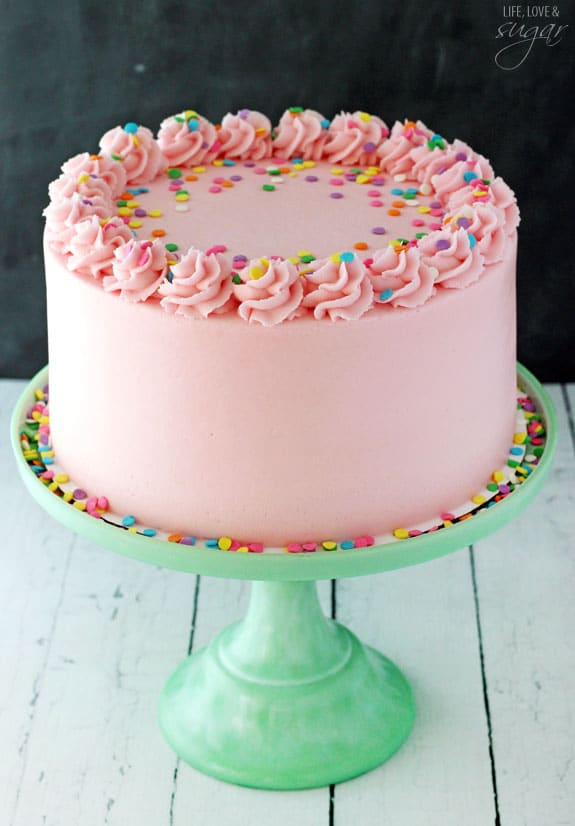
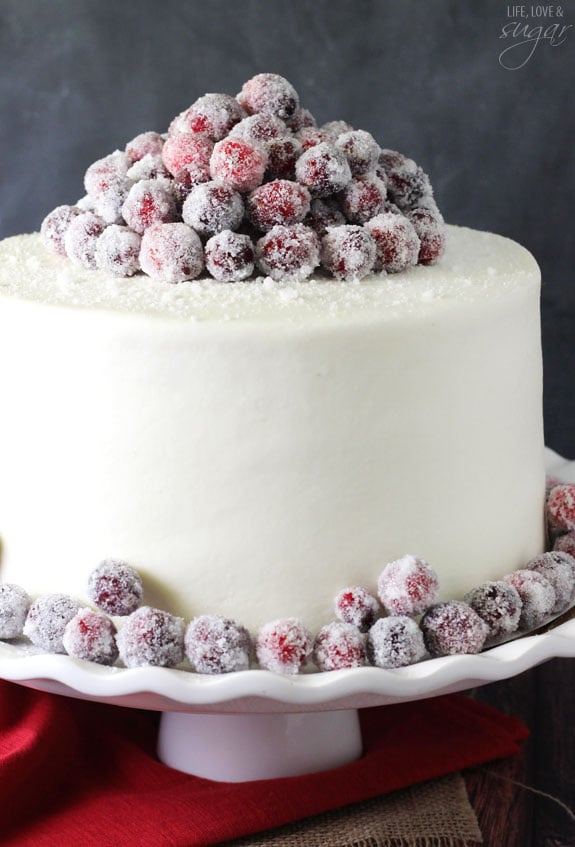
And you’re done! Put your cake on your favorite cake stand, add a few more sprinkles and dig in!! It’s time to eat all that hard work. 😉
*Update* For some help with getting the right frosting consistency, check out my new post, How to Get the Right Frosting Consistency, on how I like to do it.
This page includes affiliate links.
Learn how to decorate Sugar Cookies with Royal Icing
Practice your smoothing technique on some of these delicious cakes:
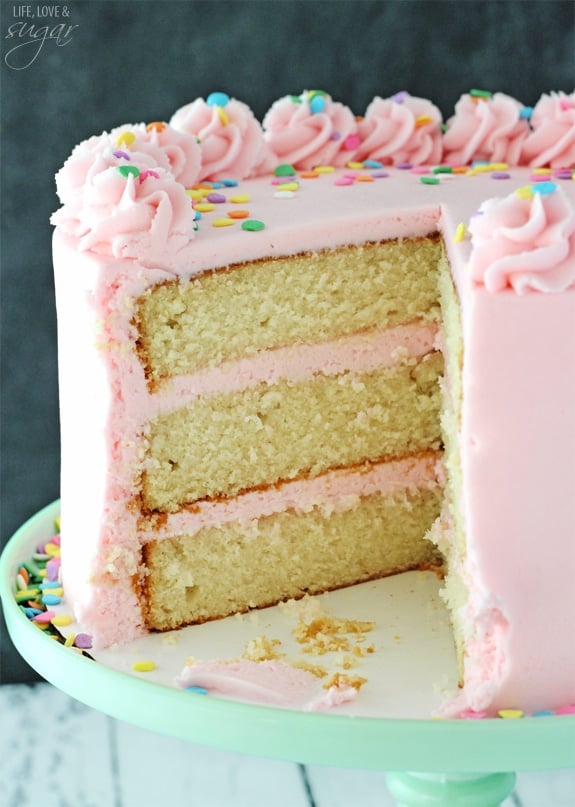
Moist and Fluffy Vanilla Cake
(the recipe for the cake in the tutorial above!)


I’m going to make your Carrot Cake Cheesecake Swirl Cupcakes, however, I’m going to use my carrot cake recipe. It calls for one and a half cups of oil. You probably think that is a lot but believe me its the most moist delicious cake ever. I’m 80 this year and I have been making this cake for at least 50 years.
I’m sure it’s a delicious cake. One thing to keep in mind is that oil based cakes tend to have a thinner batter. I would just make sure that the cheesecake layer isn’t going to sink because of that thin batter.
You forgot to mention that the frosting must be set in the refrigerator before you can start smoothing it otherwise that entire paper towel would have been covered in frosting.
No, I didn’t forget that. 🙂 Actually, if you refrigerate it first, or let it set at all, the frosting will crust and you won’t be able to use the paper towel anymore. You need the right consistency of frosting so that it isn’t too thin. Then you can use the paper towel without it sticking. I hope that helps!
Thanks for the tip. Actually the batter isn’t runny at all. I made it today and it turned out amazing. I love the white filling, it adds a new demention…
I don’t ever subscribe to anyone but I must say I’m very happy with your recipe. Thank you
I’m glad to hear it worked out!
I can’t wait to try this recipe! I’m just wanting to get into decorating cakes and your video on how to decorate a cake is amazing, I can’t wait to try all of your wonderful tips, but I have a few questions:
It doesn’t look like the turntable you used is made anymore, is there one that you would suggest to use instead? What size and brands cake boards and piping bags did you use? What size bags did you use as well?
Thank you so much,
Hannah
I’m glad you’re finding it helpful!
As for the turntable, I haven’t used any others, but it looks like there’s a similar one by Ateco on Amazon and I’m guessing that one would be good. The size of the cake board depends on the size of your cake, but for an 8 inch cake, I usually use a 10 inch cake board. The ones I have are Wilton. My piping bags are also Wilton, 16 inch. I hope that helps!
I just watched your tutorial on icing a cake — awesome! Quick question, what consistency of icing would I use to crumb coat a cake? I’ve looked in your website for some information on crumb coating. I can’t find any information, but that doesn’t means it’s not there! Thanks for great recipes and tutorials!
I haven’t done much on crumb coating, because I don’t usually do much of one. The way I apply the frosting with the piping tip makes it so that it’s not typically necessary. If I were to use one, I’d use the same consistency as the buttercream I was putting on the cake. I hope that helps!
This is my new favourite page! I love your tutorial videos, they are the best I have seen, thank you. I picked up a fondant smoother and will also be picking up an icing smoother.
Just a couple questions though, should the cake and icing be room temperature to smooth it or put in the fridge before smoothing? Also, have you ever used parchment paper instead of paper towel? I think I have seen some people use that before but not sure how well it works.
So glad you’re enjoying the tutorials! The cake and frosting should be room temperature and you’ll want to smooth it right after frosting it, so that the buttercream doesn’t have time to crust over. In theory parchment paper would be ok, but you have to be really careful not to crinkle it, or the crinkly will transfer over to the cake.
Doesnt the paper towel stick to the frosting?
It shouldn’t if the buttercream is the right consistency. It needs to be thick enough.
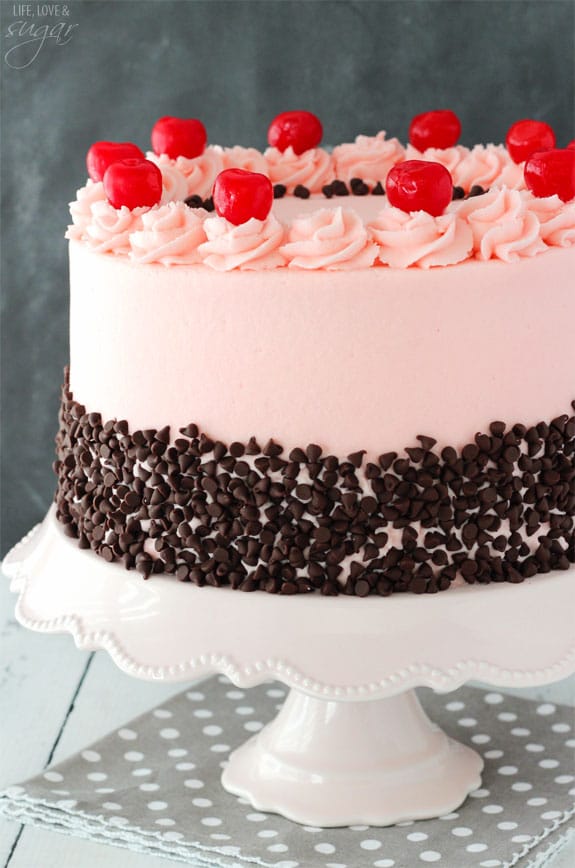
How do I get the butter cream frosting color to be pink as in the cake you are highlighting?
You will want to use gel icing color, not food coloring. Gel icing color is much more concentrated and will give you brighter and more vibrant colors.
I must follow your video on frosting a cake with buttercream. I have had problems in the past with getting the finish I want. Thanks for all the helpful tips. Could I also achieve these results using ermine buttercream? I often find regular buttercream too sweet
Yes, ermine frosting should work just fine.
Thank you!
Could you use parchment paper instead of paper towel?
No, parchment paper gets wrinkles in it that will transfer to the cake.
Very easy instructions to follow.
I would like to have the name of your you tube channel. I love the recipe so much
Hi! What size cake pans did you use for this cake? I saw where you said how many frosting recipes you had to make for this one. Was just wondering!
8 inch pans
Thank you so much for this tutorial yours was the best tips to apply smooth BC. Question though, I bought viva paper towels and the paper towel stuck to the frosting, it did not work to get the air bubbles out and to create a smoother finish. What happened, do I need to put my cake in the frig for a couple minutes to create the paper towel secret? Help on this, I really want to make your secret trick work.
It’s all about the consistency of the frosting. You need it a little bit thicker. Here’s the post I wrote about frosting consistency that should be helpful. https://www.lifeloveandsugar.com/get-right-frosting-consistency/
Hi, did you chill your cake between the final frosting and when you used the paper towel with the fondant smoother ?
No, definitely not. You need to use the paper towel immediately or the buttercream will crust over and you won’t be able to smooth it.