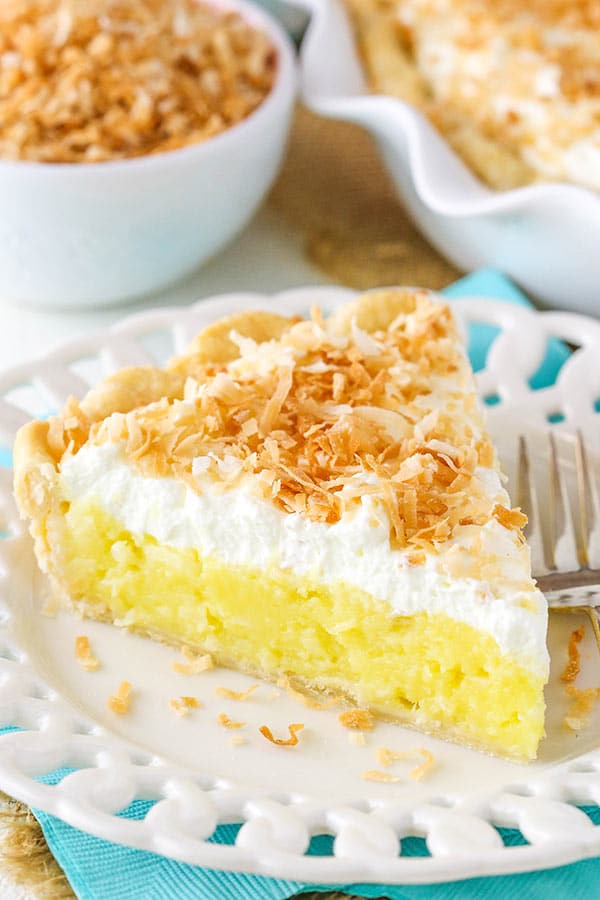
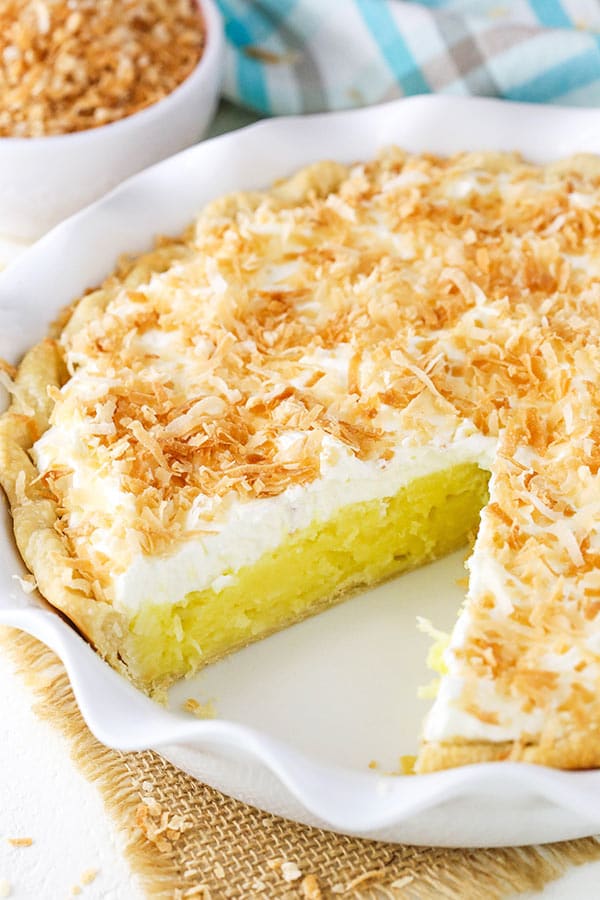
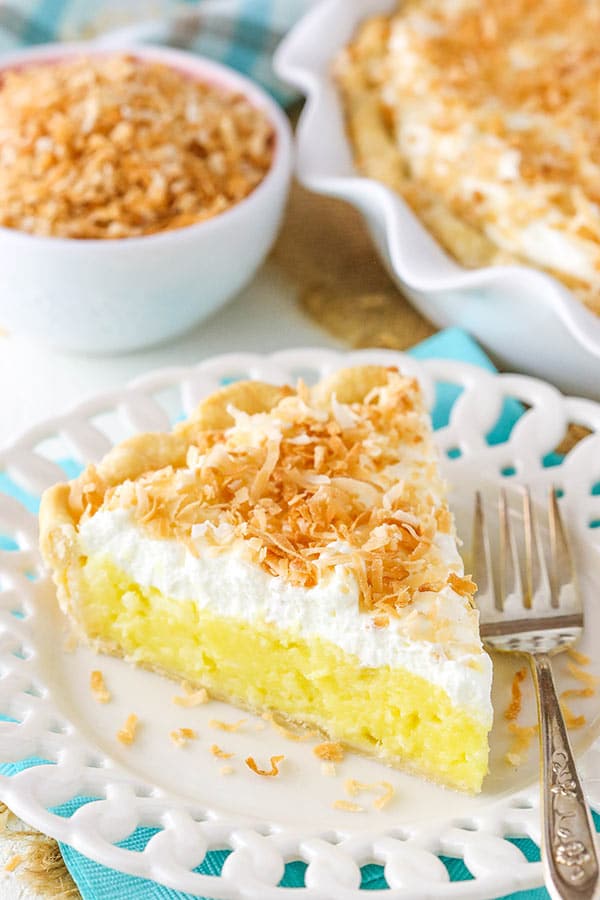
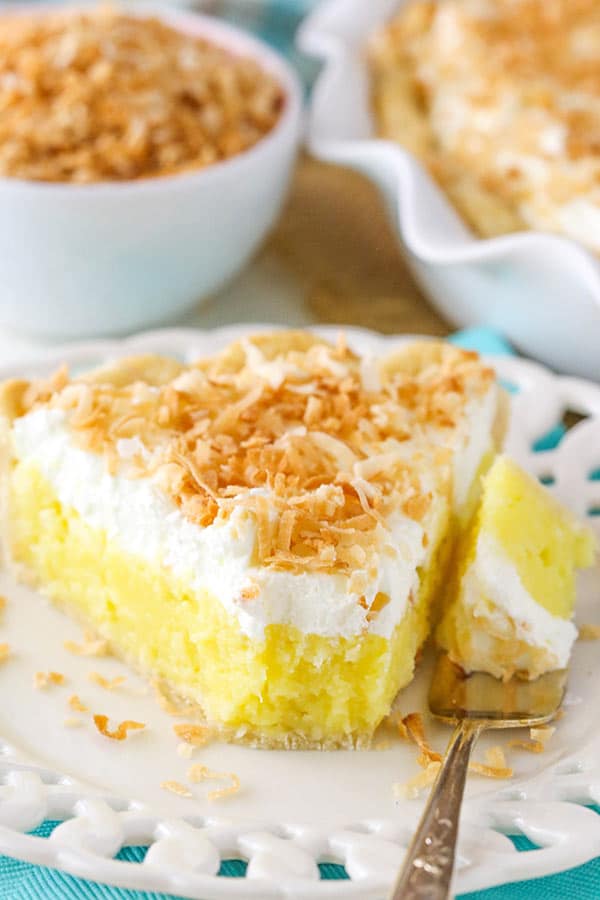
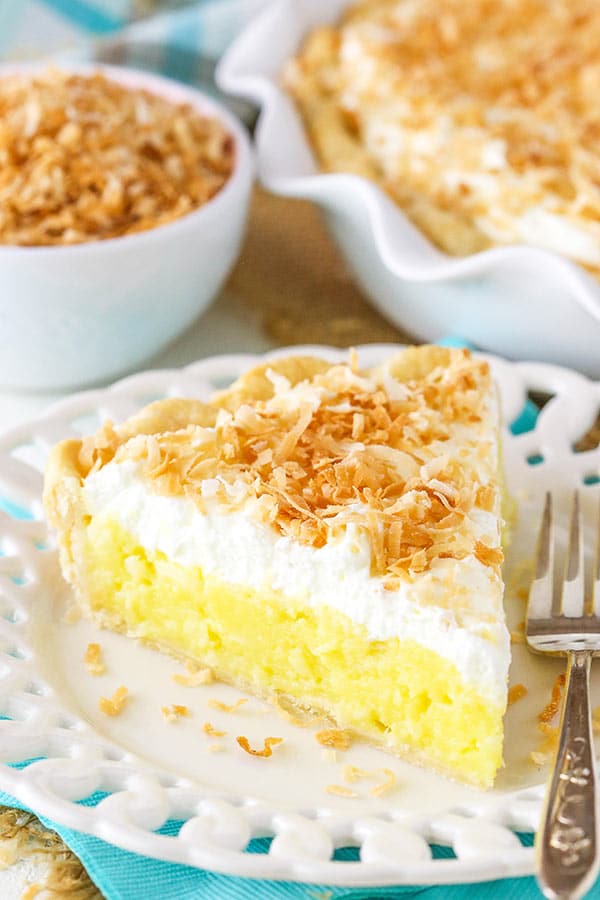
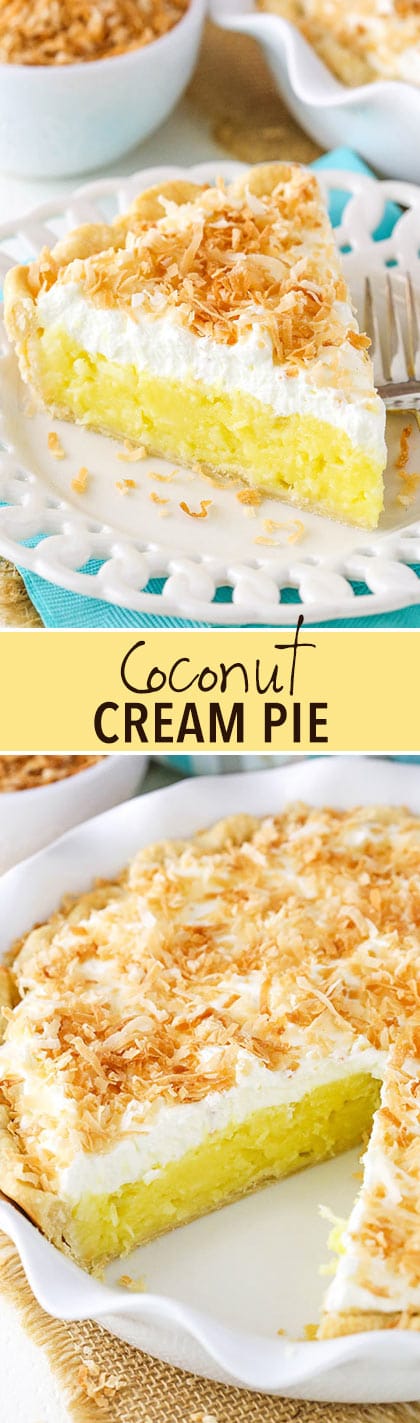
This Coconut Cream Pie is made with a coconut custard filling and a coconut whipped cream, all topped with toasted coconut! It’s a classic pie that is wonderfully delicious!
So pie is something I’ve developed more of a love and appreciation for in recent years. I grew up eating plenty of cake, cupcakes and ice cream, but not a ton of pie. It’s a bit surprising since my dad is such a pie guy, but with the exception of pumpkin pie (gimme, gimme!), we didn’t have it much when I was a kid.
But now that I know of my dad’s love for it and have been enjoying it more myself, it’s been fun to make various pies and share them with him. This is a pie he’s been waiting a while for now. He’s a lover of coconut cream pie, so when I made this, my mom took most of it (and the many trial versions) back home to him, which he loved.
And since my mom likes to freeze my desserts for later and hand them out, my grandmother also got to try it when she visited last week. She loved it and declared it to be delicious and rich!
So how to get started with making this pie? Well first up is the crust. This crust is blind baked, since the filling itself is cooked on the stove and not in the oven. You’ll want to have some pie weights handy to use to keep your pie crust from fluffing up during the baking process. I have two of the pie weight containers and use all of them to make sure the bottom and the sides stay in place.
Once the crust is baked, it’s time for the filling. It’s a classic custard cooked right on the stove. The sugar, cornstarch, milk and cream are all cooked over the stove so they start the thicken. Partway through the thickening process, some of the milk mixture is slowly added to the egg yolks. This process with the eggs is called “tempering” and it’s a way of heating the eggs slowly so that you don’t get scrambled eggs.
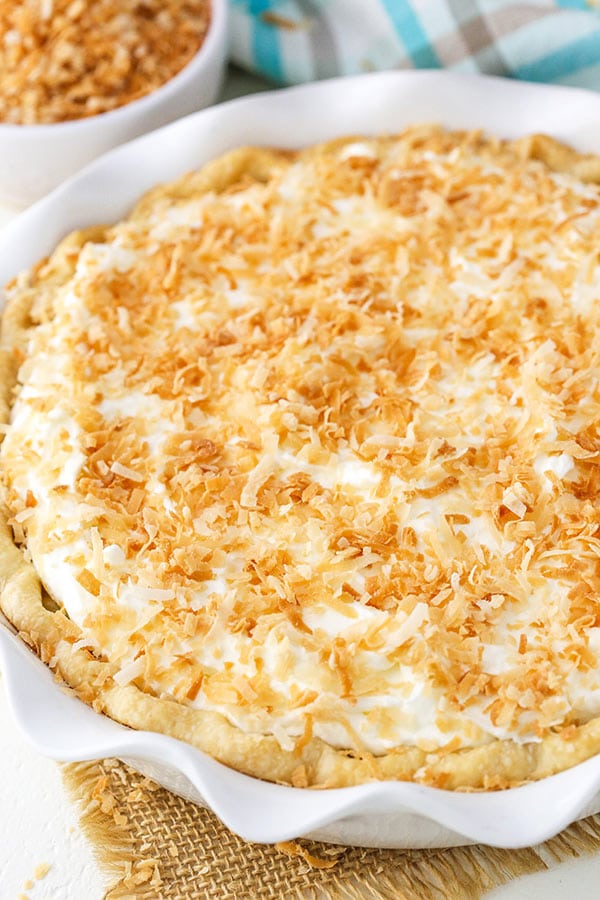
The eggs and cornstarch work to thicken the custard as it continues to cook. Once ready, it’s time to add some flaked coconut, butter, coconut extract and a bit of vanilla extract. Mix it all together and then pour it into your pie crust. Refrigerate it until it’s firm, then add the coconut whipped cream on top. The final touch is some toasted coconut!
This pie is SO good! It’s full of coconut flavor and the custard is creamy and delicious! Along with the buttery crust, it’s all just wonderful and a pie I can’t wait to make over and over again! I hope you enjoy it!

Coconut Cream Pie
- Prep Time: 1 hour 5 minutes
- Chill Time: 5 hours 30 minutes
- Cook Time: 35 minutes
- Total Time: 7 hours 10 minutes
- Yield: 8-10 servings 1x
- Category: Dessert
- Method: Oven
- Cuisine: American
Description
Made with a simple stovetop custard, this coconut cream pie is a classic and creamy dessert garnished with whipped cream.
Ingredients
Crust
- 1 ¼ cups (163g) all-purpose flour (divided)
- ½ teaspoon salt
- ½ cup (112g) cold unsalted butter (cut into ½ inch cubes)
- 2-4 tablespoons ice water
Filling
- 4 large egg yolks, room temperature
- ¾ cup (143g) granulated sugar
- 3 ½ tablespoons (20g) cornstarch
- ½ teaspoon salt
- 1 cup (240ml) whole milk
- 1 can (13.5 oz) full-fat coconut milk (1 ¾ cups)
- 1 can (14 oz) sweetened condensed milk (1 ¼ cups)
- 2 teaspoons coconut extract
- 1 ½ cups sweetened shredded coconut
Whipped Cream
- 1 cup (240ml) heavy whipping cream (cold)
- 4 tablespoons (29g) powdered sugar
- ¾ teaspoon vanilla extract
Instructions
Make the Crust
- Add 3/4 cup (98g) of flour and salt to a food processor and pulse together 2 to 3 times.
- Scatter the cubed butter over the flour and process until a crumbly dough forms, about 15 seconds. The flour should all be coated – none of the flour should be dry.
- Add the remaining 1/2 cup (65g) of flour and pulse a few times until everything is evenly distributed. The doughy pieces should break up, and it should look sandy. There shouldn’t be a bunch of big pieces remaining. A few are fine, but they should be mostly evenly distributed.
- Move the mixture to a medium mixing bowl and add 2 tablespoons of the ice water. Start with 2 tablespoons and add from there. Using a rubber spatula, gently fold everything together. The crumbs should begin to form larger clusters. If you pinch some of the dough and it holds together nicely, it’s ready. If the dough falls apart, add 1-2 more tablespoons of water and continue to press until the dough comes together.
- Work just enough for it to come together, then shape it into a disc. Wrap the disc in plastic wrap and refrigerate for at least an hour or up to 2 days.
- When ready to bake the crust, place the pie crust onto a piece of parchment paper. Cover the crust with another piece of parchment paper and roll it out with a rolling pin.
- Peel one piece of the parchment paper off and use the other piece of parchment to lift the pie crust and drape it over a 9-inch deep-dish pie plate. Carefully peel off the second piece of parchment paper, then shape your pie crust. “Dock” the crust by pricking the crust with a fork to allow steam to escape evenly. This helps the crust not bubble up and cook unevenly.
- Refrigerate the crust for 2-3 hours or freeze for about 20 minutes. You want to be sure the crust is very cold.
- Preheat oven to 350°F (180°C) and line the pie crust with parchment paper. Be sure the parchment paper presses all the way against the crust so that it’s flush. Fill the pie crust with pie weights, dry rice, or beans.
- Bake for 20-25 minutes, or until the crust begins to brown on the edges. Remove the parchment paper and pie weights and bake for another 5-10 minutes, or until lightly golden brown. Remove from the oven and allow to cool completely. If you need to speed up cooling, you can place it in the fridge.
Make the Filling
- When the crust has cooled, add the egg yolks to a medium-sized bowl, whisk together until smooth, then set aside.
- Add the sugar, cornstarch, and salt to a medium saucepan and whisk together until well combined and no lumps remain.
- Add the whole milk, coconut milk, and sweetened condensed milk and whisk well to combine. Heat mixture over medium heat, whisking constantly.
- Once the milk mixture begins to simmer, pour a little of the milk mixture into the eggs while whisking constantly, to temper the eggs. Add a little more of the hot liquid into the eggs, then pour the egg mixture back into the saucepan.
- Whisk constantly until the mixture begins to thicken and comes to a boil. Allow to boil for 1 minute, then remove from heat and whisk in the coconut extract and shredded coconut.
- Pour the filling into the cooled crust and spread evenly. Press a piece of plastic wrap directly on top of the pie and refrigerate for about 4–6 hours or until the pie is set.
Add Topping and Serve
- When the pie is completely cool and firm, remove the plastic wrap from the pie.
- Add the heavy whipping cream, powdered sugar, and vanilla extract for the whipped cream to a large mixer bowl and whip on high speed until stiff peaks form.
- Pipe the whipped cream onto the top of the pie (I used Ateco tip 844), then garnish with coconut flakes, if desired. Serve.
Notes
- Store leftover pie well-covered in the fridge. Best if eaten within 3-4 days.
Nutrition
- Serving Size: 1 Slice
- Calories: 357
- Sugar: 23.1 g
- Sodium: 124.9 mg
- Fat: 22.8 g
- Carbohydrates: 34.5 g
- Protein: 4.4 g
- Cholesterol: 98.1 mg
Enjoy!
This post contains affiliate links.


Best coconut cream pie I have ever had! Even gave the recipe to my mother-in-law and now it’s her go to recipe as well! The only thing I did differently was make a little extra whipped cream, added unflavored gelatin to stabilize it, and then let the pie filling set for a while in the fridge. Then I stirred in some whipped cream to the pie filling before adding it to the pie crust and putting the whipped cream on top. I will be trying this recipe soon with banana flavoring and sliced banana to make banana cream pie and I bet it will be awesome!!
Hi. Just wondering if i dont have coconut extract could i use coconut milk/cream instead?
I haven’t worked with coconut milk or cream much, but you could certainly try using it in place of the milk. The difference in fat content could make a difference, but I’m not sure without trying it.
Your pie looks delish. Coconut Cream Pie is my husband’s favorite so I have pinned it and will make it for him. Thanks for the recipe.
Made the for my husband’s birthday (his request). This was the best coconut cream pie we’ve ever earen!!! Delicious! Now he requests it every week…
Another terrific recipe – thank you for sharing!
Perfect! So glad it you enjoyed it!
Wow,its so easy,thanks
I love made from scratch cream pie and this looks like coconut heaven! Perfect for Spring!
Lindsey, in the recipe it says pie is better after 3 or 4 days is that correct or is it hours. It looks wonderful just like all your other recipes. Thank you. Hope you and the babies are doing well. Take care.
Sorry for the confusion. The intention is that the pie is best/good for 3-4 days. You could keep it longer, but that’s when it’s best. I hope that helps!
Thank you so much!!
Yes , thank you sorry I noticed that while making the pie. It looks so good been about 3 hours and it’s still jiggle so hard waiting on it to set really the custard is so delicious can’t wait to try a piece of the whole pie. Thank you again for the great recipes.
The pie never set up 🙁 Not sure what went wrong I looked and read the recipe 5 times and I had followed it step for step. Was disappointing but, I shall try again I love all your recipes so I’m sure I must have done something wrong. I even looked at other recipes for Coconut Cream Pie to see if there were different techniques. But mostly all were the same except they all used more cornstarch and less liquid. Most of those added all the liquid to the yolks after tempering which I didn’t I just added enough to temper the yolks, then put it all back on the heat until it thickened after simmering for 2 minutes.
I’m sorry to hear that! The cornstarch, egg yolks and the amount of cooking time/heating all work together to thicken the pie. If you didn’t change any of the amounts, which it doesn’t sound like you did, then it could be that it needed to cook a little bit longer. Adding more or less milk mixture to the egg yolks when they are tempered wouldn’t make a difference. The main thing that you’re trying to achieve there is slowly heating the eggs so that they don’t scramble.
I want to make this today, was wondering if you put the cooked hot filling directly into the pie crust or let it cool in fridge then transfer to pie crust? I read the directions a few times but I didn’t think I saw that detail… Thanks!
Great catch! That wasn’t clear, but I’ve fixed it. Add the mixture to the crust while hot. Thanks! Enjoy it!