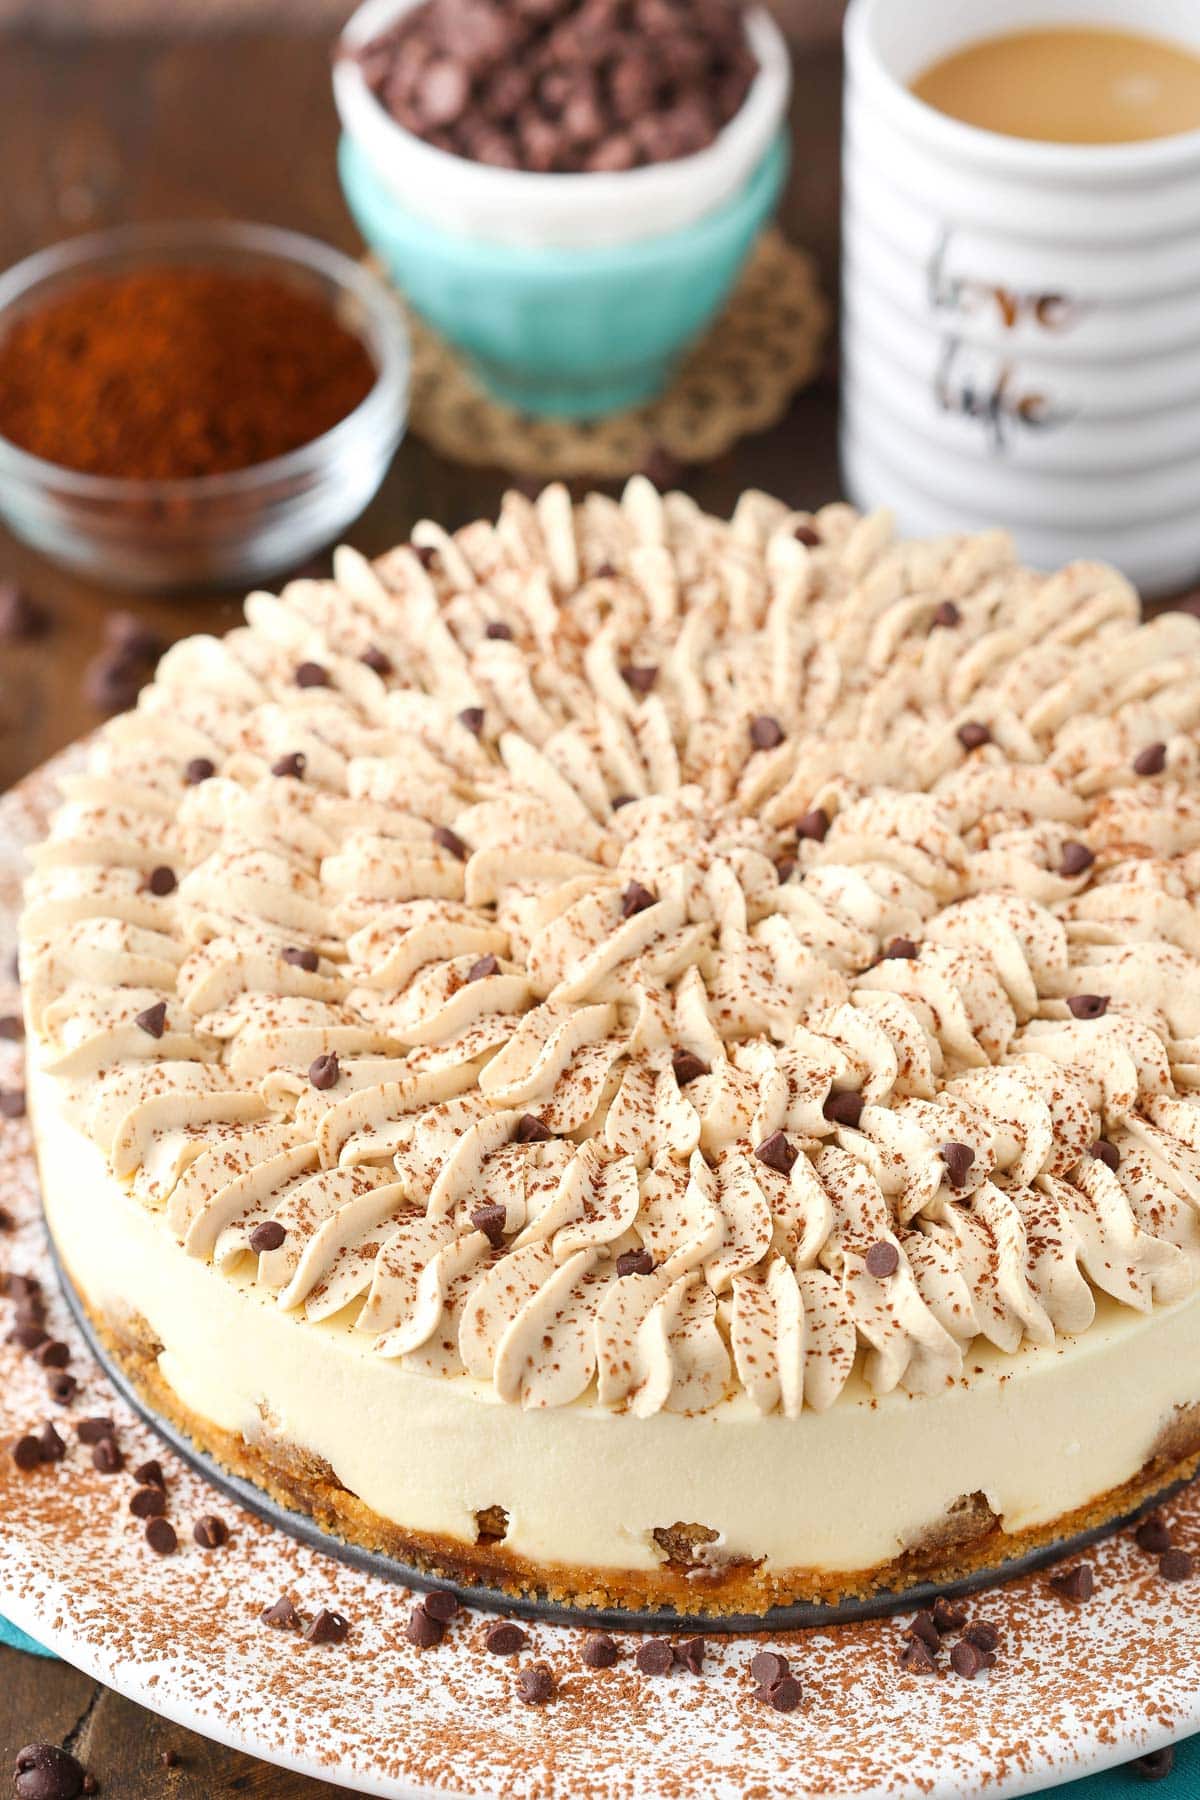
This Tiramisu Cheesecake is a super easy, no-bake cheesecake recipe that tastes just like tiramisu! The combination of espresso, Kahlua and mascarpone cheese is to die for!

An Italian Twist on Classic Cheesecake
So you may or may not have noticed that I love my tiramisu. I have a recipe for traditional tiramisu, tiramisu cupcakes, a brookie tiramisu, a pumpkin tiramisu layer cake and now this cheesecake. I even have a tiramisu related recipe in the cookbook! I fully intend to tiramisu all the things. It’s just so good!
And I had a lot of fun putting this cheesecake together. Initially, I wanted it to be a fully baked cheesecake but it wasn’t turning out quite like I wanted so I switched gears and went with this almost no bake version. The small amount of baking comes in the form of the crust and while I would normally say that you could forgo the baking I really do think it’s necessary in this case.
Let’s discuss.
How to Make Tiramisu Cheesecake
This gorgeous tiramisu dessert only takes a few steps to make. Here’s how to do it:
Make the Cheesecake Crust
Initially I made the crust with crushed up ladyfingers. It makes sense, right? But when you grind up ladyfingers they are quite soft and very light. I didn’t feel like it resulted in the firmer crust I wanted.
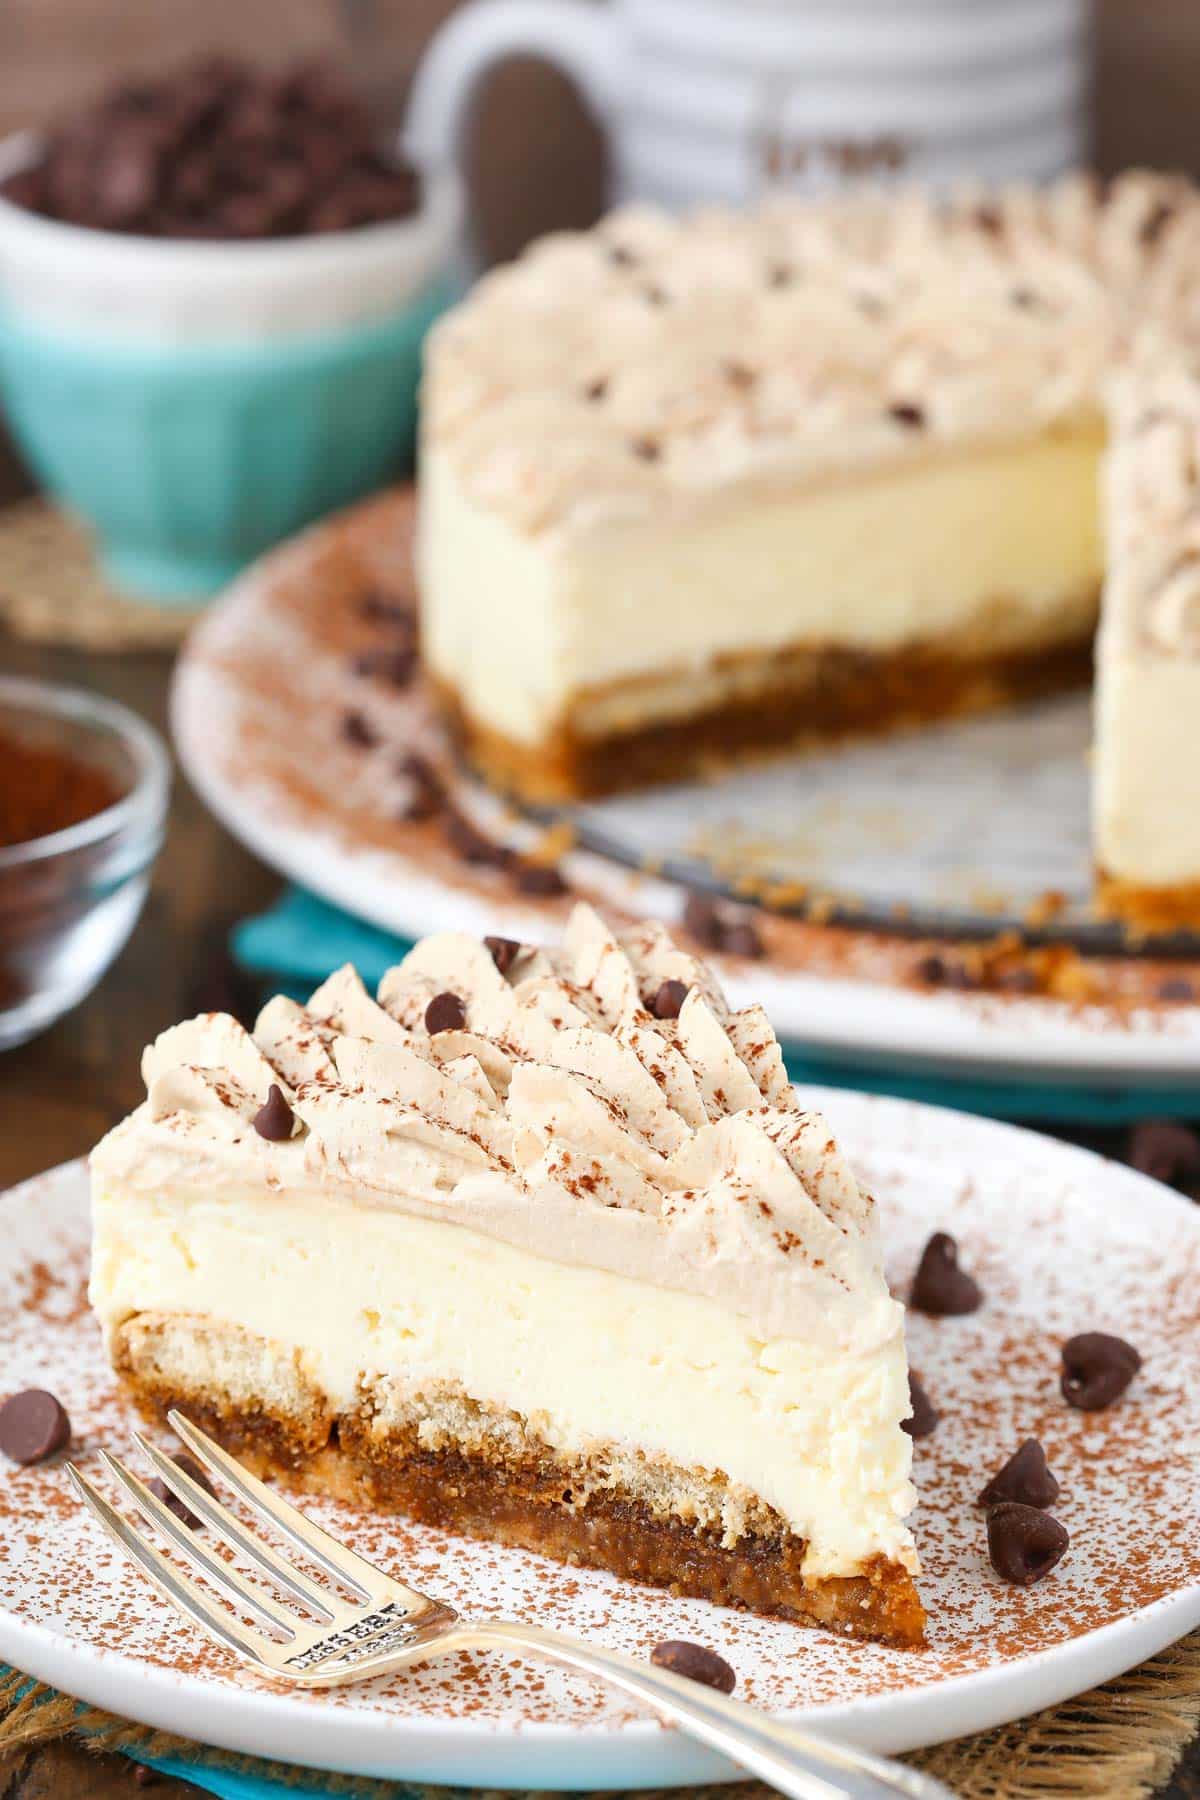
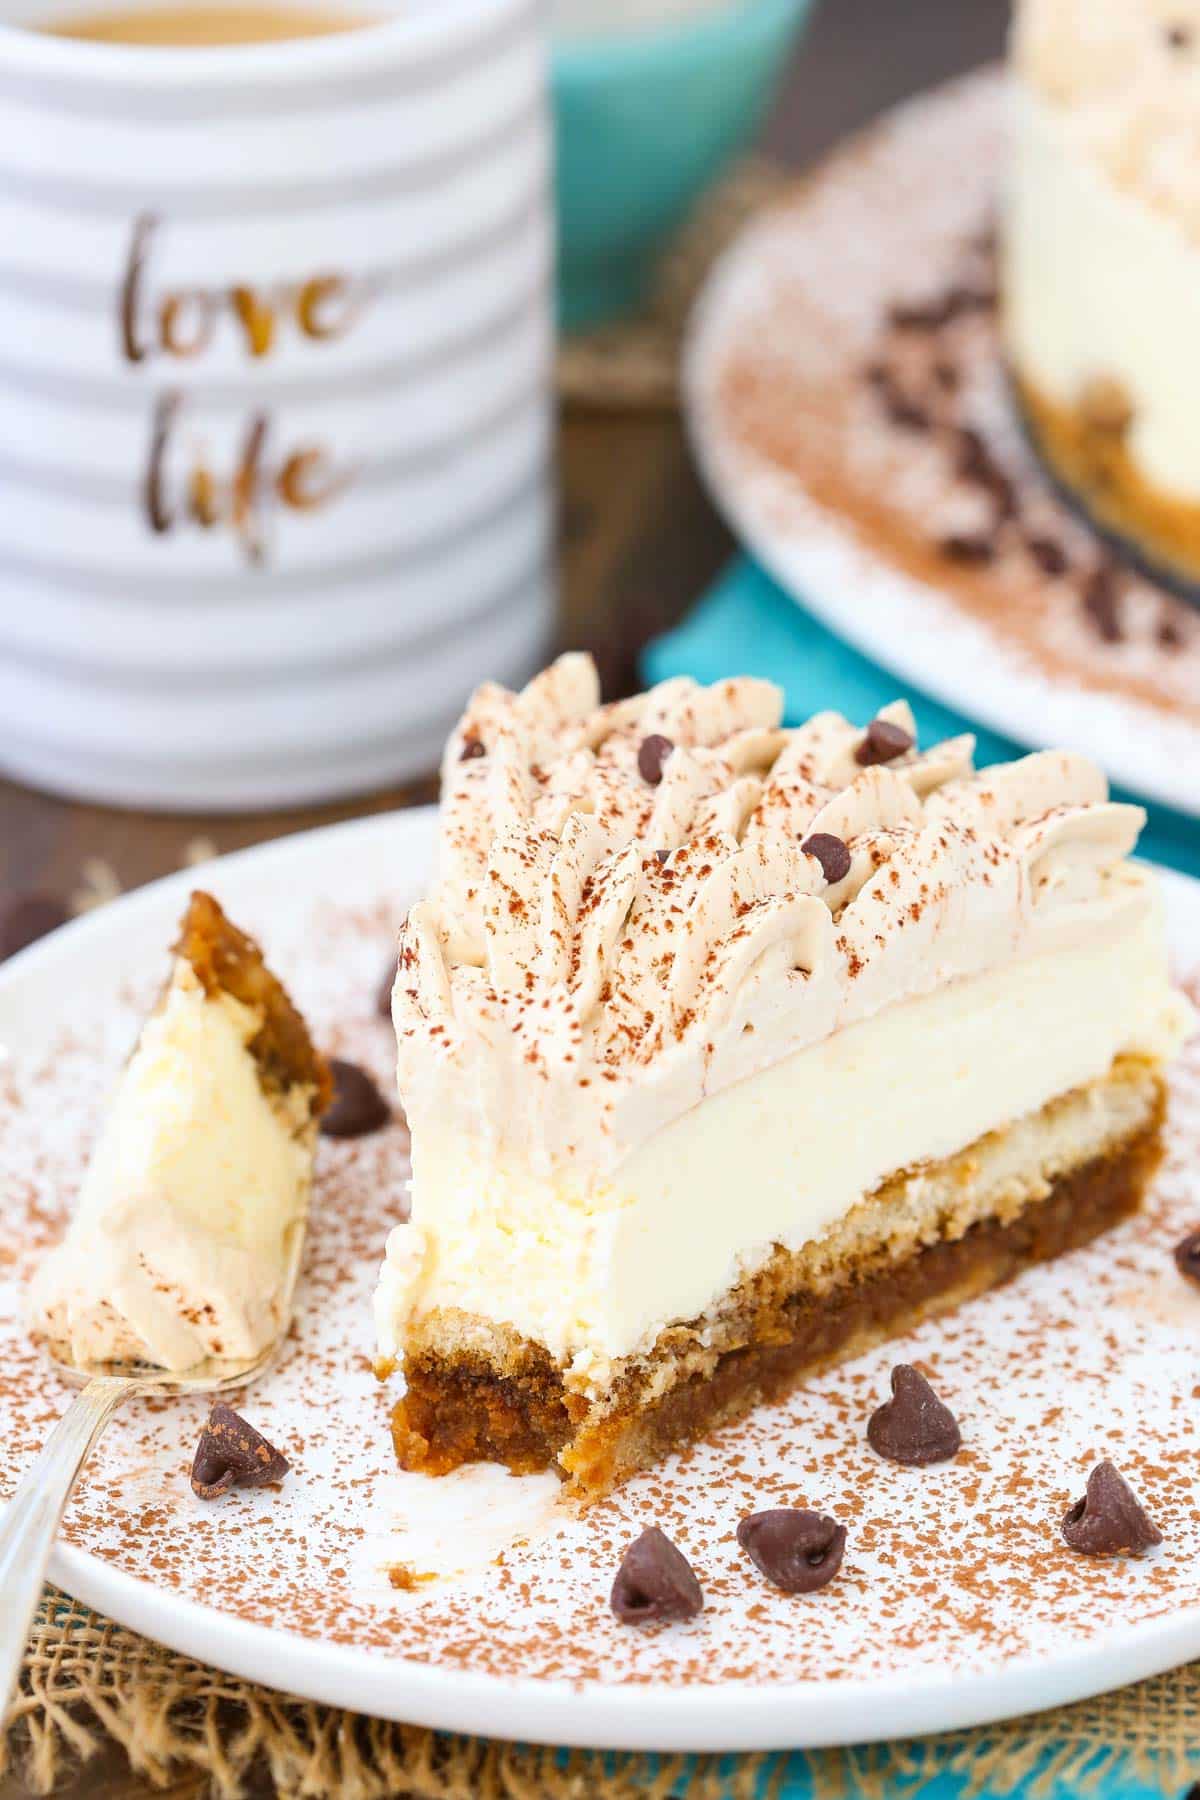
So instead I went with vanilla wafer cookies. The flavor is still great (one of my favorite crusts) and it did bake into a nicer crust. And as I said, the baking really is necessary. Baking a crust helps it hold together better when you cut into it later and for this cheesecake I really recommend it. The crust is topped with ladyfingers that are dipped in Kahlúa and espresso and some of the liquid soaks into the crust while firming up in the fridge. It softens the crust a bit so if you don’t bake it to begin with it’ll be even softer.
Add Ladyfingers
On top of the the crust, you have the ladyfingers which are dipped in espresso and Kahlúa. If you would prefer this cheesecake to be non-alcoholic you could leave out the Kahlúa and add additional water and espresso, but I always love the flavor of the Kahlúa.
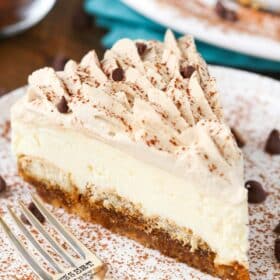
Make the Mascarpone Cheesecake Filling
Next is the mascarpone and cream cheese filling. I used a mixture of both cheeses to help with the firmness and texture of the cheesecake. Mascarpone has a tendency to be a little softer so the cream cheese helps balance it out and keep it a little firmer and less fussy. It still has that signature mascarpone flavor that I totally love though!

Top with Whipped Cream and Cocoa Powder
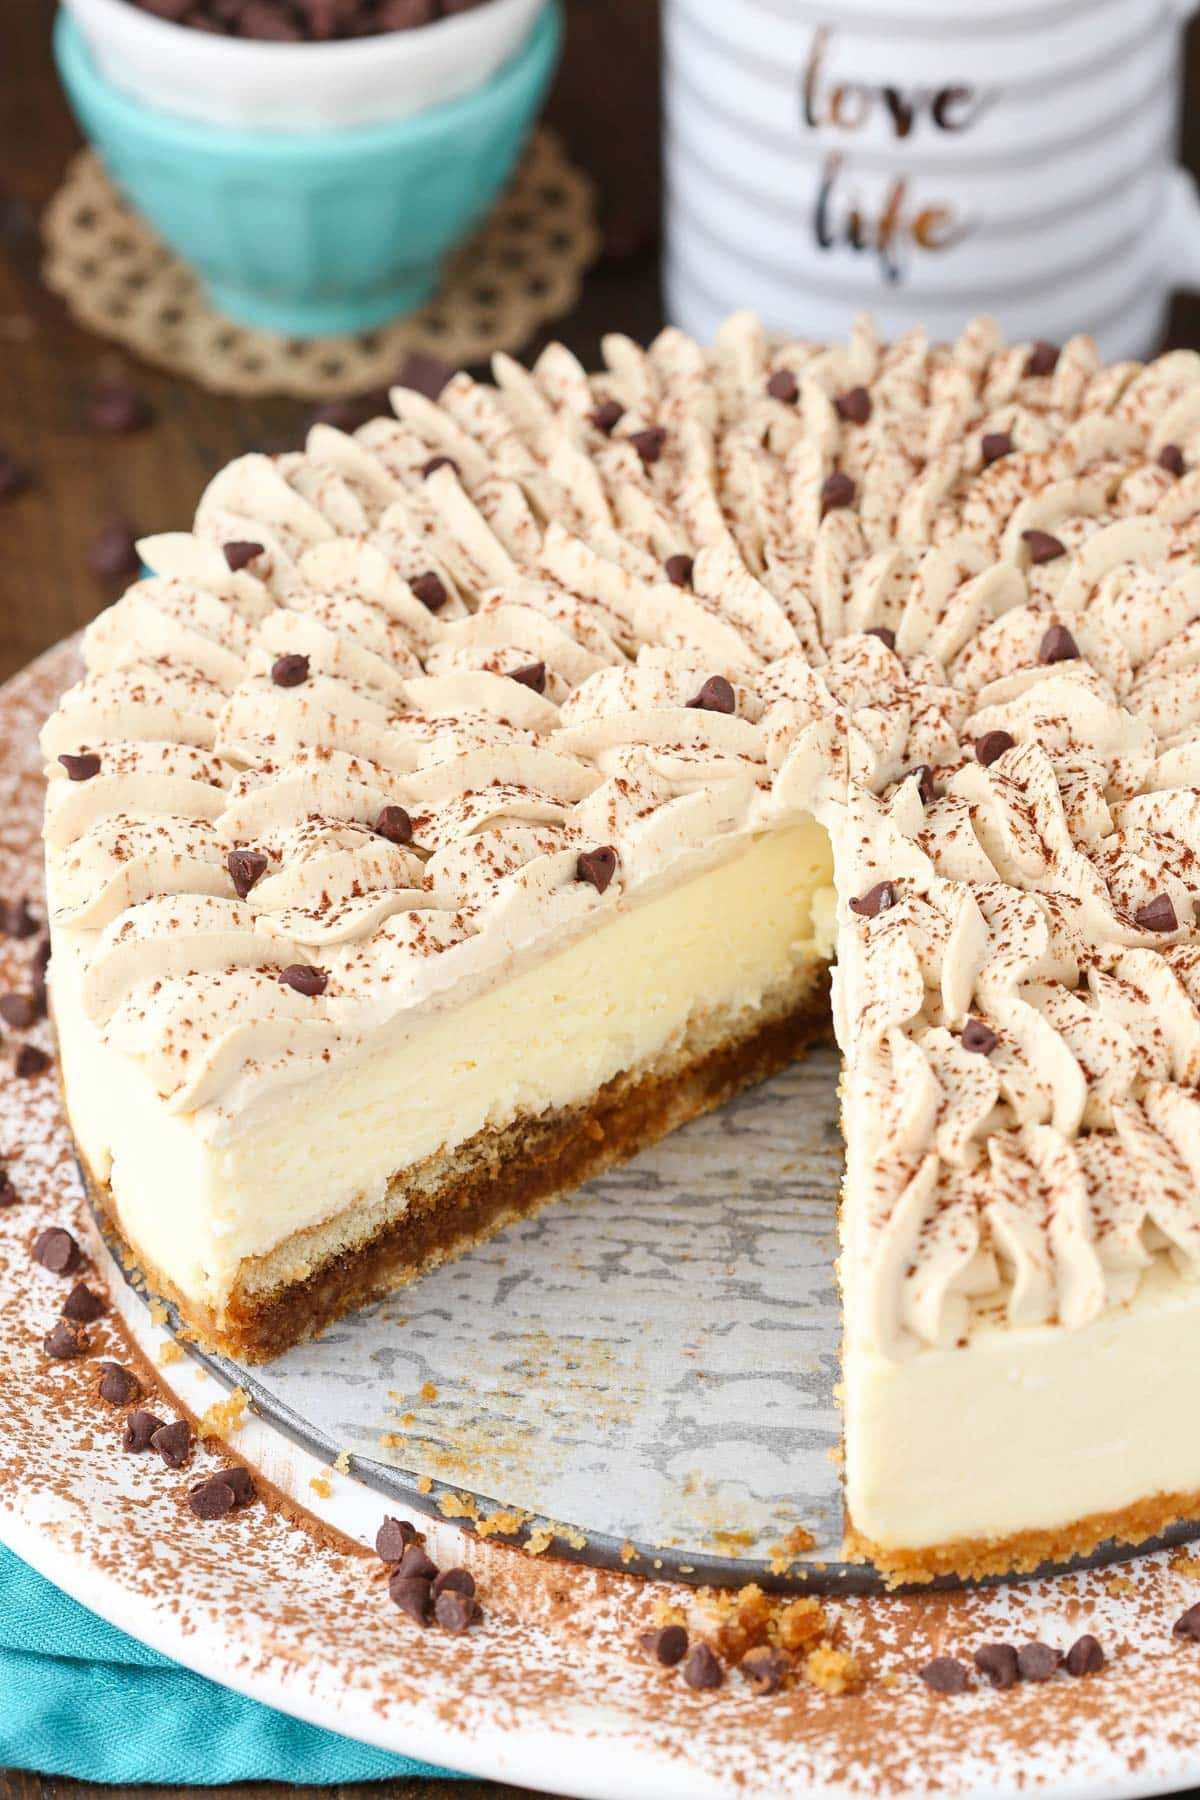
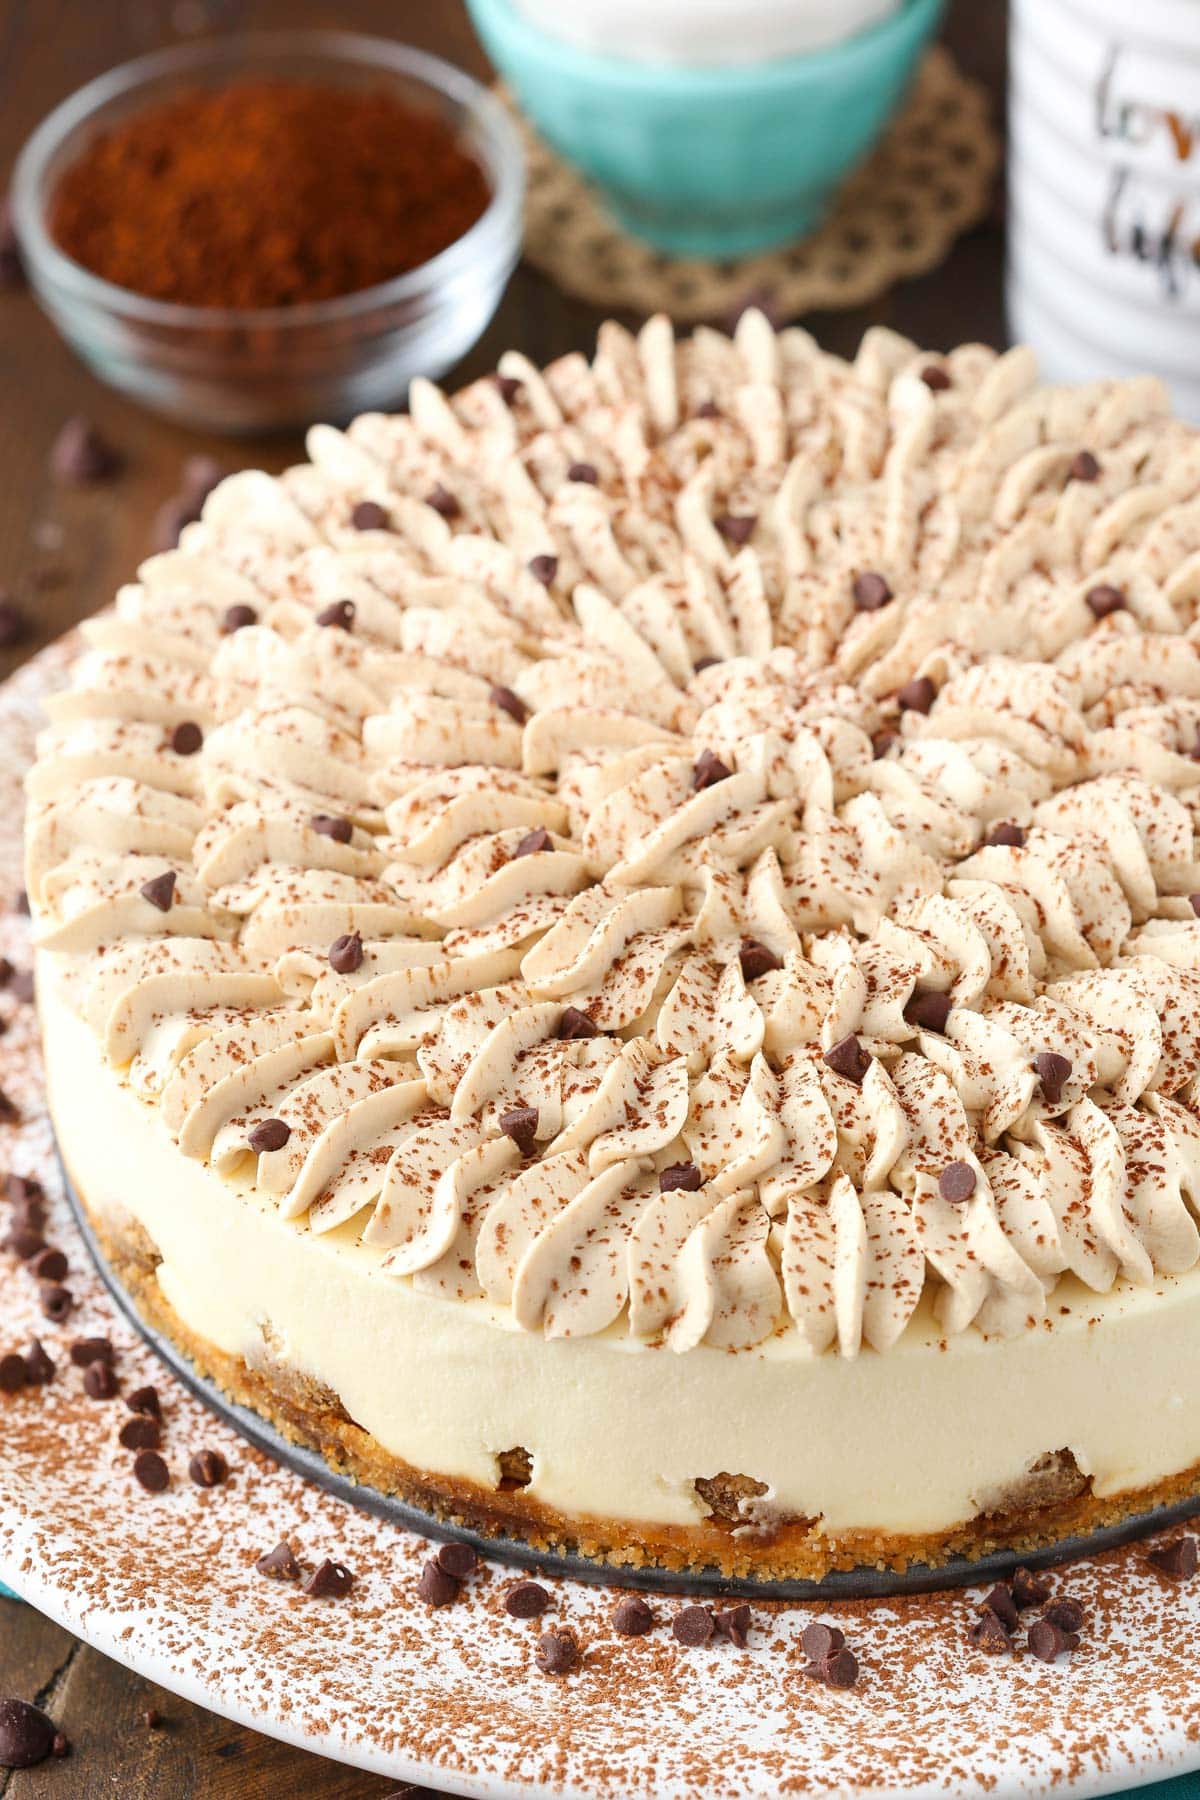
To finish off the cheesecake, I used a Kahlúa and espresso whipped cream. I used what was left of the Kahlúa mixture that I dipped the ladyfingers into, but if you don’t have any left you can make a little more. The whipped cream is piped onto the cheesecake using the Ateco 808 piping tip. Starting from the outside, you pipe shells in several full circles all the way around the cheesecake and in to the center. A sprinkle of cocoa powder finishes it off perfectly!
The hardest part of making this cheesecake is waiting for it to firm up! I couldn’t wait to dig in and it definitely didn’t disappoint. All my tiramisu dreams came true in the form of this cheesecake! So good!
More Tiramisu Desserts:
- Mini Tiramisu Trifles
- Classic Tiramisu
- Tiramisu Cupcakes
- Pumpkin Tiramisu Layer Cake
- Oreo Brookie Tiramisu
Watch How To Make It
Tiramisu Cheesecake
- Prep Time: 5 hours
- Cook Time: 10 minutes
- Total Time: 5 hours 10 minutes
- Yield: 12–14 Slices 1x
- Category: Dessert
- Method: Oven
- Cuisine: American
Description
This Tiramisu Cheesecake is a super easy no-bake recipe and tastes just like tiramisu cake! The combination of espresso, Kahlua and mascarpone cheese is to die for!
Ingredients
CRUST
- 1 1/4 cup (167g) vanilla wafer crumbs
- 1/4 cup (56g) salted butter, melted
- 1 1/2 tbsp (20g) sugar
CHEESECAKE FILLING
- 8 oz (226g) cream cheese, room temperature
- 16 oz (452) mascarpone cheese, room temperature
- 1/4 cup (52g) sugar
- 1 cup (240ml) heavy whipping cream, cold
- 1/2 cup (58g) powdered sugar
- 2 tsp vanilla extract
KAHLUA MIXTURE*
- 3 tbsp (45ml) warm water
- 2 tbsp (30ml) instant espresso powder
- 1 cup (240ml) Kahlua
- 12 soft ladyfingers
KAHLUA WHIPPED CREAM
- 1 cup (240ml) heavy whipping cream, cold
- 1/4 cup (60ml) Kahlua mixture (remaining from above), cold
- 10 tbsp (73g) powdered sugar
- Cocoa, optional
Instructions
CRUST
1. Preheat oven to 325°F (163°C). Line a 9-inch springform pan with parchment paper in the bottom and grease the sides.
2. Mix together the crust ingredients until well combined and press the mixture into the bottom of the springform pan.
3. Bake the crust for 10 minutes, then set aside to cool.
FILLING
1. To make the filling, mix the cream cheese, mascarpone cheese and sugar together on medium-low speed until combined. Do not mix on high speed or overmix or the mascarpone cheese can begin to separate. Set aside.
2. In another mixing bowl, add the heavy whipping cream, powdered sugar and vanilla extract. Whip on high speed until stiff peaks form.
3. Slowly fold the whipped cream into the mascarpone cheese mixture. Set aside.
4. Combine the warm water and espresso powder for the Kahlua mixture in a small bowl. Add the Kahlua and stir to combine.
5. Dip the ladyfingers into the Kahlua mixture one at a time, then add to the springform pan, on top of the crust.
6. Spread the mascarpone cheese mixture evenly over the ladyfingers.
7. Set the cheesecake in the refrigerator to chill and firm, 5-6 hours or overnight. Set remaining Kahlua mixture in the fridge for later.
8. When the cheesecake is firm, make the Kahlua whipped cream. Add the heavy whipping cream, 1/4 cup of the remaining Kahlua mixture and powdered sugar to a large mixer bowl. Whip on high speed until stiff peaks form.
9. Carefully remove the cheesecake from the springform pan and use an offset spatula to smooth the sides, if needed.
10. Add the Kahlua whipped cream to the top of the cheesecake. You can simply spread it on top or pipe it in a similar pattern as I did. I used the Ateco 844 tip.
11. Sprinkle a little cocoa over the top of the cheesecake, if desired.
12. Refrigerate the cheesecake until ready to serve.
Notes
For a non-alcoholic espresso mixture to replace the Kahlua mixture, replace with this:
1 cup hot water
4 tbsp instant espresso powder
4 tbsp sugar
Nutrition
- Serving Size: 1 Slice
- Calories: 508
- Sugar: 26.3 g
- Sodium: 149.8 mg
- Fat: 34.9 g
- Carbohydrates: 37.3 g
- Protein: 5.9 g
- Cholesterol: 119.1 mg
Enjoy!
Categories:
Cheesecakes, Christmas, Fall and Holiday Favorites, Holidays, Recipes, Recipes with video, Sweets and Treats, Thanksgiving,


What kind of cocoa powder is sprinkled on top?
Just regular natural unsweetened cocoa powder.
I have made this recipe many times throughout the years and it is always a hit! I’d like to try to make it in single-sized portions using a cupcake tin. Would the recipe mold well in a cupcake tin with liners? I would just break up the lady fingers to fit on the bottom. Any tips? Thanks!
I’m glad it’s been a hit! I’m not really sure about cupcake liners. Sounds like your suggestion might be best.
I wanted to follow-up and I did wind up making them in the cupcake holders – the more durable/taller ones that you find at HomeGoods/Marshalls. The recipe held up well and they tasted great! Everyone loved them. It was a great way to offer your delicious Tiramisu in individual servings.
Awesome! Thanks for sharing! I’m glad they turned out well!
I’m confused the older comment says you used soft ladyfingers the newer comments say the hard ladyfingers which one should we use?
I’m sorry, I have a couple different tiramisu cheesecake recipes, and it can be confusing on the back end to know which recipe a comment is on. This one uses soft ladyfingers, and I added that note to the recipe.
Hi, I’m looking to make this in 2 days… but I’m confused. I see in the comments people mentioning soft ladyfingers… but the video seems to show hard ones and no where in the recipe does it say anything about soft ones. What am I missing? Thanks!!!
I use the hard ladyfingers.
Wondering how long leftovers will keep?
Should be good for about 4-5 days.
Made this last night for a coworkers birthday. Huge hit! Thank you!
I’m so glad it was a hit!
I made this but wound up using the hard ladyfingers I soaked them for a few seconds on each side. Will it be ok?
I imagine it will be fine.
I made this for the first time this weekend, and it was rave reviews all around. A friend, who had just returned from 3 weeks in Italy, said it was the best tiramisu she’d ever had.
I changed the crust to a choc/cappuccino cookie blend, but kept everything else the same with the coffee only version. I didn’t realize it called for soft ladyfingers, and used crunchy ones; the coffee from them ended up leaking through the crust. Totally fine, as we just kept it on a plate, and there was some extra coffee to scoop up with each bite. 13/10 would recommend.
I’m so glad you enjoyed it and that it was a hit!
Wondering if this could be frozen? Fabulous recipe.
I’m so glad you enjoyed it! I would imagine it would do fine frozen.