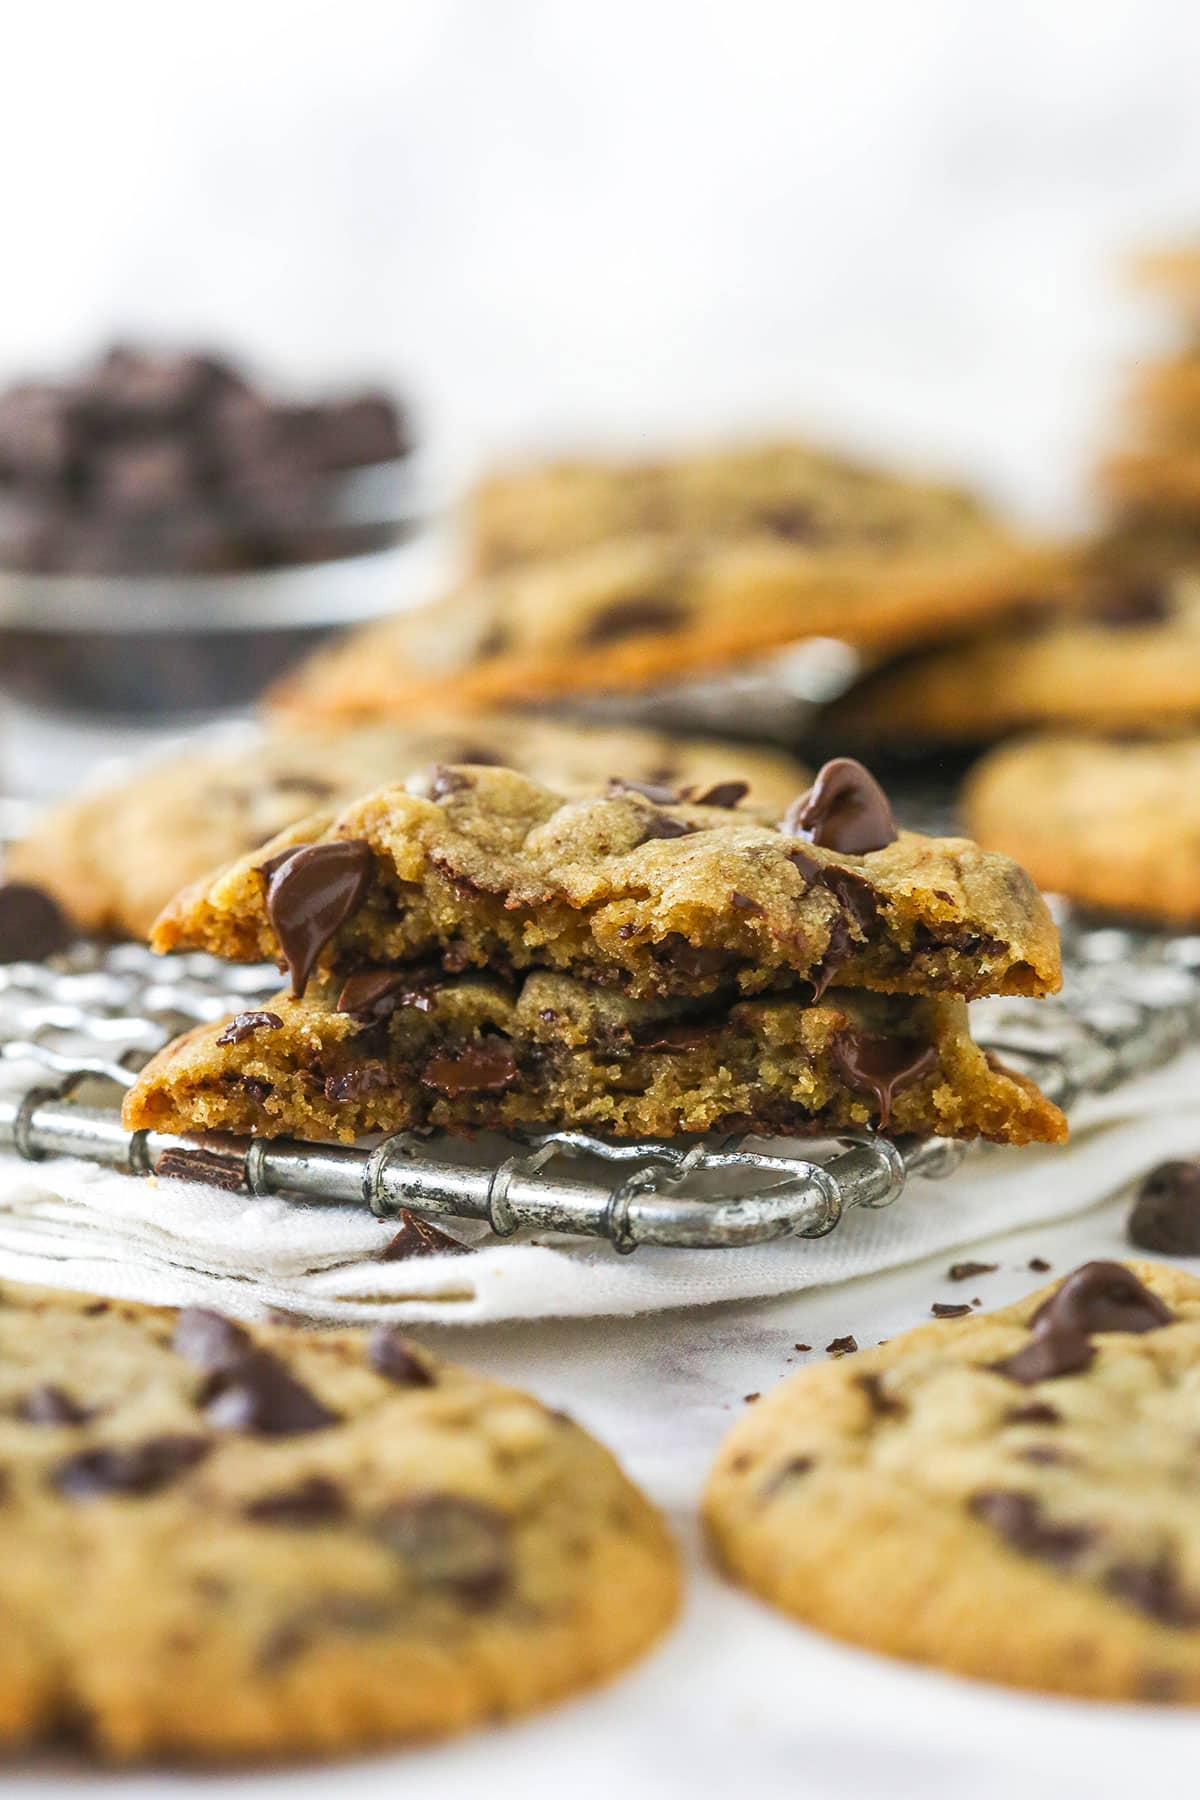
These Brown Butter Chocolate Chip Cookies take classic chocolate chip cookies to a whole new level, with a rich and slightly nutty flavor. They stay soft and chewy for days, and every bite is loaded with gooey chocolate.

After making my brown butter cutout cookies and brown butter buttercream, I decided it was time to make brown butter chocolate chip cookies. Just like in the cutout cookies, the brown butter gives these chocolate chip cookies a rich, deep flavor that is so good.
This recipe is similar to my chewy chocolate chip cookies but with a few changes and adjustments. The butter is browned, obviously, and there are a few ingredient adjustments to offset the moisture loss from browning the butter. The cookie dough is also refrigerated, which helps keep them soft and chewy for days. Plus, there’s chocolate in every bite and they’re super easy to make. Just remember to leave time for the dough to chill!
Why I Can’t Stop Making These Brown Butter Chocolate Chip Cookies
- Rich, nutty flavor. The brown butter in the dough gives these cookies a deep, slightly nutty flavor that takes your everyday chocolate chip cookie to the next level. It’s not overpowering, but it adds noticeable depth to the flavor. So good!
- Lots of chocolate. These brown butter chocolate chip cookies are loaded with plenty of chocolate – both chocolate chips and chopped chocolate. I chose to use both types of chocolate to ensure there was rich, melty, gooey chocolate in every bite.
- Soft and chewy. It’s easy for cookies to be dry when using brown butter, but these are not! In addition to the extra butter and egg used, the dough is refrigerated, which allows the flour to absorb more of the wet ingredients. They stay soft and chewy for days!

What Is Brown Butter?
Brown butter is made when you cook butter on the stove until it turns golden brown. The water evaporates as the butter melts and cooks, then the milk solids brown, creating a rich, nutty, caramel-like flavor and aroma. Let it cool for a bit and use it in baking recipes to enhance the flavor profile. It only takes about 10 minutes to make.
How To Offset The Moisture Loss
Because the water evaporates when you cook the butter, you lose about 20-25% of your butter volume, depending on the butter brand. We don’t want dry cookies, so to offset that loss, these cookies use more butter than is typical and have an extra egg.

Key Ingredients
These cookies are made with just a handful of basic baking ingredients. Be sure to scroll down to the recipe card below for the exact measurements.
- Butter – I like to use unsalted butter to fully control the saltiness.
- All-purpose flour – I like to use a food scale or the spoon and level technique for measuring flour. Over measuring your flour will give you very dry cookies. See my post How To Accurately Measure Flour for more details.
- Baking soda – Allows the cookies to rise, spread and brown properly in the oven. It also helps them stay softer and chewier for longer.
- Salt – Brings out the flavors already present.
- Sugar – This recipe uses more brown sugar than granulated sugar, which adds moisture and contributes to the chewy texture. The molasses-y flavor of the brown sugar also pairs nicely with the browned butter.
- Eggs – Use large eggs at room temperature.
- Vanilla extract
- Chocolate – I use a combination of chopped semi-sweet chocolate and chocolate chips. If you don’t have a bar of chocolate on hand, you can increase the amount of chocolate chips used.
How To Make Brown Butter Chocolate Chip Cookies
Here’s an overview of how to make these soft and chewy cookies. The printable instructions can be found in the recipe card below.
Brown The Butter

Melt the butter in a light-colored pan over medium-low heat. Increase the heat to medium and bring to a boil, again stirring constantly.

A dense foam will appear as the water evaporates and the butter begins to turn brown. Keep stirring as browned bits form.

Once the butter is browned with a nutty, buttery smell, transfer immediately to a bowl to cool to room temperature.
Make The Cookie Dough and Bake

Combine the dry ingredients in a bowl. Set aside.

In another bowl, combine the butter, eggs, sugars, and vanilla.

Add the dry ingredients to the wet ingredients and combine, then add chopped chocolate and chocolate chips.

Measure 2 tablespoon-sized balls of cookie dough. Stack the cookie dough tall and chill for at least 3 hours.

Bake the cookies for 9-12 minutes. Use a circle cutter or spoon to push in the edges and shape them, if needed. Cool on the pan for 5 minutes then transfer to a cooling rack.

Tips for Baking Perfect Cookies
- Browning the butter. Don’t walk away while making it. If you walk away from the pan, you risk burning the browned butter. Stir it constantly, so it doesn’t burn. And use a light-colored pan, so you can see it change color. For more on browning butter, see my post How To Brown Butter.
- Cool the butter. Let the brown butter cool to room temperature before using it in the cookie dough so you don’t get greasy cookies.
- Measure correctly. Measure the flour correctly so that your cookies don’t turn out dry. To get it right, use a food scale or the spoon and level method.
- Don’t over-mix. When combining the wet and dry ingredients for the cookie dough, mix just until everything is incorporated. Mixing past this point can cause the glutens to overdevelop, resulting in tough, dense cookies.
- Chill the dough. Before baking the cookies, refrigerate the dough for at least 3 hours. Do not skip this step! The flour will absorb more of the wet ingredients, resulting in more tender, chewy cookies. The longer you refrigerate them, the longer they last once baked. They get darker in color, too.
- Don’t over-bake. Bake the brown butter chocolate chip cookies just until they no longer look under-baked in the middle.
- Add sea salt. For a salty finish, sprinkle sea salt on top of the cookies when they come out of the oven.
Proper Storage
- Room temperature: Store brown butter chocolate chip cookies in an airtight container. They’re best enjoyed within 3-4 days.
- Freezer: For longer storage, place the cooled cookies in a ziploc bag and press out all of the air. Freeze for up to 3 months. Thaw on the counter or pop in the microwave to warm.
Watch How To Make Them


Brown Butter Chocolate Chip Cookies
save this recipe
Enter your email & we’ll send it to your inbox. Plus get new recipes from us every week!
Ingredients
- 1 1/4 cups (280g) unsalted butter
- 2 1/4 cups (293g) all-purpose flour
- 1 teaspoon baking soda
- 1/2 teaspoon salt
- 3/4 cup (168g) packed light brown sugar
- 1/4 cup (52g) sugar
- 2 large eggs
- 2 teaspoons vanilla extract
- 4 ounces (113g) semi-sweet chocolate (chopped)
- 1 cup (169g) semisweet chocolate chips
Instructions
Brown the butter
- Note: The butter will brown quickly once it starts to turn brown, so don’t walk away from the stove. Have a bowl ready to pour it into once it’s done, so it doesn’t continue to cook and burn.
- Add the butter to a light-colored pan over medium-low heat and allow to melt, stirring continuously. Turn the heat up to medium and allow it to come to a boil, again stirring constantly.
- The butter will change as it boils, finally getting a dense foam on top once the water has all evaporated. Stir constantly so that the butter browns evenly and milk solids don’t settle on the bottom of the pan and burn. Stirring also allows you to see through the foam to see when the butter starts to brown. The foam will subside a bit and you’ll notice brown bits on the bottom of the pan. It’ll smell buttery and nutty. I like to stir a touch longer to get plenty of brown bits, just be careful not to burn it (keep stirring!).
- Immediately remove from the heat and pour the brown butter into a heatproof bowl. Set aside to cool to room temperature (or just slightly warmer). It will thicken as it cools and become more solid, but soft, at room temperature. If you want to prep the brown butter ahead, you can refrigerate it and bring it room temperature before using it.
Make the cookie dough
- Combine the flour, baking soda and salt in a medium-sized bowl and set aside.
- Add the room temperature butter, sugars, eggs and vanilla extract to a large bowl and whisk together until well combined.
- Add the dry ingredients and stir together just until the dough is well combined. I folded it by hand with a spatula, but you could use a mixer. It may seem a little dry at first, but it’ll come together. Don’t over mix.
- Gently fold in the chopped chocolate and chocolate chips.
- Measure 2 tablespoon-sized balls (32g) of cookie dough. To have them spread properly and be a little thicker, you want them to sit tall on the cookie sheet (refer to photo above). You can think of it like you are stacking one tablespoon on top of the other.
- Cover the cookie dough balls or store in a container and refrigerate for at least 3 hours, or up to 2 days. The longer you refrigerate them, the softer and chewier they are. I like to refrigerate them overnight. You could also just roll the cookie dough into a ball to refrigerate, but the cookie dough gets quite firm so you’ll need to add time for letting it come to room temperature before you can roll the balls.
Bake the cookies
- Preheat the oven to 350°F (180°C) and line a cookie sheet with a silicone baking mat.
- Remove the cookie dough from the fridge and place cookies onto baking sheet. You can bake them straight from the fridge, or let them come to room temperature. I baked 6 a time, since they will spread a good bit while they bake.
- Bake for 9-12 minutes or until the cookies just look done in the center. Remove from oven and use a circle cutter or spoon to push in the edges, if needed. They sometimes spread in a funky shape. Allow the cookies to cool for 4-5 minutes, then remove to a cooling rack to finish cooling.
- Serve and enjoy! Store cookies in an air-tight container at room temperature. Best if eaten within 3-4 days.
Notes
- Flour – I like to use a food scale or the spoon and level technique for measuring flour. Over measuring your flour will give you very dry cookies. See my post How To Accurately Measure Flour for more details.
- Chocolate – I use a combination of chopped semi-sweet chocolate and chocolate chips. If you don’t have a bar of chocolate on hand, you can increase the amount of chocolate chips used.
- Chill the dough – Before baking the cookies, refrigerate the dough for at least 3 hours. Do not skip this step! The flour will absorb more of the wet ingredients, resulting in more tender, chewy cookies. The longer you refrigerate them, the longer they last once baked. They get darker in color, too.
Nutrition
The nutrition facts provided are calculated using a third-party tool and are estimates only. Actual nutritional content may vary based on the ingredients and brands you use, as well as portion sizes. For accurate results, please consult a registered dietitian or nutritionist.


