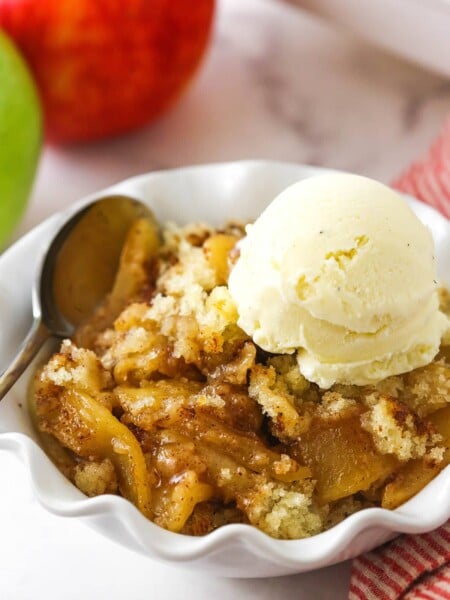
Ever wish you could share your favorite apple pie with more people? Meet apple slab pie! It takes the classic flavors you love and transforms them into a wonderfully crowd-pleasing, easy-to-serve and share pie.

Love apple pie, but need enough to share? This apple slab pie is the answer! It captures all the beloved flavors of traditional Homemade Apple Pie, but does it all in a large 10×15″ baking dish. Like my Sheet Pan Pumpkin Pie, this is such a fun, shareable twist on a classic holiday dessert! You’ll find a generous filling of tender, tart apples, perfectly spiced with sweet cinnamon, nutmeg, and a hint of vanilla. And that rich, flaky, buttery crust? It practically melts in your mouth! I even added a sprinkle of coarse sugar on top for a sweet, subtle crunch that really takes this dessert to the next level. What are you waiting for? It’s time to enjoy your favorite fall dessert with ALL of your loved ones!
Apple Slab Pie Combines Rustic Charm With Big Flavor
On the hunt for the perfect dessert for your next fall gathering? Here’s why this slab apple pie’s got my vote:
- Fabulous fall flavor. The apple filling strikes the perfect balance between sweet and tart, while the cinnamon and nutmeg add a cozy feel perfect for the season. And that rich, buttery crust!? Get out of here!
- The texture is incredible. The apples in this dessert get SO tender and juicy, and they’re surrounded by a perfectly flaky, golden-brown crust that practically melts in your mouth.
- Great for a crowd. Need an apple pie that’ll feed a crowd? This slab pie is the perfect solution, serving up to 18 people without compromising on that homemade taste! Plus, you can prep it up to 3 months in advance!
What You’ll Need
Time to head to the store! Honestly, you probably have most of these ingredients in your kitchen already! See the recipe card below for precise measurements.

- All-purpose flour – Or your favorite 1:1 gluten-free flour.
- Unsalted butter – You’ll use butter in the crust and you want it to be COLD so it doesn’t soften too much while you make the crust. If you only have salted butter, you can use it. Just leave the salt out of the crust.
- Cold water – VERY cold. If the water is too warm, it will melt or soften the butter. I’ll talk more about that in the “Tips for Success” section below.
- Apples – I went with Granny Smiths and Honeycrisps for the perfect balance between sweet and tart. See the section below titled “What Are the Best Apples for Homemade Apple Pie?” for more info.
- Lemon juice – To help keep the apples from browning and add a touch of brightness to the filling.
- Sugars – Light brown sugar AND granulated sugar. Be sure to pack the light brown sugar into the measuring cup to ensure you get the proper amount.
- Salt – It amplifies the flavors in the pie. Without it, the filling would be bland.
- Large egg – Beaten. To brush over the crust and help it brown nicely. You don’t have to use it though.
- Coarse sugar – I like sprinkling a little sugar over the top of my pie crust. It adds a lovely sparkle and just a smidge of crunch and extra sweetness. You can leave it off if you’d like, though.
What Are the Best Apples for Homemade Apple Pie?
I decided to use a combination of Honeycrisp and Granny Smith apples for this slab pie. Granny Smiths are nice and tart and hold their shape well as they bake. They’re a bit tart, though, so I like pairing them with sweeter varietals such as Honeycrisp, Braeburn, or McIntosh apples. These sweeter options get a little mushier in the oven, but when used in conjunction with the Granny Smiths, you get the perfect balance of taste and texture.

How to Make an Apple Slab Pie
Ready for some apple pie magic!? Here’s a quick look at how to make this tasty dessert. Be sure to scroll to the recipe card below for more detailed instructions.
Make the crust
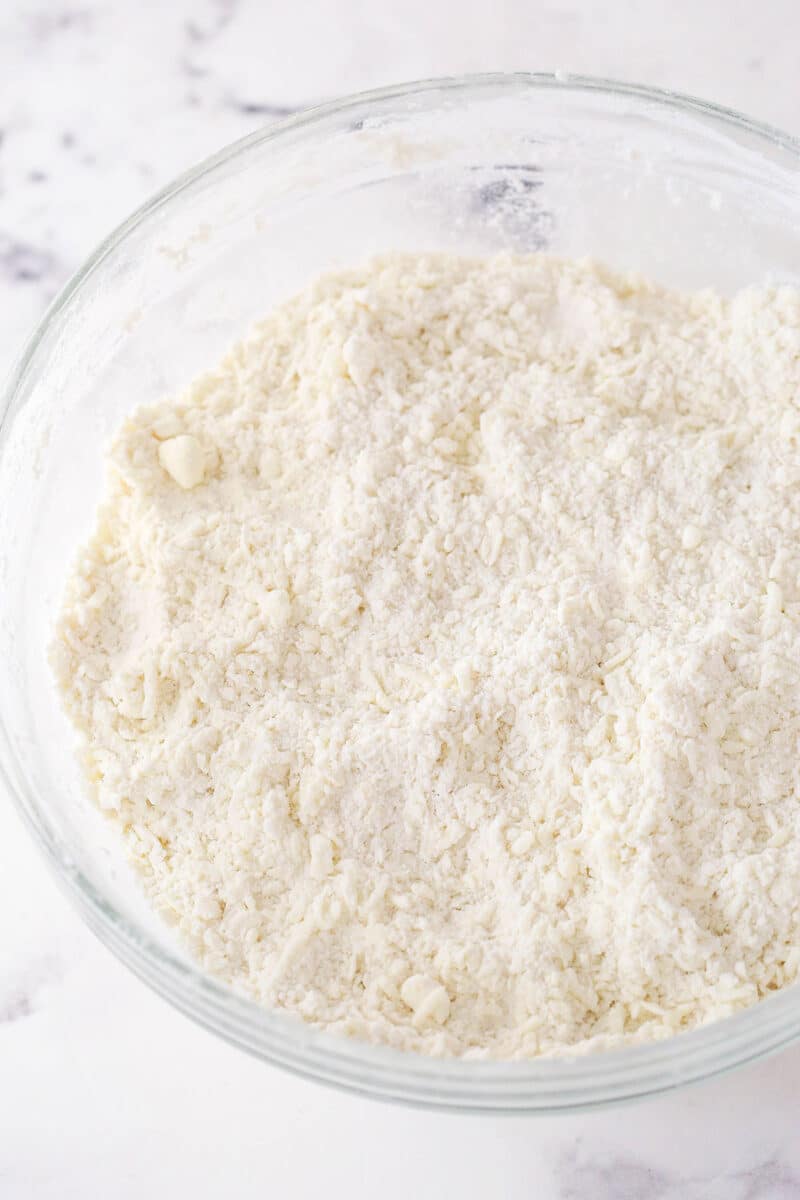
Make the dough. Combine the flour and salt, then cut the butter into the mixture until the biggest pieces remaining are pea-seized.
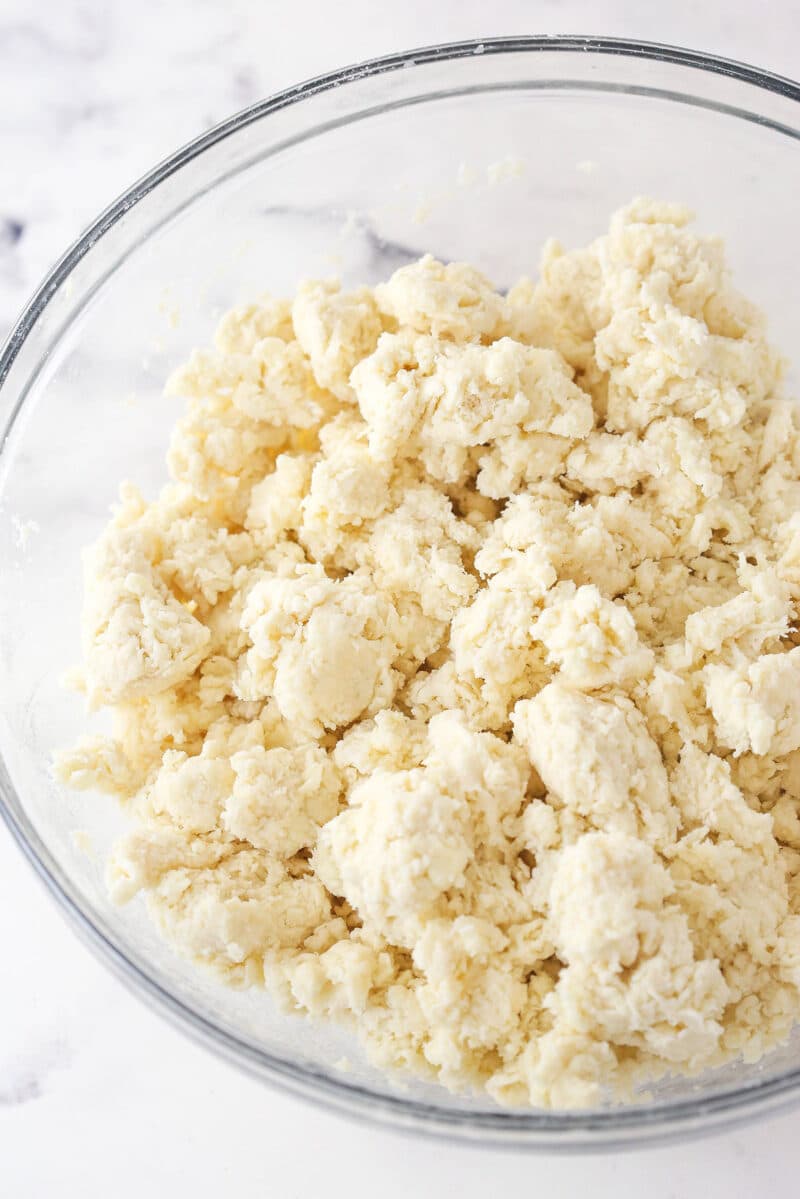
Add water. Fold in 4 tablespoons of ice water. Add more water, 1 tablespoon at a time, until the dough holds together.
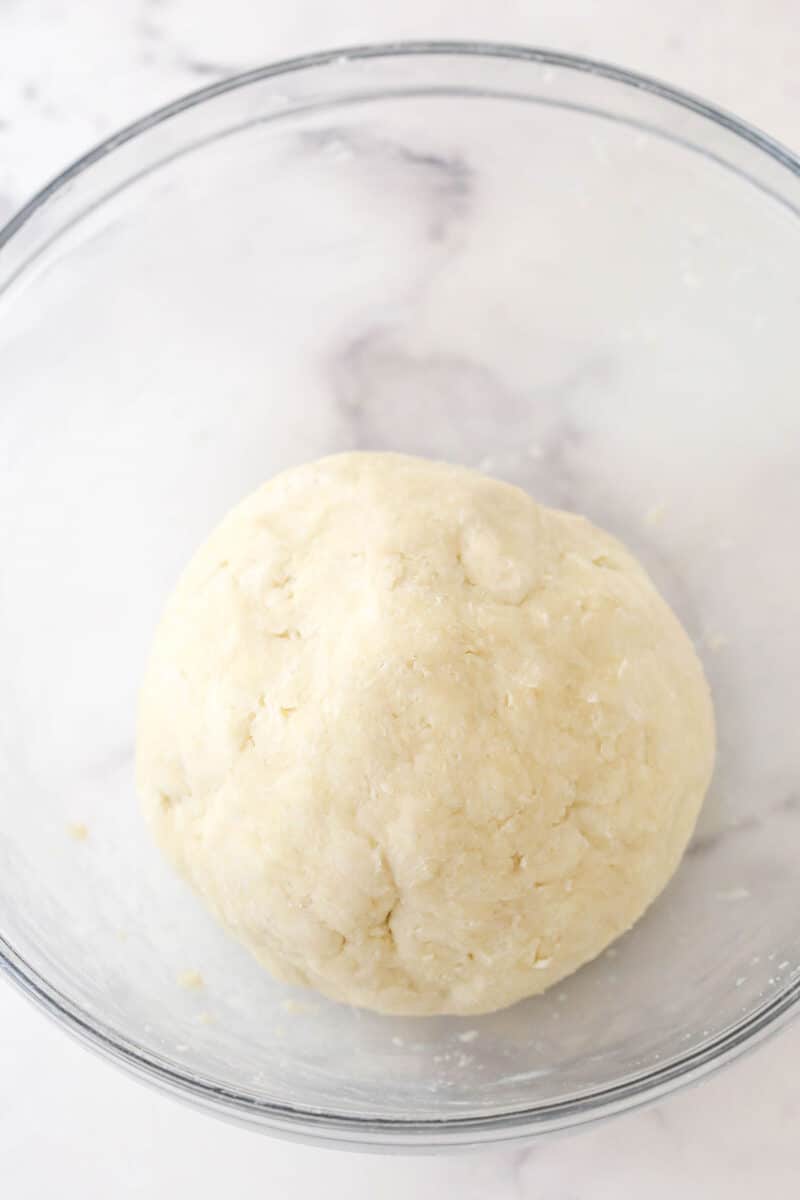
Form a ball. Keep the dough in the bowl, or turn it out onto parchment paper, and work it into a ball.
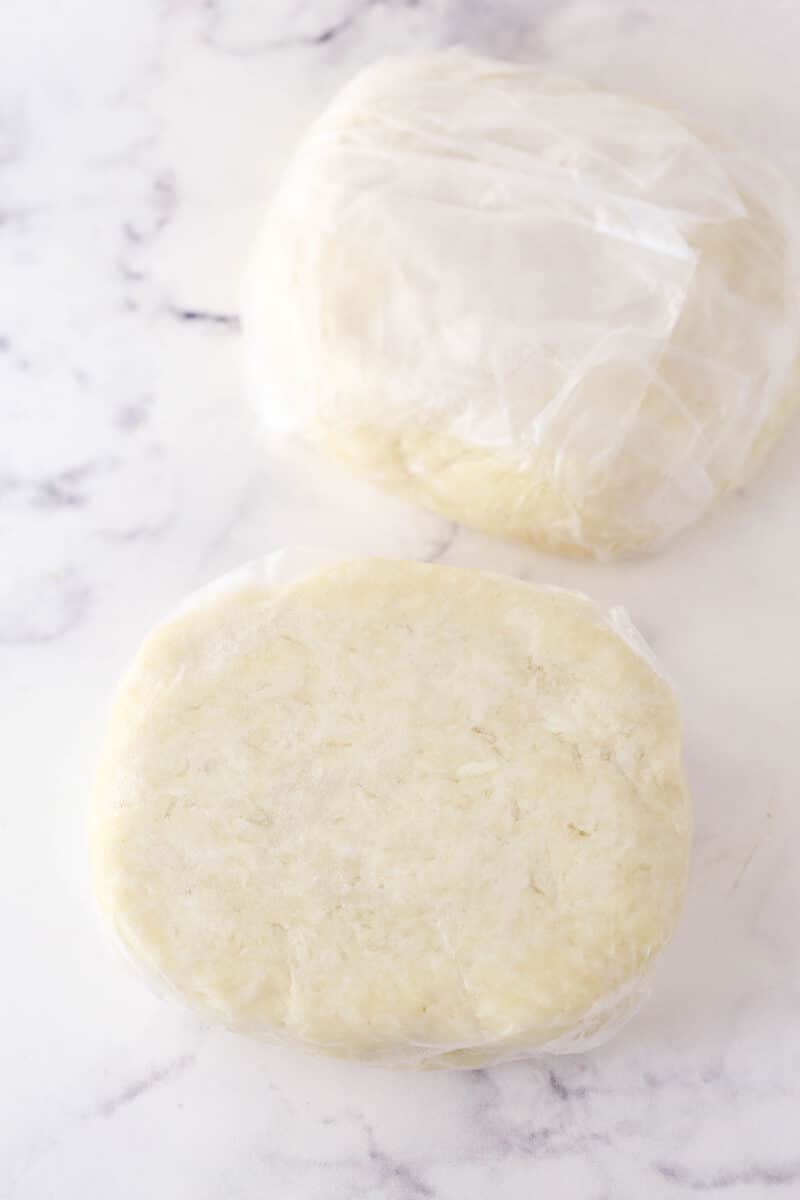
Form disks and chill. Divide the ball into two and shape each portion into a disk. Wrap each disk in plastic wrap and chill in the fridge for at least 1 hour (up to 2 days).
Make the apple filling
- Prep the apples. Peel, core, and slice the apples. Aim for uniform ~1/8 inch slices. Toss the apples in lemon juice and set aside.
- Sweeten. Toss the apples in the sugars, flour, salt, cinnamon, and nutmeg.
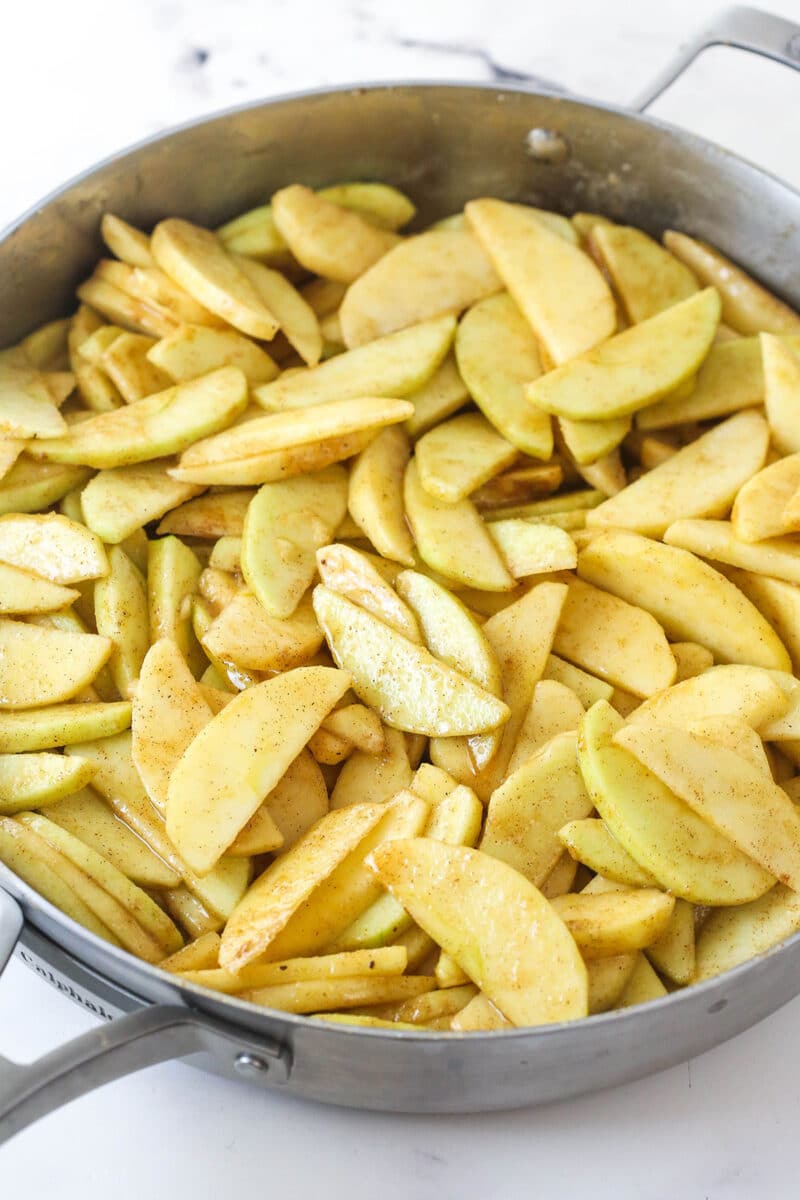
Cook. Pour the apples into a 5-quart skillet, cover, and cook over medium heat for ~20 minutes or until fork-tender. Remove from heat and stir in the vanilla.

Chill. Spread the apple filling onto a sheet pan and refrigerate until completely cool.
Assemble and Bake
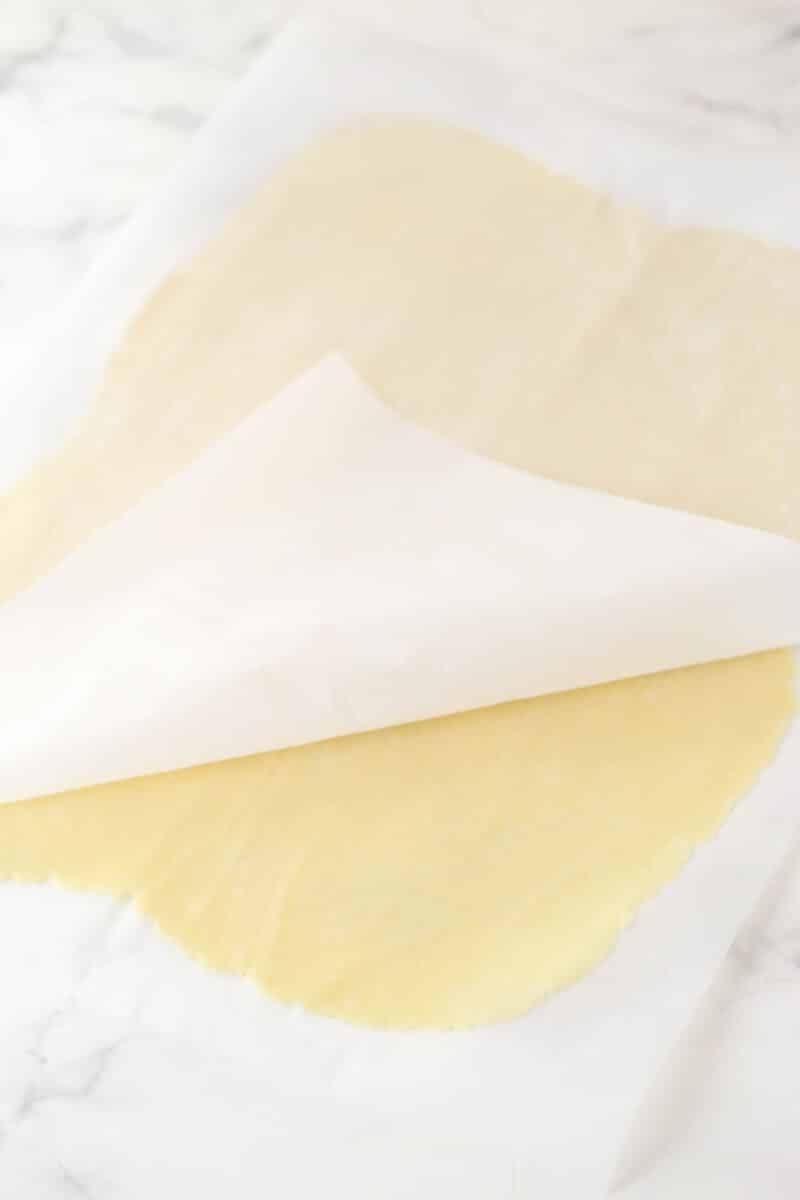
Roll out the dough. Place one of the disks of crust dough between two pieces of parchment paper. Roll the dough out into a 10×15″ rectangle (to fit the pan), with a little extra for shaping the crust.
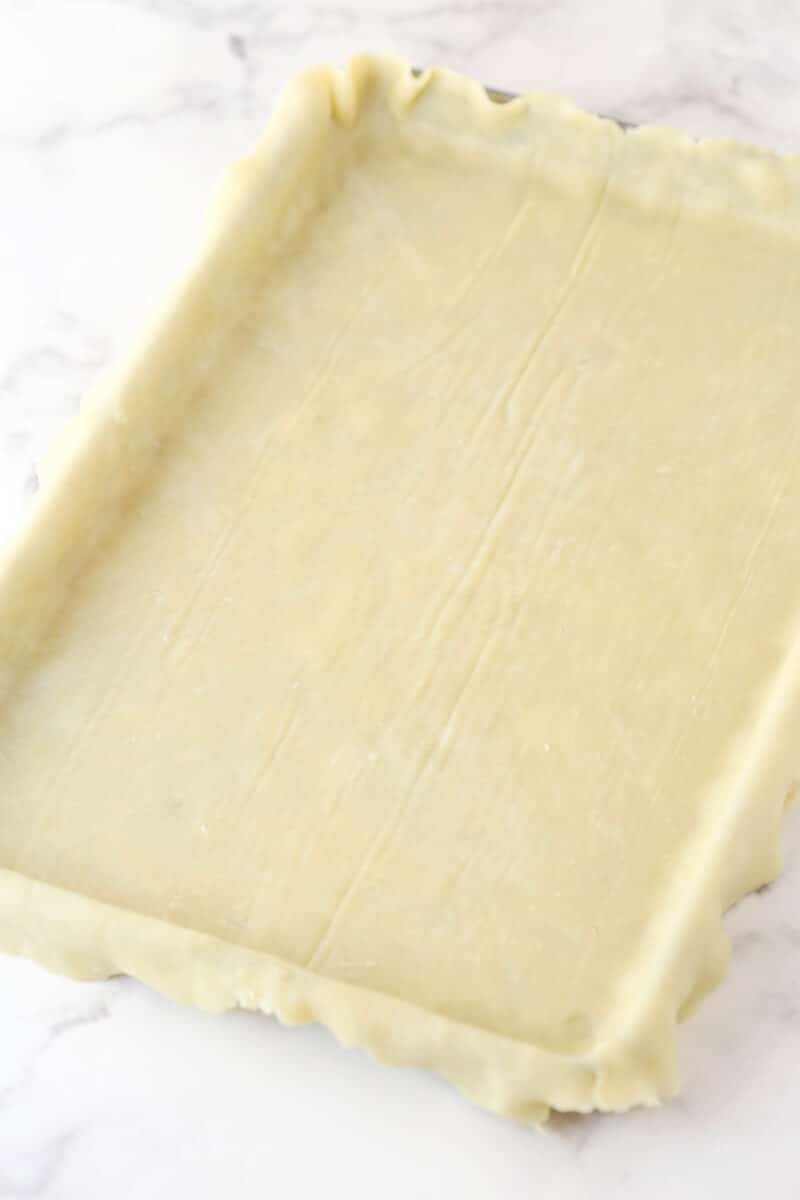
Shape crust. Peel one piece of the parchment paper off and drape the dough over the pan. Peel off the other piece of parchment and use your hands to fit the crust into the pan.
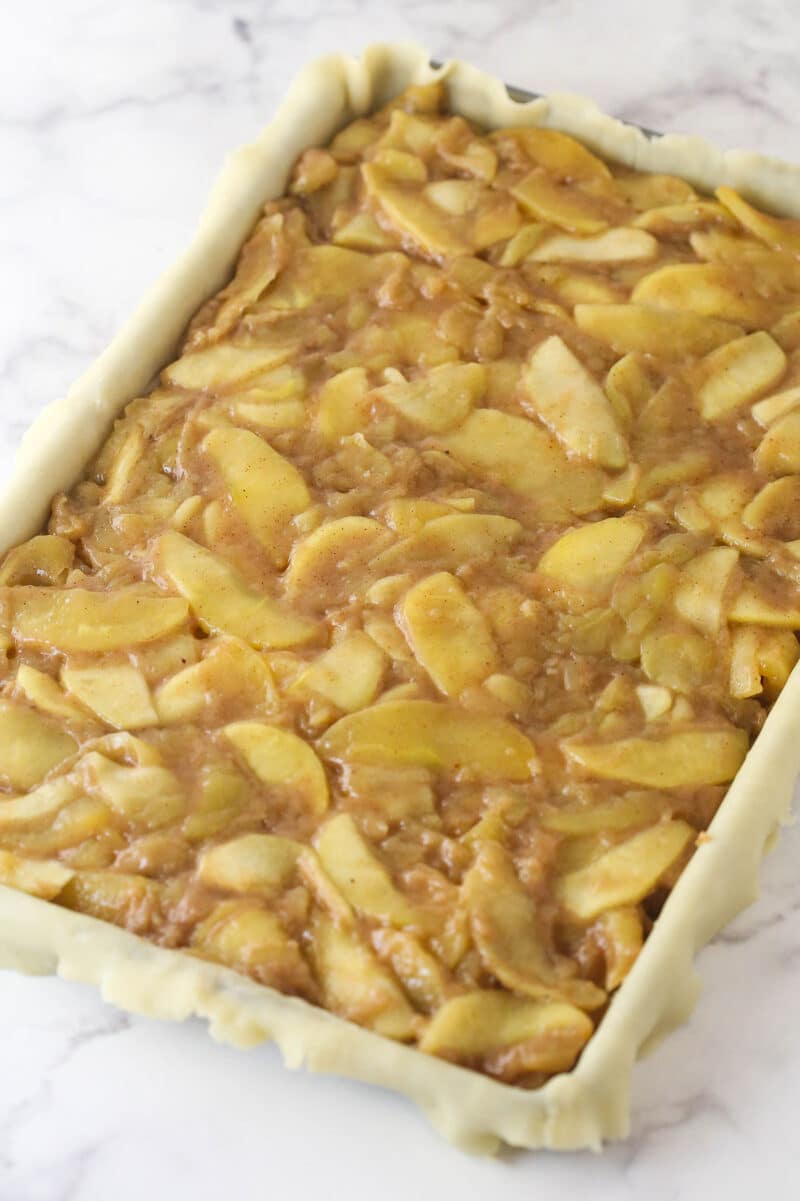
Fill the crust. Add the cooled pie filling to the prepared crust.
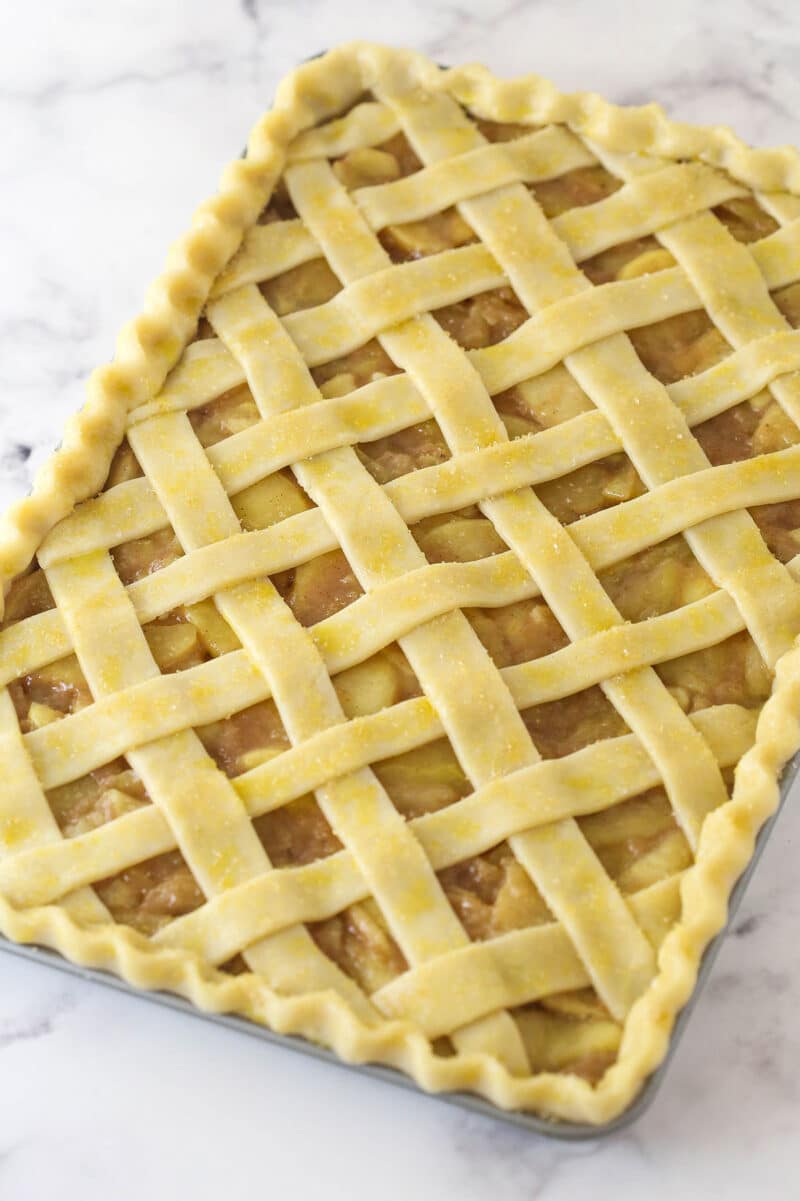
Cover. Roll out the other pie crust and add to the top of the pie I did a lattice design, but you don’t have to. If you don’t, score the crust so that steam can escape while it bakes. Brush the crust with the beaten egg and sprinkle with coarse sugar.
- Chill before baking. Chill in the fridge or freezer for 20-30 minutes.
- Prepare to bake. Preheat oven to 425°F. Let a baking sheet sit in the oven while the pie chills.
- Bake. Place the pie on the preheated baking sheet and bake for 15 minutes. Reduce oven to 350°F and bake for 25-35 minutes.
- Cool. Place the pie on a wire cooling rack and cool to room temperature.
Tips for Success
- Even apple slices. Try to slice the apples to an even thickness so they cook evenly.
- Fork-tender. Cook the apples until they are fork-tender but still hold their shape. No more. You don’t want a mushy filling. Note that the apples won’t soften more in the oven, so what you see on the stove-top is what you’ll end up with.
- Parchment paper hack. I like to roll the crust out between two pieces of parchment paper. It makes it easier to transfer it to the pie pan and works beautifully with less mess.
- Ensure proper ventilation. I did a lattice design, but you don’t have to. If you don’t, score the crust so that steam can escape while the pie bakes.
- Let it cool. I know it’s hard, but try to have patience and let the pie cool for at least an hour (ideally two) before slicing. The filling will thicken during this time. If you try to slice the pie when it’s still hot, the juices may pool.

A Tender, Flakey Pie Crust
The perfect pie crust is all about keeping the butter cold prior to baking. Here are some tips to ensure that you get the best results.
- Cold butter. It’s important to start with cold butter and to keep it (and the dough) as cold as possible until you pop the pie in the oven. Cold butter creates pockets of steam in the dough, which results in a flaky, tender crust.
- Cold water. Using ice-cold water will help you on your mission to keep the butter as cold as possible.
- Don’t over-handle the dough. The heat from your hands (and/or over-mixing) can cause the butter to melt.
- Be sure to chill the dough. Chill the dough for at least 1 hour before you roll it out. This will help keep the butter nice and cold.

How Can I Tell When It’s Done?
Since the filling was already cooked, that part is just heating through. You do need to be sure to fully cook the crust. Cook the pie until the crust is golden brown and the juices of the filling are bubbling throughout.
To prevent burning: If the crust begins to brown too much before the filling is bubbly, you can use foil to tent the pie. Just be sure it’s vented. Otherwise, the steam produced during the baking process won’t have anywhere to go, and your crust will turn soggy.
Can I Make Apple Slab Pie Ahead of Time?
Yes! There are a few ways to do it:
- Pre-make the filling: Once you make the filling, let it cool and seal it in an airtight container, such as a ziplock. You can store it in the fridge for up to 3 days or in the freezer for up to 3 months. When you’re ready for pie, make the crust, thaw the filling (if applicable), assemble, and proceed as per usual.
- Refrigerate overnight: Assemble the entire pie ahead of time and refrigerate it overnight. Bake as you normally would the following day.
- Freeze the whole (unbaked) pie: Assemble the pie as per usual (minus the egg wash and sugar) and wrap the whole thing in foil. Pop it in the freezer for up to 3 months. Let the unbaked pie thaw in the fridge, add the egg wash and coarse sugar, and bake as you normally would.

How to Store and Reheat
- Counter/refrigerator. Once it’s cooled completely, cover the pie with a double layer of plastic wrap OR arrange slices in a single layer in an airtight container. It’ll keep at room temperature for up to 2 days and in the fridge for up to 4 days.
- Freezer. Cover the fully cooled pie in a double layer of plastic wrap or arrange slices in a single layer in an airtight freezer-safe container. You can freeze this dessert for up to 3 months. When you’re ready to enjoy, allow the leftovers to thaw in the fridge.
- To reheat. Remove the plastic wrap from the leftover slab pie or transfer slices to a baking dish. Cover the baking dish with aluminum foil and bake at 325°F for 10-15 minutes or until warm. You can also microwave individual servings in 15-30-second intervals until heated through.
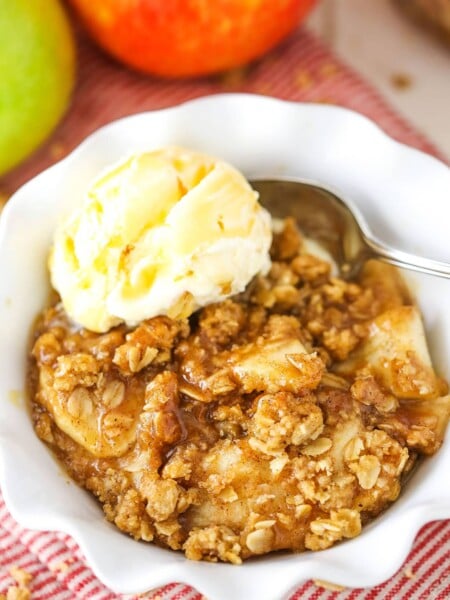
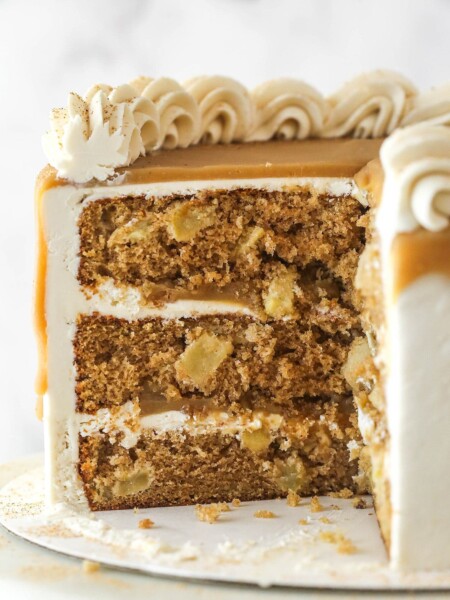
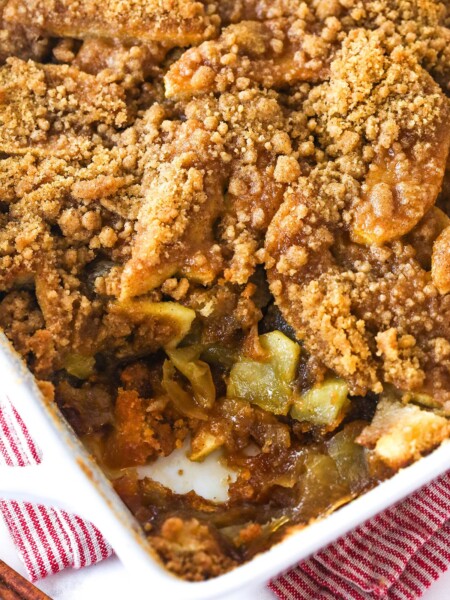
More Apple Dessert Ideas

Apple Slab Pie
save this recipe
Enter your email & we’ll send it to your inbox. Plus get new recipes from us every week!
Ingredients
Crust
- 3 3/4 cups all-purpose flour (488g)
- 1 1/2 teaspoons salt
- 1 1/2 cups cold unsalted butter, cut into 1/2-inch cubes (336g)
- 4-6 tablespoons very cold water
Apple Filling
- 2 1/2 pounds Granny Smith apples, before peeling and coring (5-6 large apples)
- 2 1/2 pounds Honeycrisp apples*, before peeling and coring (4-5 large apples)
- 1 tablespoon lemon juice
- 1/2 cup packed light brown sugar (112g)
- 1/2 cup sugar (104g)
- 1/3 cup all-purpose flour (43g)
- 1/2 teaspoon salt
- 1 1/2 teaspoons ground cinnamon
- 1/4 teaspoon ground nutmeg
- 1 teaspoon vanilla extract
- 1 large egg, beaten
- Course sugar, optional
Instructions
Make the crust
- Combine the flour and salt in a large bowl and stir together.Scatter the cubed butter over the flour. Use a pastry cutter or a fork to work the butter into the flour, until the biggest pieces remaining are about the size of little peas.
- Add 4 tablespoons of the ice water (start with 4 tablespoons and add from there). Using a rubber spatula, gently fold everything together. The crumbs should begin to form larger clusters. If you pinch some of the dough and it holds together nicely, it’s ready. If the dough falls apart, add 1 more tablespoon of water and continue to press until dough comes together.
- Pour the dough out onto a piece of parchment paper and work just enough for it to come together and form a ball. Divide the dough in half, shape each half into a disc (or a somewhat flattened rectangle) and wrap in plastic wrap. Refrigerate for at least an hour or up to 2 days. If refrigerated overnight, let it sit out for about an hour before rolling it, since it will be pretty firm.
Make the apple filling
- Peel, core, and slice all of the apples to about 1/8 inch thick. You want to try to slice them all about the same thickness so they cook evenly. Add the lemon juice to a very large bowl and toss the apples in the juice as you slice them, leaving the apple slices in the bowl for later.
- Add the sugars, flour, salt, cinnamon, and nutmeg to the apple slices and gently toss to coat them all with the mixture. Be careful not to break the apples as you toss them. Pour the apple mixture into a large 5-quart skillet.
- Cook the apples (covered with a lid) over medium heat for about 20 minutes. You want the apples to be fork-tender but still hold their shape. The apples won’t soften more in the oven, so how they are when you stop cooking them is how they’ll be in the pie. Cook them to how you like them. Remove the pan from the heat and gently stir in the vanilla extract.
- Spread the apple filling evenly onto a sheet pan or any pan with a lip around the edge and refrigerate it until completely cool. Depending on how cold your fridge is, it’ll take a couple of hours or so to cool fully. You could also pop it in the freezer to cool more quickly, but you won’t want it to be frozen when you go to use it later. You can use it right after cooling, or store it for up to 2 days ahead of making the pie.
Assemble and Bake
- When ready to make the crust, place the pie crust onto a piece of parchment paper. You can add a touch of flour if you like, but you don’t have to. Cover the crust with another piece of parchment paper and roll it out with a rolling pin into the rectangular shape and size of your 10×15-inch pan, with a little extra for shaping the crust.
- Peel one piece of the parchment paper off and use the other piece of parchment to lift the pie crust and drape it over the pan. Carefully peel off the second piece of parchment paper, then shape your pie crust.
- Add the cooled pie filling to the pie crust. Roll out the other pie crust and cover the filling with it. I did a lattice design, but feel free to do it however you like. If you don’t do a lattice or a design that is naturally vented, just be sure to score the crust so that steam can escape while it bakes. Fold and crimp the edges of the pie as desired.
- Brush the crust of the pie with the beaten egg and sprinkle the top with the coarse sugar.
- Place the pie in the fridge or freezer for 20-30 minutes to get it cold and firm.
- Preheat oven to 425 degrees Fahrenheit. While the pie is chilling, place a large baking sheet in the preheated oven for about 20 minutes to get nice and hot. You'll set your pie on this pan when you place it in the oven.
- Put the pie into the oven on the preheated baking sheet and bake for 15 minutes or until the crust is starting to brown.
- Reduce oven temperature to 350 degrees Fahrenheit and bake for an additional 25-35 minutes, or until the crust is golden brown and the juices of the pie are bubbling. If the crust begins to brown too much, you can use foil to tent the top of it. Just be sure it’s vented for the steam to be released.
- Let the pie cool on a wire rack to room temperature or just warmer, about 1-2 hours, depending on the temperature of your kitchen. The filling will thicken as it cools. If you cut it when it’s still hot, the juices may pool.
- When the pie is cool, slice and serve.
Notes
- I used Honeycrisp apples, but mainly you want to be sure to use an apple that isn’t tart like the Granny Smith apples. You want a mix of tart and sweet/flavorful apples.
- To store. Store the pie at room temperature for up to 2 days, then refrigerate it. The pie should be good for 3-4 days.
- To freeze. Cut any remaining pie into slices and place them uncovered in the freezer. Once frozen, wrap the slices in plastic wrap and place them back into the freezer. You can keep them there for up to 3 months. When you’re ready to eat, let the slices thaw overnight in the fridge. Heat them up before serving.
Nutrition
The nutrition facts provided are calculated using a third-party tool and are estimates only. Actual nutritional content may vary based on the ingredients and brands you use, as well as portion sizes. For accurate results, please consult a registered dietitian or nutritionist.


I totally intend to try your recipe this weekend, and I’m sure it will be very good, because you are one of my trusted recipe sources. But the way the print box now splashes big, dark “subscribe to me” bands in not one but TWO places across every recipe? Jeepers. . . I’m already subscribed. Wish those ink-sucking boxes would GO AWAY. . . They make a recipe that I should be able to get on the back and the front of ONE piece of paper take up at least two. And I’ll probably lose the second one. . .
I’m so glad you enjoy the recipes! Thank you for the feedback on the recipe card. I don’t typically print recipes, so I hadn’t considered that. I will see if we can get that changed, since it’s not necessary in the print version. Thanks!
AWESOME–thank you so much!
This looks wonderful! I have a question. You are saying to put a pie pan in the oven while the pie is chilling in the fridge. Are you putting one pie pan into the other to bake this? Thanking you for clarifying for me.
Sorry for the confusion. You want to put a pan that’s larger than the one you made the pie in in the oven to preheat. You’ll place the pie on that pan when you put it in the oven. It helps to bake the crust quickly so that it stays crisp and doesn’t get soggy. It also catches any overflow from the pan while it bakes. I hope that helps!