This post may contain affiliate sales links. Please read my disclosure policy.
Last week I promised that I’d have a video, tutorial and all the info you need to learn How to Decorate Cookies with Royal Icing and today is the day! If you’ve ever wanted to make beautifully decorated cookies, follow this simple guide!

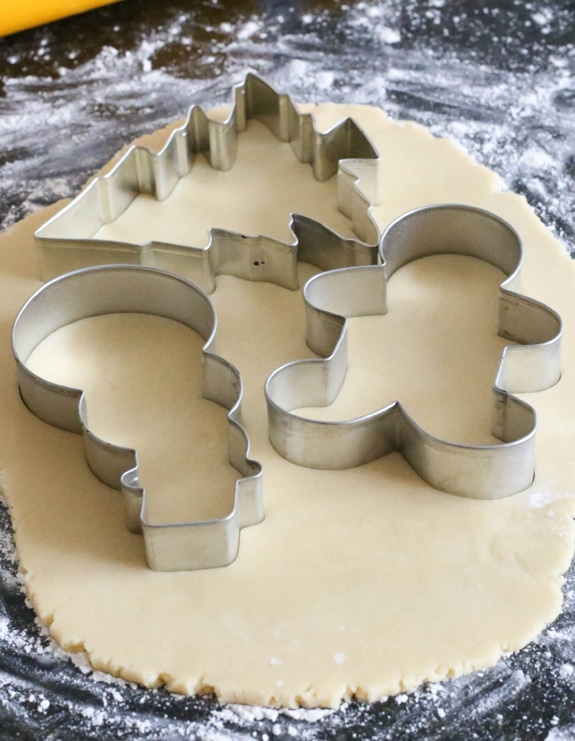
To start, if you haven’t already be sure to checkout my cutout sugar cookie recipe. You’ll obviously want to start with making those cookies. 🙂
Once your cookies are baked and cooled, it’s time for the fun part – the decorating. The first thing to talk about is the royal icing. Don’t be afraid just get in there! They may not be perfect the first time, but you’ll get the hang of it.
This royal icing dries nice and firm, so you can easily stock the cookies, wrap them, whatever your preference and transport them.
To make the royal icing, you’ll combine meringue powder and powdered sugar, then add water and mix together for 7-10 minutes on low to medium speed. I use my whisk attachment on my mixer. Keep mixing until the icing looses it’s sheen. You’ll notice in the video below that my icing is fairly thick to begin with. You could have it a little thinner to start since you’ll end up with a thinner icing in the end, but I do like to have more control over that so I usually start on the thick end.

Once the icing is made, be sure to keep a damp cloth over the bowl when you aren’t using it or it will dry quickly. I typically cover the bowl with a paper towel and sprinkle water over it. Just be sure to sprinkle more water on as it dries.
The recipe below should be enough to cover the cookies made with my cutout sugar cookie recipe. Depending on what cookie cutters you’re using and what you’re decorating, you’ll want to think about how much icing you’ll need for each color. I needed a fair amount of white, red, green and brown for my cookies, with just a little bit of black. So divide your icing into separate bowls based on the number of colors and amounts you think you’ll need. The icing goes pretty far.
If you’re using colors similar to mine, I used Wilton icing color, which can be found at most local craft stores like Michaels, Hobby Lobby, Walmart, or online. I used pretty basic colors including Leaf Green, Red, Black and Copper with a little bit of black for the gingerbread men and other areas where there was something brown or skin toned.
If you haven’t used icing color before, it’s pretty straight forward. It’s thick and almost gel-like so that you don’t thin out your icing too much. I use toothpicks to slowly add the amount of color I need, adding small amount at a time. There’s nothing worse than adding too much of a color and ruining your icing. Start with small amounts – it’s much easier to add more color than to remove it. One other note about the icing and coloring it – the color actually darkens as the icing sits. So black for example might look like a really dark grey at first, but as it dries on your cookie it’ll darken.
As you add the color to your icing you can also be slowly adding more water, if needed, to get the right icing consistency. You’ll see that I included video of my icing and how I test the consistency to help it be a little more clear.

There are many ways to test icing consistency and I’ve used methods where there’s a thicker icing for the lines and thinner “flood” icing to fill in the lines. I find that it is a huge pain to have to make two consistencies of every icing color so in this method, there’s one consistency that’s used for everything.
How to Tell When Your Icing is Ready to Use
To test it, I run a toothpick through the center of the icing. You want to icing to naturally fill that line back in – but not too quickly. It should actually need some encouragement in the form of shaking from you to come completely back together. You’ll notice in the video that I let the icing sit for couple seconds, then shake it to come together completely. I do the same thing when icing the actually cookies. When I fill in the icing, it’ll mostly come together on it’s own but I shake it a little bit to help it come together completely.
You could also use a toothpick to move the icing around and help it come together, but I find that I get more air bubbles in my icing when I do that. No good.
To pipe the icing onto the cookies, you’ll need icing bags, couplers, icing tips (I used tip 3 for everything, but you could go smaller for smaller details), icing bag ties and icing tip covers. I suggest having enough icing tips for each color so you aren’t needing to switch out the tip constantly. The ties and covers are important for keeping your icing from drying out while in the bags during your decorating session. The icing can quickly dry out and leave your tip clogged and hard to work with, so the cover is important. If that does happen, a toothpick can help remove the blockage, but something it still can cause an issue once it’s started drying out.
Once you have your icing ready and into your bags, it’s time to get to piping! 🙂
You’ll want to keep even pressure on the bag as you squeeze out the icing. In the video, notice that for the most part I don’t keep my icing tip super close to the cookie. I actually lift up a bit so that icing falls in a more natural, soft line around the cookie.

You’ll want to think through the decorating before you start so you know what details you want to include and if the icing should dry or not before adding details. Notice in the video below that I add the hat and main who body of the snowman and then let it dry before adding the rest. If you add the details before it dries, they won’t sit on top of the icing but will settle into it. If you prefer that look, you can do that too. But you’ll want to think it through before you begin. Use the video below to help give you guidance in thinking through the best way to ice your specific cookie.
And above all else, have fun! Decorating cutout sugar cookies with royal icing has become super fun for me. The first couple of times it drove me crazy, but now I love it. If you aren’t in love with your cookies the first time, don’t give up. After a few tries, you’ll develop “your touch” and everyone will be begging you to make their cookies. 🙂
Enjoy the video! I’d love your feedback. 🙂
[adthrive-in-post-video-player video-id=”l0e8Q5BU” upload-date=”Fri Aug 05 2016 00:55:31 GMT+0000 (UTC)” name=”How to decorate sugar cookies with royal icing” description=”How to decorate sugar cookies with royal icing”]
Read transcript

- Category: Dessert
- Method: Bowl
- Cuisine: American
Description
Last week I promised that I’d have a video, tutorial and all the info you need to learn How to Decorate Cookies with Royal Icing and today is the day! If you’ve ever wanted to make beautifully decorated cookies, follow this simple guide!
Ingredients
- 3 tbsp meringue powder
- 4 cups (460g) powdered sugar
- 6–8 tbsp (90-120ml) water
- 1 tsp vanilla extract
Instructions
1. Combine meringue powder and powdered sugar in the bowl of a mixer.
2. Add 6-7 tablespoons of water and mix with whisk attachment at medium speed for about 7-10 minutes, or until icing looses it’s sheen. Begin with 6 tablespoons and add up to an addition tablespoon if needed to get the icing smooth for mixing.
3. Once icing is ready, add additional water to get the right consistency for piping and the vanilla extract. See notes and video above for guidance on consistency, coloring and piping.
Notes
Once icing is ready, cover with a damp cloth to keep it from drying out. Icing can be stored in an airtight container for 1-2 weeks. Stir again before using.
Filed Under:
Enjoy!
This post contains affiliate links.


I tried to make it like that but it was a little to runny and I want to know how to make it just right
How long do you need the icing to dry before putting on more details?
It depends a little, but it should start to form a thin crust on top after about 15 to 30 minutes.
Do you have a book or pictures that show how to design or decorate using royal icing?
I don’t. This is it. Sorry!
I plan on trying this out for my son’s birthday party. Is it feasible to make the cookies and decorate them 3 days ahead of time? If so, how should they be kept? Best to individually wrap them? Refrigerate? Any advice is appreciated! Thank you!
I keep them at room temperature in an airtight container. You can layer them if you want, but I would put parchment paper between the layers.
Thank you for the recipe and for explaining everything I needed to know to decorate with royal icing for the first time! I decorate cookies all the time now thanks to your recipe and tips!
So glad it was helpful!
Tweezers would make handling those tiny decorations so much easier (after a bit of practice)!
Can you freeze these decorated cookies?
Yes, you can. I’d thaw in the fridge though.
This looks like something I can do…but I don’t have a stand mixer for the icing… will a hand mixer work? thanks for the info.
You’d have to whip quite a bit, but I supposed it’d be fine.
I have never seen meringue powder in any shops in the U.K. We have powdered royal icing sugar (made by silver spoon) – would that be the same?
I’m not sure if it’s the same. There’s powdered icing sugar, which wouldn’t be the same. If it’s called royal icing sugar, then maybe it has meringue powder added? I’d check the label.
Hello!
I just tried making royal icing cookies for the first time the other day,and it was such a pain to make two icing consistencies. I like the idea of only having to make one. But if the icing is thin enough to flood together, how is it sturdy enough to hold the shape at the edges? I’m a bit confused about how this works. Thanks for your help!
I can see why it’s confusing but to do it you need a consistency that’s kind of in the middle. You want it to be just thick enough to hold the line on your cookies but still thin enough that you can also flood the cookies. Since it’s not as thin as something that’s just for flooding, it doesn’t flood without a little help but it works very well.
i love this recipe so much
How soon after you complete the outline does the flooding get completed: outline should be totally dry? or soon after outlining the flooding can be done? Thanks!!
You could do it either way, depending on the look you want. If you want the filling to blend with the outline, then do it before the outline dries. That’s probably most common.
Where or how do you acquire meringue jujupowder
You should be able to find it at craft stores like Michael’s or at Walmart.
Is it possible to add Caro Syrup to the recipe to get the “shiny” look?
I haven’t tried it, but would think it’d be ok.
How many cookies would this recipe be able to ice.
It depends a little on the size of your cookies and how much icing are using for each cookie. Generally though I would say you should be able to decorate 25 to 30 cookies pretty easily.
We did this with a more watery consistency and used paint brushes. Kids loved it and so easy!
I love the idea of using the paint brushes! How fun!
Hi! I was wondering if you’ve ever frozen the cookies with royal icing and what that process is? Thanks!
I wouldn’t really recommend freezing them with the royal icing. When you thaw them, the moisture will cause the colors to bleed. It’s best to freeze the cookies without the icing on them.
Where did you get the holly and berry decoration that you put on the snowman’s hat, and the yellow star that you put on the Christmas tree? Did you make them or did you buy them already pre-made?
I had so many questions about what to do to decorate sugar cookies, but between your video and the questions and comments everyone has made here and your links as to where and what to buy, has helped me get started. Thank you!!
I have found similar sprinkles at many places. Home Goods often has great seasonal sprinkles. Here’s a holly and berry mix from Target too. And these are the stars I used, but unfortunately they are unavailable right now. Maybe you could find something similar. I’m so glad to hear the tutorial was helpful!
I have finally learned to outline and fill my cookies with royal icing when decorating. Yay! I am having problems with small detail piping. When I want a small line or dot, I use a # 1 or #2 tip to pipe.my Icing. Either the icing will barely come through the tip or it comes through too wet. Also my piping is thicker in some places than others and the lines dry flat instead of raised. My small detail line piping changes my cookie decorations and makes them look like an amateur. What am I doing wrong? Thanks so much for your help.
Looking to try these out soon. My son’s birthday party is on Sunday. Today is Wednesday. How soon can I make them before the party to ensure they will not be too hard and still taste fresh?
If you’ve already applied royal icing to the cookies, they will stay fresh for longer. I would say 3 to 5 days is usually fine.
Question: do you Store the icing at room temp or the fridge? I’m thinking the cold fridge would harden and maybe dry it out? Just want to make sure it stays safe to eat when left at room temp though. Thanks!
Room temperature. You might need to mix it a little bit again when you’re ready to use it, if it’s been sitting a bit.
love your video. just wondering how many cookies does the icing recipe cover approx. Thank you
That would depend a little on the size of your cookies and how much icing you need for your decorations. But I had more than enough to cover my 20 large cookies, if that helps.
Hi Lindsay,
Thank you so much for showing a video on royal icing. You made it look so easy (but who knows how well I will execute!) haha I loved how you “flooded” the icing because I’ve seen it done differently that scared me.
I just had 2 quick questions. I read in one of the comments you use vanilla in your icing. How much vanilla extract do you use? Is it extract or is it something else.? Oh and whats the difference between meringue and corn syrup? Some of the recipes for royal are corn syrup.
Thanks!
I’d try between 1/2 to 1 tsp of vanilla extract. As for meringue powder and corn syrup – they are quite different. I haven’t ever used corn syrup in royal icing, so I’m not entirely sure of the effect it has. But generally corn syrup softens frosting and gives it a sheen, so I imagine it does something similar to royal icing. However I wouldn’t think it would dry as firmly. Meringue powder acts somewhat like egg whites in that it whips to a high volume and is light and airy. In this icing, it dries very firm. I hope that helps!
I want to thank you so very much for sharing your sugar cookie recipe with me. My son is getting married and one day I was looking through a magazine, most likely the monthly Costco Connection. There was a picture of the most adorable heart shaped bride & groom cookies. I just had to figure out how to make them. I went to Joann’s and bought all types of fondants to try and cut them out to put on sugar cookies. Afterwards for some reason I decided to goggled for Bride & Groom cookies, I stumbled upon you. I not only got a fantastic recipe for the cookies I got a very detailed description on how to make Royal Icing, I found your pictures that are the exact ones I had seen in a magazine! So, I decided to give them a shot, I made the cookies and they are as good as you say. Your detailed description was so helpful, answered questions I had and you told me what the dough would look like. The cookies were FANTASTIC! Soft, chewy and tasteful. Then I decided to try the Royal Icing and again your recipe and descriptions were so very helpful. Well, last night I put the two together and until 2am was putting dresses on cookies. I was having so much fun I didn’t want to go to bed. But, I have an awful lot of chores to do before we leave Monday for a snowy wedding and figured I should get some sleep. So, this morning I’m starting the tux’s, lets hope I have as good of a time with those. The only thing I didn’t have was the edible pen so my dresses are not so perfect as yours. Thank you Lindsay so much for sharing, I’m definitely going to be looking here for other great ideas & recipes when I get back home.
Hi! I clicked the link for the icing tips but Amazon said that the page doesn’t exist anymore. Would you mind updating it? I am going to buy everything you used! Thank you!
Thanks for letting me know! The link has been updated. 🙂
I’m thinking about trying this with my 12 and 8 year old boys. They don’t have to be perfect. But wanted your opinion on if you think it’s something that would be too difficult for them to try.
I would think they could do it with the right tools. Could depend a bit on how comfortable they are with baking related things though.
Wow, your video was amazing! I can’t wait to try your cookie and icing recipes for the cookies I’m taking to a Christmas cookie swap!!
Hi, I really love ur work. I just have one question am in nigeria finding egg white powder is a bite difficult I just want to know if its ok to use fresh egg whites?
I haven’t done that before so I’m not really sure. I’m sorry!
I would
Use the lemon in your cookie recipe only.
Hello Lindsay,
How you get that black color on the icing? Thanks!!!
It’s a black gel icing color. I use Wilton brand.
I should have read your explanation above about black dyed icing looking dark gray before it dries. I probably used a half of the wilton gel container in a tiny bit of icing trying to get it black enough! Still worked though. My first time making royal icing and your recipe was fabulous!
Hello! I am just getting into baking and decorating cookies and understand oil will ruin my royal icing. I want to add lemon extract for flavor but cannot find one that doesn’t include oil! Do you have a brand of lemon extract you recommend for icing?
Thanks!
I’m sorry, I don’t. I don’t really use lemon extract at all. I typically use vanilla in my royal icing.
THANK YOU! This is awesome!
Lindsay, I love watching your videos–thanks for doing them! Question on filling in the large areas on cookies with the Royal Icing: I get why you wouldn’t want a thick icing for the edge and a thinner icing for the filling, but I was getting antsy watching the process of filling in the large areas, and wondered if you ever fill two bags with the same color: a smaller bag/smaller tip for the edges, and a larger bag/larger tip to more quickly fill in the large areas? You’d have to be careful not to over-fill the area, but wouldn’t that speed up the process when making a ton of cookies?
You could certainly do that. Like you said, you’d just need to be careful. You have more control with the smaller tips.
Hi Lindsay I agree great video.. I’m new to the royal icing world and this video was great. Do you make a border on your cookies with the 3 tip then let dry then flood the center? If so how long do you wait for it to dry?
I don’t let the border dry first, I just flood the center. It makes a more even appearance on the icing. I add a border after everything is done and let that dry.
Hi, I was wondering how long they should dry before packaging/stacking them, thanks 🙂
I’d say at least a couple hours, just to be sure they’re firm.
I’m new at baking and your posts and especially your videos have provided to be invaluable learning tools. Could you by any chance describe how you did the Santa like you did the Christmas tree? It would be greatly appreciated! Thanks so much for your blog!! Don’t know what I’d do without it!
I’m so glad the videos are helpful! I’ll do my best to describe it – it’s been a while. 🙂 Star by adding the the outline of the red suit and red part of the hat and filling that in. Let it dry for 15-20 minutes. Add the face, beard, hands and boots next and again allow to dry a bit. Add the red outlines on the suit and hat, then add the white “fluff” on the suit and hat. When the initial layer of white beard had dried a bit, I added a second layer so it was raised above his face a bit. I added a dot of the skin color in the middle of the top of the beard for his mouth. Once the face and beard are dry, you can add the eyes and mustache. I hope that helps!
how long will these cookies last once iced? I’ve heard Royal Icing gets too hard to eat after too many day??? Thanks for the video, it’s great!
I don’t usually have an issue with them getting too hard, especially the way I’ve suggested making the icing. It’s a little thinner to begin with and should stay nice for up to a week, in my experience.
Do you use vanilla in yoir royal ocing recipe?
I usually do, yes.
Great video! Where did you get the caps for your tips? I decorated cookies this holiday and the icing kept dripping out when I wasn’t using it. Those caps would be sooo useful!
Thanks Chris! They are wilton decorating tip covers. You can easily find them online, or in craft stores like Michaels, Hobby Lobby or even Walmart.
Love the video. Do you have a video of how u decorated the Christmas trees?
Thank you! I don’t have a video of the tree, but I can try to describe it for you. It’s a similar process to the one in the video. I did the outline of the tree and stump and filled them in first. Once the green part of tree was dry (at least 15-20 minutes, it’s pretty big area), I added the green lines for the tree branch levels and added the star. Once that was dry, I added the red strings and dots. I hope that helps!
LOVE the video! I think I’m still in that stage like you said, where the first couple times drive you crazy, haha. 🙂 But this video makes it look so easy. I really want to decorate some cookies now!
This is a great video….thanks for sharing!
Normally I don’t love royal iced cookies because the royal icing to too hard. However I had the chance to try these cookies and they were FANTASTIC! I’ve never had a royal icing that was soft when you bite into it. Love it!
Hi Lindsey! Love, love, love this tutorital. How long would you say it took the icing to dry before you added the details on the snowman?
I think it was about 15-20 minutes.
Hey, could you please tell me the ingredients measurement in grams?
I’m unsure of the weight for meringue powder, but I added the powdered sugar measurement.
Love the video, Lindsay! It’s awesome to watch you work. Do more!