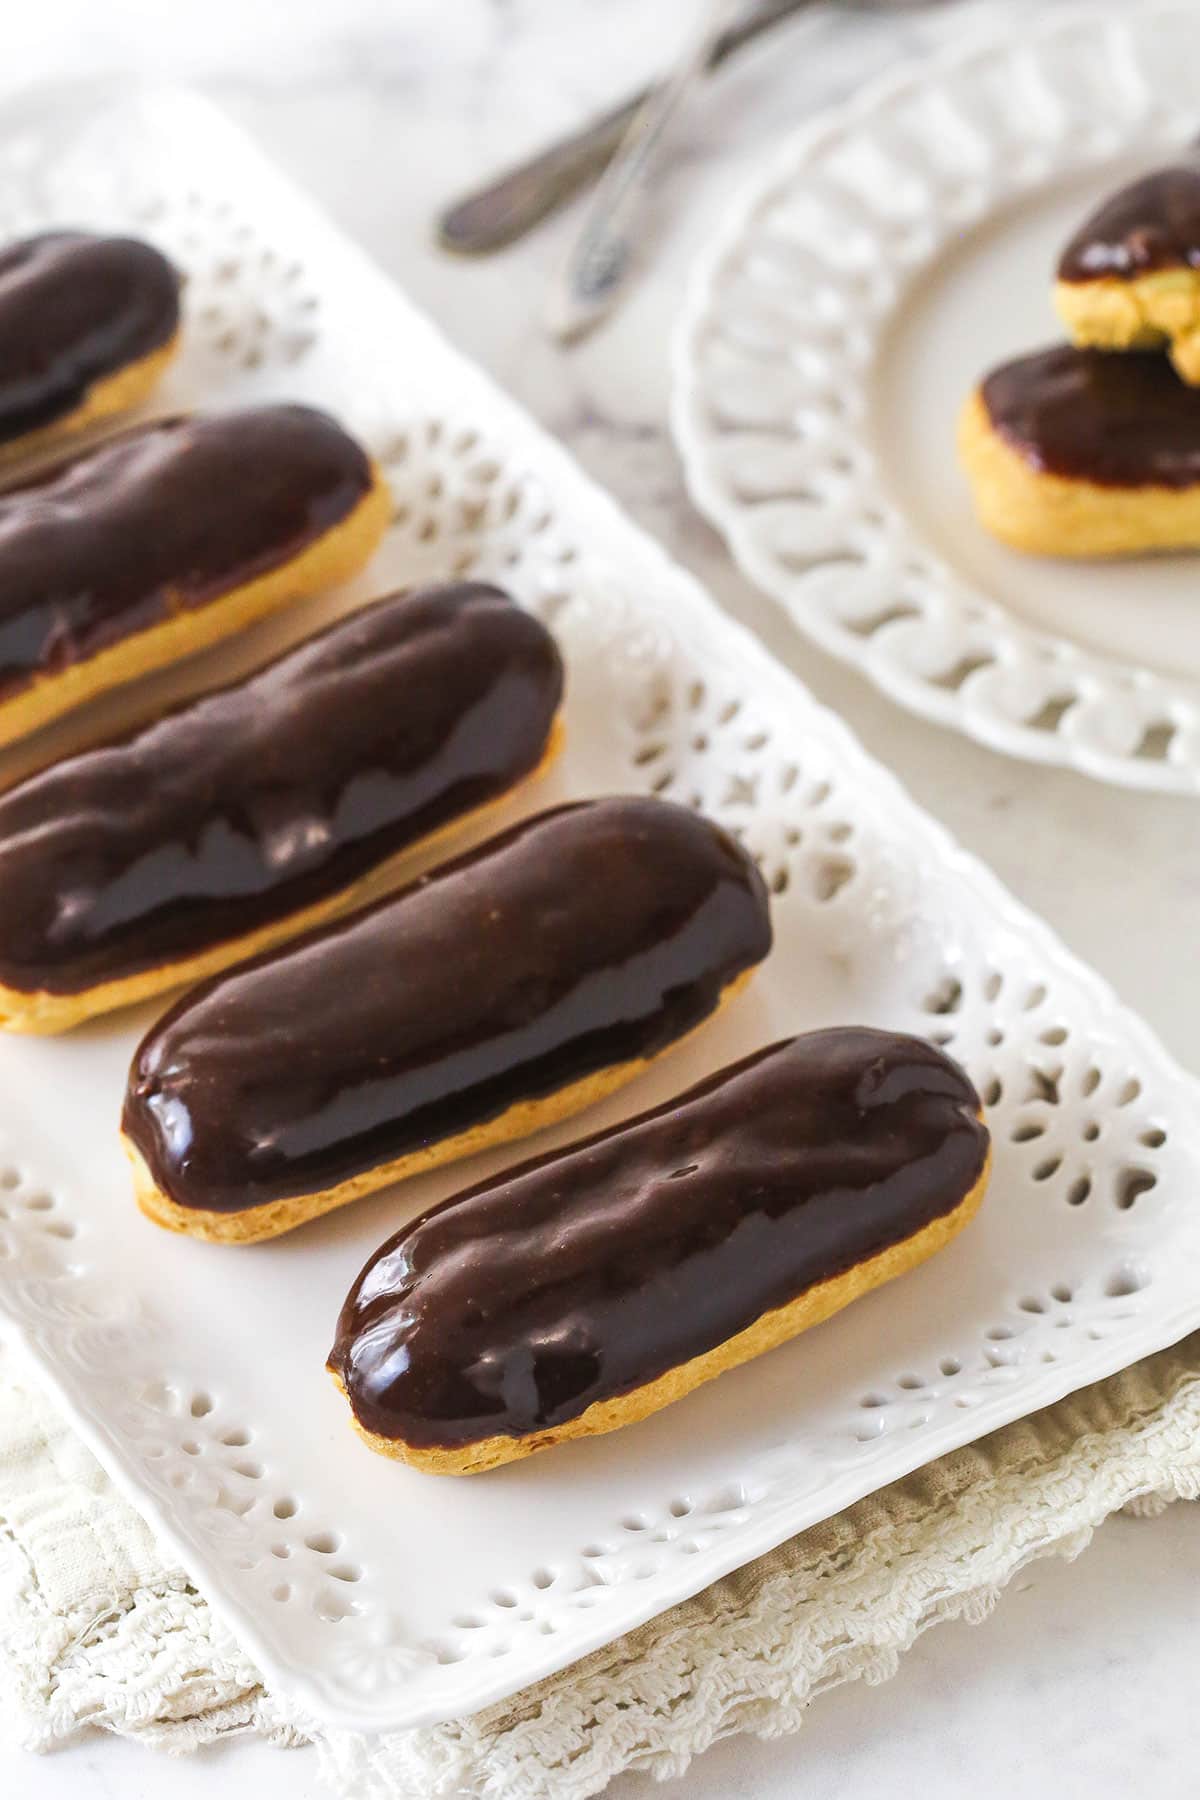
Mastering eclairs at home is easier than you think with my step-by-step photos and in-depth tips. They are filled with homemade pastry cream and topped with chocolate glaze for a bakery-style éclair that is sure to impress. Enjoy this classic French dessert at home and feel like a pro!
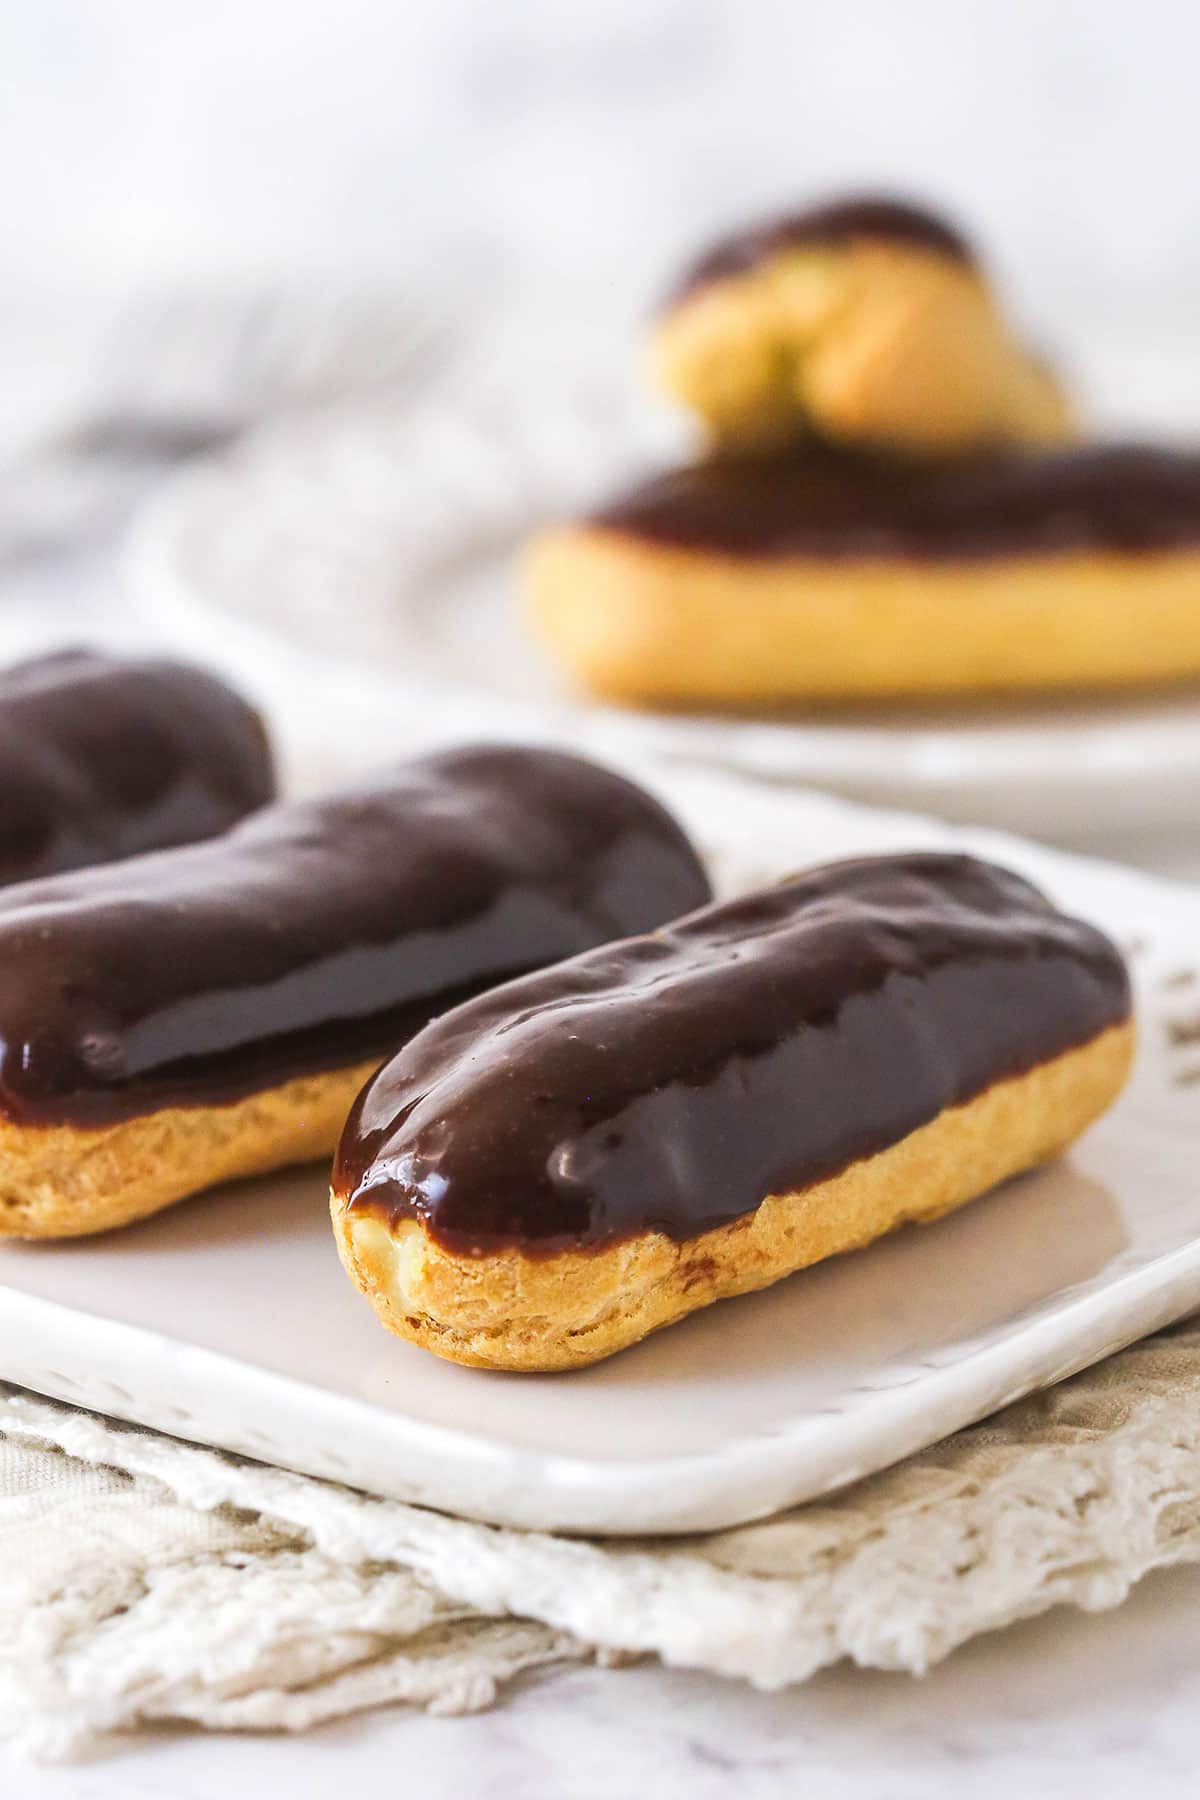
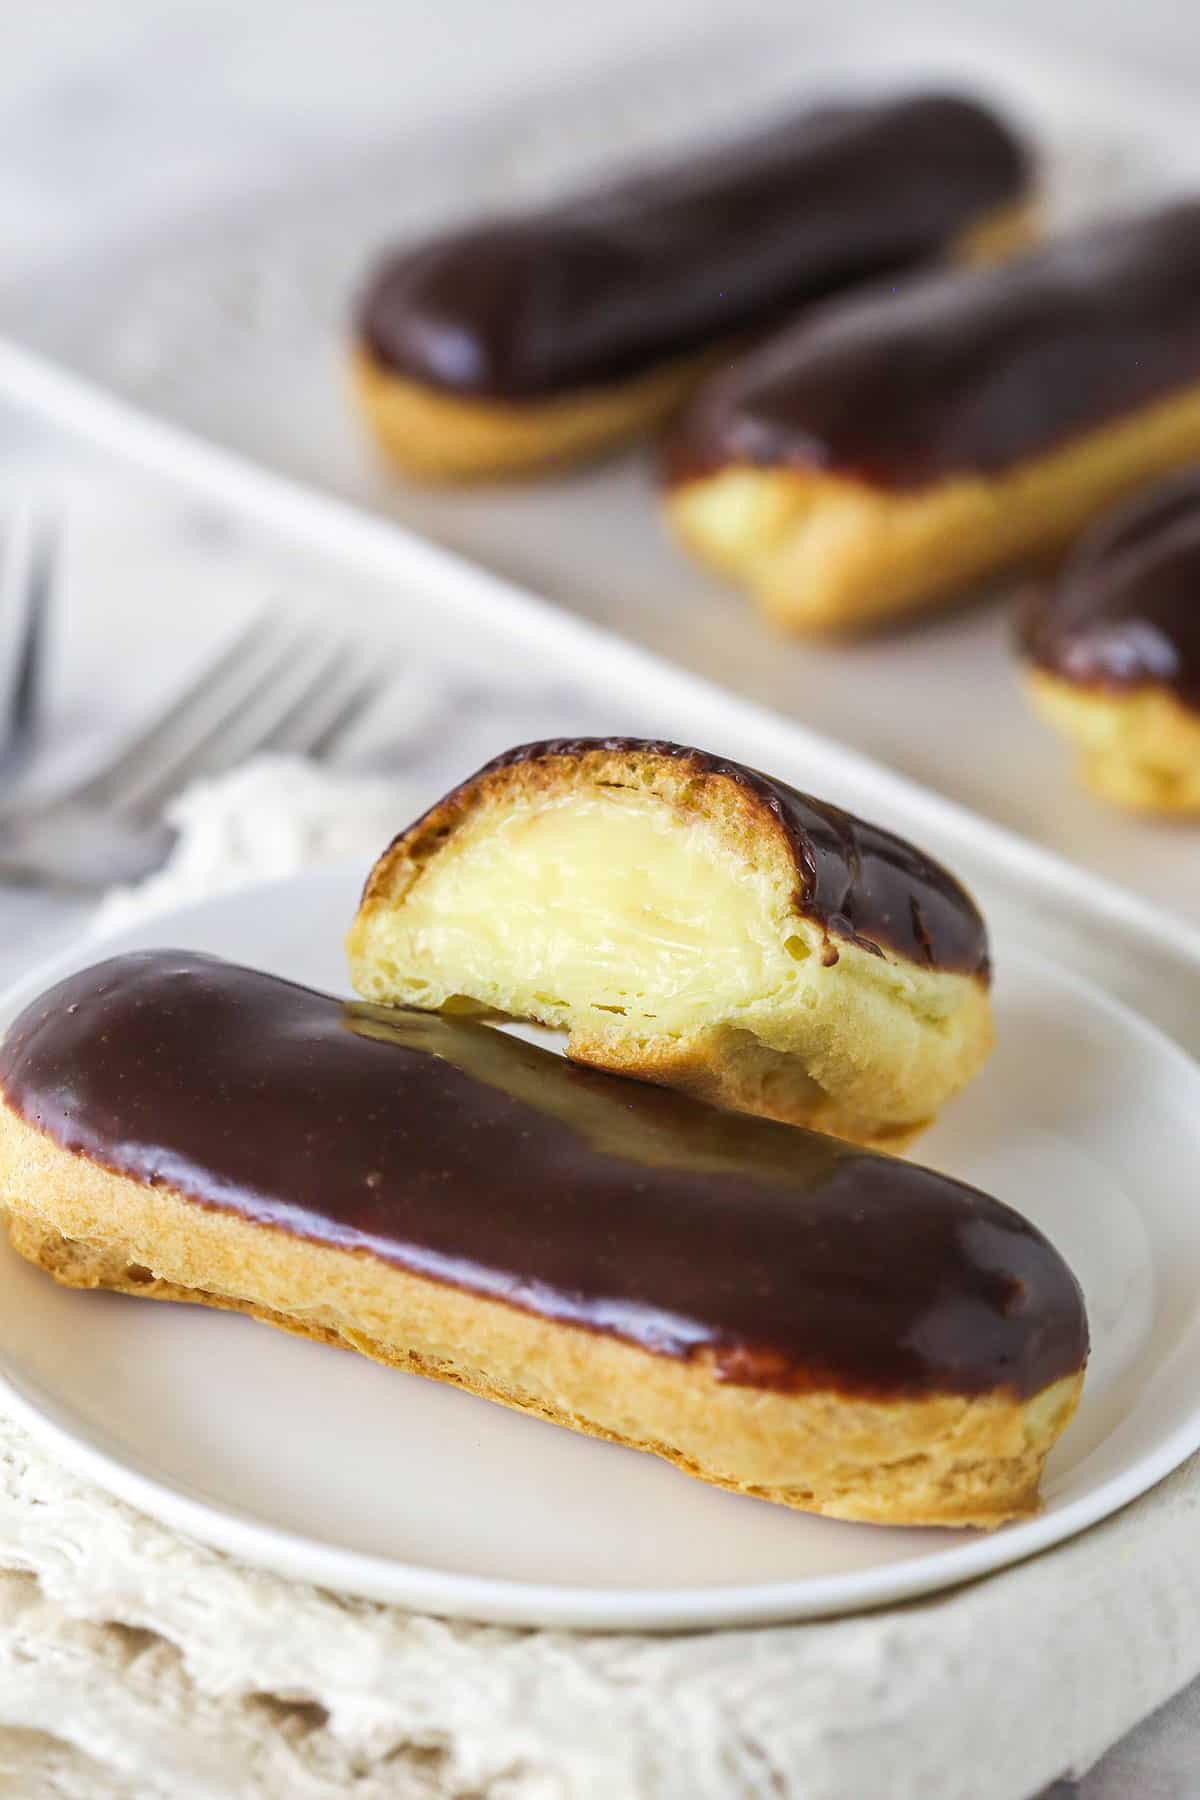
Growing up, my grandmother always made eclairs at Christmas. We always looked forward to them. While I don’t have her recipe, these taste just like them! The choux pastry is light and crisp, the pastry cream is rich, but not too sweet and perfectly creamy, and the chocolate on top is just lightly sweet, not too bitter and the perfect finishing touch.
These chocolate eclairs don’t take nearly as long to make as many desserts, like a cheesecake or chocolate layer cake, but you do need to look for some visual cues to ensure things turn out just right. It’s a fun thing to make with others, particularly at the holidays. Set up an assembly line for filling and topping the eclairs, and they’ll be done in no time!

Why This Is The Best Eclairs Recipe
- Light, crispy shell. My favorite eclairs are the ones with light, crispy shells, so that’s exactly what this recipe offers. My choux pastry recipe is made with water, which creates a lighter shell, and I’ve included all of my best tips below to perfect the recipe.
- Thick pastry cream filling. To me, the big difference between cream puffs and eclairs (besides the shape) is the filling. In my cream puffs, I add whipped cream to the pastry cream to give it a lighter filling. In these eclairs, we stick with the original thick, creamy vanilla pastry cream. It’s so good!
- Very basic ingredients. One thing I love about this recipe is that both the pastry cream and the choux pastry are made with very basic ingredients, like eggs, flour, and butter. The process is what creates the magic, not any fancy ingredients.
Ingredient Notes
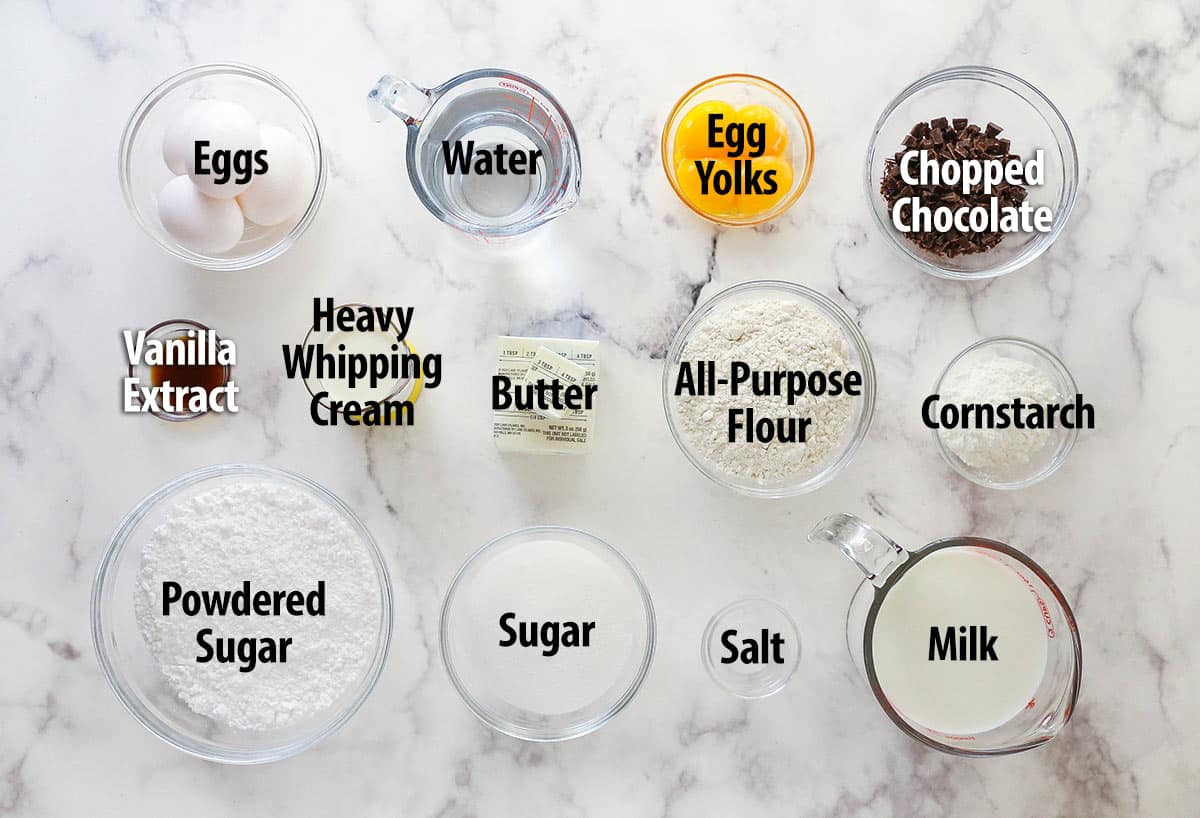
Each part of this recipe requires just a handful of basic ingredients. Here’s an overview of everything that’s needed, and why. Be sure to scroll down to the recipe card at the end for the exact measurements.
Pastry Cream
- Egg yolks – Yolks only, as the egg whites thin the cream and reduce the flavor. The egg yolks themselves add just the right amount of structure.
- Sugar – Sweetens the cream.
- Cornstarch – Thickens the pastry cream without adding a flour-y taste or impacting the texture.
- Whole milk – Stick with whole milk for a thick pastry cream. Other types of milk will thin it too much.
- Unsalted butter – Salt is not needed here, so stick with unsalted butter. It’s what you’ll use in the pastry, as well.
- Vanilla extract – Adds a light vanilla flavor to the pastry cream.
Choux Pastry
- Eggs – Be sure to use large eggs to get the right amount.
- Butter – Again, unsalted butter is best here because we add out own salt. Slice it into 10 pieces for even melting.
- Water – Some people use milk to make choux pastry but I prefer water. It results in a lighter, crispier shell.
- Salt – A small amount of salt adds flavor to the dough.
- Sugar – Just a tiny amount is added to sweeten the dough just a bit.
- All-purpose flour – Be sure to measure the flour carefully, using the techniques outlined in my post How To Accurately Measure Flour. Too much or too little will greatly impact the choux pastry dough.
Chocolate Glaze
- Semi-sweet chocolate – Any quality bar of chocolate will work. So will chocolate chips.
- Whipping cream – Makes the melted chocolate pourable and creates the ideal glaze texture.
- Powdered sugar – Optional, to sweeten the glaze. Be sure to sift it first to avoid any clumps.
How To Make Eclairs
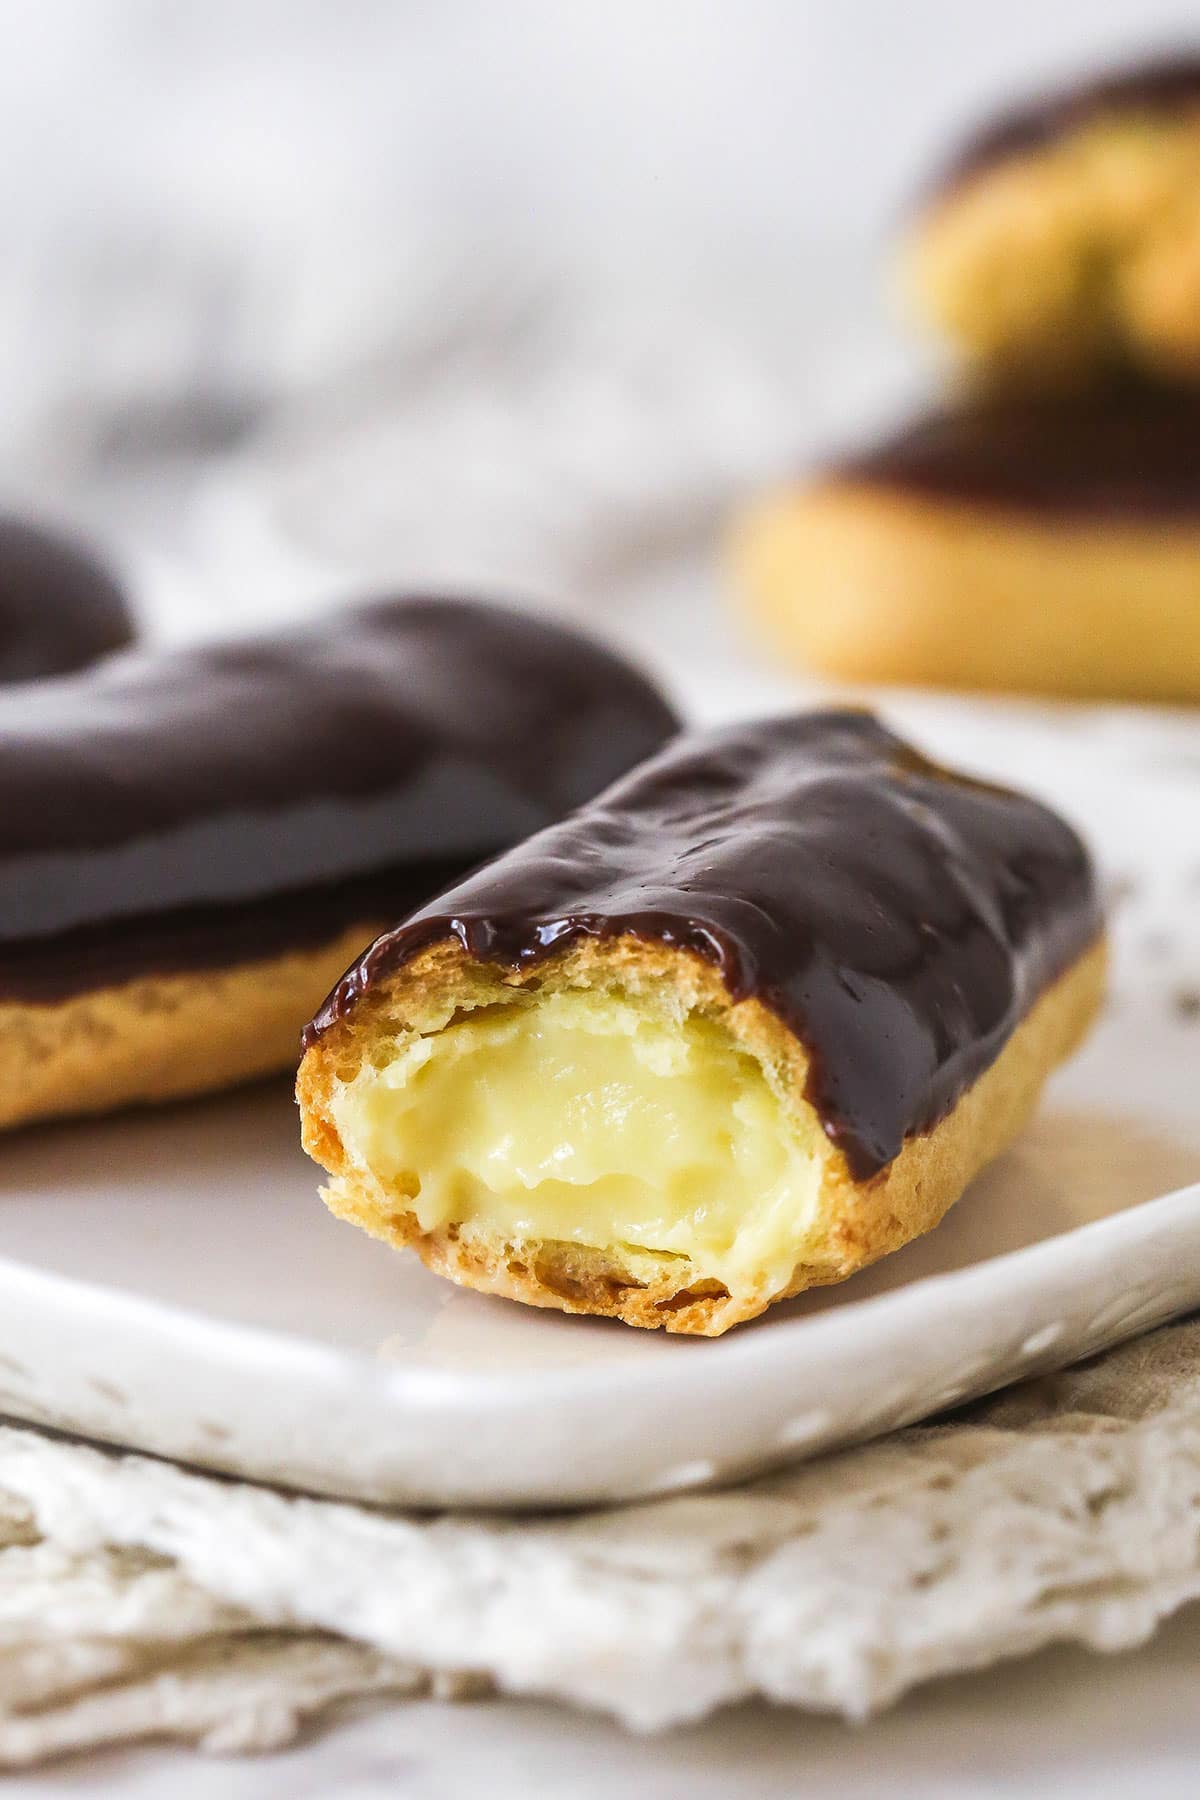
The process for making eclairs does require a bit of time and careful attention to the visual cues of the choux pastry and cream, but it’s not necessarily a difficult process. Here’s an overview of all the steps. The detailed printable instructions can be found in the recipe card at the end of the post.
Make the pastry cream
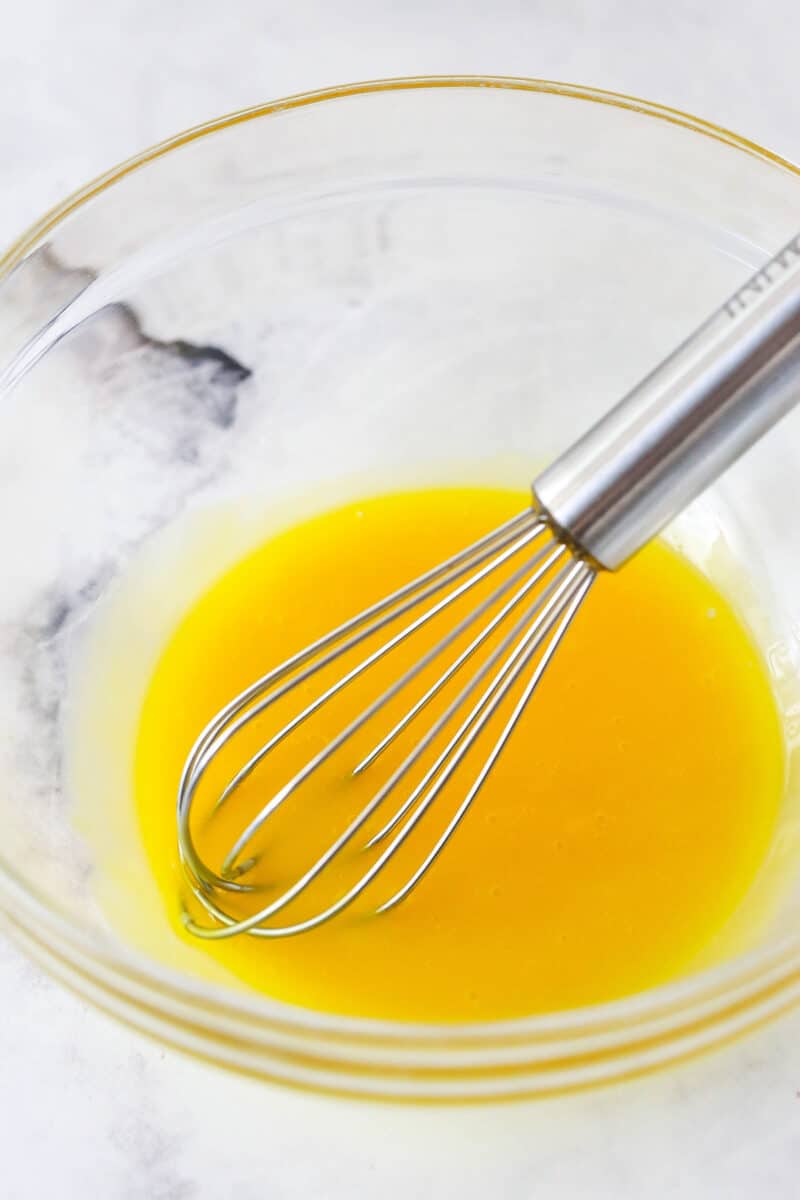
Gently beat the egg yolks in a bowl.
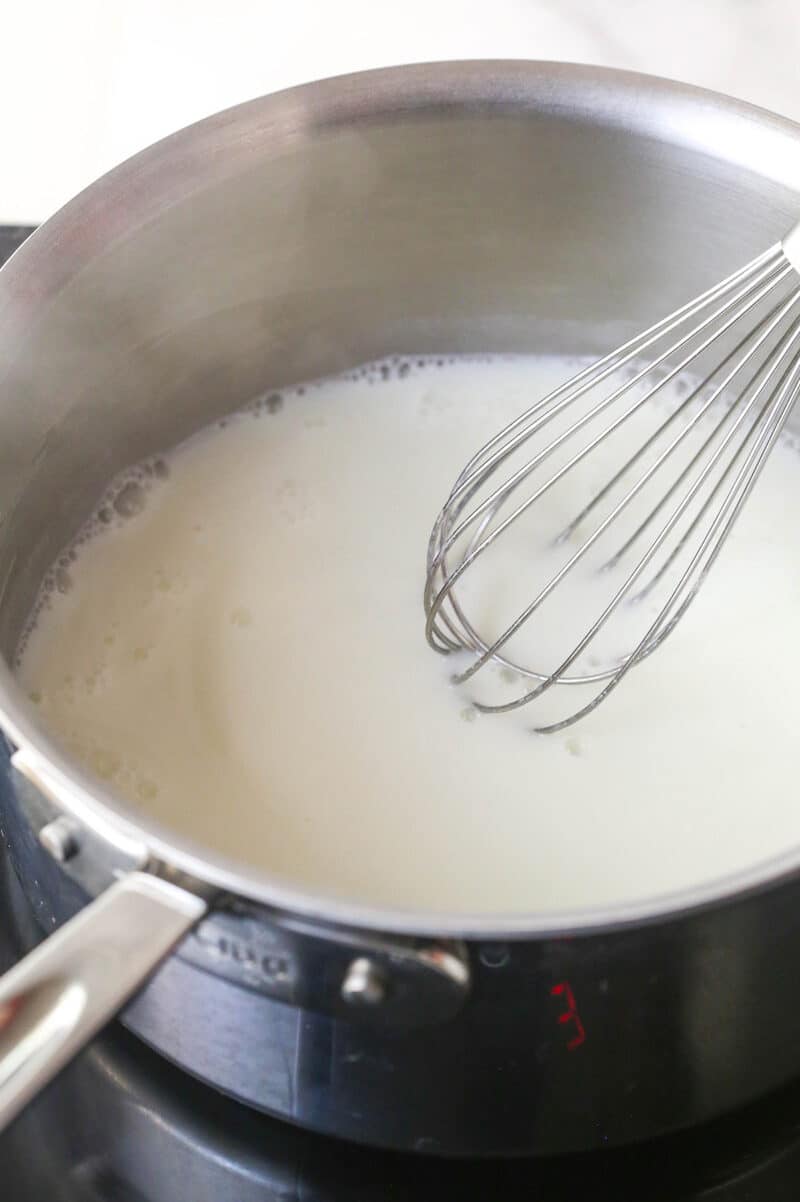
Whisk the sugar and cornstarch then add the milk. Heat, stirring continuously, until it begins to simmer and thicken.
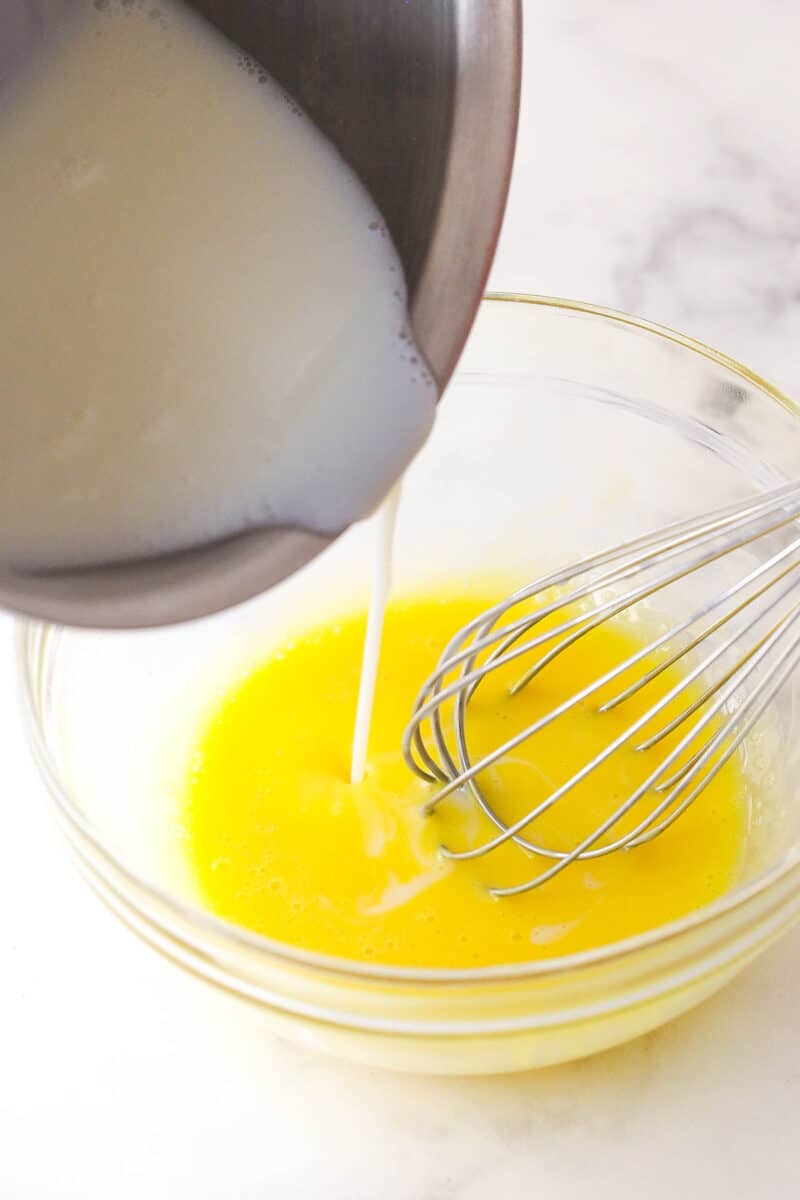
Stream a small amount of milk into the eggs, whisking constantly, then add the egg mix to the milk mixture. Add it all back to the pan.
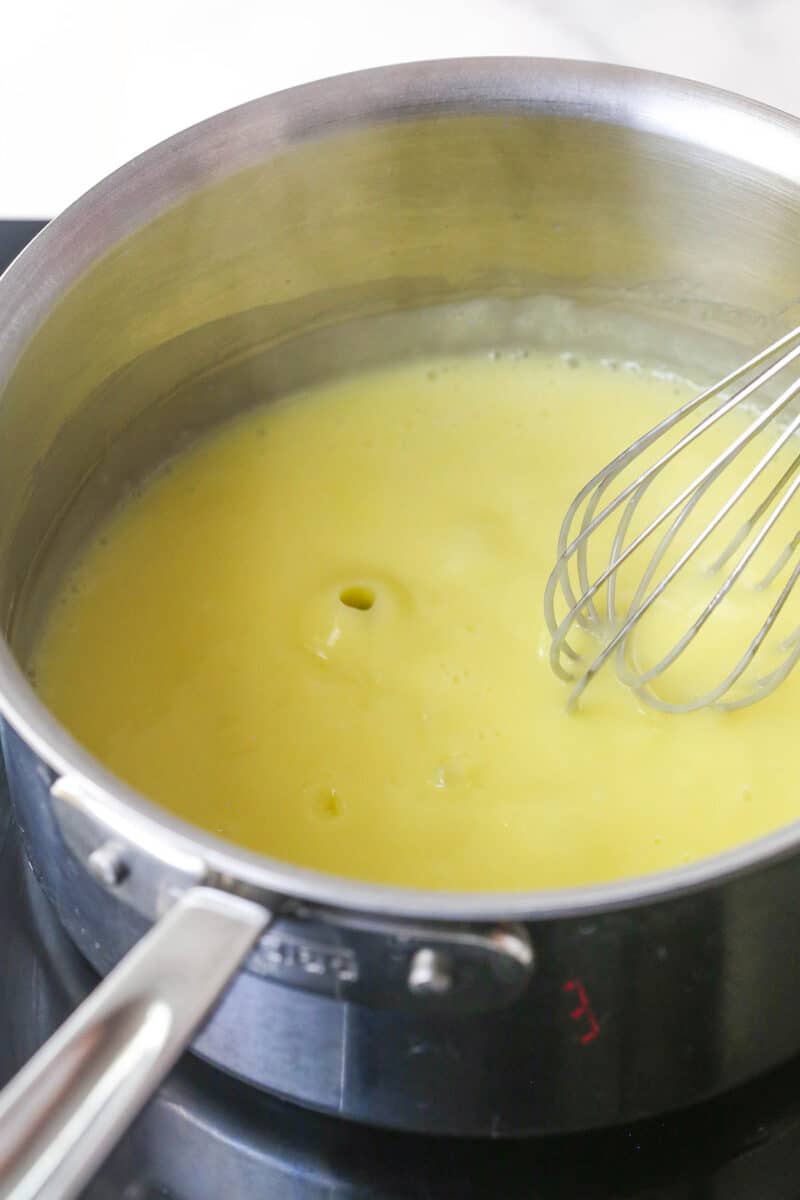
Bring the mixture to a light boil for 1 minute, stirring continuously.
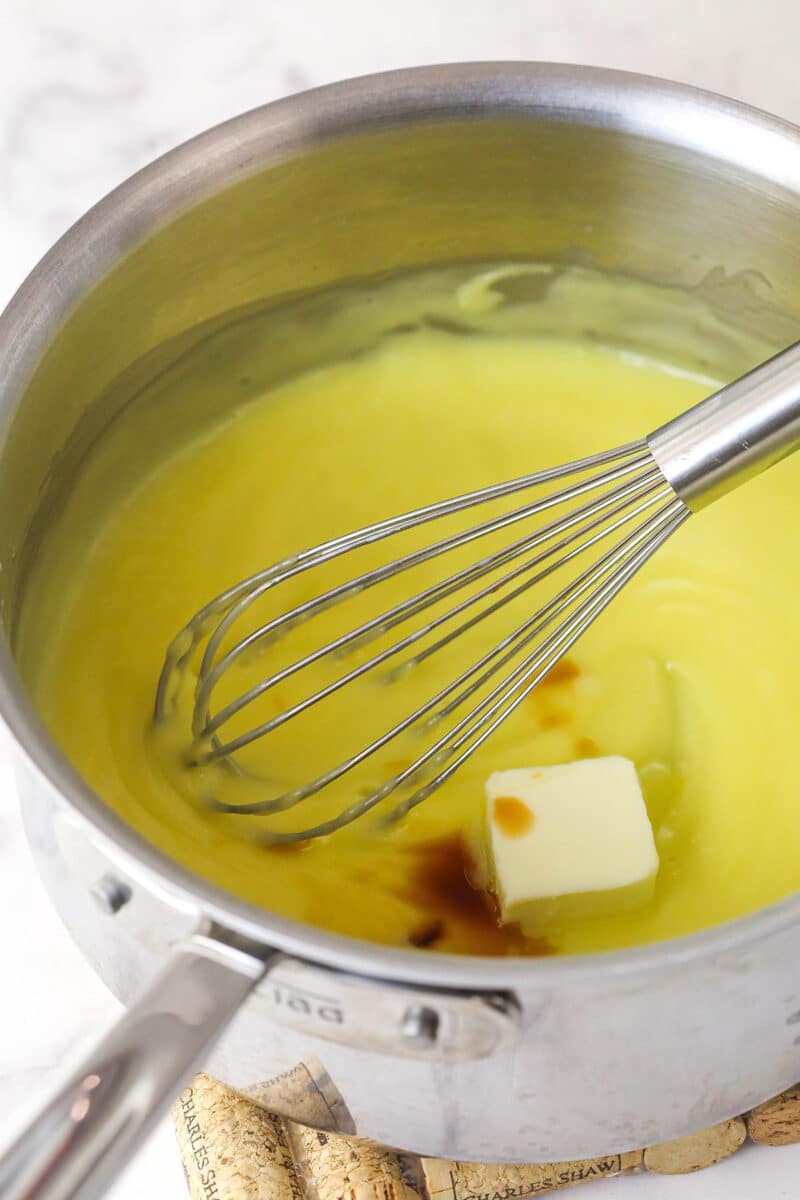
Remove from heat and add the butter and vanilla, stirring until melted and smooth. Strain if needed.
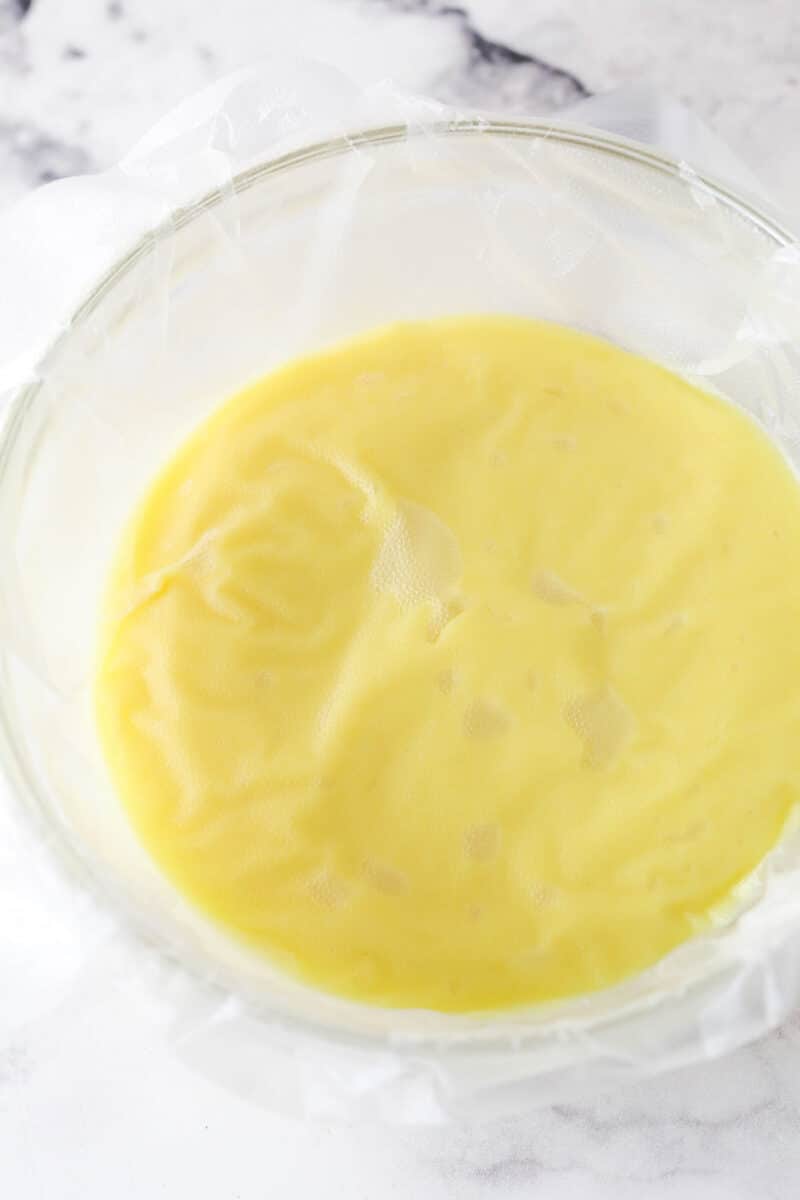
Transfer the pastry cream to a bowl. Cover with clear wrap pressed directly on top. Chill until firm.
Make the choux pastry shells
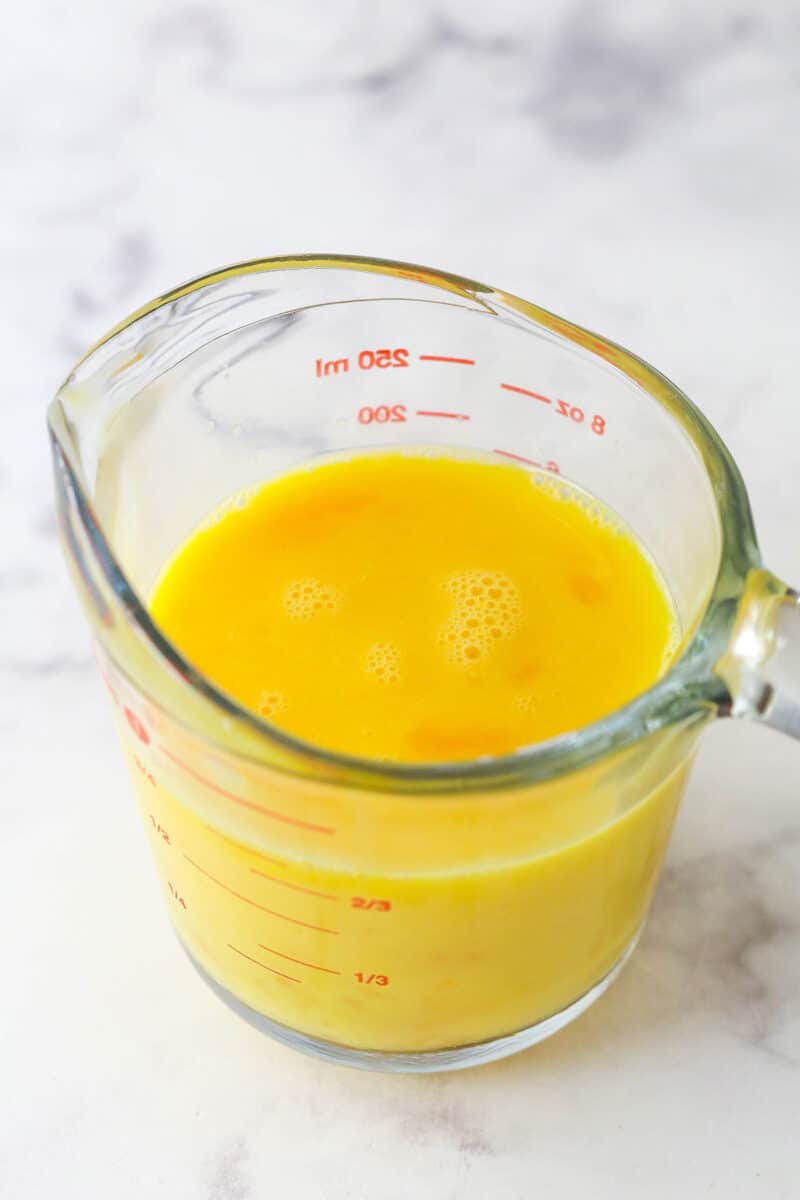
Beat the eggs in a measuring cup. Set a bit aside, so that there is 3/4 cup.
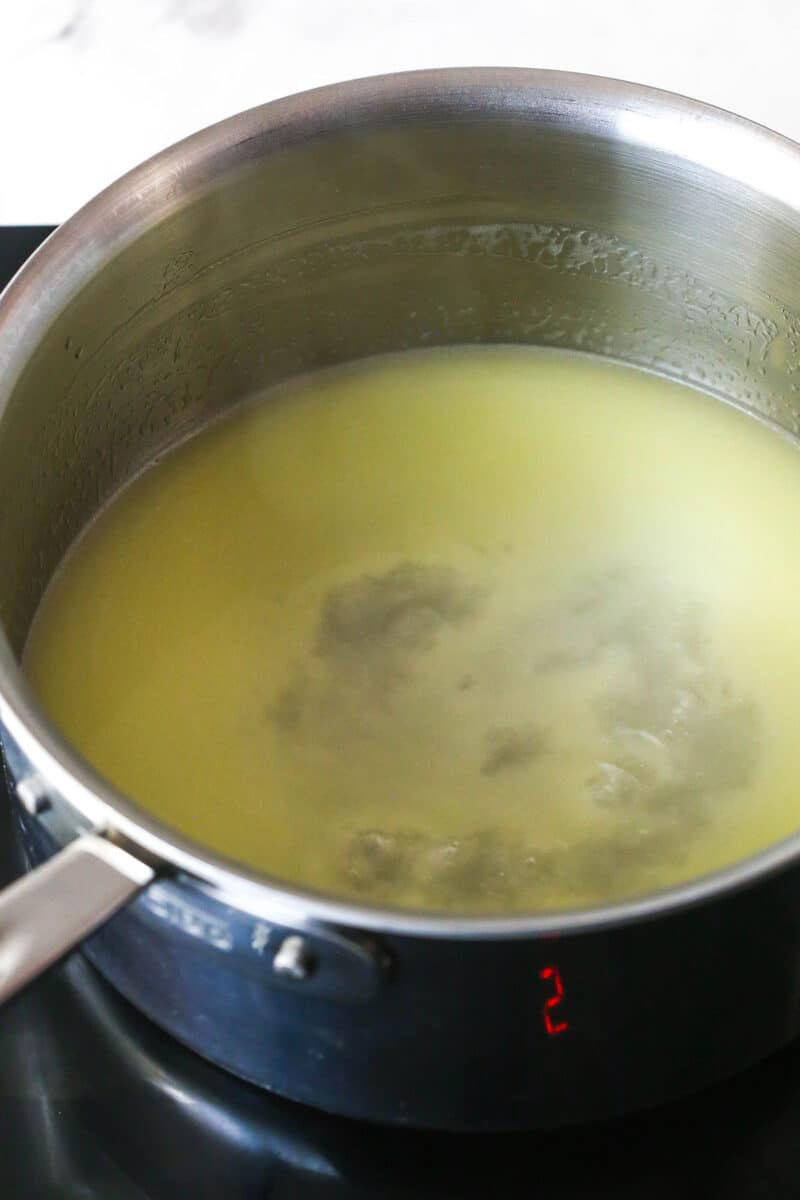
Heat the butter, water, sugar, and salt over medium heat. Stir until the butter melts. Bring to a simmer.
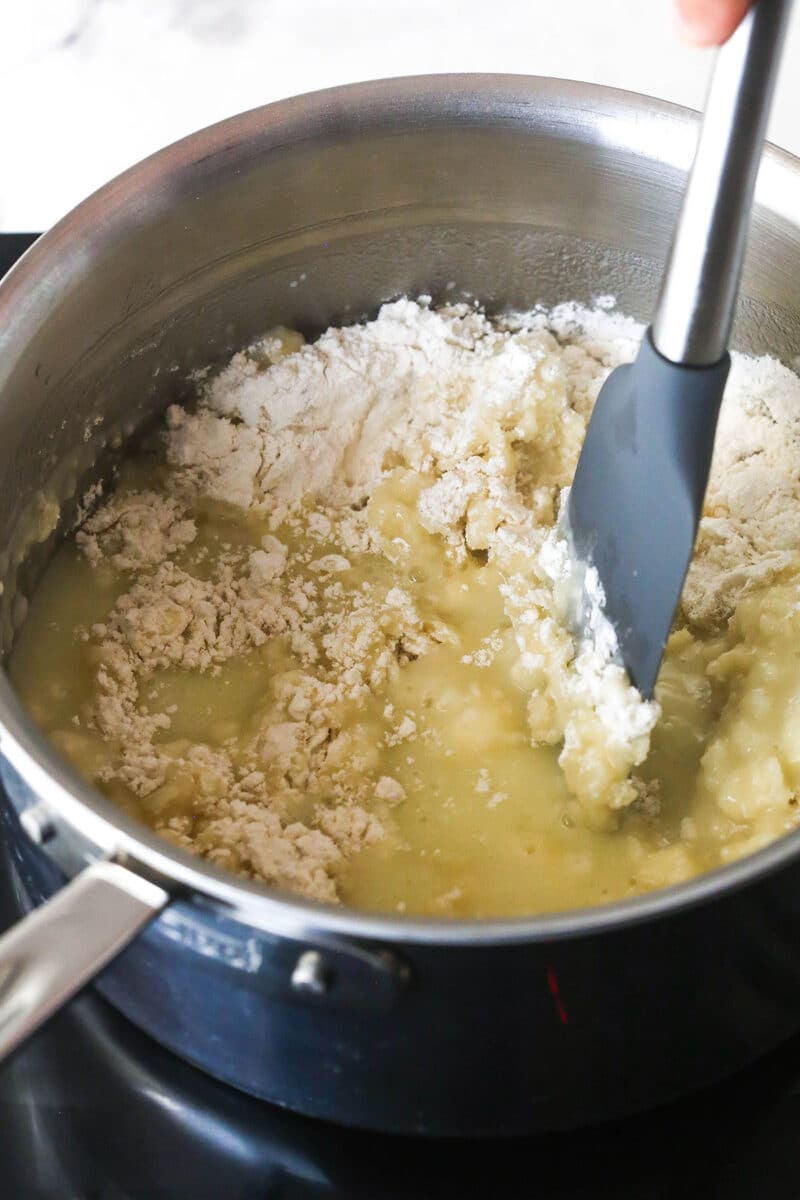
Reduce the heat to low. Add the flour. Stir quickly to combine, pressing against the sides, until a dough forms.
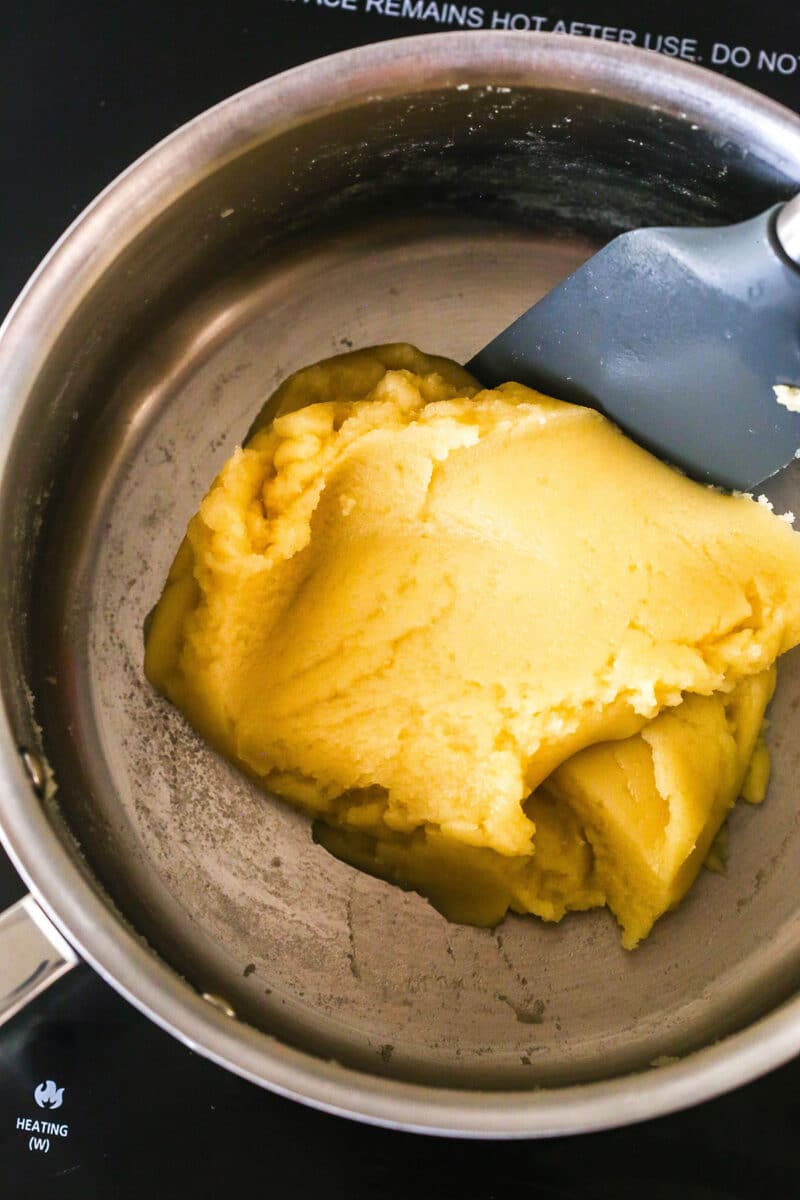
Continue stirring quickly until it forms into a ball. A thin white film should form on the pan.
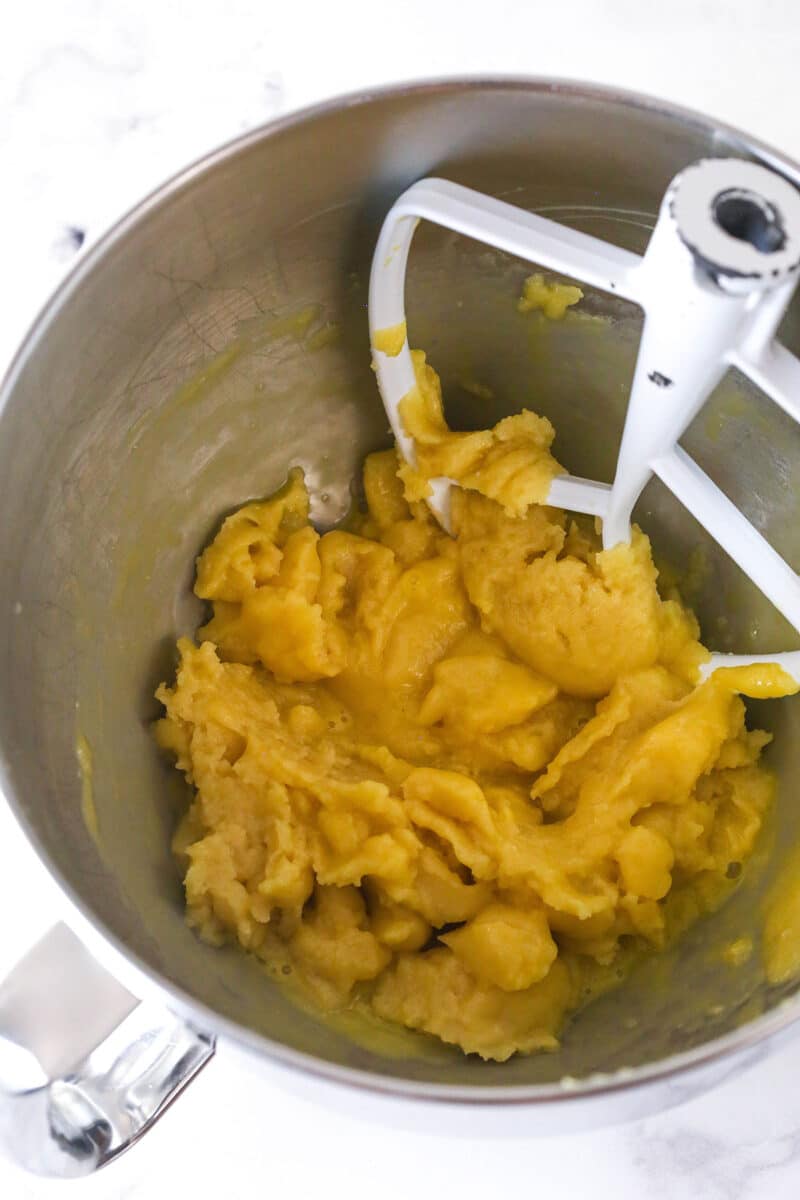
Transfer to a mixer bowl and cool for a few minutes. Add the eggs in 3-4 additions, mixing between each.
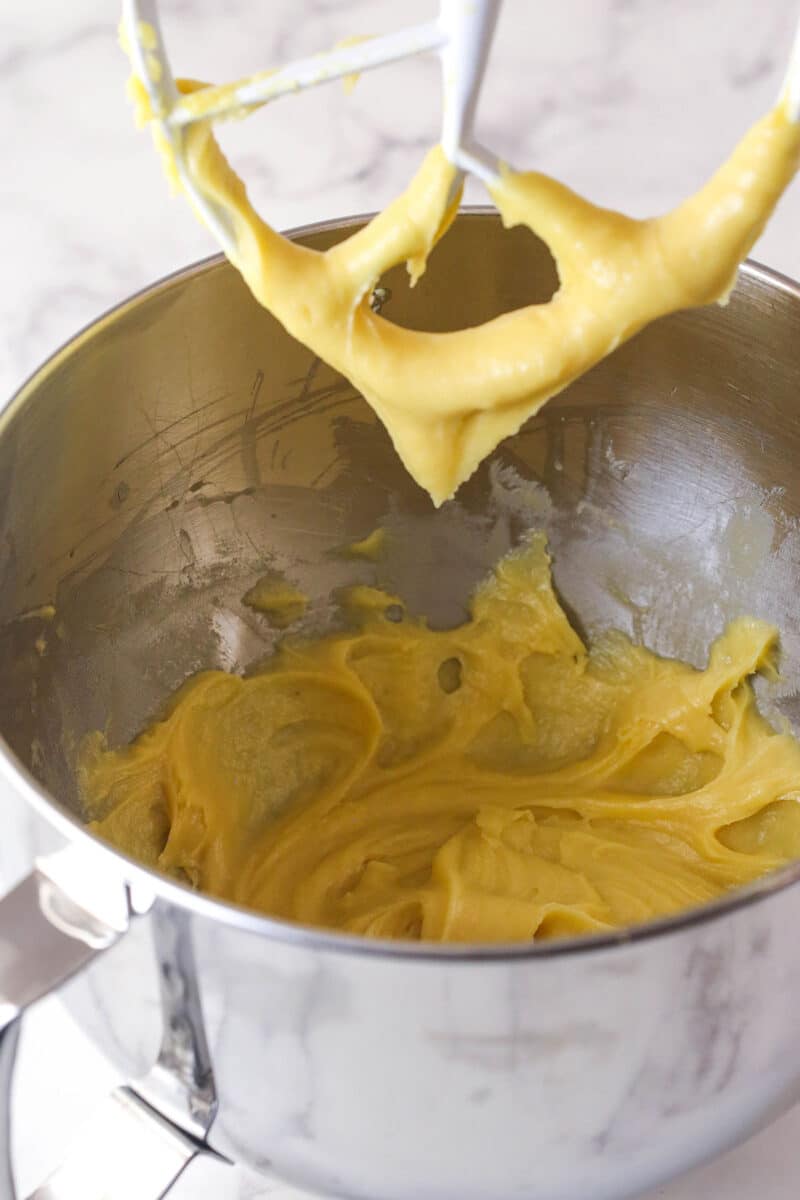
The mixture should be shiny, thick, smooth, and pipeable. A “V” shape should form with the dough if you lift the paddle attachment up.
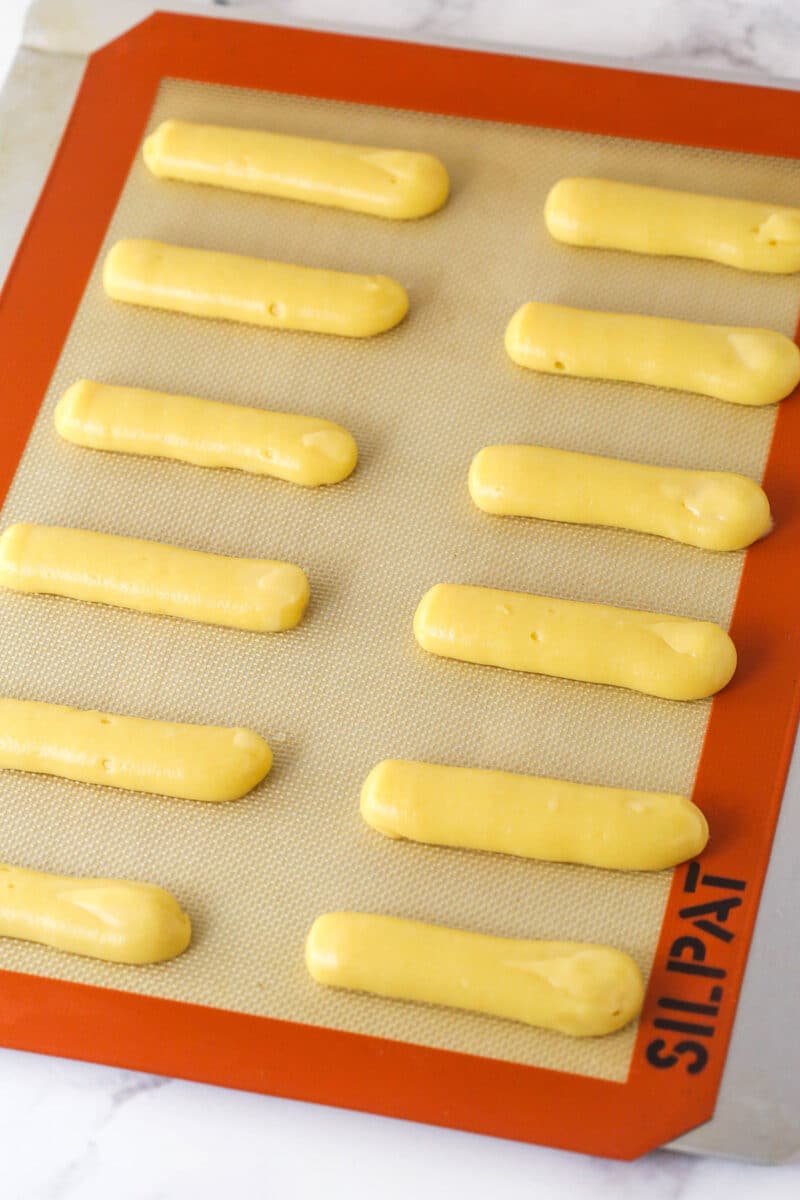
Transfer the dough to a piping bag with a large tip. Pipe 4-inch logs onto the baking sheet. Bake for 25-30 minutes.
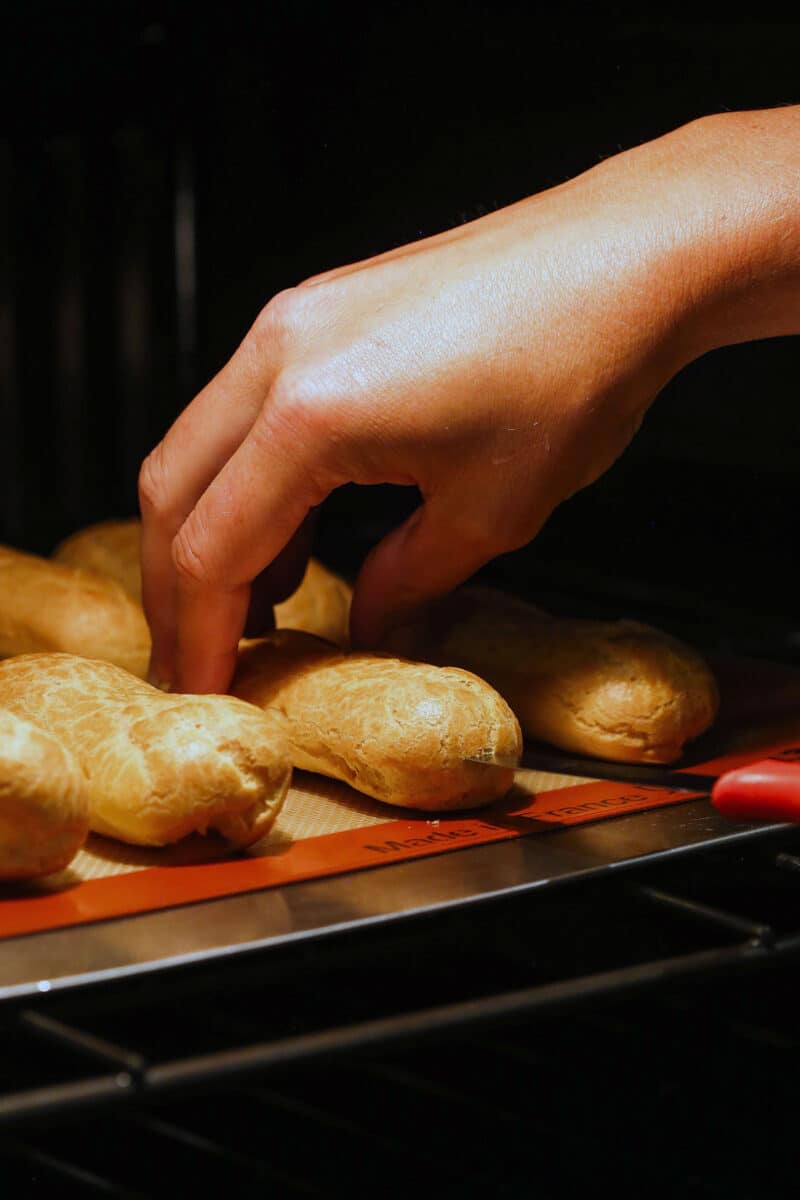
Reduce the oven temp to 350F, bake for another 10-15 minutes. Turn the oven off and use a paring knife to pierce the side.
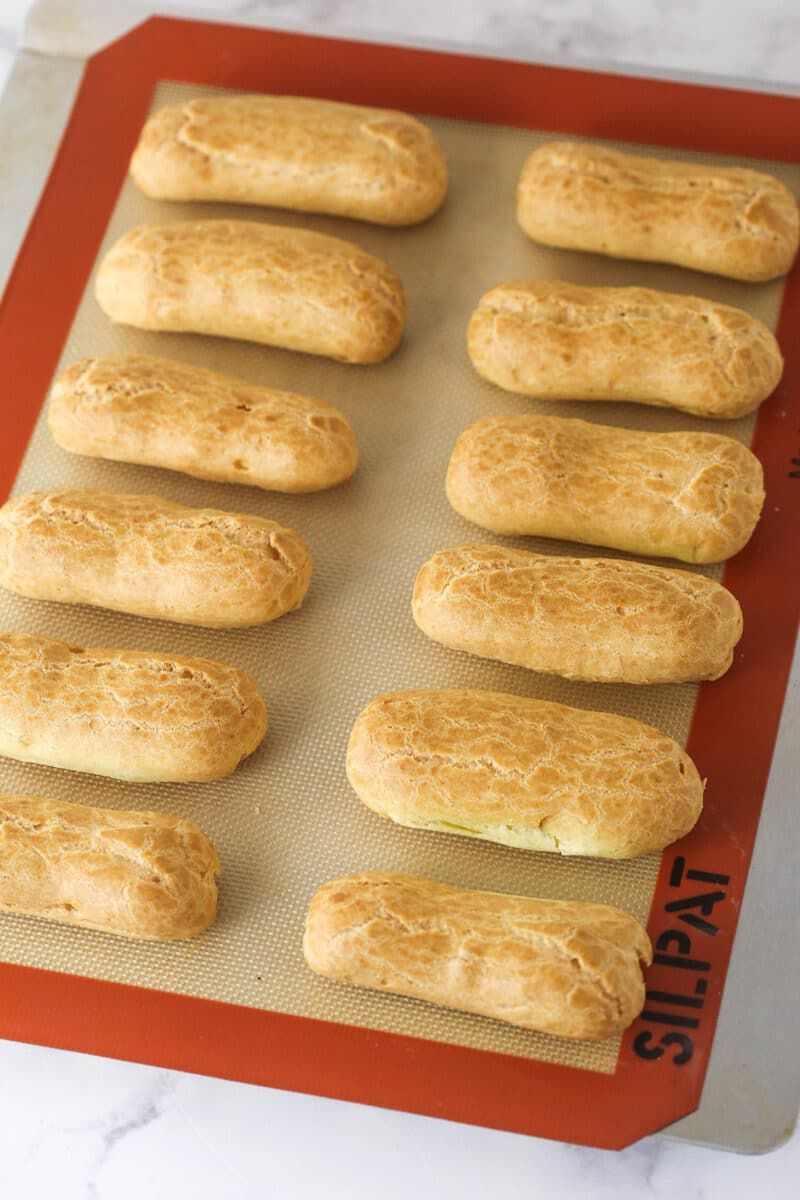
After piercing, cool in the oven with the door open for 5-10 minutes. Then cool completely on a cooling rack.
Fill and finish your eclairs
Once the pastry shells are completely cool and the pastry cream has chilled for 2-3 hours, it’s time to assemble the eclairs!
Stir the pastry cream then transfer it to a piping bag with a small round tip. (I use Ateco 802, which is similar to Wilton 12).
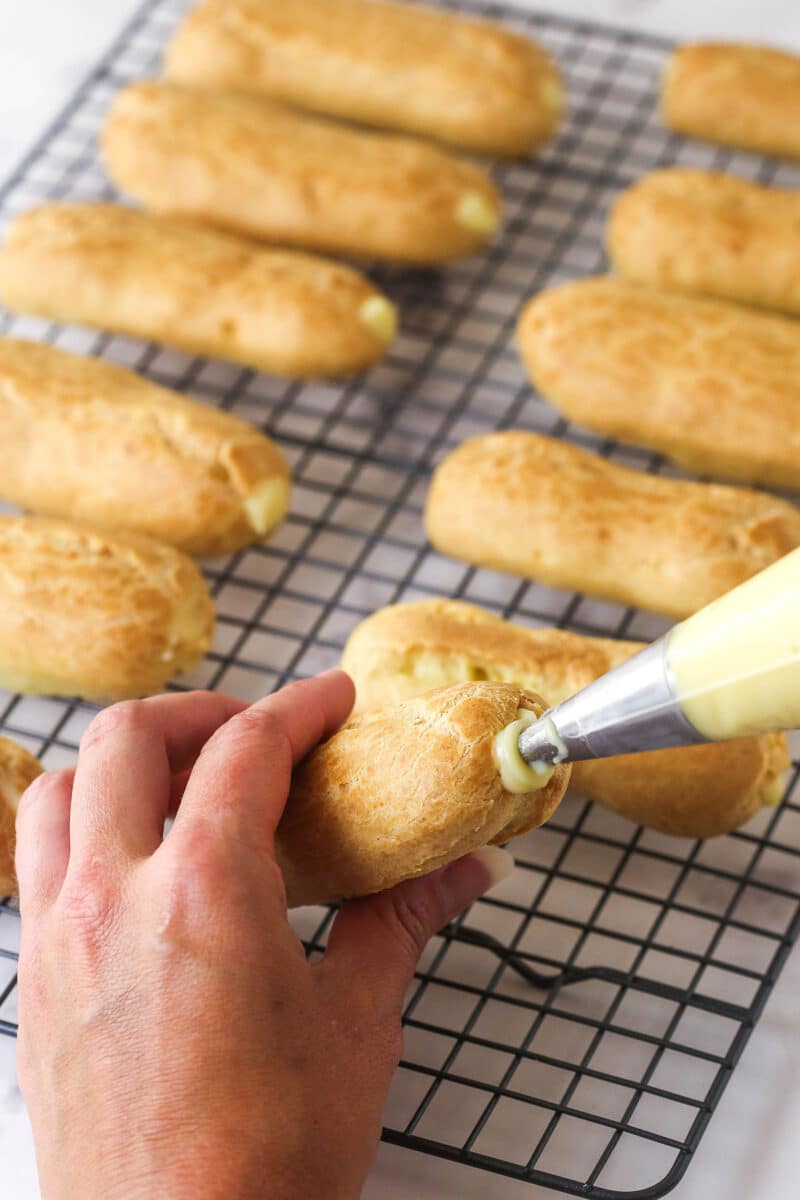
Pipe the pastry cream into the eclairs. If it doesn’t go all the way through, poke a hole on the other side and fill from there too.
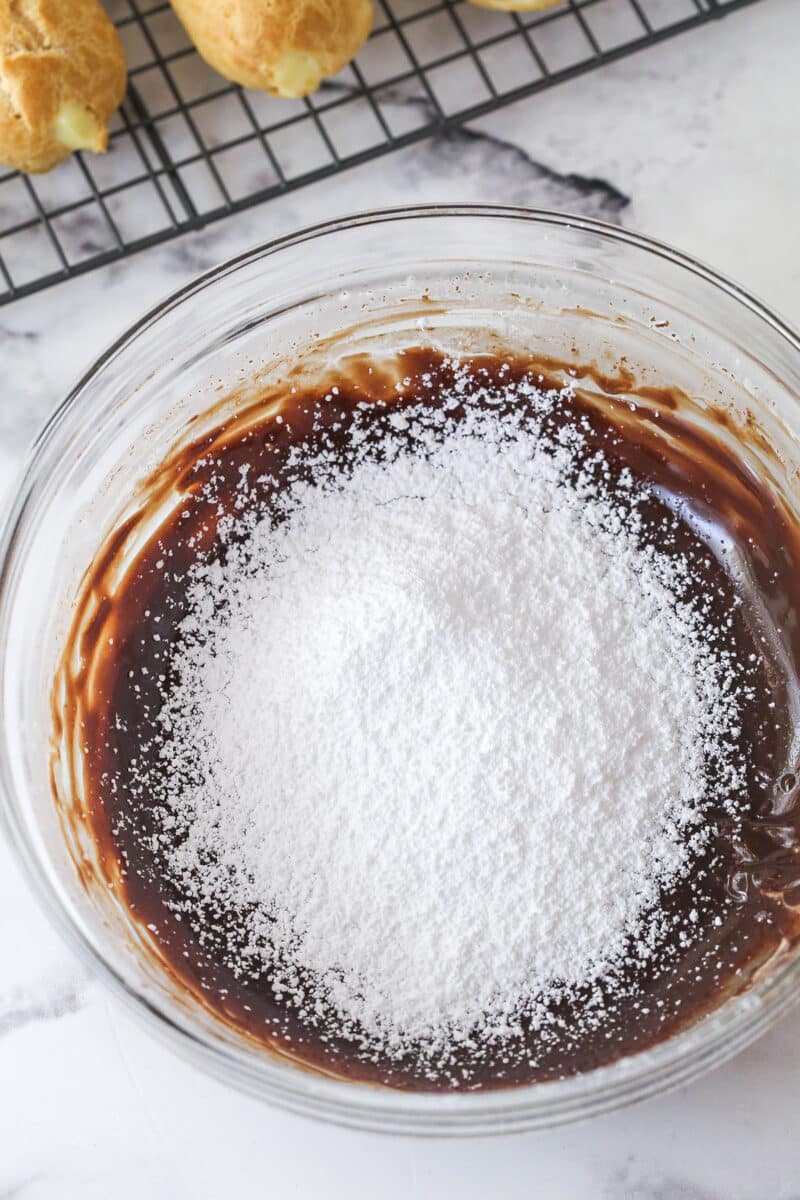
Heat the cream until it begins to boil. Pour over the chocolate, let sit for 2-3 minutes, then whisk until smooth. Stir in the powdered sugar.
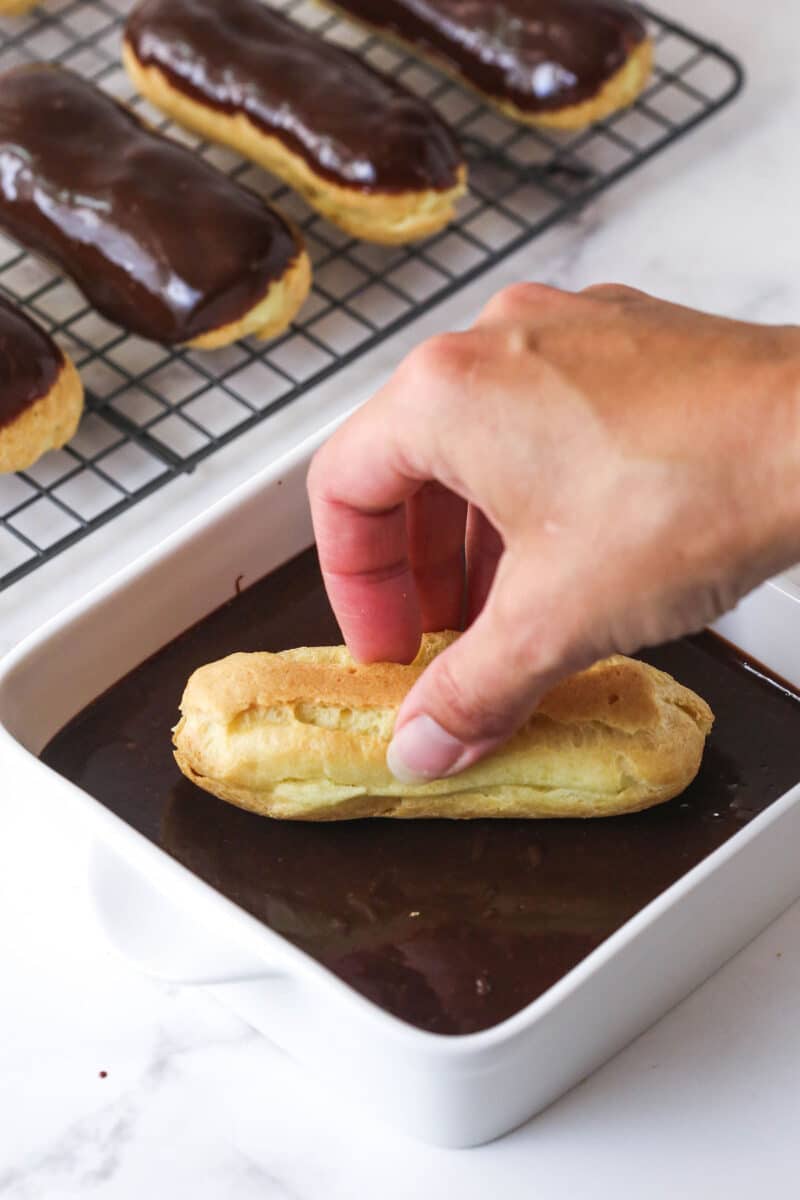
Turn each eclair upside down, dip the top half into the chocolate, let any excess glaze drip off, and return to the cooling rack.
For crisp eclairs, serve them right away, as soon as the chocolate firms up. Otherwise, place them in the fridge until you’re ready to enjoy.
Tips for Thick Pastry Cream
A thick pastry cream is essential for filling these eclairs. One that’s too runny will soften the shells too quickly and be difficult to pipe and keep in place.
- Heat gently. Slow and steady is the way to go here. Heat the ingredients over medium or medium-low heat, so that the cream has time to thicken properly. Turning up the heat may speed things up, but it won’t help your cream thicken as well.
- Boil just long enough. The key here is to cook it long enough that it can thicken (45 seconds to 1 minute), but not so long that the cornstarch actually breaks down. If that happens, it won’t thicken the cream and will leave you with a runny mess.
- Cool completely. Some of the thickening happens during the cooling process, so it’s important to let it chill in the fridge for 2-3 hours.
- Smooth it out. Before filling the choux pastry shells, give the chilled pastry cream a good stir to smooth it out.
The Key To Perfect Choux Pastry
I know a lot of people are intimidated by choux pastry. But if you keep an eye on the visuals provided in the detailed instructions in the recipe card and follow these tips, you’ll be baking perfectly light and crispy pastry shells in no time.
- Use water. I prefer water over milk in my choux pastry. As the water evaporates, the choux pastry expands. In my opinion, it gives you a better rise than milk, plus you get a crispier shell with less fat.
- Look for a thin white film. Cooking the flour mixture a bit helps the starches gelatinize, which also strengthens the dough so it can trap the steam needed to rise. To know when it’s ready, look for a thin white film to form on the bottom and/or sides of your pan as you stir.
- It’s important that you add the right amount of egg. The egg really contributes to the moisture in the dough. Too little and your pastry will be too thick and won’t expand properly. Too much and it won’t have the structure it needs to hold the steam that causes them to expand.
- Bake longer than you think. The most common mistake when making eclair shells is not baking these long enough. If they are under baked, there will be too much moisture remaining and they will deflate as they cool. Bake them a little longer than you think, until they are golden brown all over. They should have a crisp outside. Don’t be afraid to bake them a few extra minutes.
- Time can vary. If you make your eclairs larger or smaller, your baking time will vary, so it’s important to look for them to be brown and crisp to know they are done baking.
- Leave the oven closed. The pastry shells will deflate if you open the oven too early and let the heat out. Turn on your oven light to see how they’re doing, rather than opening the oven door.
Why Did My Pastry Shells Deflate?
If the pastry shells for your eclairs deflate, it’s likely because they weren’t baked long enough and had too much moisture.
You really want the shells to dry out when baking. That’s why it’s important to bake them longer than you think and to make sure enough moisture bakes out.
Keep in mind that if you make them bigger or smaller, that also affects how long they need to bake. Be sure to look for visual clues and browning to know they’re done. The other possibility is that the oven door was opened too soon.
If your eclair shells do deflate, you can still cut them in half and add a filling that’s a little more stable, like a whipped cream. Mascarpone whipped cream or strawberry whipped cream would also be good. They won’t look like an eclair but they’ll taste pretty close and be delicious!
Can I Make These Eclairs In Advance?
Yes, if you are not concerned about the outside being crispy. If the time to prepare the entire recipe is the concern, certain elements can be prepared in advance.
- Eclairs: The assembled eclairs can be stored in the fridge for 3-4 days. Just keep in mind that the pastry shell will no longer be crispy. The flavor will still be fantastic, though.
- Pastry cream: The pastry cream can be made a day or two in advance. Just keep it in the fridge, with clear wrap pressed against the top to prevent a film from forming.
- Pastry shells: The shells will soften with time and no longer be crispy the next day, even if they aren’t filled. If that doesn’t bother you, you can definitely make them one day and fill them the next. If you really want a crispy shell and need to bake them ahead, preheat your oven to 375°F and bake the shells in the oven for 3-5 minutes to crisp them back up a bit. It may not be quite as crisp as before, but it should help.
- Choux pastry dough: Another option is to make the choux pastry ahead and store it in the fridge in a piping bag for later. While it’s not ideal, I tested refrigerating it overnight and it worked fine. If it’s too thick to pipe when cold, just bring it back to room temperature before piping.


Eclairs
save this recipe
Enter your email & we’ll send it to your inbox. Plus get new recipes from us every week!
Ingredients
Pastry Cream
- 4 large egg yolks
- ¾ cup (155g) sugar
- 4 tablespoons (32g) cornstarch
- 2 cups (480ml) whole milk
- 2 tablespoons (28g) unsalted butter
- 2 teaspoons vanilla extract
Choux pastry
- 4 large eggs
- ½ cup (112g) unsalted butter (sliced into 10 pieces)
- 1 cup (240ml) water
- ¼ teaspoon salt
- 2 teaspoons sugar
- 1 cup (130g) all-purpose flour
Chocolate Glaze
- 4 ounces semi-sweet chocolate (chopped)
- ½ cup heavy whipping cream
- ¼ cup (29g) powdered sugar (sifted, optional)
Instructions
Make the pastry cream
- Put the egg yolks in a medium sized bowl and gently beat them together. Set aside.
- Add the sugar and cornstarch to a large saucepan and whisk together until no more lumps of cornstarch remain, then add the milk.
- Cook, stirring continuously, over medium heat until mixture just begins to thicken and simmer. Be careful not to boil it.
- Stream a little bit of the milk mixture to the egg yolks, while whisking together continuously so that the eggs don’t scramble. Add the egg mixture to milk mixture, putting it all back in the pan. This process ensures that you don’t cook the egg yolks too quickly and get scrambled eggs.
- Place the pan back on the heat and bring to a light boil. You should see large bubbles slowly popping on top. Allow to boil for 1 minute, stirring continuously. Don’t boil for too long, or you can overcook it and it’ll actually break down and thin out, rather than get thicker.
- Remove from heat and add the butter and vanilla extract. Stir until smooth, then pour into a bowl. If it seems lumpy, you can strain it to remove any lumps. Cover with clear wrap pressed against the top so that it doesn’t get a film on top and set in the fridge to cool completely, 2-3 hours.
Make the choux pastry shells
- Add the eggs to a large measuring cup and lightly beat with a fork. Set aside a little bit of the egg, so that you have ¾ cup. Hold onto the egg that was set aside, in case you end up needing it. Set eggs aside.
- Add the butter, water, salt, and sugar to a medium saucepan over medium heat. Stir until the butter has melted, then bring the mixture to a simmer.
- Once simmering, reduce heat to low (so you don’t scorch the flour or over-brown the mixture) and add all of the flour at once. Quickly stir until the flour is completely combined and a thick dough forms. As it starts to come together, you can press the dough against the sides of the pan as you stir. This helps remove and incorporate any lumps of flour.
- Continue stirring the dough. It should be thick and natural form into a ball. Stir it until a thin white film forms on the bottom and/or sides of the pot. This could take anywhere from 1-5 minutes, depending on your heat, size of your pot, etc. Look for the thin film to form.
- Remove the dough from heat and add it to a mixer bowl. Let it cool down for a few minutes so you don’t scramble your eggs in the next step.
- Slowly add the eggs to the dough in 3-4 additions, mixing well between each. It’s important to start by adding a smaller amount, to help break up the dough and help it combine evenly, without getting lumps. The exact quantity of egg you add may vary depending on how much moisture evaporated during the cooking stage. Stop adding when the dough is shiny, thick, smooth and pipeable. If you measure by weight, I usually add about 190 grams of egg, but be sure to look for visual cues. The best way to look for the right consistency is to swirl your paddle attachment around in your dough a couple times and then lift it up. If it slowly falls and leaves a “V” shape on the paddle, it should be ready. The “V” shape shouldn’t look too shaggy, but should be smooth without being too thin. If it drizzles off, it’s probably too thin.
- Line your baking sheets with a silicone baking mat or parchment paper. Add the choux pastry dough to a piping bag fitted with a large piping tip (I use Ateco 809). Pipe logs that are 4 inches long and about 2 inches apart onto the prepared baking sheets. If you need to smooth down any peaks created after piping, dip your finger in a little water and pat them down.
- Let them rest while you preheat oven to 400°F. This resting time helps them rise more evenly.
- Bake for 25-30 minutes (or until they are just lightly golden), and then, without opening the oven door, reduce oven temperature to 350°F and continue to bake for 10-15 more minutes until golden brown all over. They should have a crisp outside. Don’t be afraid to bake them a few extra minutes. Do not open the oven as the pastries cook, or the heat and steam that is helping them rise will be released and they can deflate.
- Once done, turn off oven, open oven door and using a paring knife to pierce the side where you’ll fill it later. Let cool in the oven with the door open for 5-10 minutes.
- Remove from the oven and allow to cool completely on a cooling rack.
Fill and finish your eclairs
- Use your paring knife, if needed, to open up the hole you created earlier just a bit. Stick the piping tip in the hole and pipe in your pastry cream. If it doesn’t seem like the pastry cream went all the way through to the other end (I can usually feel by the weight of the éclair), then poke a hole in the other end and fill that side too. Set eclairs aside.
- To make the chocolate glaze, add the chopped chocolate to a medium-sized bowl. Heat the cream just until it begins to boil, then pour it over the chocolate. Let it sit for 2-3 minutes, then stir or whisk together until melted and smooth.
- Add the powdered sugar (be sure to sift it to avoid lumps), if using, and stir until well combined and smooth. Pour the glaze into another smaller bowl or shallow dish to make it easier for dipping, if you’d like.
- Carefully turn each éclair upside down, one at a time, and dip the top half of them into the chocolate glaze. As you lift the éclair, let some of the excess glaze drip off, then set back on the cooling rack to let the chocolate firm up.
- Serve immediately or transfer to a container to store eclairs in the fridge until ready to serve. If you want them to remain crisp, the should be served right away. Otherwise, they are fine to be stored in the fridge and enjoyed for up to 3-4 days.
Notes
Nutrition
The nutrition facts provided are calculated using a third-party tool and are estimates only. Actual nutritional content may vary based on the ingredients and brands you use, as well as portion sizes. For accurate results, please consult a registered dietitian or nutritionist.