Description
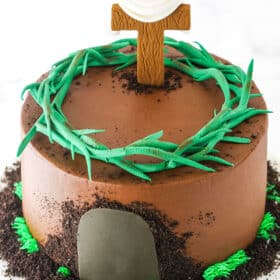
This Resurrection Cake is perfect for celebrating Easter! The cake is decorated as a tomb, with a cross and crown of thorns on top. And when you cut into the tomb, it reveals that it’s empty inside!
Ingredients
Decorations
- Brown fondant
- Green fondant
- White fondant
- Black gel icing color
- Green gel icing color
- Brown color dust, optional
Chocolate Cake
- 2 cups (260g) all purpose flour
- 1 tsp baking soda
- 1/2 tsp salt
- 1 cup (224g) unsalted butter
- 2 cups (414g) sugar
- 4 large eggs
- 1 tsp vanilla extract
- 3/4 cup (180ml) warm water
- 3/4 cup (85g) natural unsweetened cocoa powder
- 3/4 cup (180ml) milk
Chocolate Frosting
- 2 1/2 cups (560g) butter
- 9 cups (1035g) powdered sugar
- 1 cup (114g) natural unsweetened cocoa powder
- 2 tsp vanilla extract
- 4–5 tbsp (60-75ml) water/cream
- 1 cup Oreo crumbs
Instructions
1. The first thing you’ll want to do is make your fondant pieces so that they have time to dry out and firm up. I’d suggest making them 3-5 days in advance. To start, roll the brown fondant out to about 1/4 inch thickness and cut out a cross. You could do it by hand, or use a cross cookie cutter. I used the 3.5 inch cookie cutter in this cross cutter set.
2. Apply gentle, but firm pressure to the bottom of the cross and gently push the skewer in as far as it will easily go.
3. Use a toothpick to create wood grain lines in the cross, then set it aside to dry out.
4. To make the crown of thorns, trace the cake pan that you’ll be using onto a piece of parchment paper to use as a guide.
5. Roll out some green fondant into a long rope that will loop around the inside of the cake circle you drew about 3 times. It can hard to roll something out that long, so you can make a few pieces and join them together, if needed.
6. Use a sharp knife to gently cut away pieces of the side of the rope, creating “thorns”. I alternated cutting back and forth from one side to the other. You may need to straighten out your rope in order to cut all the way around.
7. Next, you’ll want to re-loop your crown. Be sure to use your parchment circle so that you know your crown will fit properly on your cake. As you loop it around (be very careful, because it will come apart easily. If it does, just pinch it back together), use little pieces of paper towels to prop up some areas, so that the crown isn’t just flat. You want the rope/thorn to look like it kind of wraps around itself a little as you loop it. Let the crown dry out.
8. Preheat the oven to 350°F (176°C). Line the bottom of four 8-inch (20cm) cake pans with parchment paper and grease the sides.
9. Combine flour, baking soda and salt in a medium sized bowl. Set aside.
10. Cream butter and sugar until light in color and fluffy, about 3-4 minutes. Don’t skimp on creaming time.
11. Add the eggs one at a time, beating just until blended after each.
12. In another medium sized bowl, combine the cocoa, vanilla and water. Stir until combined, then add to cake batter and mix until well combined.
13. Alternate adding the flour mixture and milk to the batter. Begin by adding half of the dry mix, then mix well. Add the milk and mix well, scraping down the sides as needed. Add the remaining flour mixture and mix until well combined and smooth. Don’t over mix.
14. Divide batter between the cake pans. Bake for 18-22 minutes, or until a toothpick inserted comes out with a few crumbs.
15. Remove cakes from the oven and allow to cool for 2-3 minutes, then remove from pans to a cooling rack to finish cooling.
16. To make the frosting, beat the butter until smooth.
17. Slowly add 4 cups (460g) of powdered sugar and mix until smooth.
18. Add the vanilla extract and half of the water or cream and mix until smooth.
19. Slowly the other 5 cups (575g) of powdered sugar and mix until smooth. Add some additional water or milk, if needed.
20. Set aside about 1/3 cup of the frosting (it should not have any cocoa added yet). You’ll use this for the green “grass”.
21. Add the cocoa powder and mix until well combined.
22. Add the remaining water or milk until the frosting is the right consistency.
23. To build the cake, you’ll need something to be able to cut through the cake layers with. I used a 3 inch biscuit cutter, but a round cookie cutter, something similar, or a sharp knife would be fine too. Use your cutter to cut a hole all the way through two of the cake layers. Cut the hole to be in the center of the cake.
24. Place one of the full cake layers onto a cake plate or cardboard cake circle and spread about 1 cup of frosting evenly onto the top of the cake.
25. Place the next cake layer on top – one of the ones with the center removed – then add another even layer of frosting. I used about 1/2 cup of frosting.
Add the second layer with the center removed and another layer of frosting.
26. Add the final layer of cake on top, then frost the outside of the cake. Feel free to use my tutorial for frosting a smooth cake.
27. Use a little bit of the remaining brown fondant and add a touch of black gel icing color to it (if you like) and then roll it out to cut out a door. Use a little water brushed onto the back of the fondant door to attach it to the cake. Press some Oreo crumbs onto the cake, around the outside of the door to resemble dirt.
28. Grab the white frosting you set aside earlier and color it with green gel icing color. Add any additional cream or water, if needed for consistency.
29. Pipe the “grass” around the bottom of the cake using the Wilton tip 233.
30. Add additional Oreo crumbs around the bottom of the cake to resemble dirt.
31. Place the fondant decorations on the top of the cake. It’s best to add them shortly before serving the cake, as the moisture from the cake can cause them to soften up. I used a little brown color dust to brush onto parts of the crown to make it look a little “dirty” once it was on top of the cake. Try to set the cross back a little on top of the cake, so that you press the skewer into a part of the cake that isn’t hollow – it’ll give it more support to stand up.
32. Roll out some white fondant into a thin rectangle. You want it long enough to be able to drape it over the cross and have it hang down a bit. It should be wide enough to fold a couple of times. Create the fold in the middle first, the create a fold on each side. Drape the “fabric” over the cross.
33. Cake is best if stored well covered and eaten within 2-3 days.
Nutrition
- Serving Size: 1 slice
- Calories: 963
- Sugar: 107.6 g
- Sodium: 233.8 mg
- Fat: 50.2 g
- Carbohydrates: 130.7 g
- Protein: 6.9 g
- Cholesterol: 175.4 mg