Description
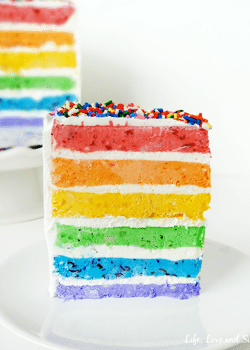
This Rainbow Ice Cream Cake is made with no churn ice cream and fresh fruit for a fun and tasty ice cream cake!
Ingredients
ICE CREAM LAYERS
- 20 oz cream cheese
- 1/2 cup + 1/8 cup milk
- 1 1/4 cups sugar
- 20 oz Cool Whip (OR 2 1/2 recipes of homemade whipped cream)
- 1 cup grapes
- 1 cup blueberries
- 1 cup chopped kiwi (about 2 kiwis), OR juice from 2 limes
- 1 cup chopped pineapple
- 1 cup chopped peaches (about 2 peaches)
- 1 cup chopped strawberries
- Purple, blue, green, yellow, orange and red Gel Icing Color
FILLING
- 12 oz Cool Whip
ICING
- 8 oz Cool Whip
Instructions
MAKING THE ICE CREAM:
1. Mix cream cheese, milk and sugar together with a mixer until completely combined. Should be somewhat thick and creamy.
2. Fold in the Cool Whip.
3. Separate ice cream mixture evenly between 6 bowls, about 1 3/4 cup + 1/8 cup per bowl.
4. Puree or crush each fruit, adding each to a different bowl so that you have all 6 flavors of ice cream.
NOTE: I found the fruit tough to puree in a food processor because each amount is so small. I used a muddler to crush each of them instead. Do whichever you prefer.
5. Add desired amount of appropriate gel icing color to each bowl to get the shade of each color you want.
LAYERING THE ICE CREAM:
1. Prepare your two 8-inch cake pans with parchment paper and cake circles. You can use spingform cake pans or regular. For more on pan preparation, see my note below.
NOTE: The rest of the recipe will be written as if you are using 2 pans. If you are using 3, you’ll do two layers of ice cream in each pan instead of 3.
2. In the bottom of one pan, add the purple ice cream. Spread evenly.
3. In the bottom of the other pan, add the yellow ice cream. Spread evenly.
4. Put both pans in the freezer for about 45 minutes to an hour, or until fairly firm. It should be firm enough that you can spread another layer on top without messing the previous layer up.
5. Add a cup of Cool Whip to each pan, spreading evenly. Make sure you know which pan has which color in it.
6. Freeze again for about 30 minutes or until firm.
7. Add the blue ice cream to the pan with the purple ice cream. Spread evenly.
8. Add the orange ice cream to the pan with the yellow ice cream. Spread evenly.
9. Freeze again for about 45 minutes to an hour or until firm.
10. Add a cup of Cool Whip to each pan, spreading evenly. Freeze again for about 30 minutes or until firm.
11. Add the green ice cream to the pan with purple and blue ice cream. Spread evenly.
12. Add the red ice cream to the pan with yellow and orange ice cream. Spread evenly.
13. Freeze again for about 45 minutes to an hour or until firm.
14. Add a cup of Cool Whip to the pan with the green ice cream on top. Do not add more Cool Whip to the pan with the red ice cream. This layer will be the filling between the green and yellow layers. Freeze again for about 30 minutes or until both layers are completely frozen.
PUTTING IT ALL TOGETHER:
1. Once completely frozen, remove both halves from their pans. You may need to run a knife around the top edge, but the parchment paper should have kept it from sticking. If you used sringform pans, remove the sides. If you used regular cake pans, lift the cakes out using the saran wrap. Remove all parchment paper and saran wrap and remove the cake circle from the bottom of the yellow ice cream.
2. Spread a very thin layer of Cool Whip on top of the Cool Whip on the green ice cream, just to give something for the other layer to adhere to.
3. Put the yellow/orange/red cake half on top of the purple/blue/green cake half. The green and yellow should meet in the middle. You should end up with purple on the bottom of the full cake and red on the top.
4. Freeze again until firm and steady.
5. Frost your cake with the remaining Cool Whip and freeze.
Notes
NOTE about preparing the pans: I used two 8-inch by 3-inch cake pans (not springform). This is a pretty tall cake, about 6 inches in height. Because my pans were 3 inches high, I only needed 2 pans, but if your pans are 2 inches high, you will probably need 3. Using multiple pans allows you to make the two halves (or 3 parts if you use three 2-inch pans) all at the same time. The other option is to use the same pan for each section, finishing and removing one section before moving to the next. It will work, but just take longer to get through all the layers.
The best way to prepare the pans is to put a cardboard cake circle (found at craft stores like Michaels and JoAnns; I’ve also seen them at WalMart) in the bottom to help you remove it from the pan when done. You also should put parchment paper around the edges, allowing it to stick above the top edge of the pan. This will keep the ice cream from sticking to the sides of the pan.
If you are using a regular cake pan, as I did, I recommend putting Saran wrap (or other clear wrap) in the pan underneath the cake circle and parchment paper (so put it in first). I used it to help lift the cake out of the pan once it was frozen. It came out really easily.
Nutrition
- Serving Size: 1 Slice
- Calories: 507
- Sugar: 45.8 g
- Sodium: 153.3 mg
- Fat: 34.4 g
- Carbohydrates: 48.7 g
- Protein: 4.5 g
- Cholesterol: 41.2 mg