This post may contain affiliate sales links. Please read my disclosure policy.
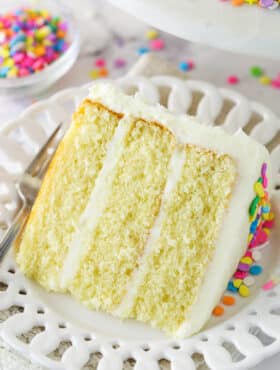
This vanilla layer cake is the one cake that everyone needs to know how to make. Three layers of moist, fluffy vanilla cake are filled and frosted with rich vanilla buttercream. It’s wonderfully simple and absolutely heavenly.

Table of Contents
The Best Vanilla Layer Cake Recipe
I have been experimenting with vanilla cakes for years now trying to get the flavor and texture just right. It’s a bit of a running joke. But in an attempt to satisfy everyone and all the different preferences out there, I’ve arrived at several versions of vanilla cake and cupcakes over the years in order to please everyone.
This recipe is my most recent and “final” recipe. I’ve taken all of the feedback over the years incorporated into this cake. It has all of the things you could want in a vanilla cake. The cake itself is light and fluffy but with enough substance to bite into. It’s perfectly moist and topped with a rich buttercream frosting that is just to die for. The search for the perfect vanilla cake is over. I can’t wait for you to see (or taste, rather) what I mean.

Why You’ll Love This Easy Vanilla Cake
A simple, easy, moist vanilla layer cake? Everyone needs one in their recipe collection. Here are a few reasons why this one, in particular, is 100% necessary for every baker to try.
- Texture. Creaming together the butter, oil, sugar, and vanilla extract until they are fluffy gives this cake a wonderfully airy texture. Unlike cakes that only utilize egg whites, however, this one uses whole eggs. The inclusion of the yolks gives the cake the perfect amount of substance and richness. So it’s not too airy and not too heavy. It’s perfect. Plus, the addition of oil makes the vanilla cake perfectly moist.
- Flavorful. I love the subtle vanilla flavor of this cake. It makes it universally loveable. The use of butter in addition to oil gives the cake extra richness and flavor as well. It’s seriously so good.
- Simple recipe. While you will still have to follow several steps to make the batter, this recipe requires a simpler mixing method than many other cakes without compromising texture or flavor.
- Versatile. Everyone needs a simple vanilla cake in their life. It is the perfect canvas for a variety of different fillings and frostings. I used a vanilla buttercream here but feel free to experiment! Check out the section below titled “Decorating Tips & Ideas” for inspiration.

What You’ll Need
Here’s a list of ingredients you will need to make this easy vanilla cake. Make sure to scroll to the recipe card below for detailed measurements.
Vanilla cake
- All-purpose flour – You want to be sure not to over measure your flour, or you could end up with dry, dense cake. Feel free to use your favorite 1:1 gluten-free flour instead.
- Baking powder – When it comes to vanilla cake, I prefer baking powder over baking soda. It gives the cake a nice bakery-style texture and keeps the color lighter.
- Salt – Always needed for flavor.
- Unsalted butter – The butter must be at room temperature. Otherwise, it will not cream properly with the sugar, oil, and vanilla extract.
- Vegetable oil – The vegetable oil adds a nice moistness to this cake.
- Sugar – Sugar adds both sweetness and moisture and affects the final texture of the cake.
- Vanilla extract – A good quality extract is recommended for great vanilla flavor.
- Eggs – They should be large eggs (not medium or extra large) and it is best that they are at room temperature so that they incorporate more easily with the other ingredients.
- Milk – I use 2% milk but feel free to use whole milk. The fat in the milk adds moisture and texture to the cake.
Vanilla frosting
- Unsalted butter – The butter should be at room temperature so that you don’t get a lumpy frosting.
- Powdered sugar – This adds volume to the frosting and affects the consistency. Less powdered sugar will give you a thinner frosting that doesn’t hold up as well to things like piping, and more powdered sugar will give you a stiffer frosting that stays exactly where you put it.
- Vanilla extract
- Heavy cream – This adds a wonderful creaminess to the frosting and can be used to thin it out if it gets too thick.
- Salt – For flavor. It also can help cut down on the sweetness.
- Sprinkles – I used a mix that is similar to these sprinkles. Feel free to use your favorite.

How to Make Vanilla Layer Cake
Here’s a quick overview of how to make this easy vanilla layer cake. Be sure to scroll to the recipe card below for more detailed instructions.
For the cake
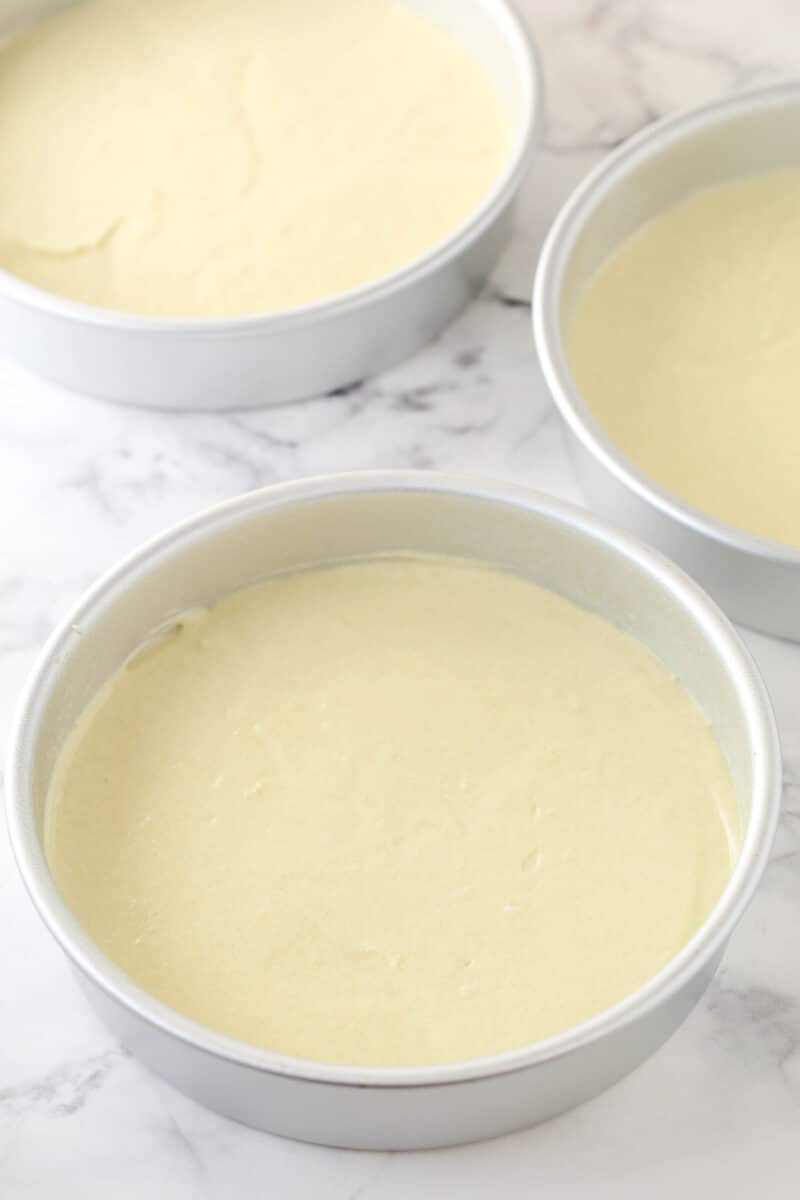
- Prep. Line the bottom of 3 8-inch cake pans with parchment paper circles and grease the sides. Preheat the oven to 350°F.
- Whisk together the flour, baking powder, and salt.
- Beat together the butter, sugar, oil, and vanilla extract until light in color and fluffy.
- Add the eggs one at a time, mixing to combine after each addition.


- Add. Mix. Add half of the dry ingredients to the batter and mix to combine. Slowly add the milk and mix to combine. Add the remaining dry ingredients and mix until smooth.
- Bake. Divide the batter between the cake pans. Bake for 22-25 minutes.
- Cool. Remove the cakes from the oven and allow them to cool for 2-3 minutes before transferring them to wire racks to cool completely.

For the frosting
- Beat the butter until smooth.
- Add. Mix. Add half of the powdered sugar. Mix until smooth. Add the vanilla extract, 4-5 tablespoons of heavy cream, and salt. Mix until smooth. Add the remaining powdered sugar. Mix until smooth.
- Refine the consistency. If the frosting is too thick, add additional heavy cream, 1 tablespoon at a time, and mix until smooth. Check out my tutorial on how to get the right consistency of frosting.
To assemble the cake
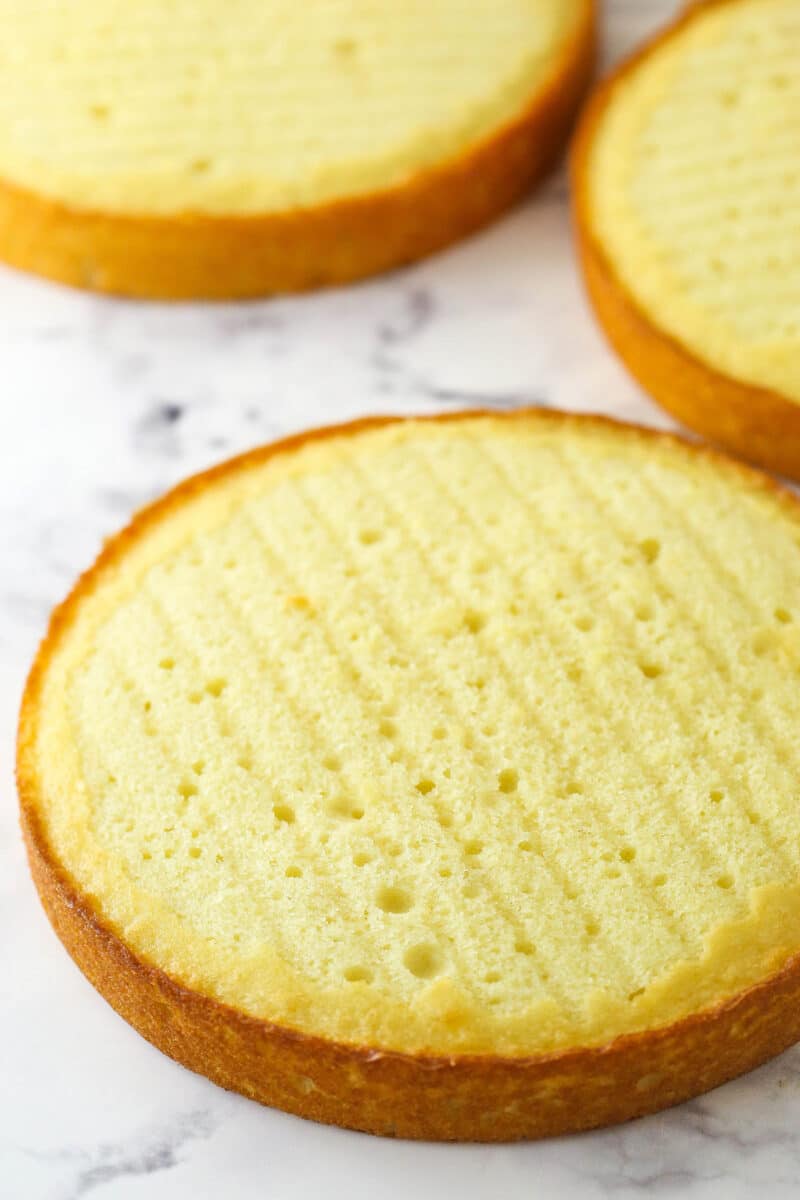
- Remove the domes from the top of the cakes with a large serrated knife.
- Stack. Place the first cake on a serving plate and spread 1 cup of frosting over the top. Repeat with the second layer and the third.
- Frost the outside of the cake. Refer to my tutorial for frosting a smooth cake, if needed.
- Decorate. Press sprinkles into the sides of the cake and pipe swirls of frosting around the top edge. Add a few more sprinkles to the top of the cake.

Tips for Success
Are you feeling intimidated by the idea of making a layer cake? Don’t be. You can do this! Just follow these simple tips and tricks to get the best results possible.
- Measure flour correctly. One of the biggest mistakes people make is over or under measuring flour. Most often the flour is over measured and it gives you a dry cake. I highly recommend using a food scale and weighing your flour to avoid this. If you prefer not to use a food scale, I recommend the spoon and level method.
- Room temperature ingredients. The butter in the batter should be at room temperature. Otherwise, it will not cream properly with the sugar, oil, and vanilla and you will find yourself with an overly dense cake. The eggs should also be at room temperature. They will incorporate more easily with the other ingredients which will help to prevent over-mixing. The butter in the buttercream should be at room temperature as well. If it is too cold, you will end up with a lumpy frosting.
- Don’t skimp on creaming time. When beating together the butter, sugar, oil, and vanilla, do so until the mixture is light in color and nice and fluffy. This should take 2-3 minutes. This will help make the cake itself light and fluffy.
- Don’t over mix. Over mixing the cake batter after you add the flour will cause the glutens in the flour to overdevelop. This will give you a tough, dense cake.
- Scrape the bowl. As you are adding ingredients to the batter and mixing to incorporate them, be sure to scrape the sides of the bowl periodically. This will bring any ingredients stuck to the bowl back into the batter.
- Cool before frosting. It is essential that you allow the cakes to cool completely before stacking, filling, and frosting. If they are too warm, the frosting will melt right off the cake.

Decorating Tips & Ideas
I covered this moist, fluffy vanilla cake with white buttercream frosting and rainbow sprinkles but one of the great things about this recipe is that it is so versatile. Here are a few fun ways to make it your own.
- Color your frosting. Add a couple of drops of gel food coloring to the buttercream to add color to this dessert. You can color the whole cake or just pipe some colored swirls on top.
- Add a drip. Elevate your cake and use my tutorial for adding a chocolate (or white chocolate) drip.
- Decorate with buttercream rosettes. Similar to this ice cream cake tutorial, you can use buttercream to top your cake with beautiful and easy rosettes.
- Sprinkles. I love adding sprinkles to my cakes. Keep it a little more reserved, like the cake in the photos, or press sprinkles all the way up the sides. There are lots of fun options.
- Use other food. I love using other foods for decorating! Arrange fresh fruit on top, add some toasted coconut or cookie crumbs, or top with your favorite candy. All would look great!
Can I Use This Recipe To Make Cupcakes?
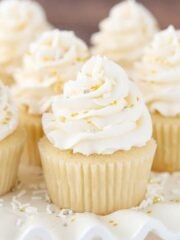
Yes! You can actually find that recipe in my Easy Homemade Vanilla Cupcakes. The recipe is cut in half and makes about 12-14 cupcakes. You’ll make the cake batter and buttercream as normal (just less of it), add the batter to cupcake liners and then bake for 15-18 minutes.

How to Store a Frosted Layer Cake
After cooling and frosting, transfer the cake to an airtight cake carrier or wrap it in a double layer of plastic wrap. If you go the plastic wrap route, I suggest using toothpicks to prop the plastic wrap away from the buttercream swirls.
Alternatively, you can slice the cake and arrange the slices in a single layer in an airtight container. In any case, store the cake at room temperature for up to 24 hours or in the refrigerator for up to 4 days. This cake is best enjoyed at room temperature, so if you choose to refrigerate it, let it sit on the counter for an hour or so before diving it.

Can I Freeze Layer Cake?
You can! I typically recommend freezing the layers prior to frosting. Wrap them well in clear wrap and aluminum foil prior to freezing. Thaw the cake layers in fridge prior to frosting. If you’d like, you could try freezing the full cake. In that case, pop the fully frosted cake in the freezer for a couple of hours to firm up before wrapping it in a double layer of plastic wrap. You can also slice the cake and wrap the individual slices in clear wrap and foil. Store the cake in the freezer for up to 3 months. Thaw the cake in the refrigerator overnight before allowing it to come to room temperature before serving.
More Vanilla Cake Recipes:
Vanilla cakes are the king of all cakes and as I mentioned before, I’ve got many to try. This moist vanilla layer cake is my absolute favorite but here are some other fabulous recipes for you to try.
- Funfetti Cake
- 6-inch Vanilla Cake
- White Cake
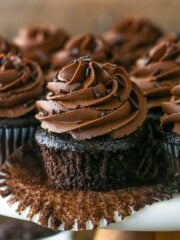
- Moist Yellow Cake with Chocolate Frosting
- Rose Water Vanilla Layer Cake
- Moist Vanilla Cupcakes
- Fluffy Vanilla Cake
- Perfect Vanilla Cupcakes
Moist Vanilla Layer Cake Recipe
- Prep Time: 1 hour 20 minutes
- Cook Time: 25 minutes
- Total Time: 1 hour 45 minutes
- Yield: 12-14 slices
- Category: Cake
- Method: Baking
- Cuisine: American
Description
Everyone needs to know how to make this moist vanilla layer cake. Three layers of moist, fluffy vanilla cake are filled and frosted with rich vanilla buttercream. It’s absolutely heavenly.
Ingredients
Vanilla cake
- 2 1/2 cups (325g) all purpose flour (measured properly)
- 2 1/2 tsp baking powder
- 1/2 tsp salt
- 3/4 cup (168g) unsalted butter, room temperature
- 1/4 cup vegetable oil
- 1 1/2 cups (310g) sugar
- 1 tbsp vanilla extract
- 4 large eggs, room temperature
- 1 1/4 cups (300ml) milk, room temperature
Vanilla Buttercream
- 2 1/2 cups (560g) unsalted butter, room temperature
- 10 cups (1150g) powdered sugar
- 1 tbsp vanilla extract
- 6–8 tbsp (90ml-120ml) heavy cream
- Pinch of salt
- Sprinkles, for decorating
Instructions
For the Cake:
- Prepare three 8 inch cake pans with parchment paper circles in the bottom and grease the sides. Preheat oven to 350°F (176°C).
- Combine the flour, baking powder and salt in a medium sized bowl and set aside.
- Add the butter, sugar, oil and vanilla extract to a large mixer bowl and beat together until light in color and fluffy, about 2-3 minutes. Do not skimp on the creaming time.
- Add the eggs one at a time, mixing until mostly combined after each. Scrape down the sides of the bowl as needed to be sure all ingredients are well incorporated.
- Add half of the dry ingredients to the batter and mix until mostly combined.
- Slowly add the milk and mix until well combined. The batter will look curdled, but that’s ok.
- Add the remaining dry ingredients and mix until well combined and smooth. Scrape down the sides of the bowl as needed to be sure all ingredients are well incorporated. Do not over mix the batter.
- Divide the batter evenly between the cakes pans and bake for 22-25 minutes, or until a toothpick comes out with a few crumbs.
- Remove the cakes from the oven and allow to cool for about 2-3 minutes, then remove to cooling racks to cool completely.
For the Frosting:
- To make the frosting, beat the butter until smooth.
- Slowly add half of the powdered sugar and mix until smooth.
- Add the vanilla extract, 4-5 tablespoons of heavy cream, and salt and mix until smooth.
- Slowly add the remaining powdered sugar and mix until smooth. Add additional heavy cream, as needed to get the right consistency of frosting.
To Assemble the Cake:
- To put the cake together, use a large serrated knife to remove the domes from the top of the cakes so that they’re flat. These cakes don’t have a large dome, but I like to make sure they’re completely flat.
- Place the first cake on a serving plate or a cardboard cake round.
- Spread about 1 cup of frosting evenly on top of the cake.
- Add the second layer of cake and another cup of frosting.
- Top the cake with the remaining layer and frost the outside of the cake. Refer to my tutorial for frosting a smooth cake, if needed.
- Press sprinkles into the sides of the cake.
- Pipe swirls of frosting around the top edge of the cake. I used Ateco tip 844.
- Add a few more sprinkles to the top of the cake. Store in an air-tight container. The cake is best for 3-4 days.
Notes
For cupcakes, see my homemade vanilla cupcakes. It’s the same recipe in cupcake form.
Nutrition
- Serving Size: 1 Slice
- Calories: 977
- Sugar: 107.2 g
- Sodium: 223.3 mg
- Fat: 51.1 g
- Carbohydrates: 127.9 g
- Protein: 5.8 g
- Cholesterol: 175.4 mg